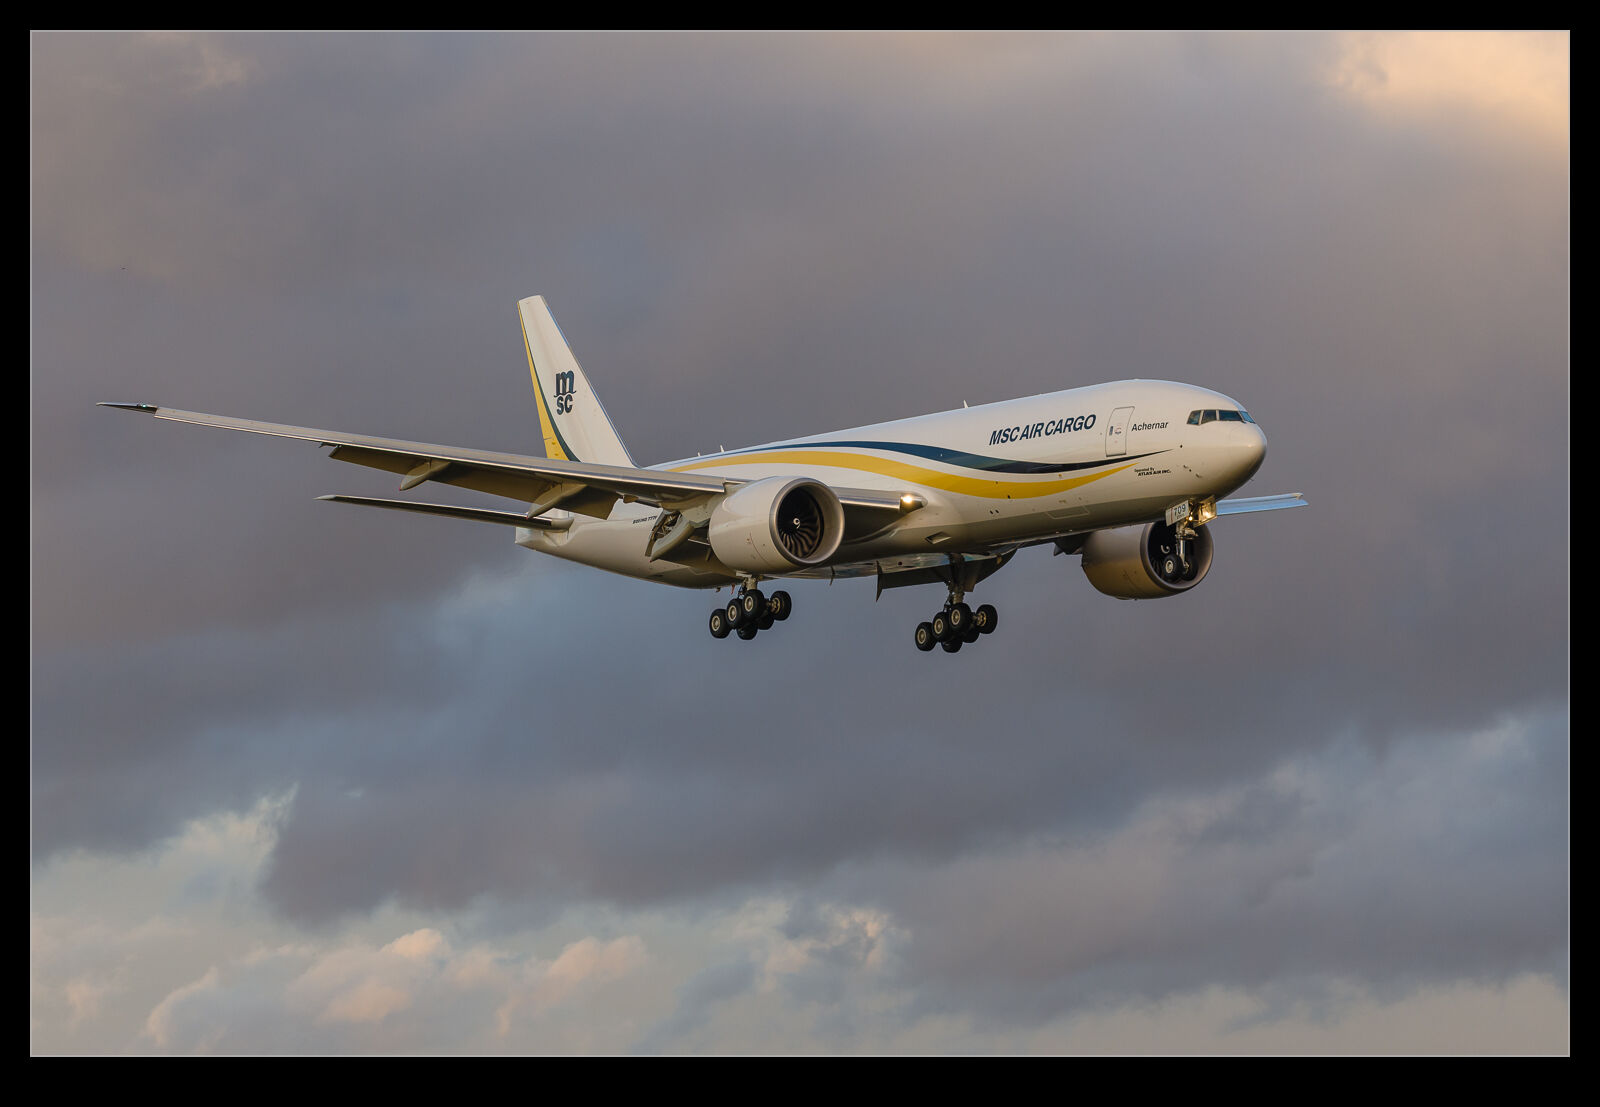
 A stormy sky doesn’t immediately inspire you when going for some aircraft photography but, if the light on the subject can end up being okay, a dark background can suddenly seem like a great option. One Sunday an Atlas 777F was up on test at Paine Field. The sky was dark and gloomy but not a solid cloud background. Instead, the clouds were stratified so there was more detail and texture to see.
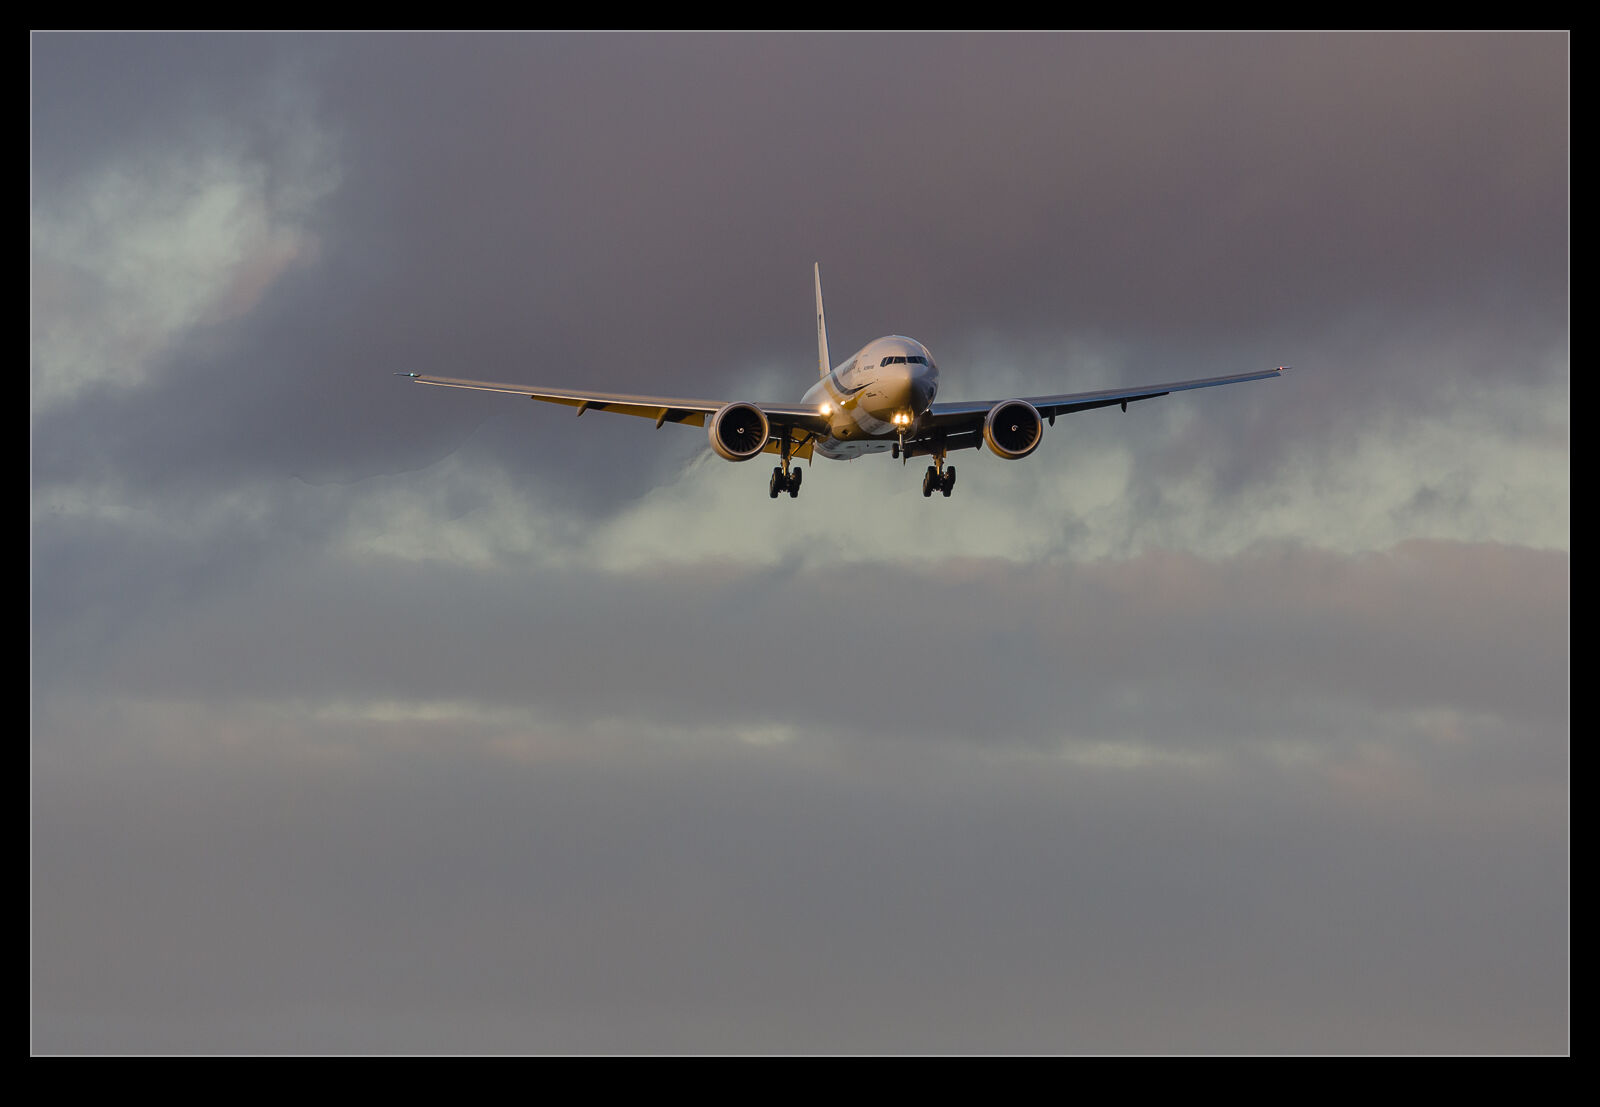 As the 777 came down the approach, it was not brightly illuminated but it was picking up a good amount of light compared to what I had expected to be the case. This did require some thought about the camera settings. When the sky is dark, I often significantly over-expose. This is because the clouds will dominate the metering response and the subject – which is usually quite dark – really disappears. In post processing I can then bring the exposure back down but there is sufficient light on the subject to get a good image of it against the sky.
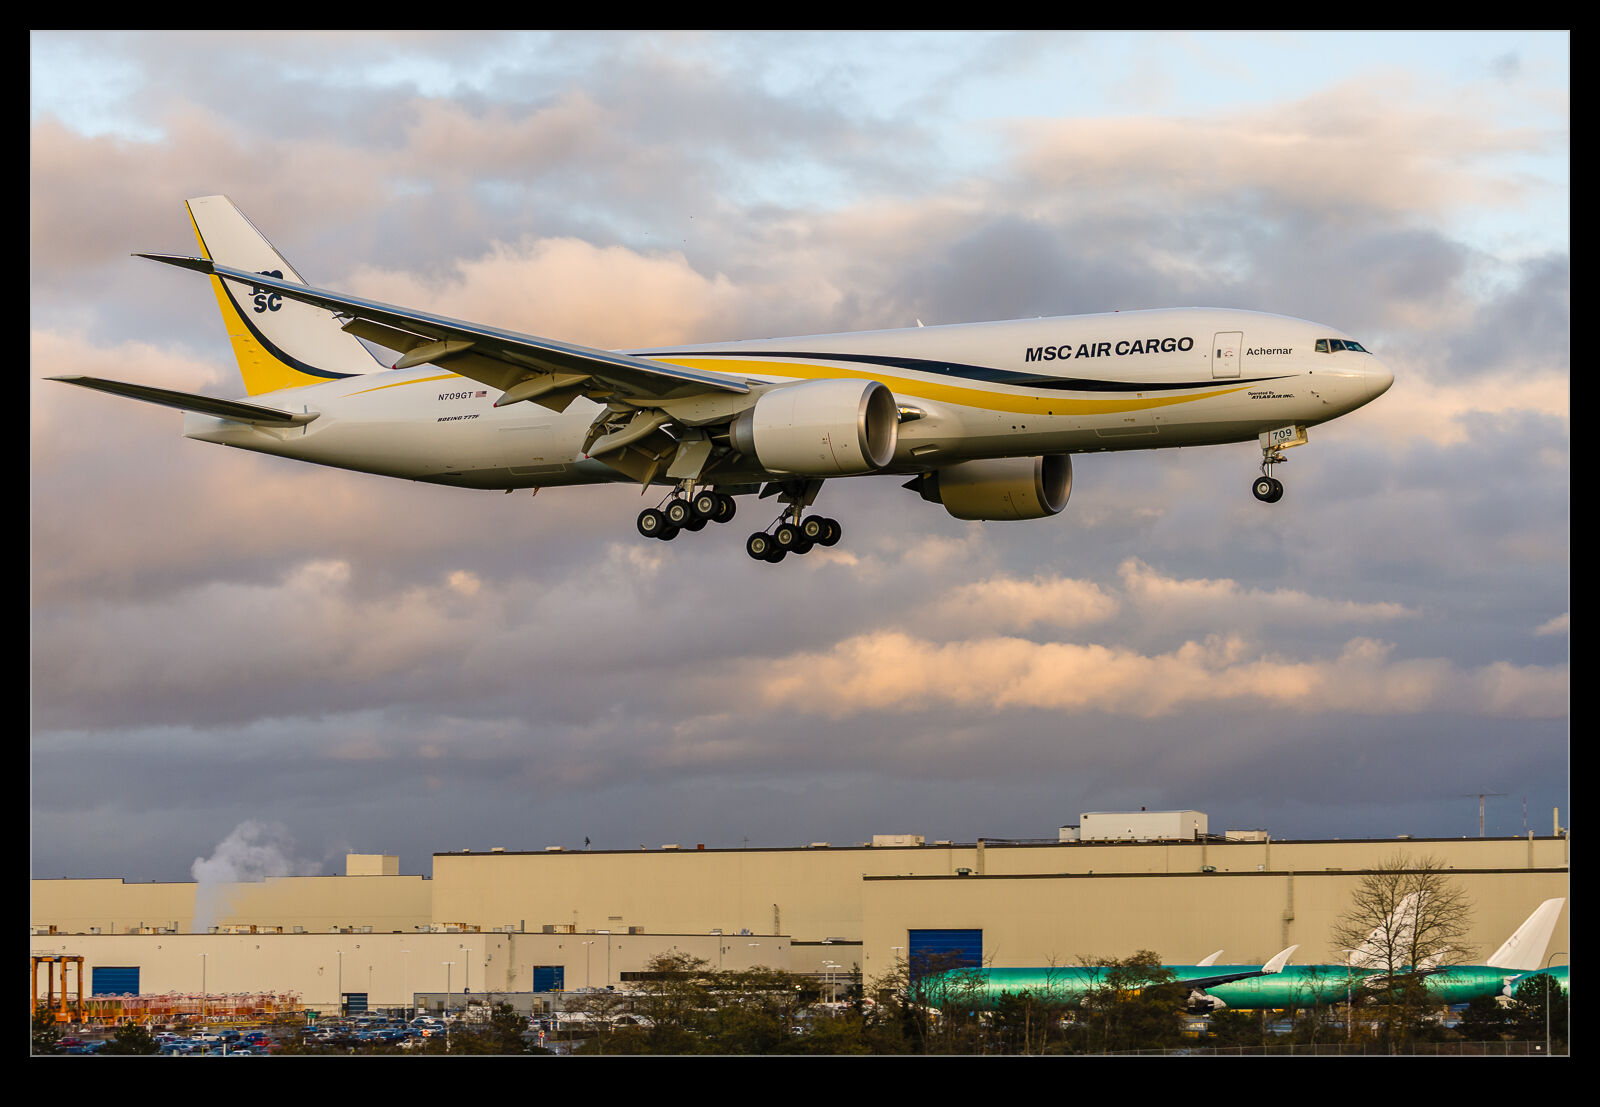 In this case, I had to be more careful. With good light on the subject, the dark sky would result in blowing out the plane. Therefore, I had to keep the exposure compensation off to allow the subject to not get too overexposed and not leave enough latitude for processing it to where I wanted it to be. The results came out okay. This was more important for the longer shots. Once the plane was close in, it started to dominate the metering response and, once on the ground, the illumination was more balanced.
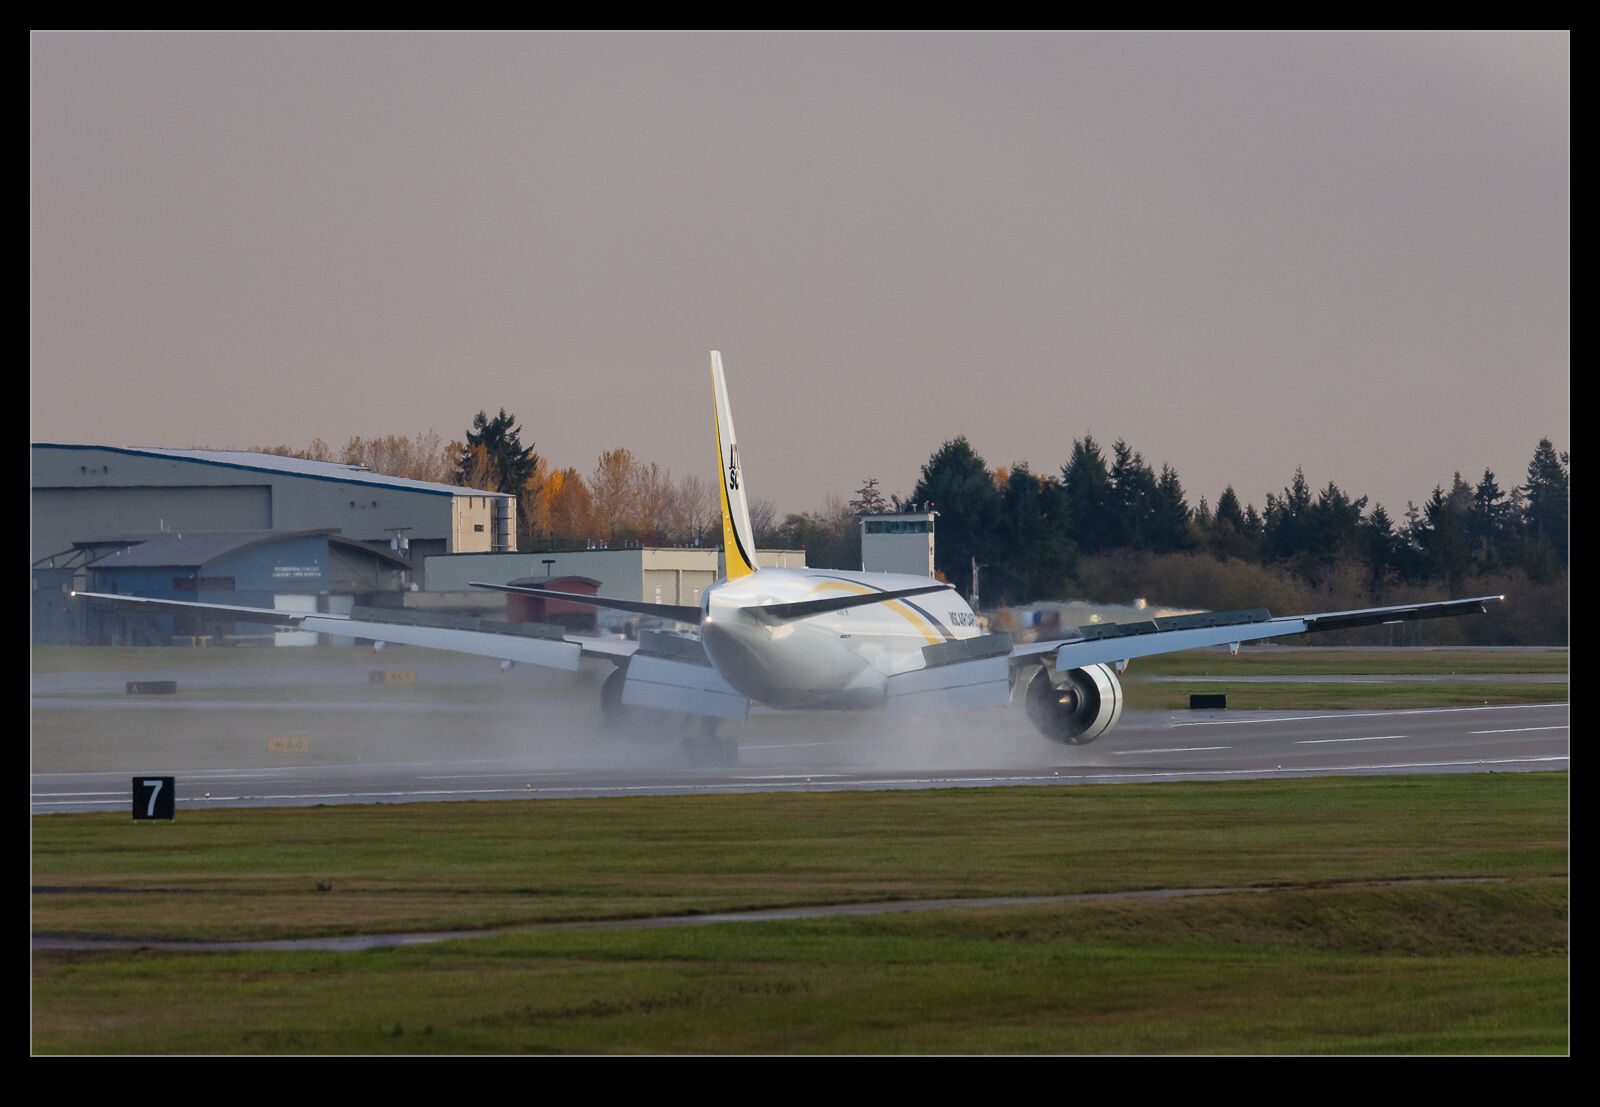 Once they touched down and brought in the reversers, you could see that the conditions had not long ago been wet as the runway still had plenty of water on the surface and the reversers kicked it up in the air.