Tag Archives: Lightroom

Lightroom Noise Reduction Update Testing

One of the software tools that I find a lot of people talking about these days is DeNoise from Topaz.  I have never been terribly bothered by noise in my images.  Modern cameras do a pretty remarkable job of handling noise and, for most usage purposes, the noise is not really an issue if it is there.  I have posted my efforts with PureRAW in its various forms where I have tried it out to see how the noise reduction comes out and, while I have seen strengths and weaknesses in it, I have never seen it as something I needed to spend on.

Lightroom Classic had one of its periodic updates recently.  The big new feature was their own denoise functionality.  Much like my experimentation with PureRAW, it analyzes the shot and creates a new DNG file with the noise suppressed.  I was curious to see how it would perform and, seeing as it is included in the price of my subscription, I have it anyway.  I decided to take some shots I had recently used for the PureRAW3 trial I had done and compare with the Lightroom version.

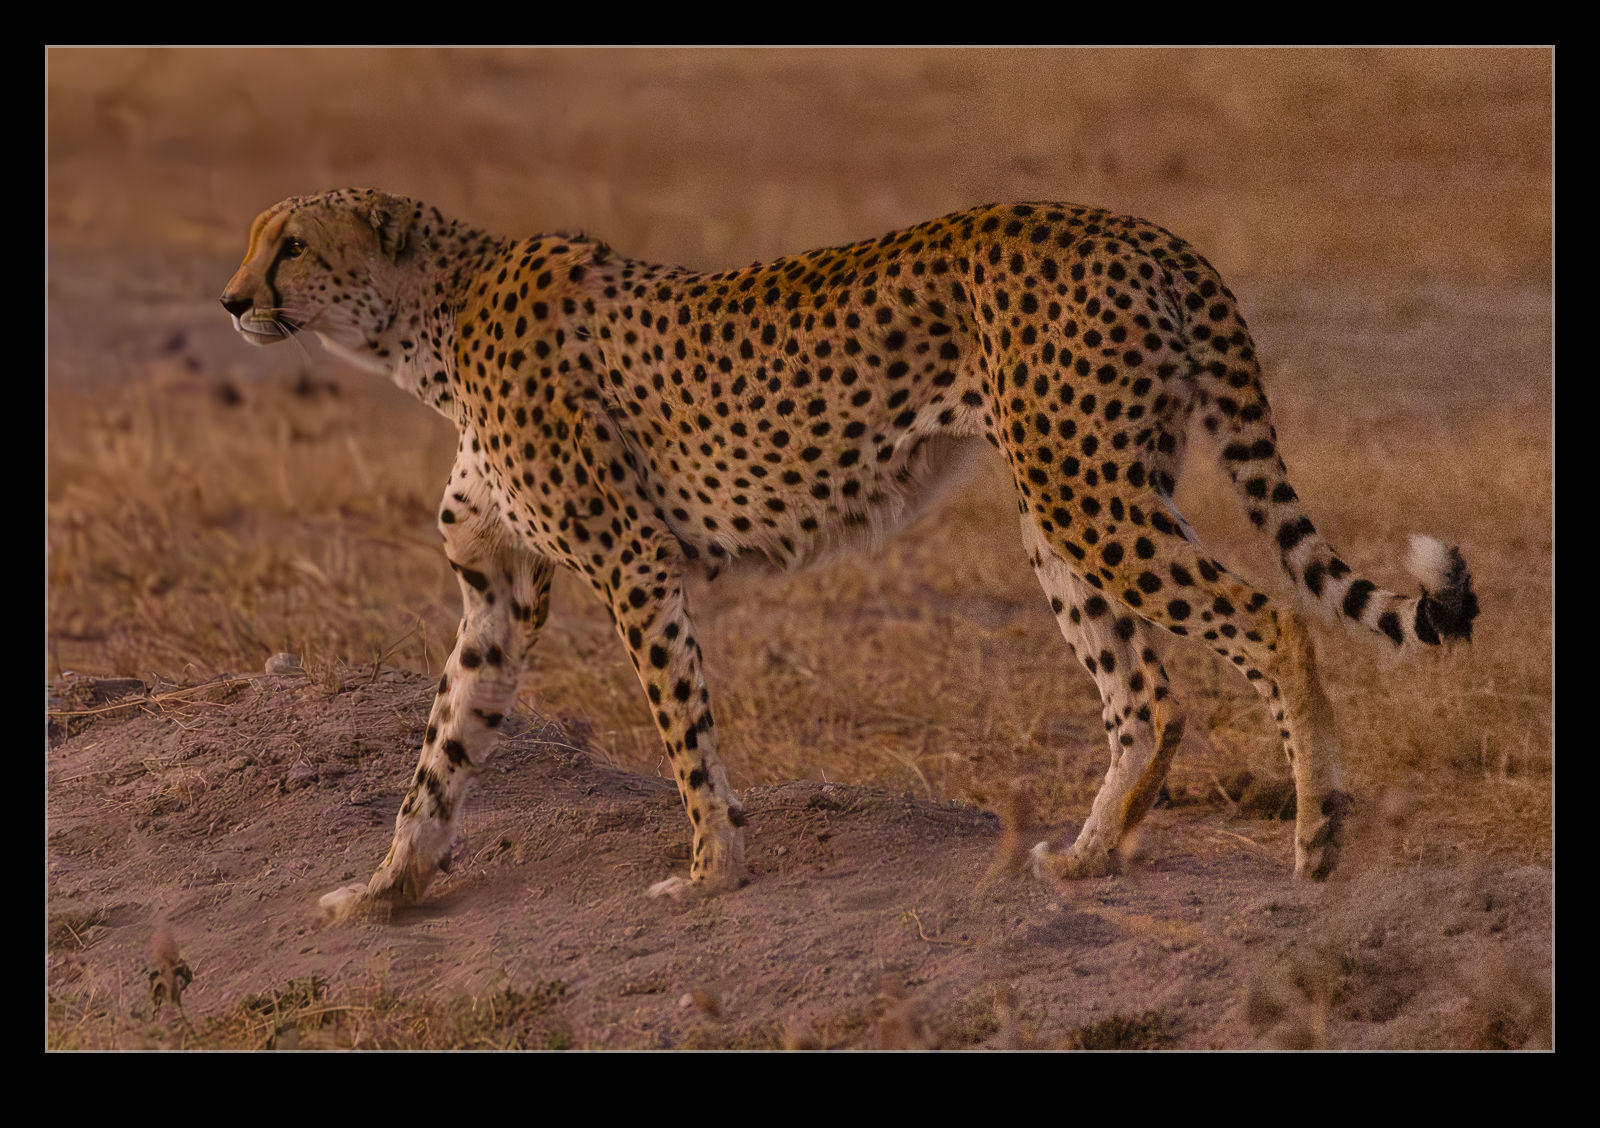
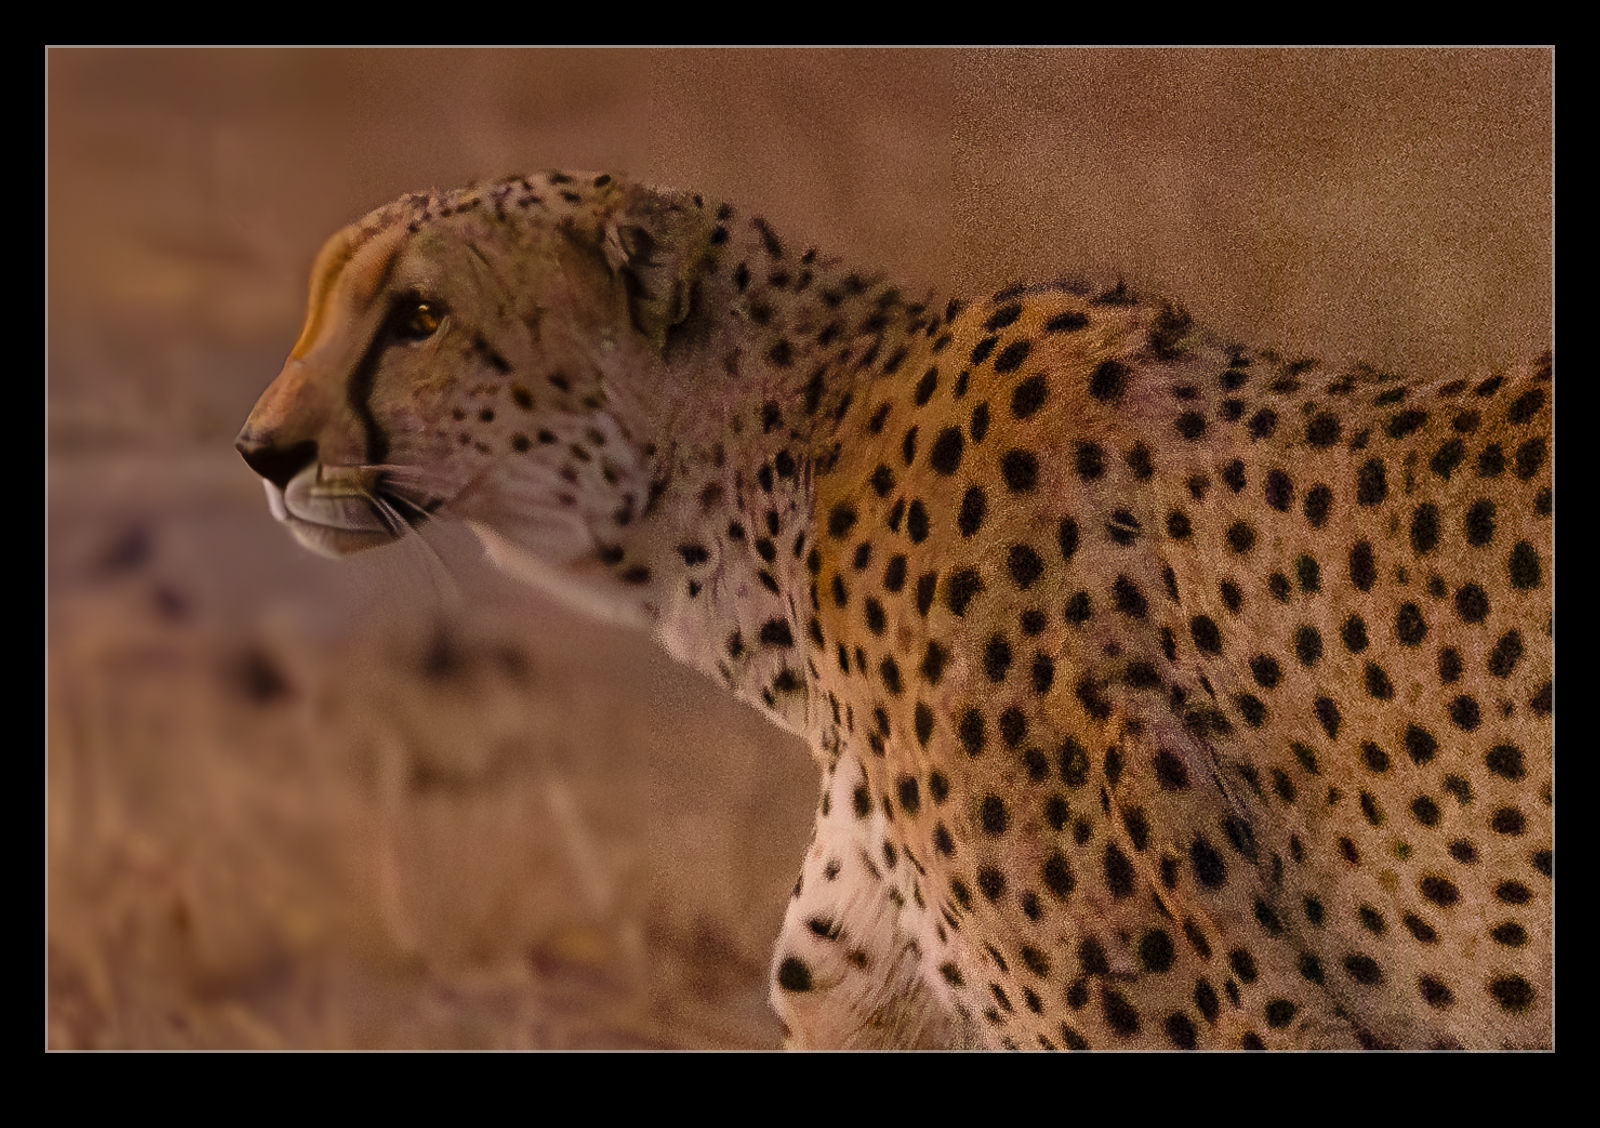
It defaulted to a 50 level of noise reduction.  I don’t know whether this is a percentage and what of but it is a scale so I played with it.  I did some at 50 and some at 75 to see whether more aggressive noise reduction had detrimental effects on other parts of the image.  Comparing these things and then sharing the results is a touch tricky so I have created a single image from four layers.  They are the original Lightroom develop settings, the PureRAW3 version, the 75 denoise settings and the 50 denoise settings.  I mask them to make the image into four sections.  Then, to make it useful on here, I have zoomed in to show the borders between them to provide some sort of comparison.

The PureRAW3 result is very aggressive on noise reduction.  However, I find it can make some odd artifacts in the images where details were not that clear to begin with.  The 75 setting in Lightroom provided a very similar level of noise reduction to PureRAW3.  It is slightly noisier but barely enough to matter.  A setting of 50 does show more noise.  It is still a significant improvement over the basic Camera Raw settings and very usable.

What do I conclude from all of this?  First, as I have said before when testing the PureRAW trials, it provides some interesting results but it is not relevant to enough of my work to matter to me sufficient for me to spend a bunch of money on buying it.  Having denoise in Lightroom now provides me with a very similar option but within the existing price I am paying for Lightroom.  Therefore, I will make use of it when the situation dictates.  It would be a regular part of my workflow because really high ISO shots are only an occasional thing for me but having it there when I want it will be handy.

Air Canada Special Early Sunday Departure And Lightroom Masking Options

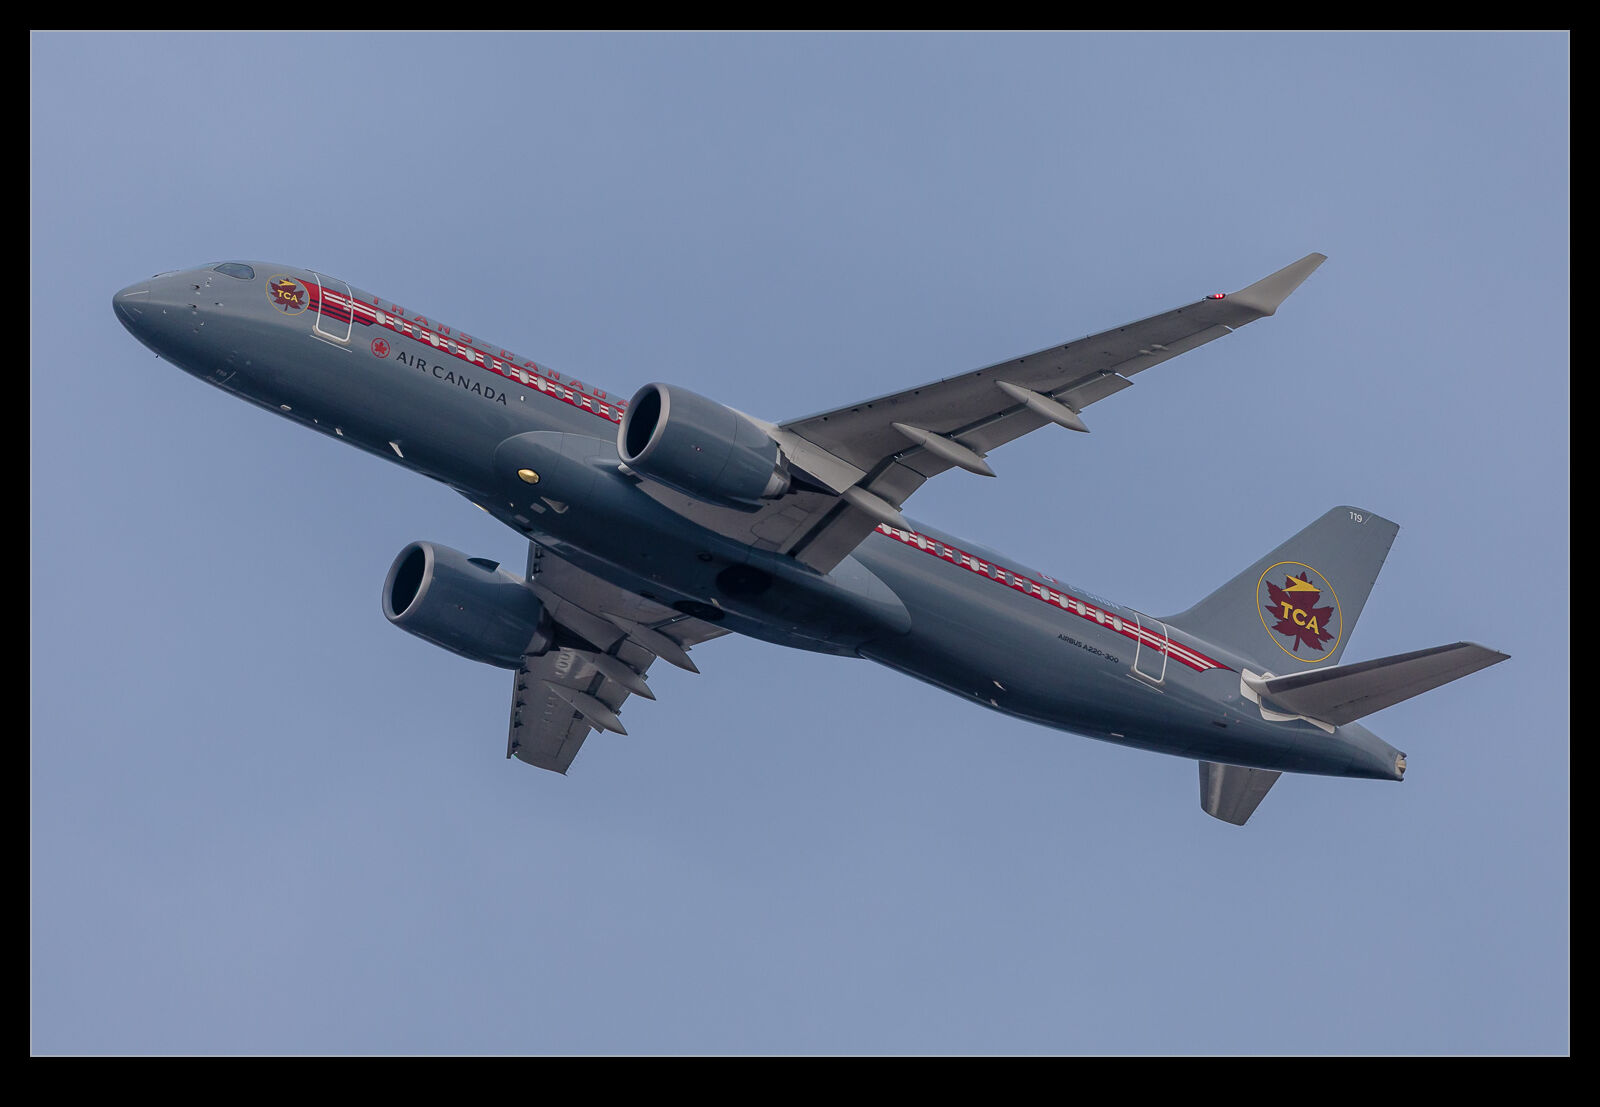
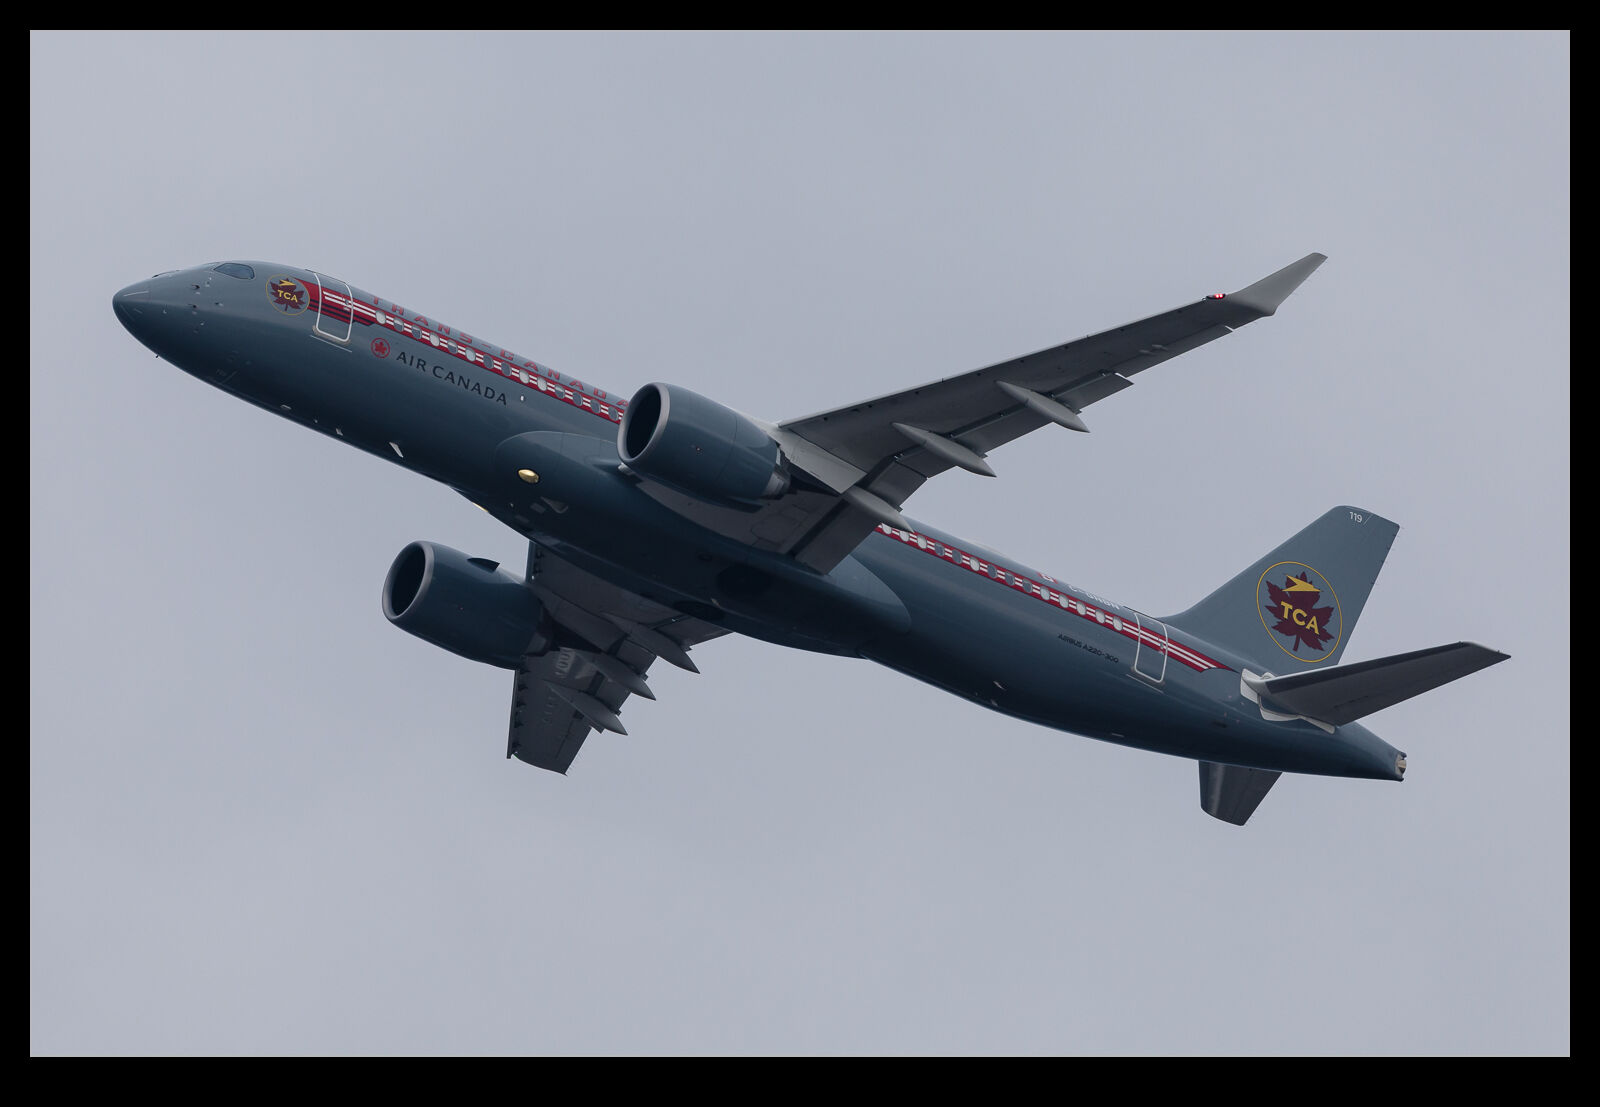
Air Canada brings a pair of A220-300s in to SEA each evening – one from Toronto and one from Montreal.  They leave the following morning with the Toronto flight heading out early and the Montreal flight following a couple of hours later.  The Toronto flight one weekend was the TCA special aircraft so I decided to head out and catch it departing.

The day started very overcast and gloomy but there was a sign that things were going to get better.  This did happen but things were still not great when the jet departed.  The light had improved a bit but the cloud was still there.  When looking at the shots, I figured it was time to make use of the masking options that Lightroom offers.  The latest update has improved their usability somewhat.  First I drop the exposure of the shot overall to get the sky looking roughly how I want it.  Then I select the aircraft suing the Subject option.  It does a pretty reasonable job but I do then refine it with an addition brush to bring in the bits it has missed and a subtract brush to take out the detail areas where the mask has overlapped.

The new option is the click on this mask and choose the Duplicate and Invert option.  This gives me a sky selection that matches what I have got for the aircraft.  For the sky, I can work on the white balance to bring it back to something more cool which suits the overall look of the shot.  I can similarly work on the white balance for the jet to make the reds pop more in the livery.  The exposure can be brought up a bit with the shadows helping a little while bringing the blacks down while improve the contrast.

All of this is pretty straightforward.  One nice feature of the latest update is that you can actually apply the same settings to multiple images.  The brush adjustments are not going to work well for this so it is best to do the overall selections and sync to the various images and then, if a shot is worthy of further work, the refining of the mask can be done afterwards.  If you know which shot is the best, you can just focus on that one.

Lightroom’s New Content Aware Remove Tool

The latest version of Lightroom Classic was recently rolled out.  It comes with a bunch of new additions and refinements.  The one that caught my eye was the addition of content aware remove.  There was already the cloning tool and the healing tools built in and these could do a lot of what you might want.  However, these have now been supplemented by content aware removal.  The tool is really straightforward to use but you can customize it if you like, both by choosing what area to use as a reference and also the ability to get it to try again if you don’t like the result by hitting Refresh.

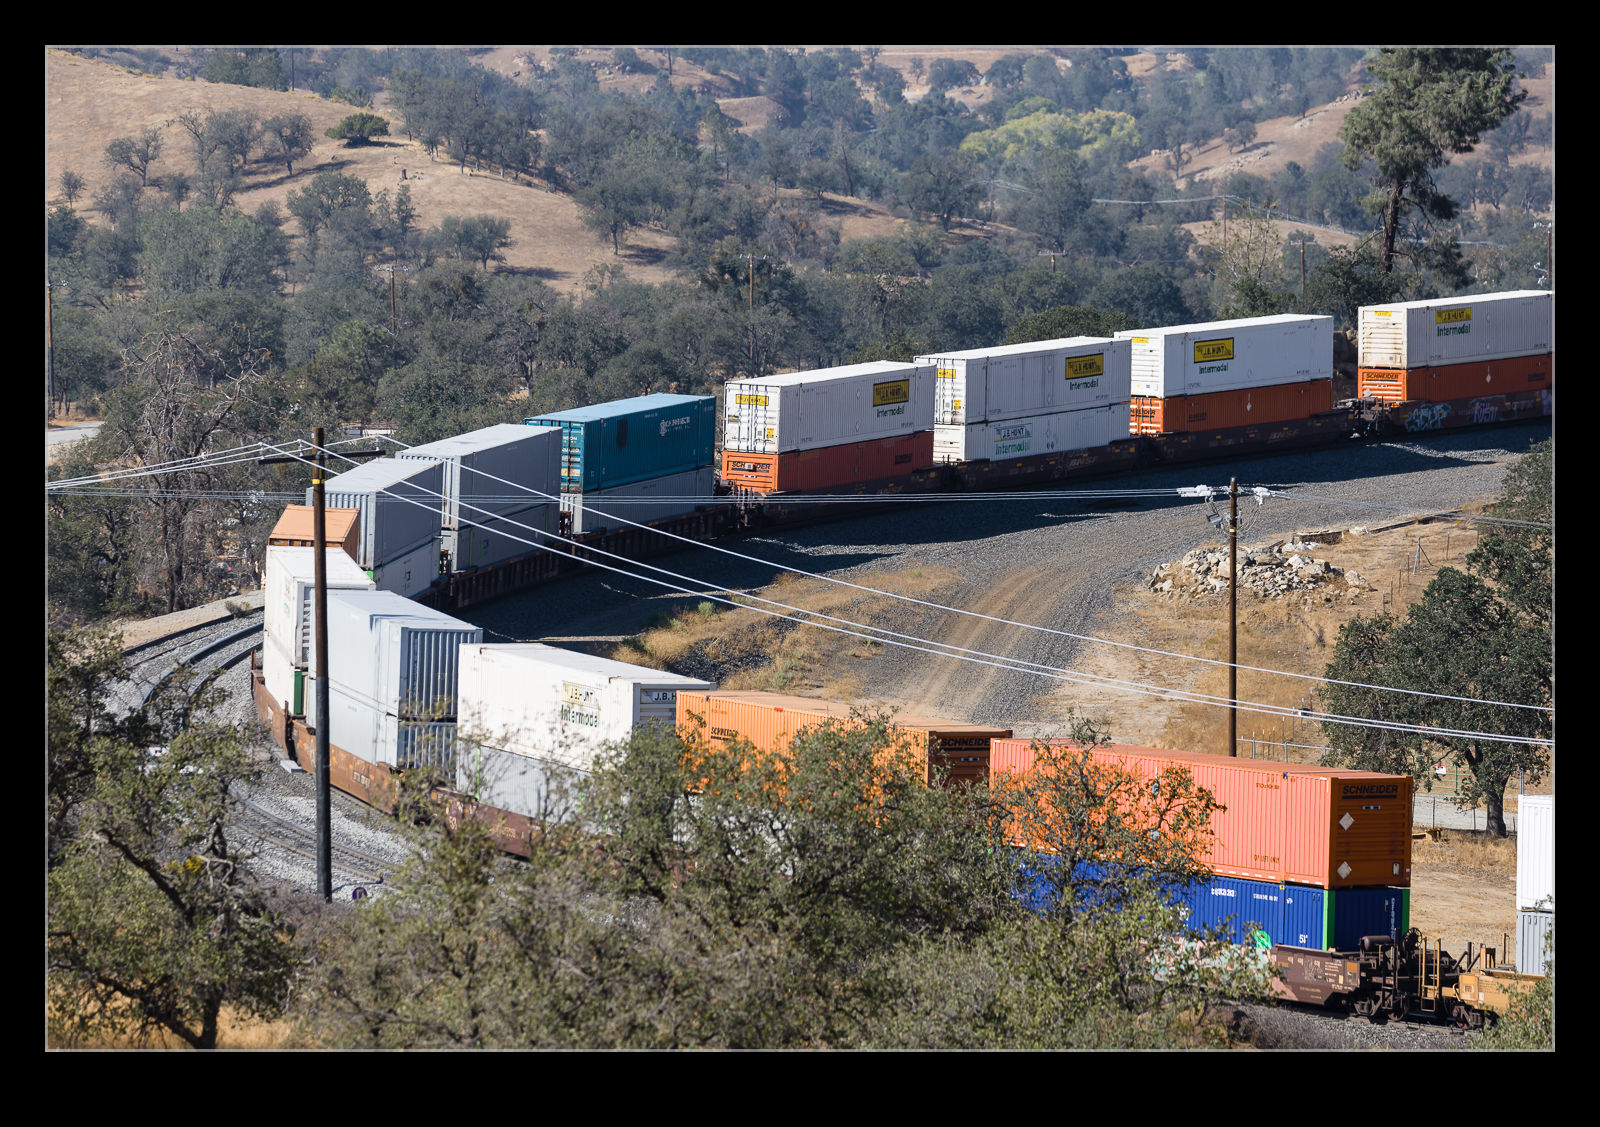
The thing I wanted to try out was using it to remove power lines.  These can sometimes be a bit of a pain when taking shots but, rather than use an aviation shot with some power lines crossing it, I happened to be looking at a photo I took in California of some railroad which had a bunch of lines strung across it.  I wasn’t bothered about making a great shot.  I was just interested in what the tool would do with the power lines.  It was surprising effective.  Too close an inspection would show the flaws but, if you look at the overall image, it came out quite well with very little effort.  I have the before and after shots here for comparison.

DxO PureRAW2 Review

This post might look like it is an aviation post but, while the examples I am using are planes, this is about software.  A while back I downloaded the trial of DxO’s PureRAW product.  I liked it but didn’t see enough use for me to justify buying the full version.  I was also a little put off by the lack of integration with Lightroom.  You had to start in the app and then the output DNG file would be exported to Lightroom.

PureRAW2 has been released so I downloaded the trial version of that to see how well it works.  I was interested not only in the processing capabilities but also the new Lightroom integration.  Now it is possible to use the application as a plugin so I can go to a file in Lightroom and take it out to PureRAW before the DNG returns.

First, what is my experience of the integration?  It is okay but not great.  Taking the file out works well and you can get the processing sorted out.  The return to Lightroom is not ideal.  First, it gives you the option to either put the new files in a DxO folder or to go to a specific folder you choose.  I would rather it went to the same folder as the original.  That is not available.  The second issue is that the re-import process takes a very long time.  It was a couple of minutes after closing the file that it showed up in Lightroom.  No idea why it takes so long.

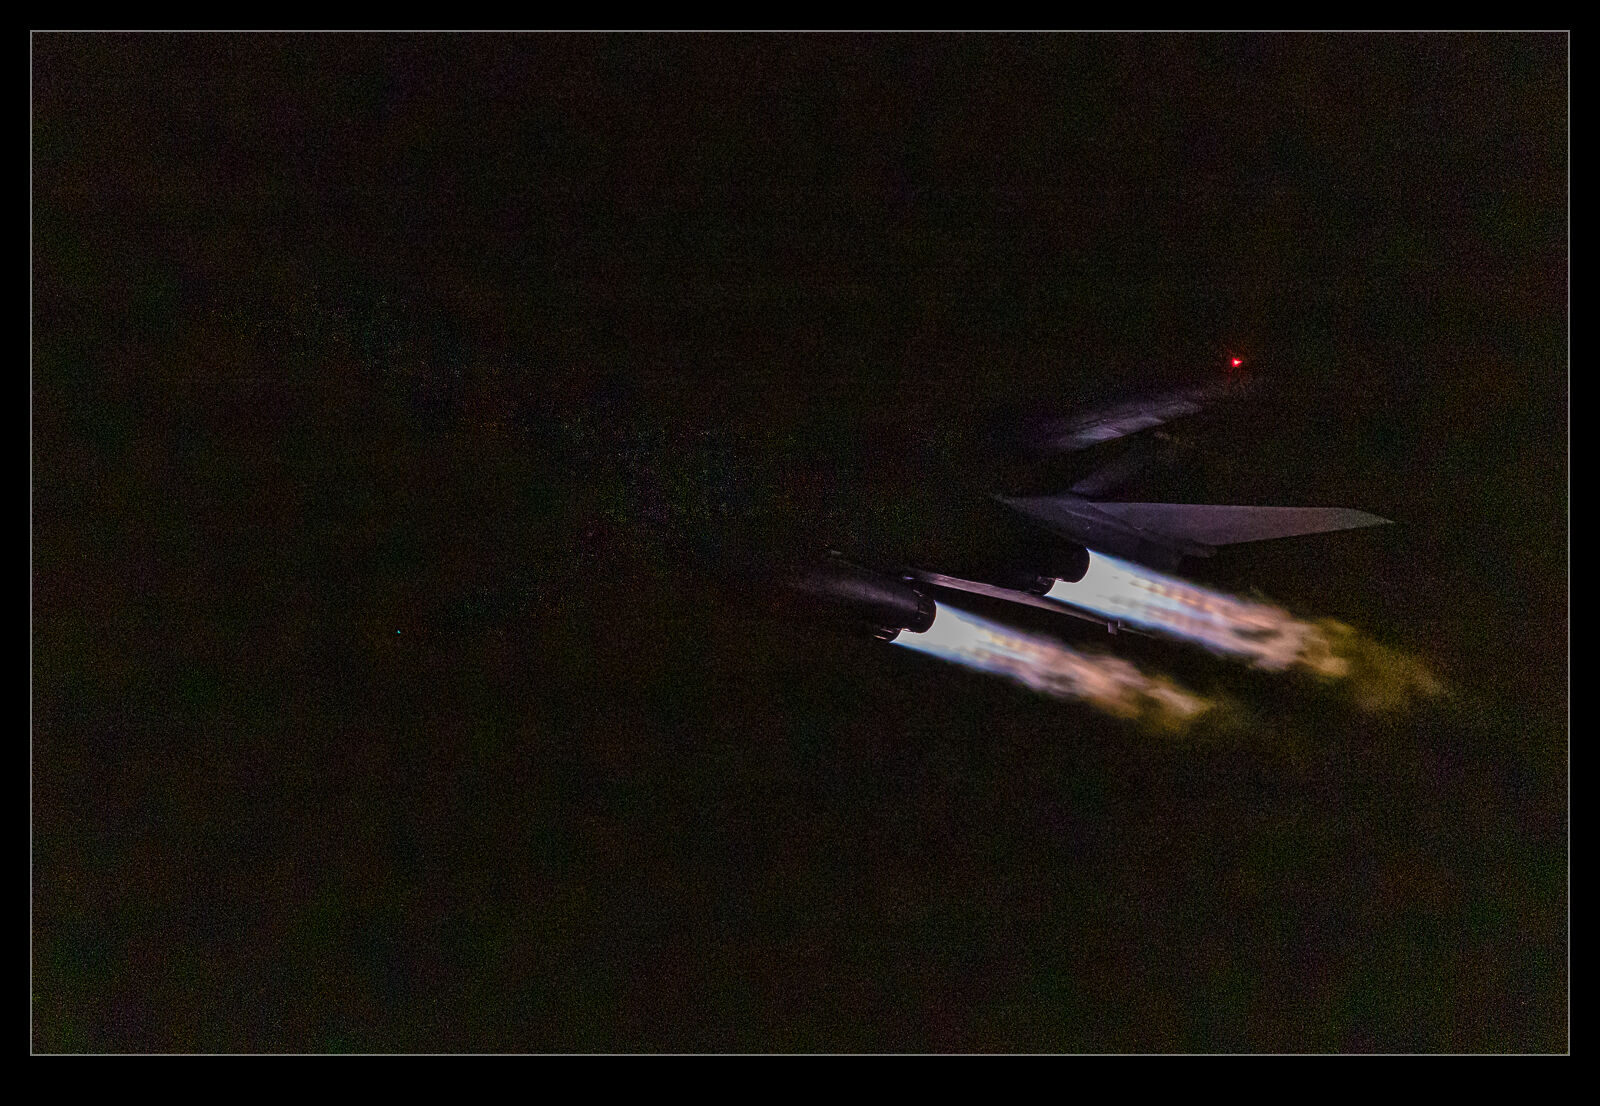
Now for the processing.  It is very impressive.  I was working with some shots from very dark conditions with B-1s taking off.  The exposure was heavily driven by the afterburner plumes so the rest of the airframe was very dark.  When I tried to bump up the exposure in Lightroom to get something that showed the bare outline of the fuselage, the noise was really bad.  The PureRAW DNG was so much cleaner and allowed me to move the exposure around quite a bit.  For an ISO 51,2000 shot, this was very impressive.  I think the processing is not massively changed from before but it clearly works well.

However, as before, the number of times I would want to use this are not many.  The full version is now $129 which is a step up from where the original was priced when I reviewed it.  I am still not sure I need it enough to justify the investment.  No question, though, that it is a significantly improved tool from the original version.

New Lightroom Feature I Don’t Have Yet

I have seen announcements from Adobe about a feature that is coming soon to Lightroom which seems particularly appealing to me.  When dealing with dull and overcast conditions, I shoot quite heavily overexposed.  This gives me a lot more shadow detail to work with and also still allows me to pull back detail in the sky.  On a dull day, a couple of stops of overexposure can work quite effectively.  The Lightroom/Camera Raw editing only has a limited amount you can do with the exposure and shadows sliders so it is not ideal for this.  However, the new version of Lightroom is going to use AI to analyze the image for a subject to be selected or a sky.  What I didn’t realize was that this was already available in Photoshop.  I decided to have a play with it there to see how it works and get a feel for the way it might work in Lightroom soon.

I opened the image in Photoshop as a Smart Object.  I then created a New Smart Object Via Copy to duplicate the object.  In Select, I picked Subject and it did a pretty good job of selecting the airframe.  Some edges were a little vague but overall pretty good.  I used that selection to make a mask on the upper layer.  Then, I was able to open each Smart Object in Camera Raw and edit them each to optimize the sky or the background.  Some tweaking was occasionally required to ensure that it didn’t look like a bad superimposed job but it worked quite well.  Lightroom will have this function as a filter so I should be able to do something similar in there but we shall see when it gets released.  If it works, it could be a great addition to the editing toolset.  I wish I had known about it in Photoshop before to be honest!

UPDATE: The Lightroom update is now out and I have played with it a bit. I think it is even better than the Photoshop implmentation so I shall put together a more detailed post on how it is working out for me.

HDR Processing on a Slide

I decided to try a little experiment with my slide scanning.  Having scanned a bunch of slides and negatives using a DSLR and macro lens set up, I had come across a few slides where the image just didn’t seem to work out very well.  A big part of this is that the original slides were not very well exposed so I was starting from a less than ideal place.  However, when editing the raw file, I found I wasn’t able to get a balance of exposures that I liked, despite slides supposedly having a very narrow dynamic range.

Since I could see some detail in the original slide, I figured an HDR approach might be of use.  I took three shots of the slide with differing exposure – an inconvenient thing to do when tethered since the AEB function didn’t seem to work on the 40D in that mode – and then ran the HDR function in Lightroom on the three exposures.  Despite the borders possibly confusing the algorithm, it seemed to do a pretty reasonable job of getting more of the image in a usable exposure range.  This is not a great image and would not normally be making it to the blog but, as an example of getting something more out of a problem shot, I thought it might be of interest to someone.

Red Flag Night Launches

Adobe periodically updates the processing algorithms that are used by Lightroom and Photoshop. Each update provides some improvements in how raw files are processed and it can be good to go back to older shots and to see how the newer process versions handle the images.  I find this particularly useful for images shot in low light and with high ISO.

I have some standard process settings I use but have also experimented with modified settings for use with high ISOs and the higher noise levels that come with them.  I got to some night launch shots from an old Red Flag exercise and had a play with the images.  The E-3 launch was actually as the light was going down but it still had some illumination so it didn’t need much work.

The KC-135 and B-1B shots were a different story and were at high ISOs and with very little light.  I was able to update the process version and apply some new settings I had worked out since the original processing and it resulted in some pretty reasonable outputs considering how little light there was to work with.

It Might Be Raining, But It Is A 727!

Winter in the PNW does not mean reliable conditions for photographing planes.  If the weather is bad, you might decide it isn’t worth going out.  If it is raining and threatening to rain harder, there is a strong possibility you would skip a shot opportunity.  However, 727s are getting pretty rare these days so that seems worthy of a trip out.

The weather was unpleasant when it made its approach but not as bad as it got a short while later.  I went with my normal approach for shooting in really bad conditions by pushing the overexposure pretty high.  I include a couple of edits.  For the main image, I actually blended two different process versions in Photoshop to get the combination that most reflects how the shot looked through the view finder.  The other edit is a straightforward Lightroom edit where the angle and the light suited it.

Variations in HDR Processing

While scanning through some images, one of the shots that showed up in my catalog was an HDR processing of some shots of a US Army Chinook.  It had been processed with a plugin that I had previously experimented with.  I thought it looked over vibrant but I was impressed with the way the dark interior of the helicopter had shown up while the outside was also well lit.  I decided to have another go at processing the images.

I used Lightroom initially to do the processing.  It came out surprisingly well and looked not unlike the outcome from the plugin.  However, there was some ghosting on people in the shot and there was a lot of chromatic aberration.  I have noticed issues with Lightroom making a worse job of it than Photoshop so I decided to try HDR Pro in Photoshop as well and use Camera Raw for tone mapping.  The outcome was very similar from an overall perspective.  However, the ghosting was virtually eliminated and the aberration was not apparent either.  It clearly is still a better bet than Lightroom.

Lightroom Craps Out With Videos

This is a tale of a problem I got in to with Lightroom.  I Googled solutions for this and got a bunch of suggestions but none of them worked.  In the end, Adobe sorted out the issue but I wanted to share what happened in case anyone else experiences the same issue and ends up Googling like I did.  Maybe this post will help someone out.  The source of the problem was an MP4 video file that apparently had some corruption within it.  This screwed up stuff within Lightroom that needed some detailed work to fix.  First, I shall tell you what the main error was.  This might be what someone is searching for.

Dynamic Link Media Server Failed to Launch

The result is that video files don’t import and then you seem to struggle to preview videos at all.  When you are in the Import dialog, the video preview doesn’t show and an icon of a camera comes up instead.  Some of the recommendations online were to delete the Dynamic Link Media folders in the App Data section of Windows and restart but that didn’t help.  I also tried that and deleting the media cache but no luck.  Next was to delete the Preferences folder for Lightroom which can often be a solution for unexplained problems but that didn’t work either.  That is when I got Adobe involved.

The support engineer tried a bunch of things.  Eventually, he created a new user on the machine and opened up Lightroom in there.  We tried importing a new video file from the same camera and that worked.  He then set about deleting the Lightroom related app data in my user profile and replacing it with the data from the new User.  We then tried importing the new file and it worked fine.  Next was the previous file and that caused the same problem as before.  Now we knew the file was the problem we could isolate that from everything we did afterwards.

Of course, I had damaged Lightroom again but now we knew what was required, it was a simple task to copy the folders across again.  The only downside to this was that all of my presets and information got deleted.  However, I had copied the old Lightroom folders before starting all of this.  It wasn’t too tricky to replace my camera profiles, develop presets and plugins.  At first I thought I had lost some functionality that I really like.  I have a plugin called LRInstagram which allows me to post from Lightroom to Instagram directly.  Facebook has turned off the ability to do this so, if you install the plugin now, it won’t work.  However, something about my legacy setup meant I had still been using it.  When I tried to set this up again, it failed to work.  However, my old Lightroom folder had a sub folder for the plugin which contained something like a cookie and, when I copied this across, I was back up and running!

All of this is to say, if you have a similar problem to me, there is a solution.  I won’t lay out the files that are involved because it is a bit tedious and there are some other things to bear in mind but, if this happens to you, get in touch and I will talk you through what we did.