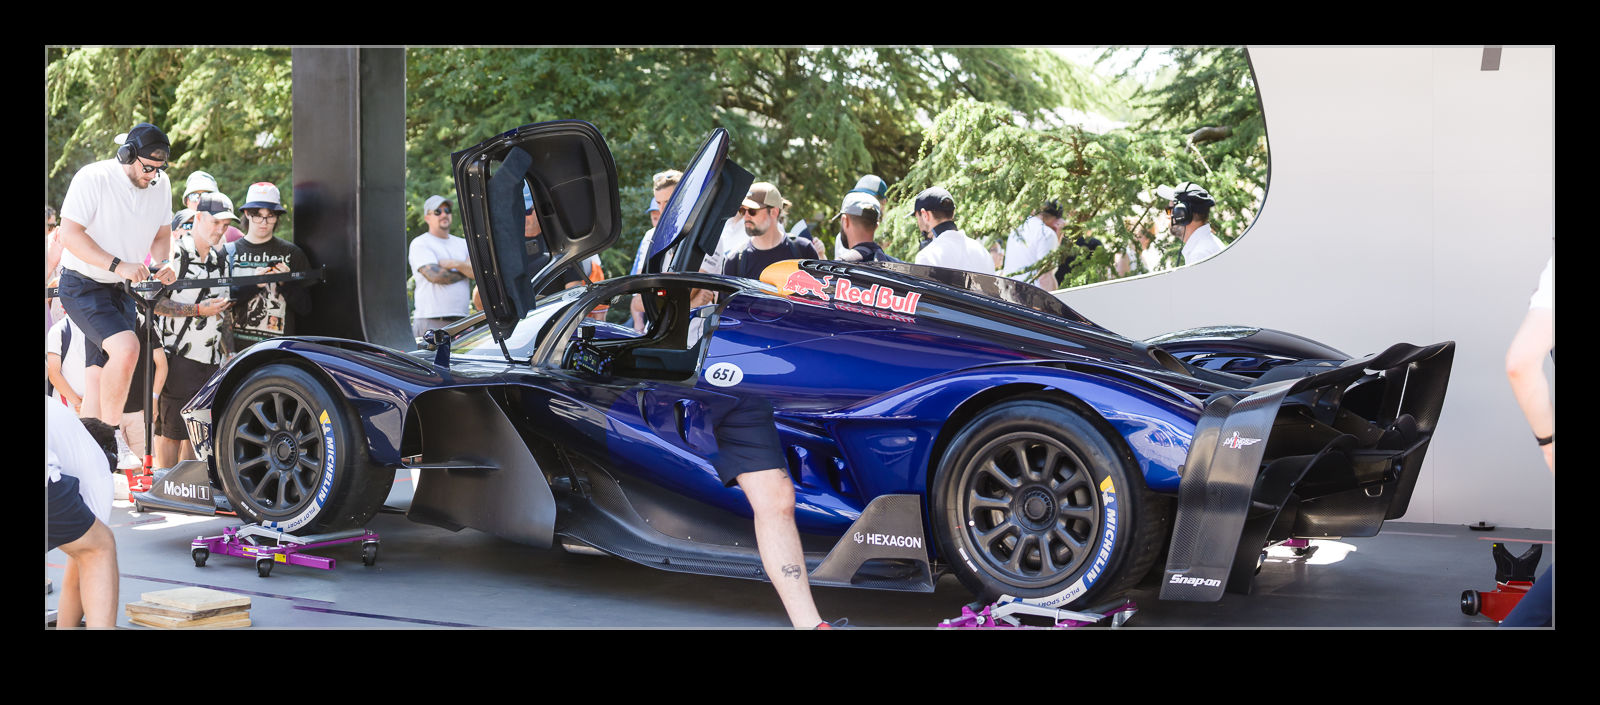
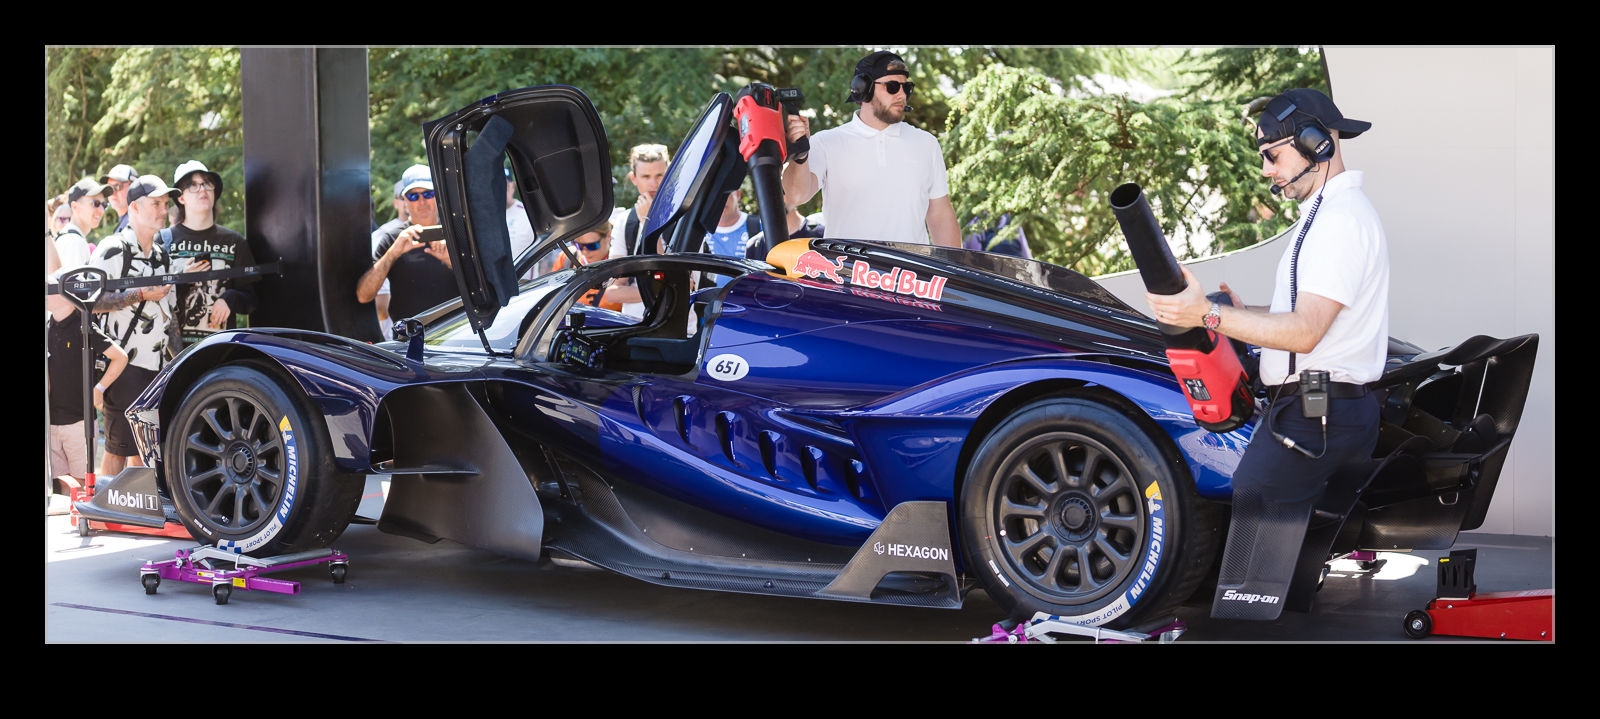
The panorama merge function in Lightroom is usually pretty good. It can have some odd quirks, and the three different projections can produce very different results at times but, on the whole, I rely on it for my pano creation. Every once in a while, though, it catches me out. At the Festival of Speed, I did find myself using a longer lens to get elements of a shot with the intent of stitching them together later. Partly, this was because the crew was working around the car and I took shots when they were in different places to aim to have an unobscured car in the final shot.
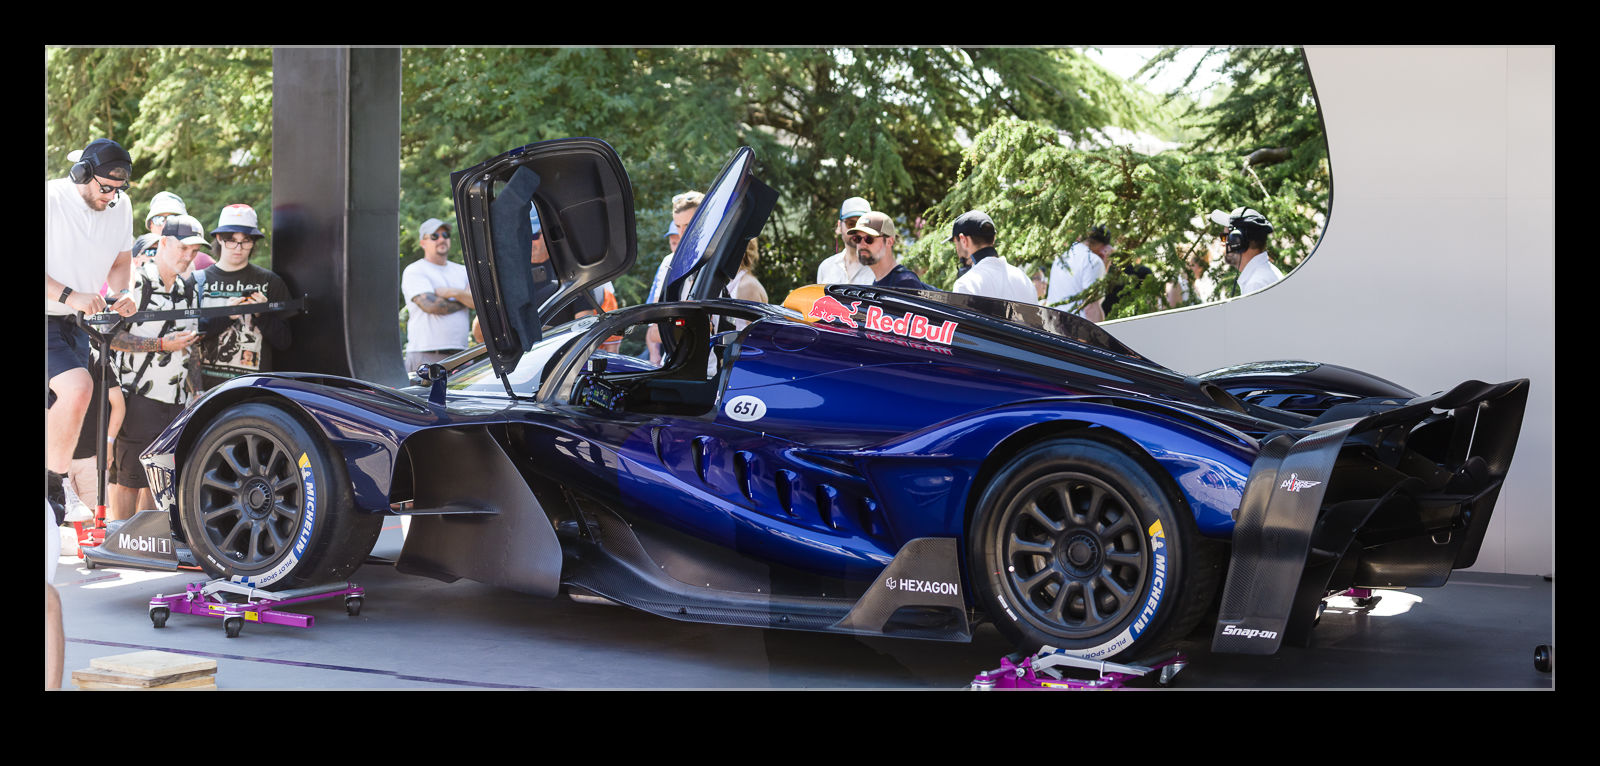
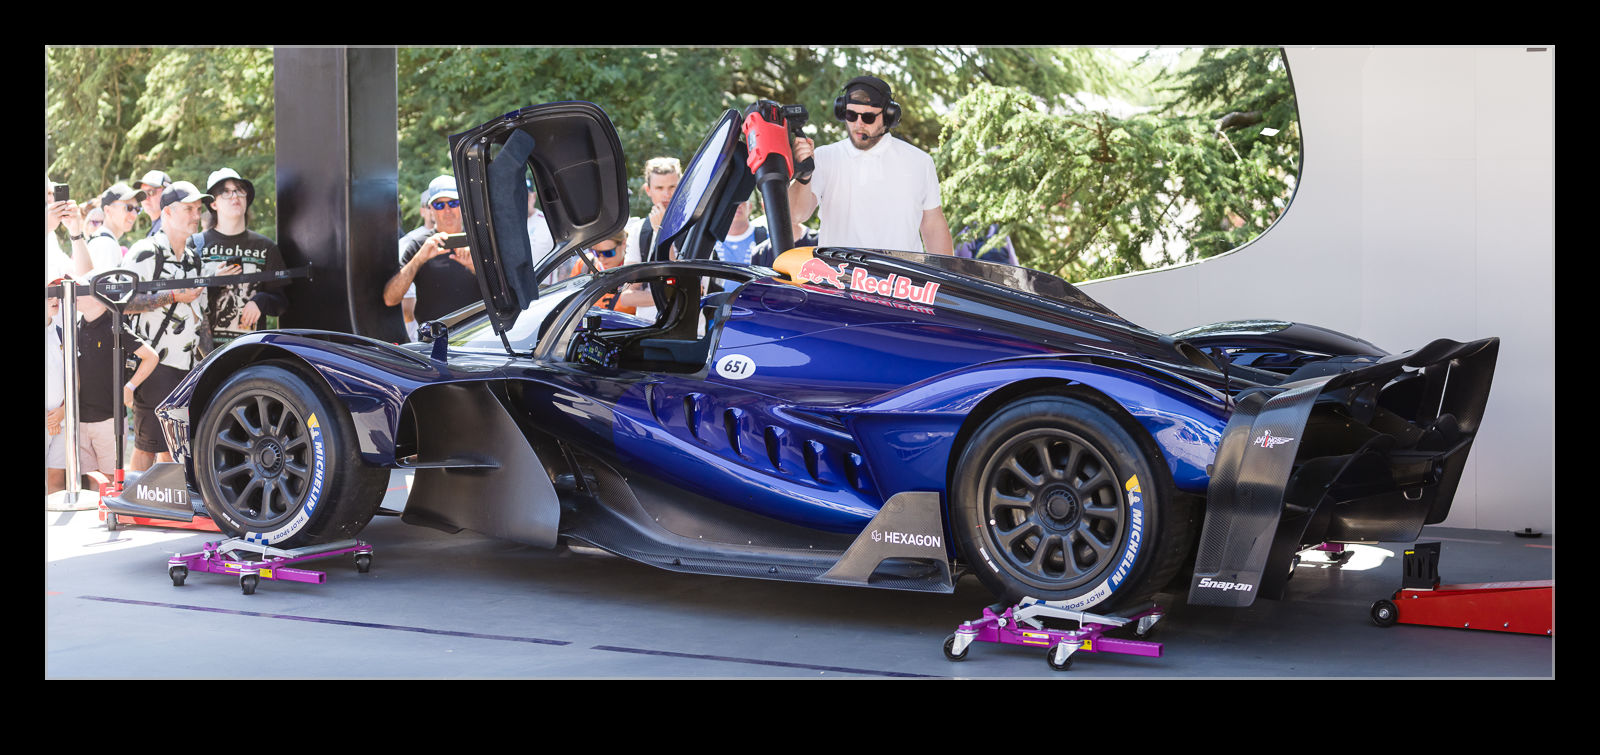
It was the Red Bull RB17 where I was playing with this. When I went to stitch the images together, Lightroom gave an old result. Instead of either having the whole person or no person, it managed to have parts of them only in the shot. I decided to use Photoshop’s photo merge function instead, but it gave the same results. However, it did this by outputting layers with masks which were then editable. I was able to go into the shots and get rid of the bits I didn’t want while bringing out the bits I did. Some of the blending is not perfect in the revised versions but, for a quick solution, it works fine. If I needed to do more with the images, I would fix the flaws with more care.
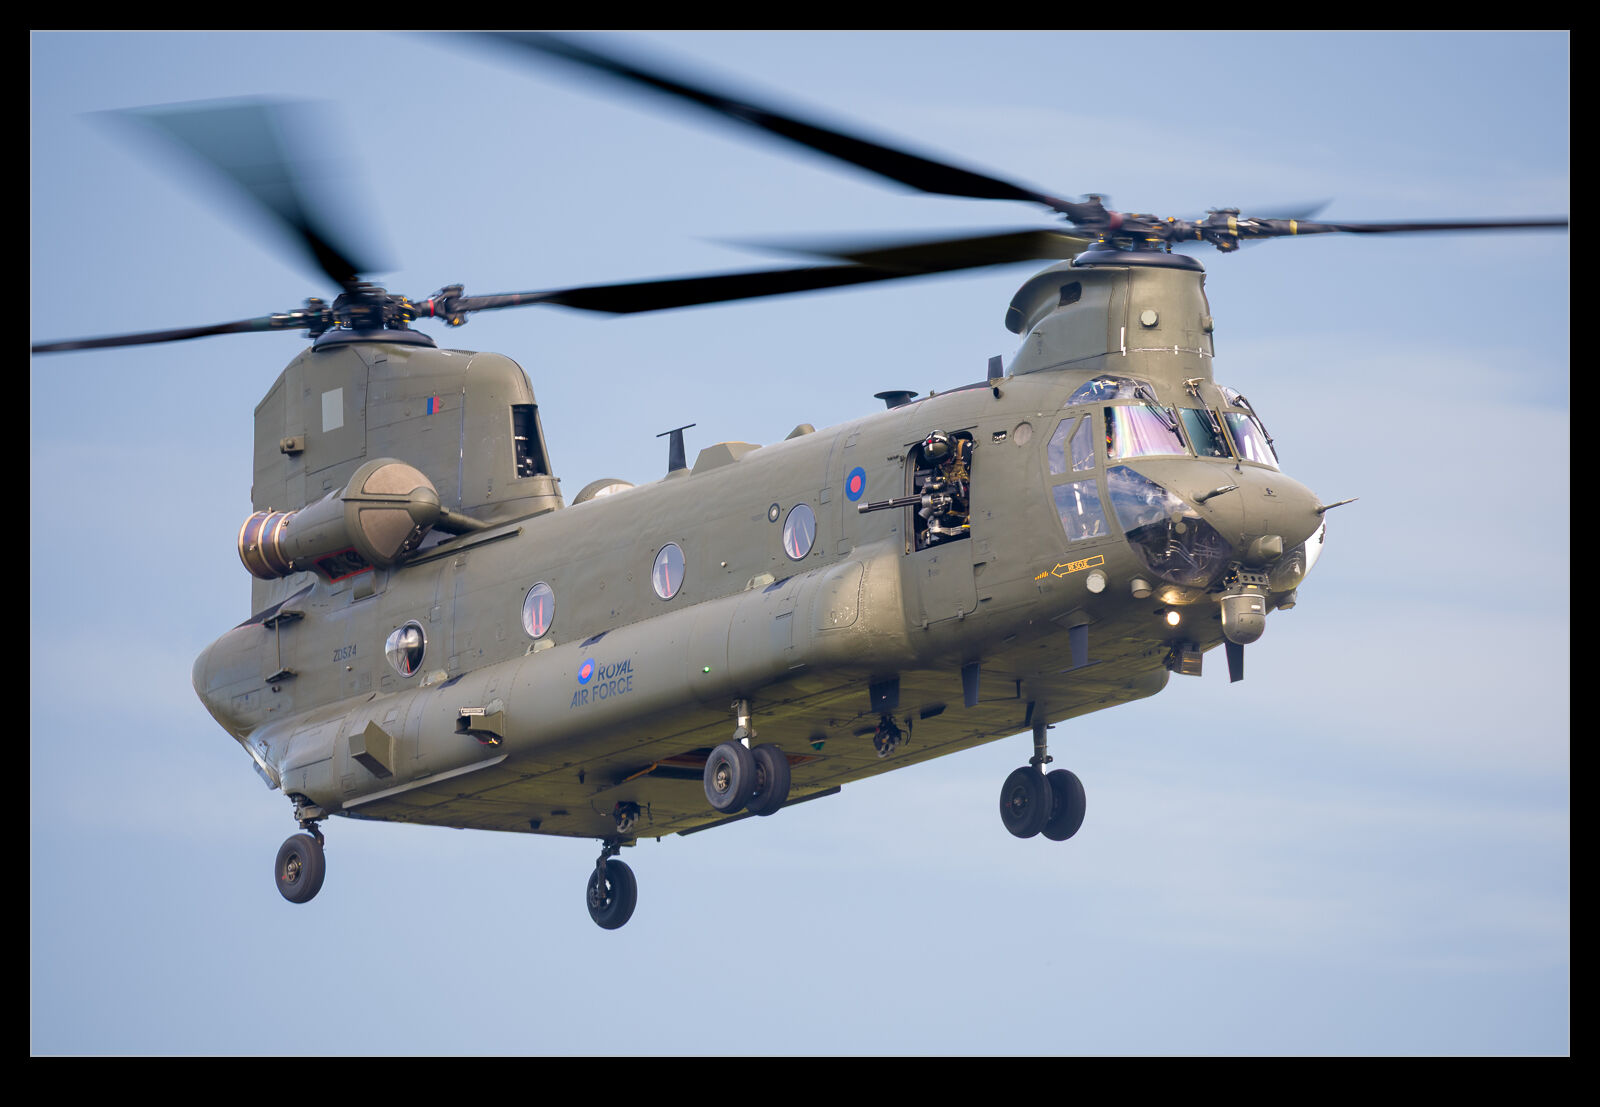
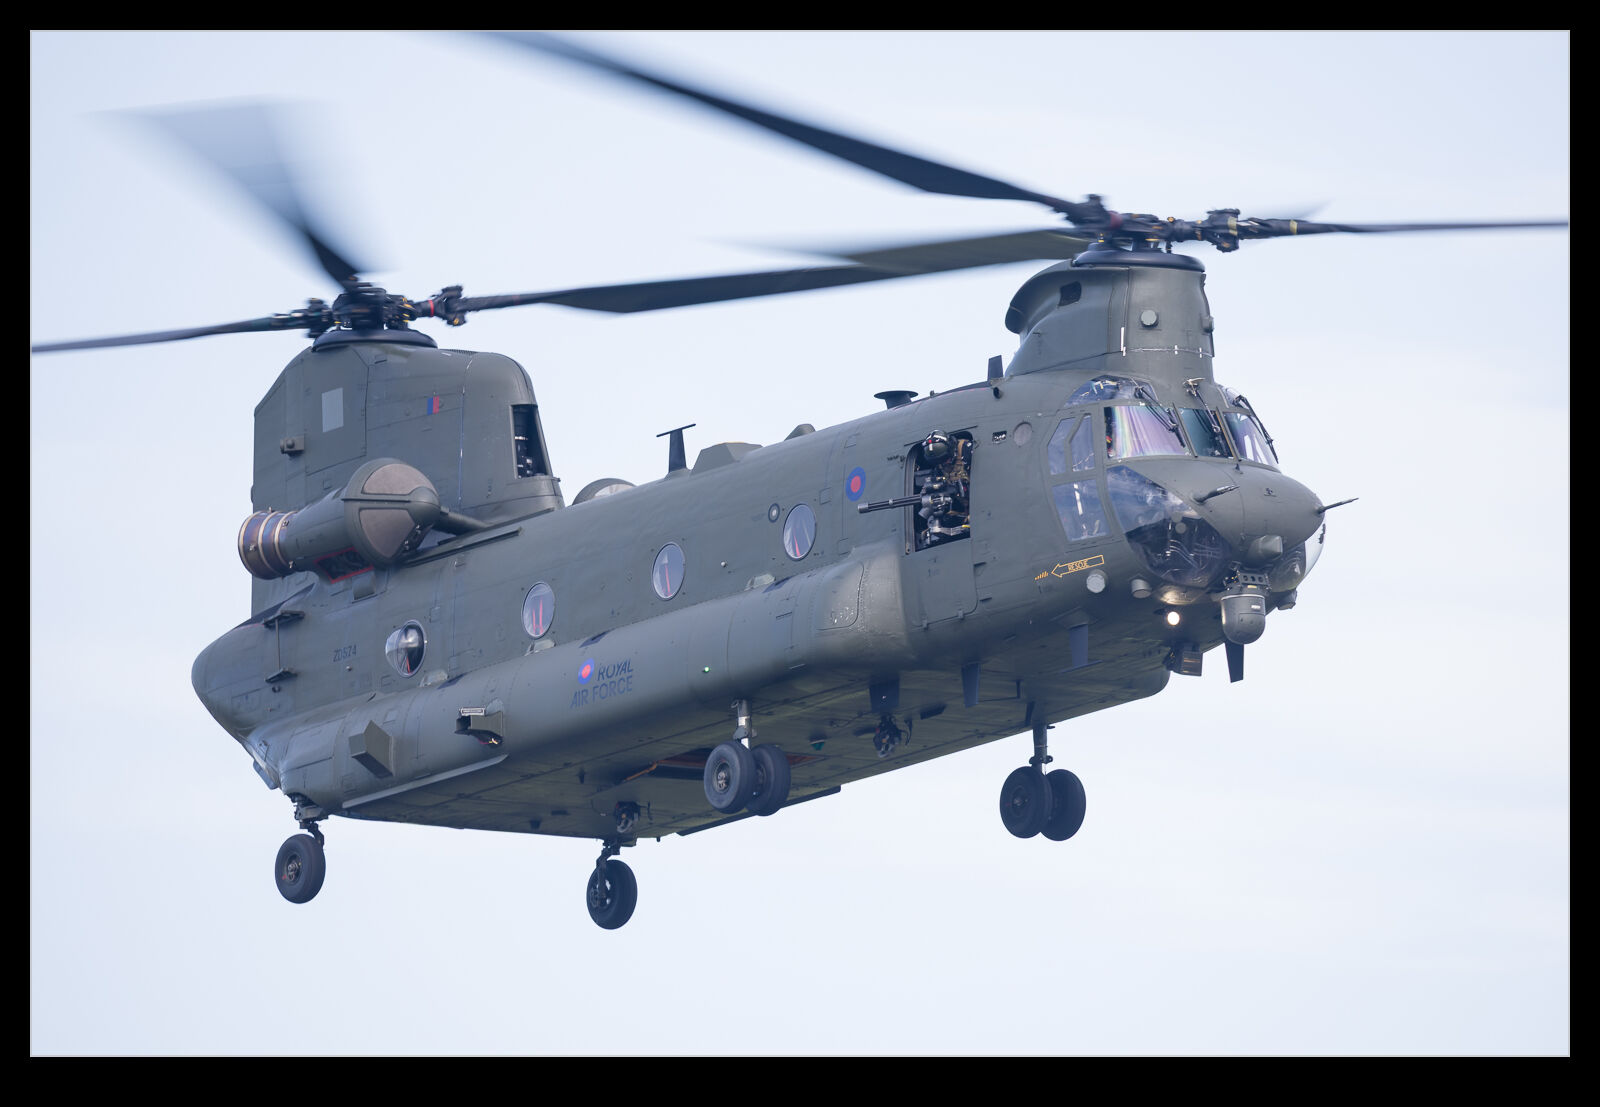
I will put together a post soon about the Chinook display at RAF Cosford. It was a great display. However, this post is not about that. Instead, it is about editing. Lightroom Classic recently had an update to the masking tools and the subject select process is now way better than it used to be. I used to spend a lot of time refining the selection to get something usable but now the process has become a fair bit quicker as a result of the starting point being more accurate. Not perfect, but better. Anyway, I include a version of the image almost out of camera and then the result when working on the airframe and sky in separate masks. It is a lot more how the thing looked at the time and a significant improvement in my mind.
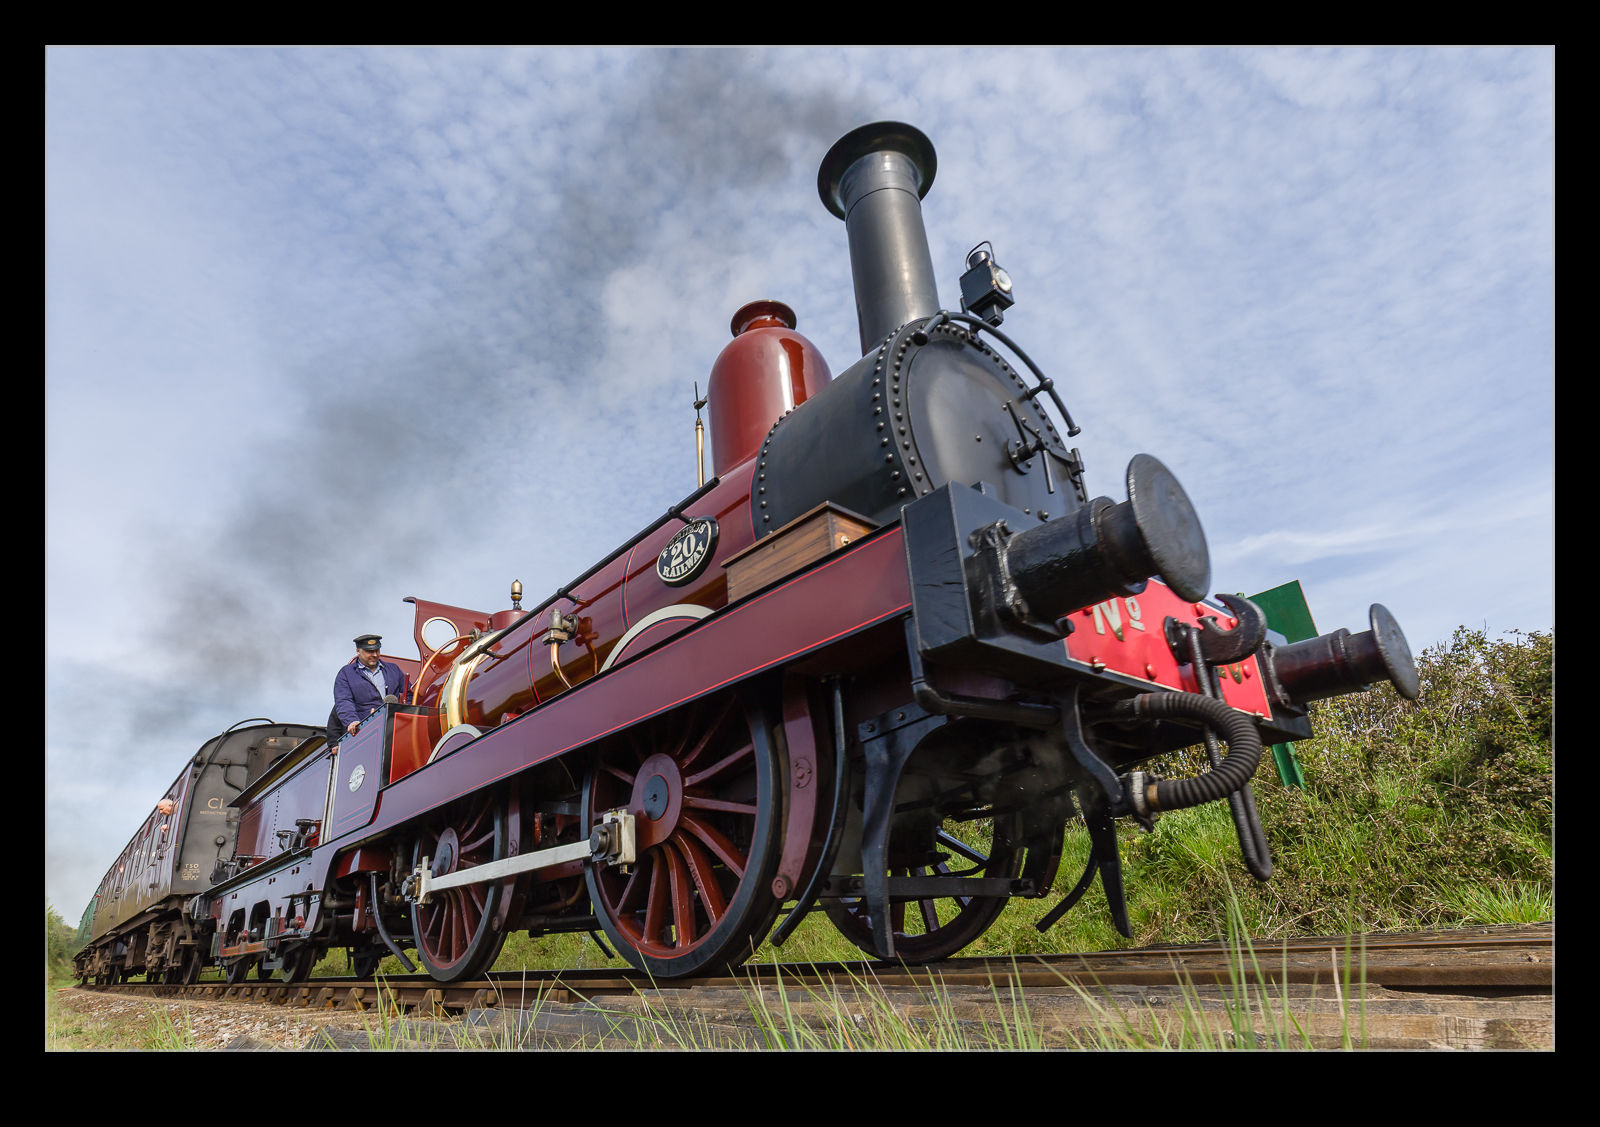
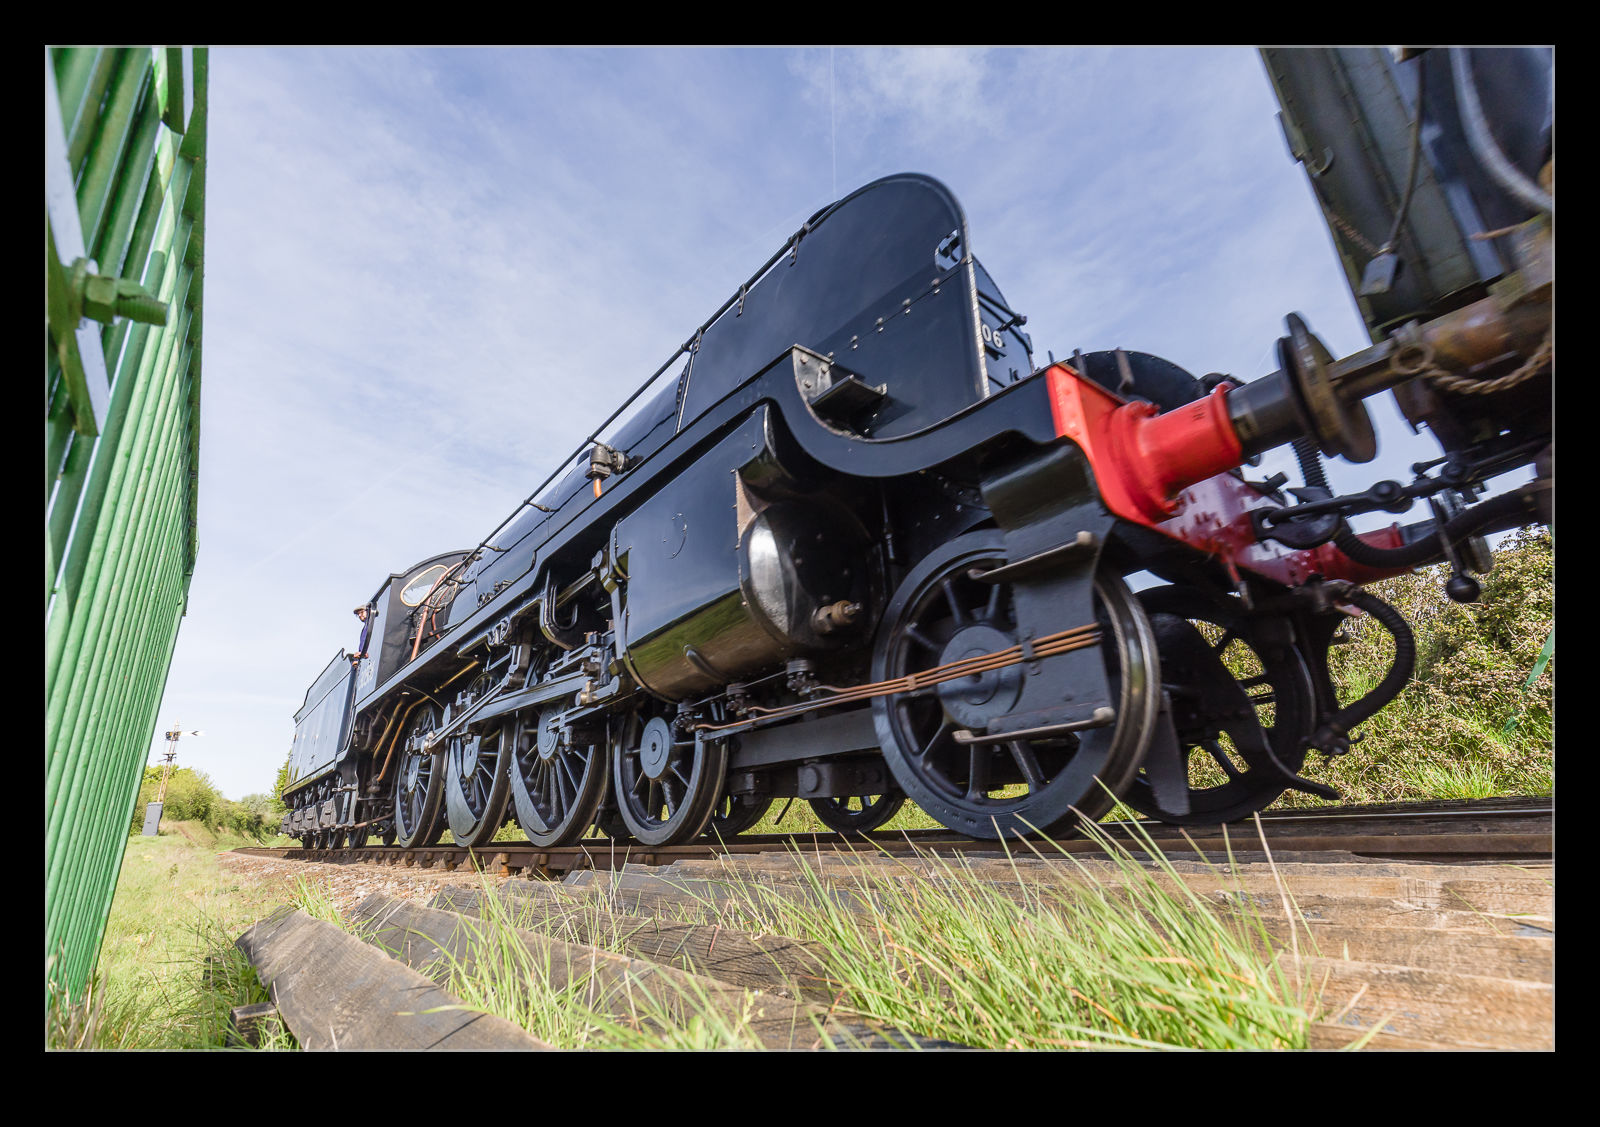
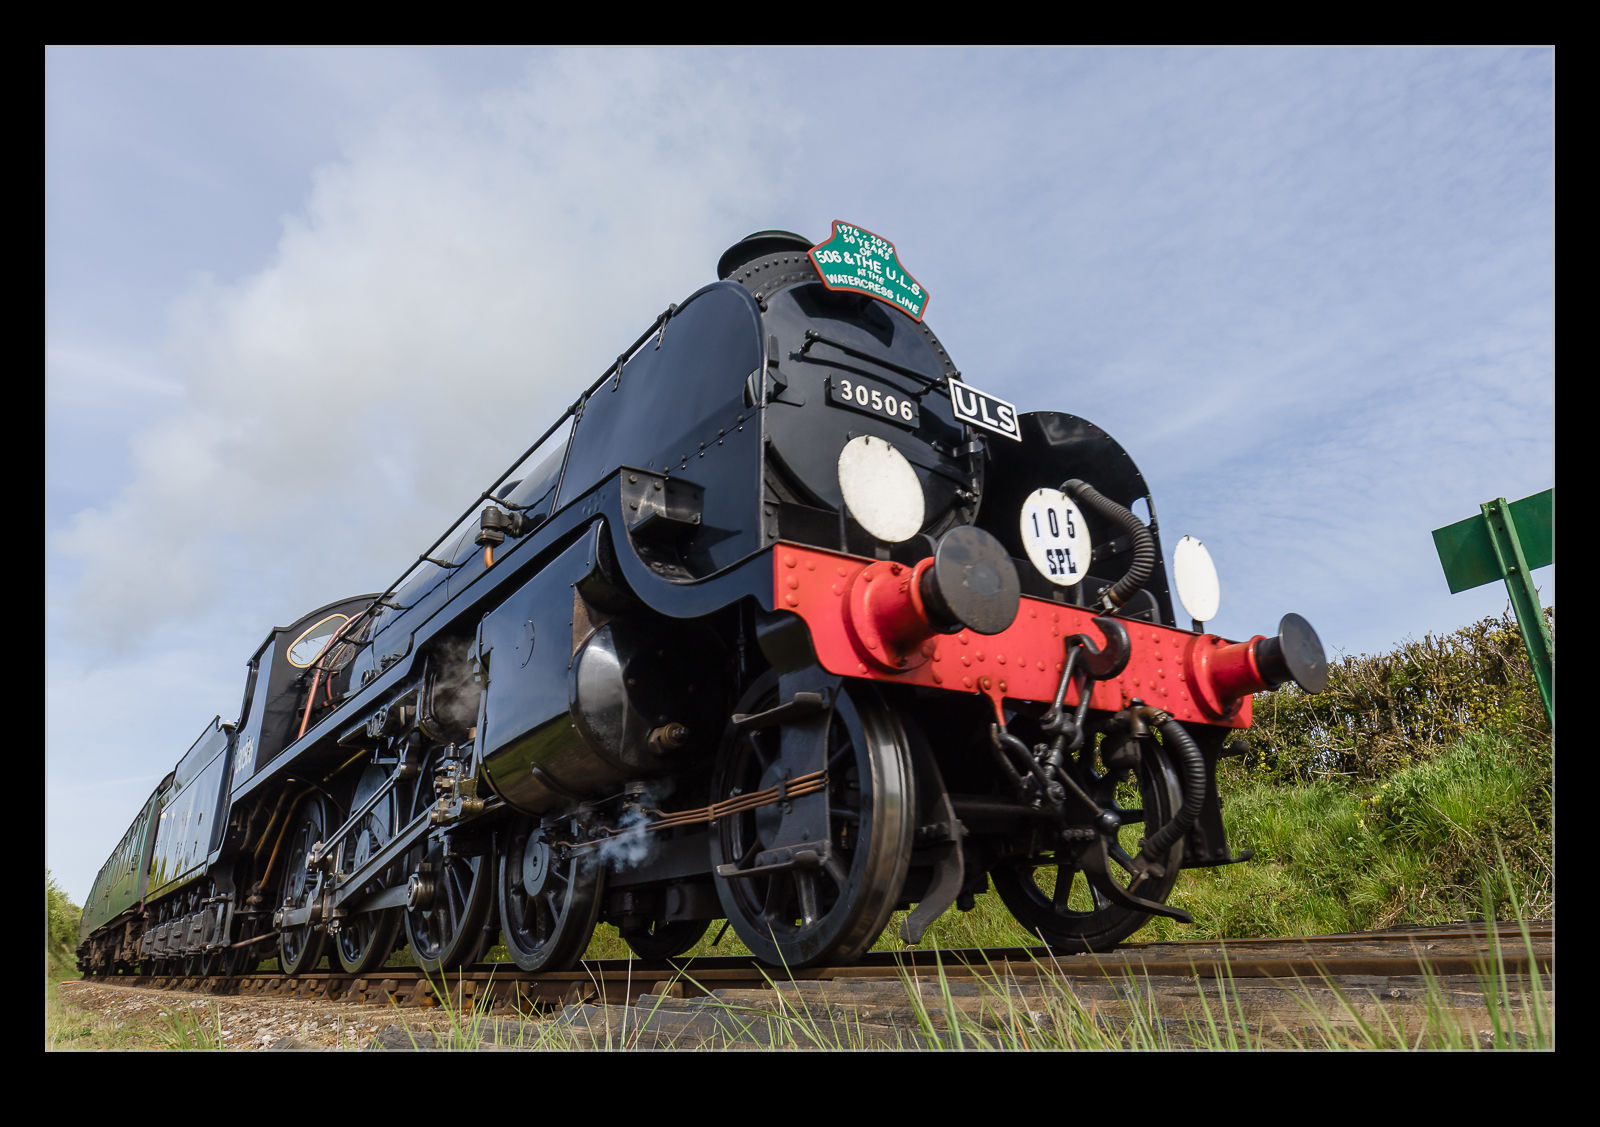
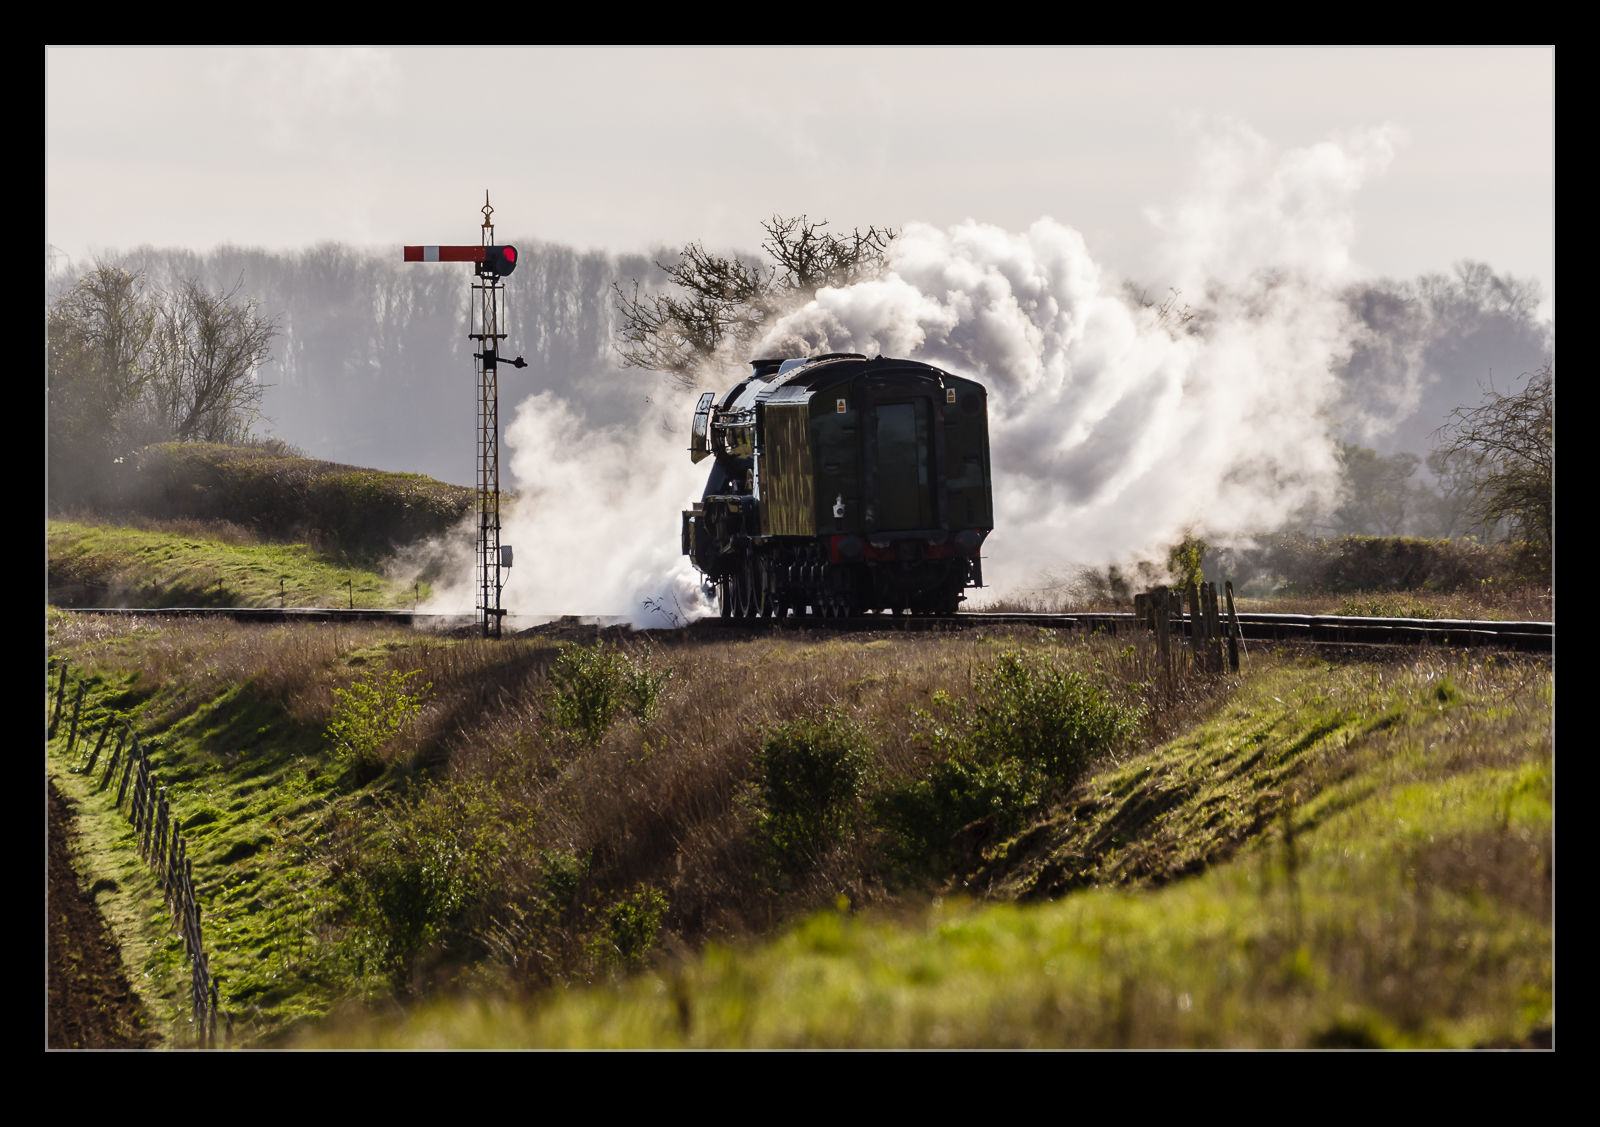
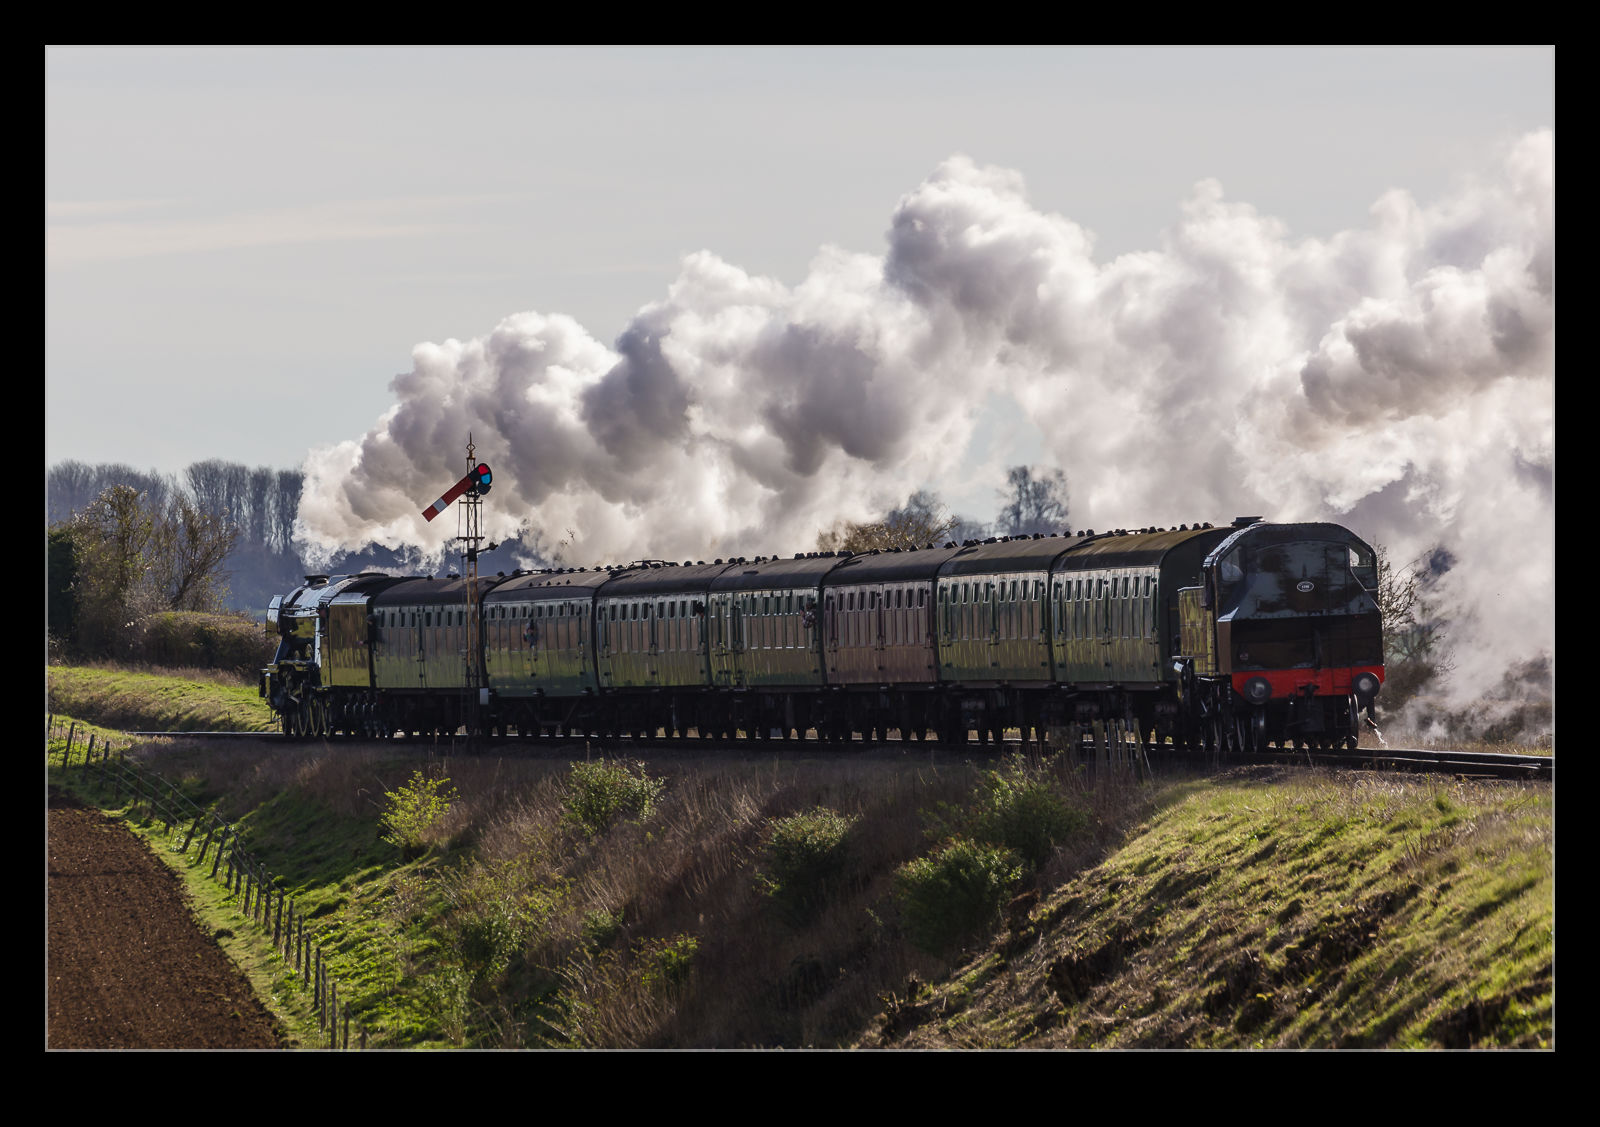
The Watercress Line makes pretty regular appearances on this blog at the moment. Since it is close to home, if I am not doing something else, there is something on and the weather isn’t crummy, I might sneak across to get a few photos. One weekend morning, the Steam Gala was on. We had some plans later in the morning, but I figured the light would be best early and so headed across to Bishops Stoke to get some shots.
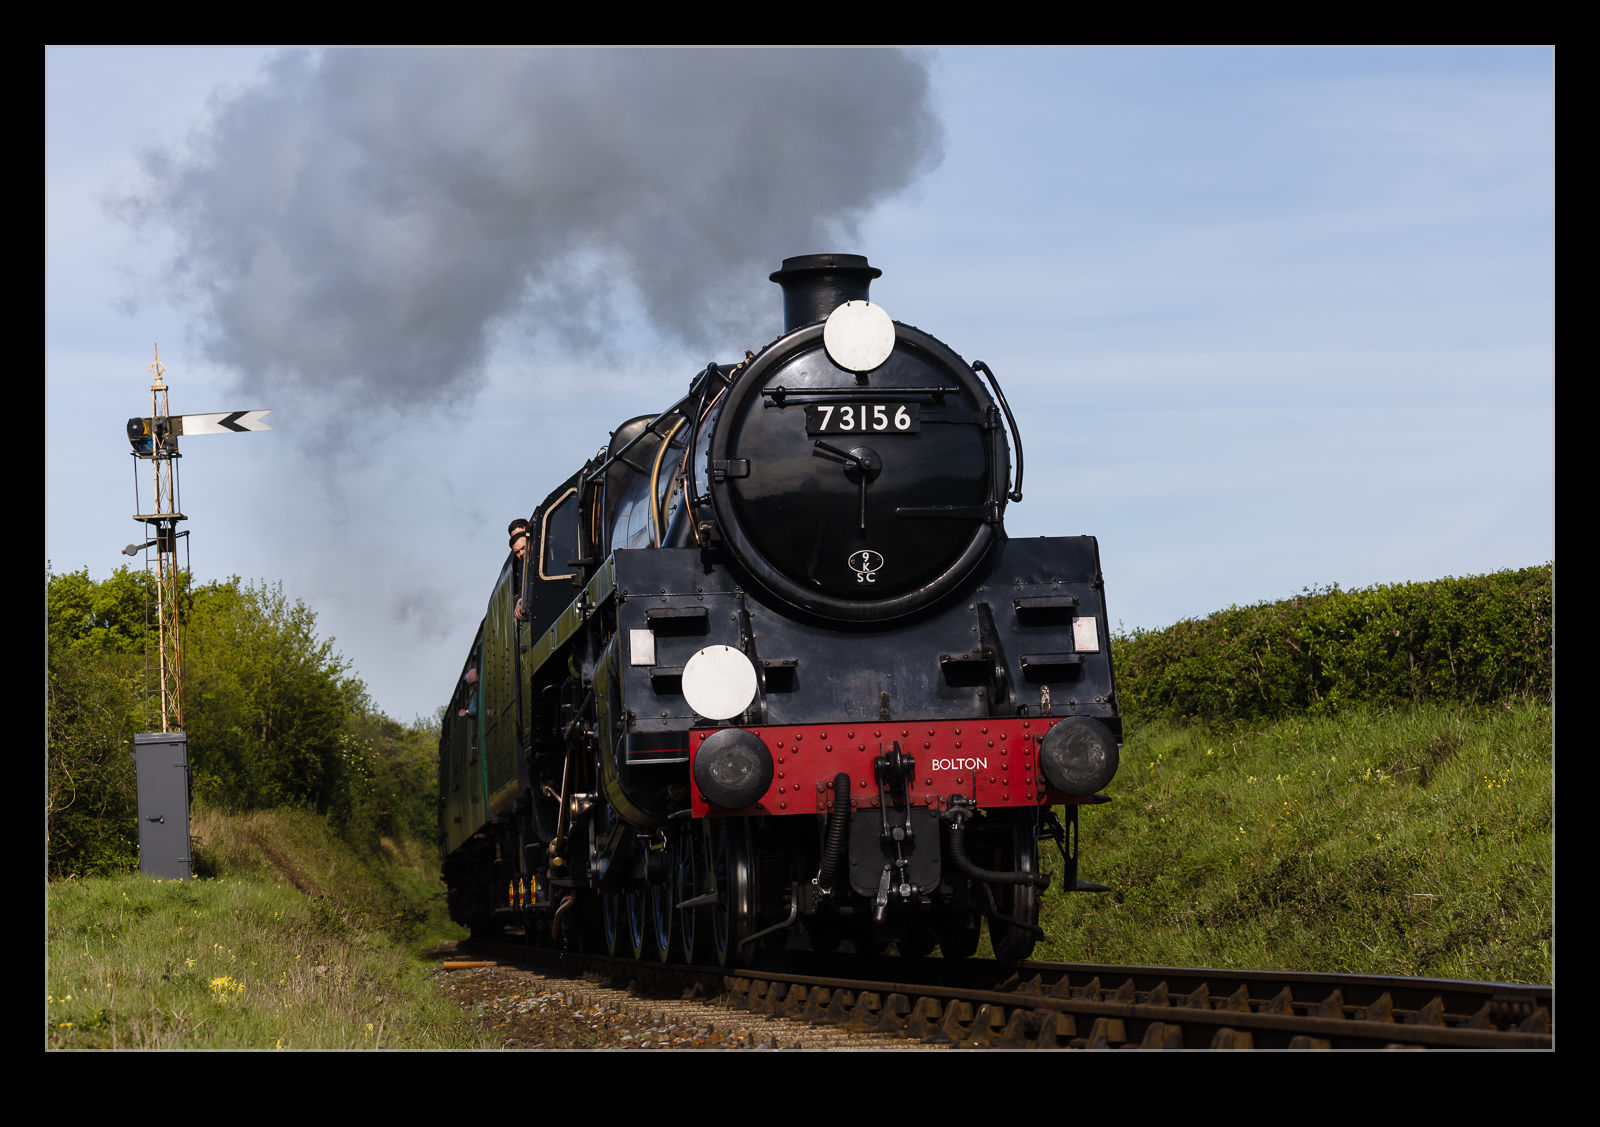
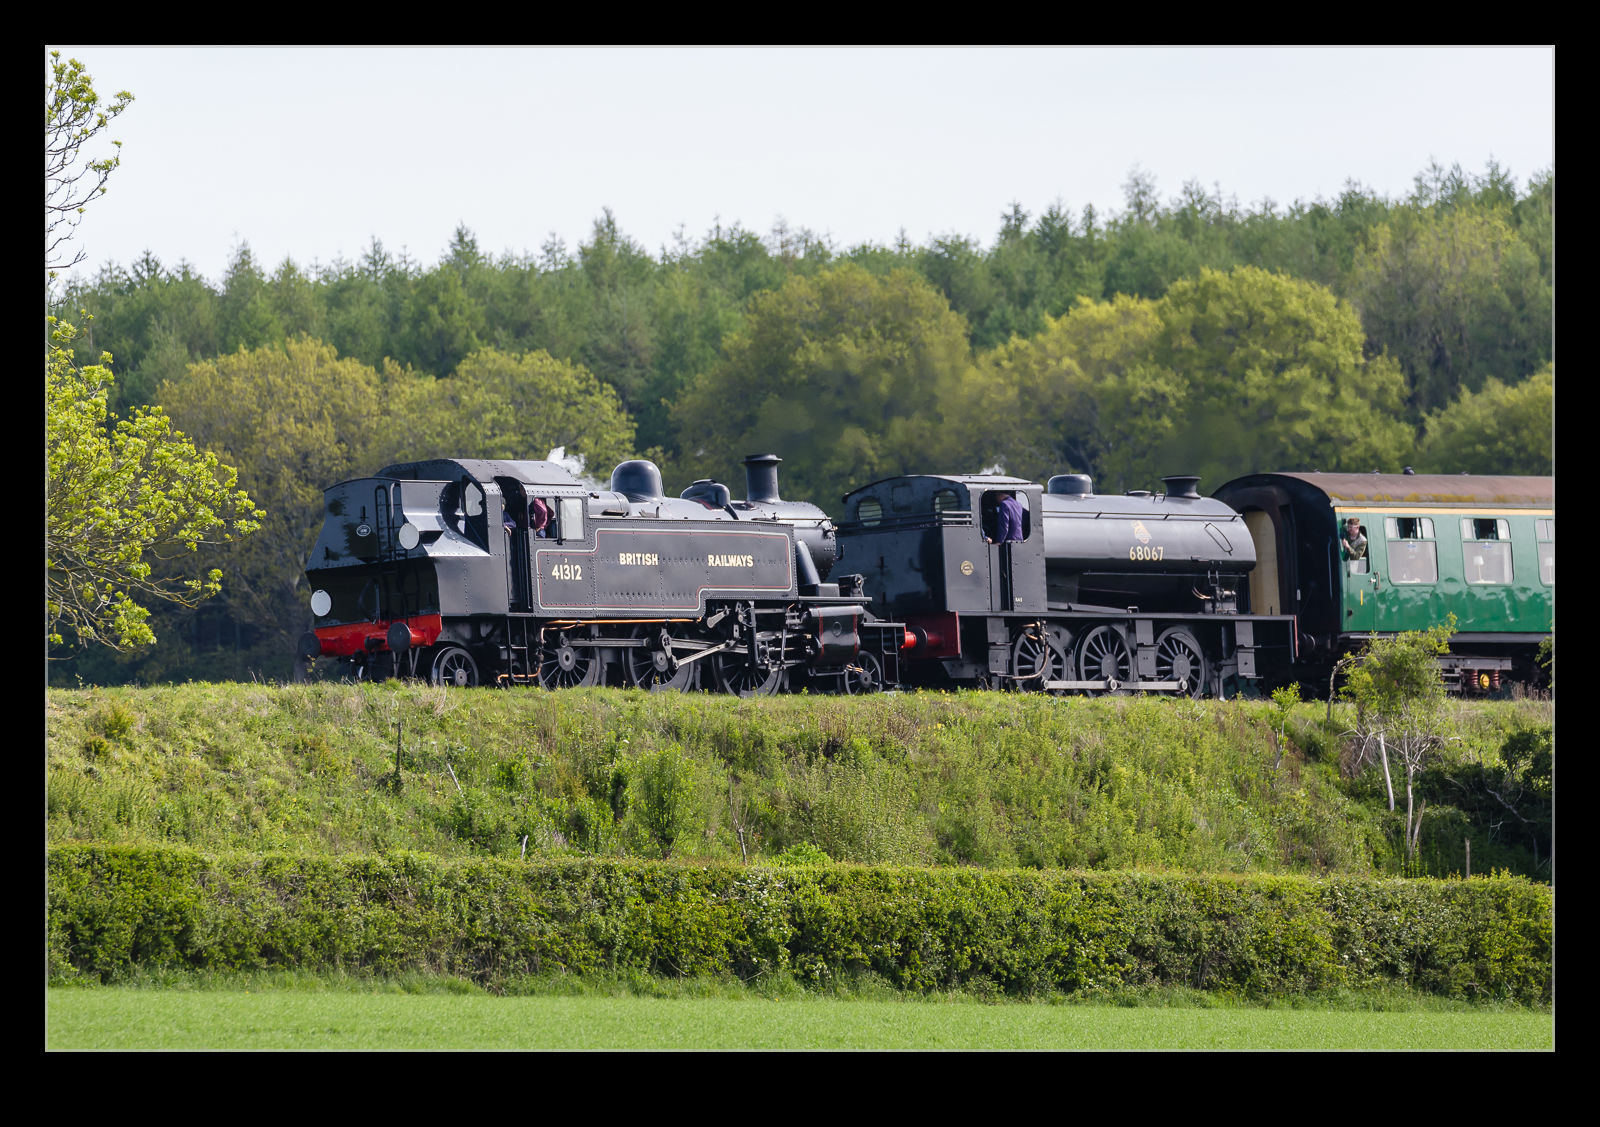
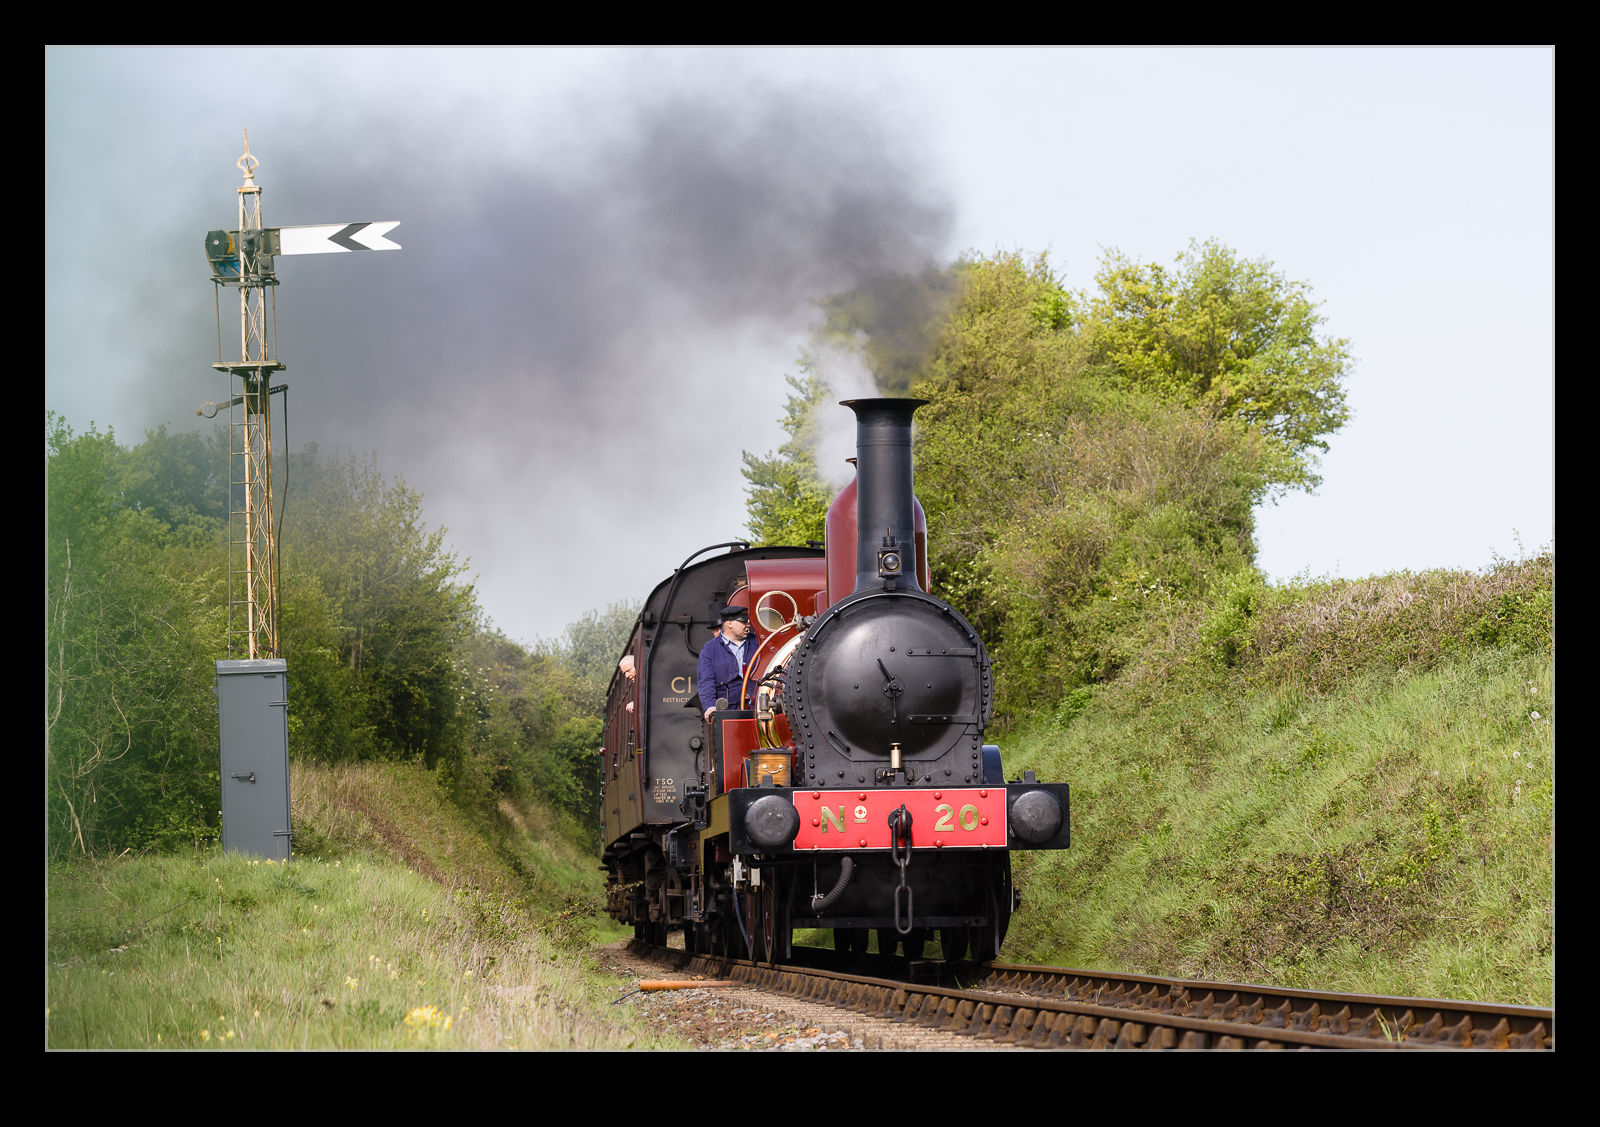
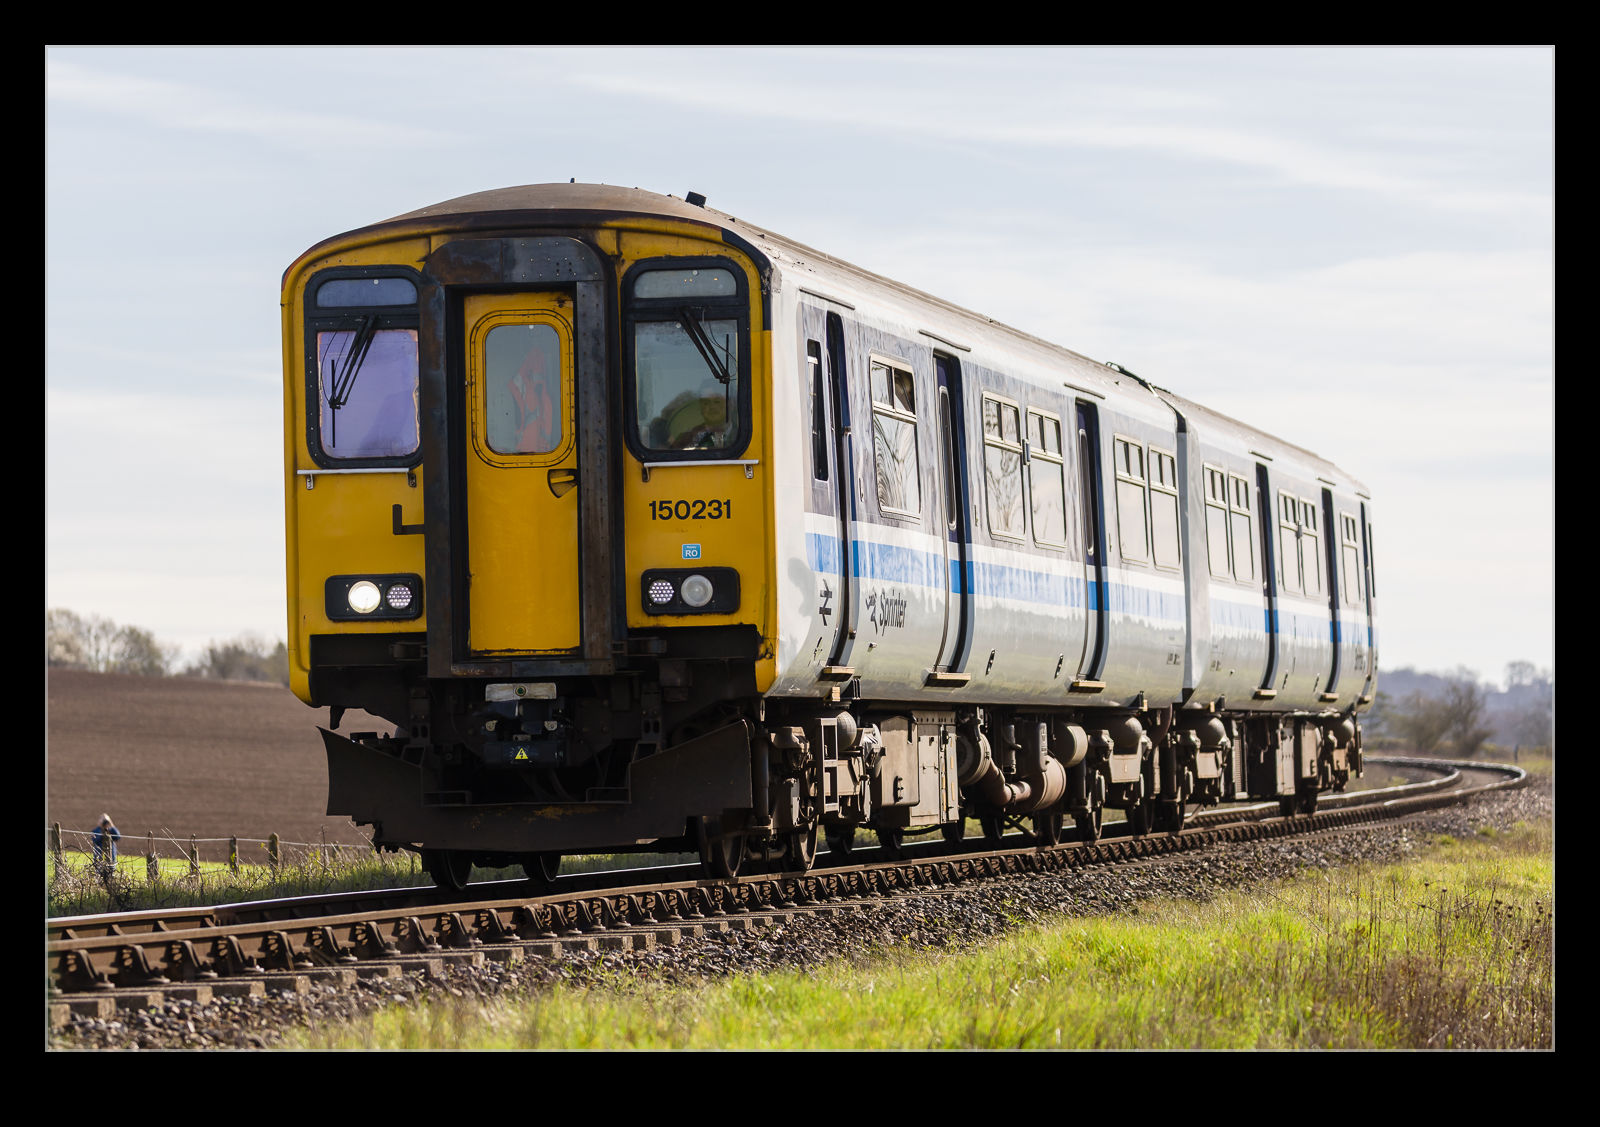
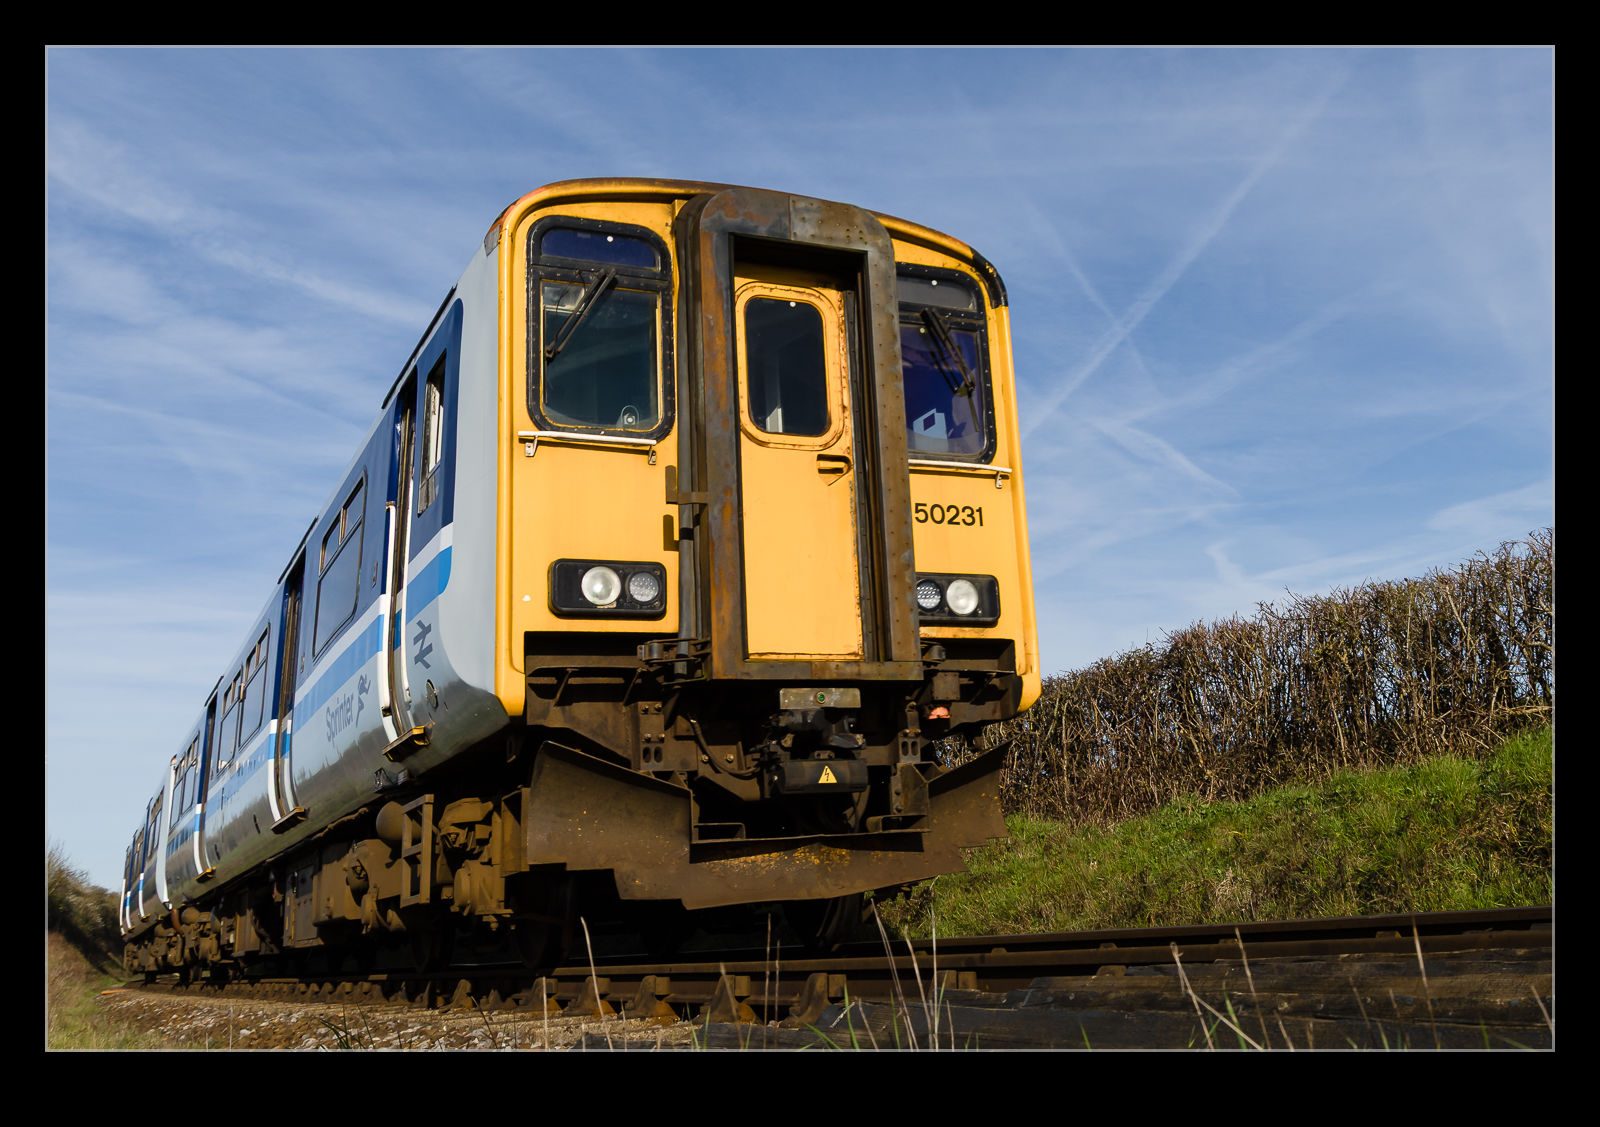
They had a variety of steam locos taking part (with the occasional diesel providing some support). Some were larger late generation locos, there were some tank engines and there was one that, to my untrained eye, looked like it was a lot older given the open area of the cab and the high chimney (is that the right term?). I used the same set up that I had tried previously with a longer lens handheld and a wide-angle lens set on the ground controlled by a Pocket Wizard. I also had the Insta360 mounted high on a fence to get some video.
The set up worked better this time. I had gone with a wider lens for the ground camera and also held the Pocket Wizard in a better way to allow a smoother transition from one shot to the other without any frantic fumbling! Overall, pretty happy with the way things worked out. I suspect I might head back for some of their other events this year if I am free (and the weather plays ball).
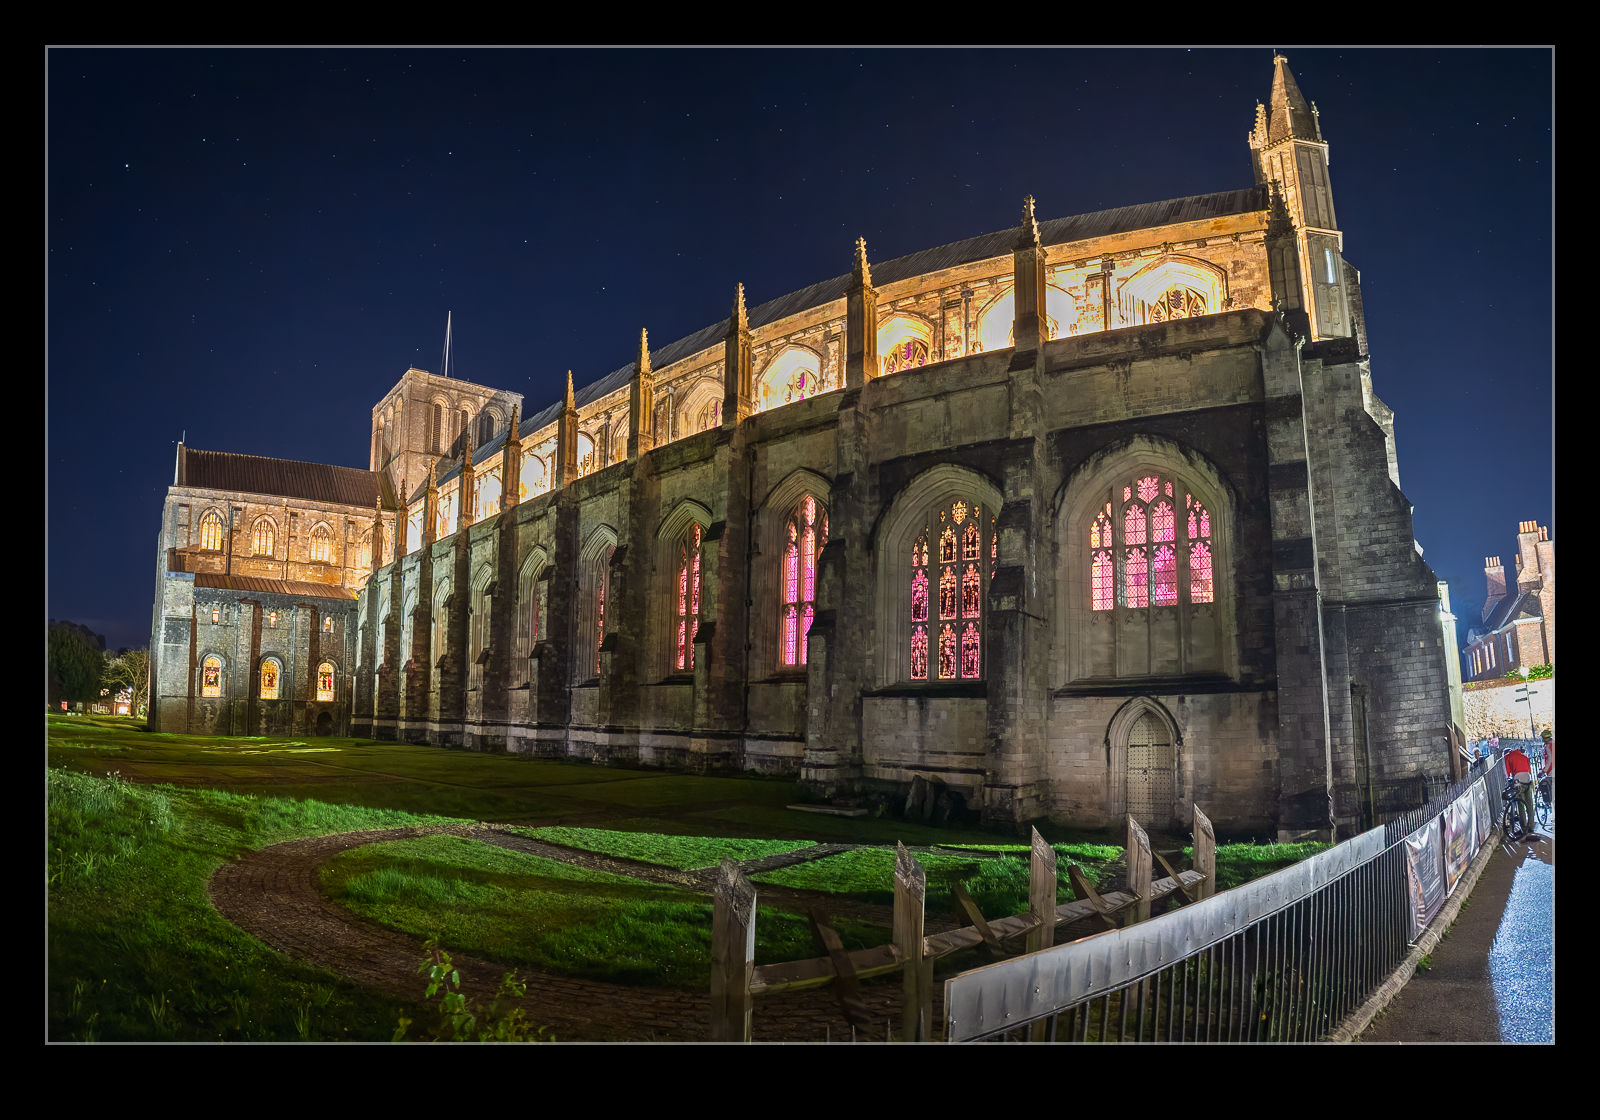
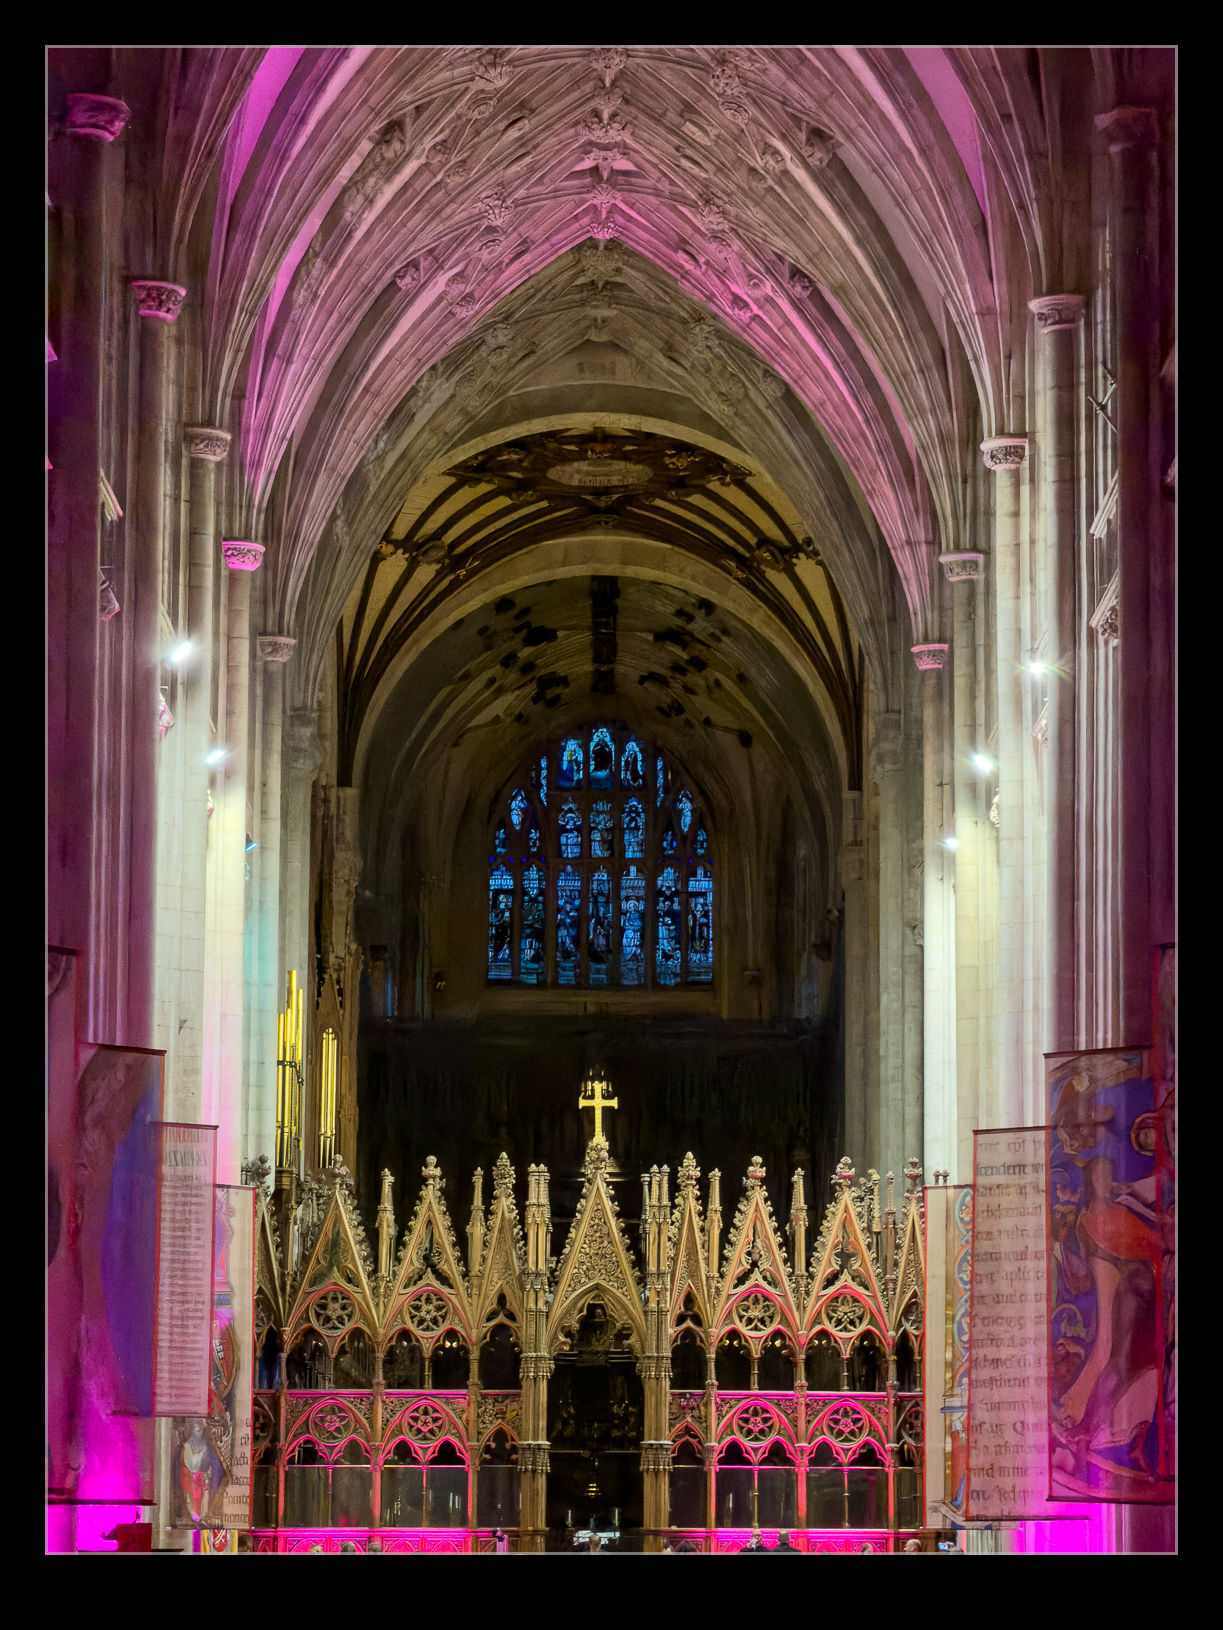
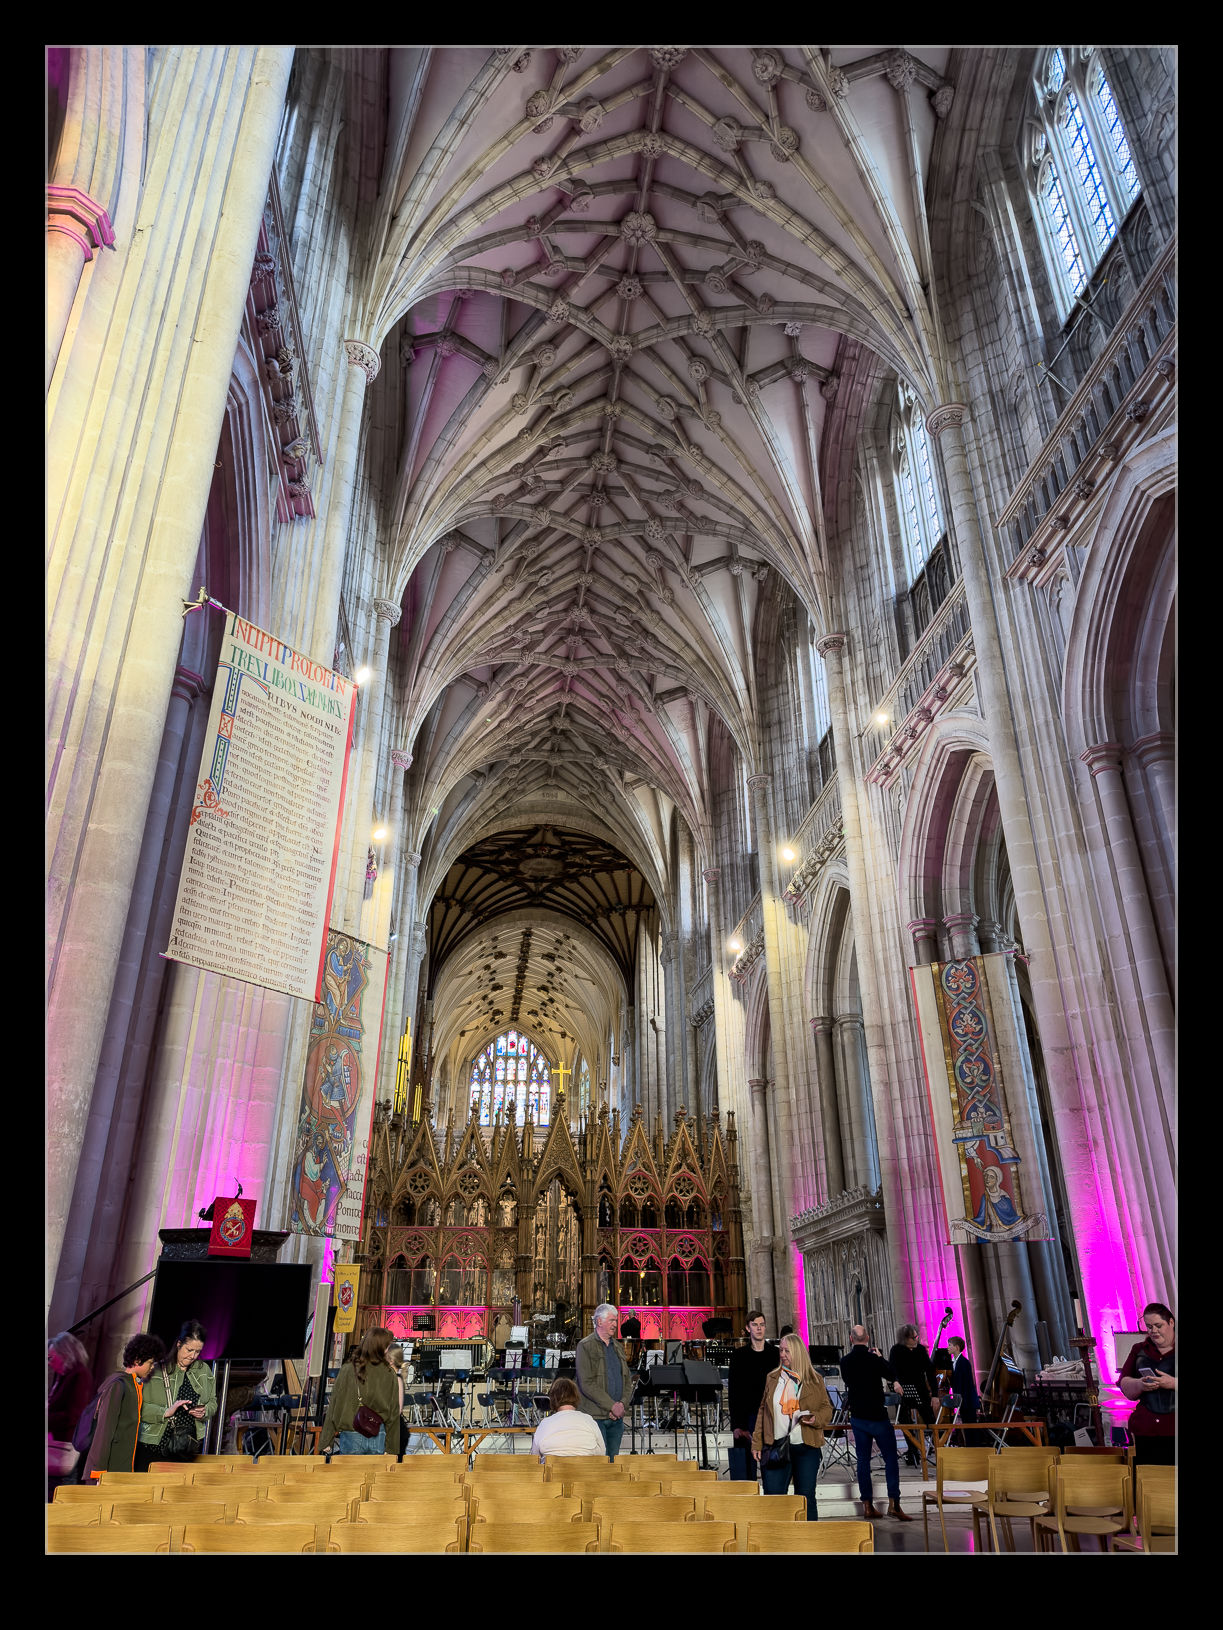
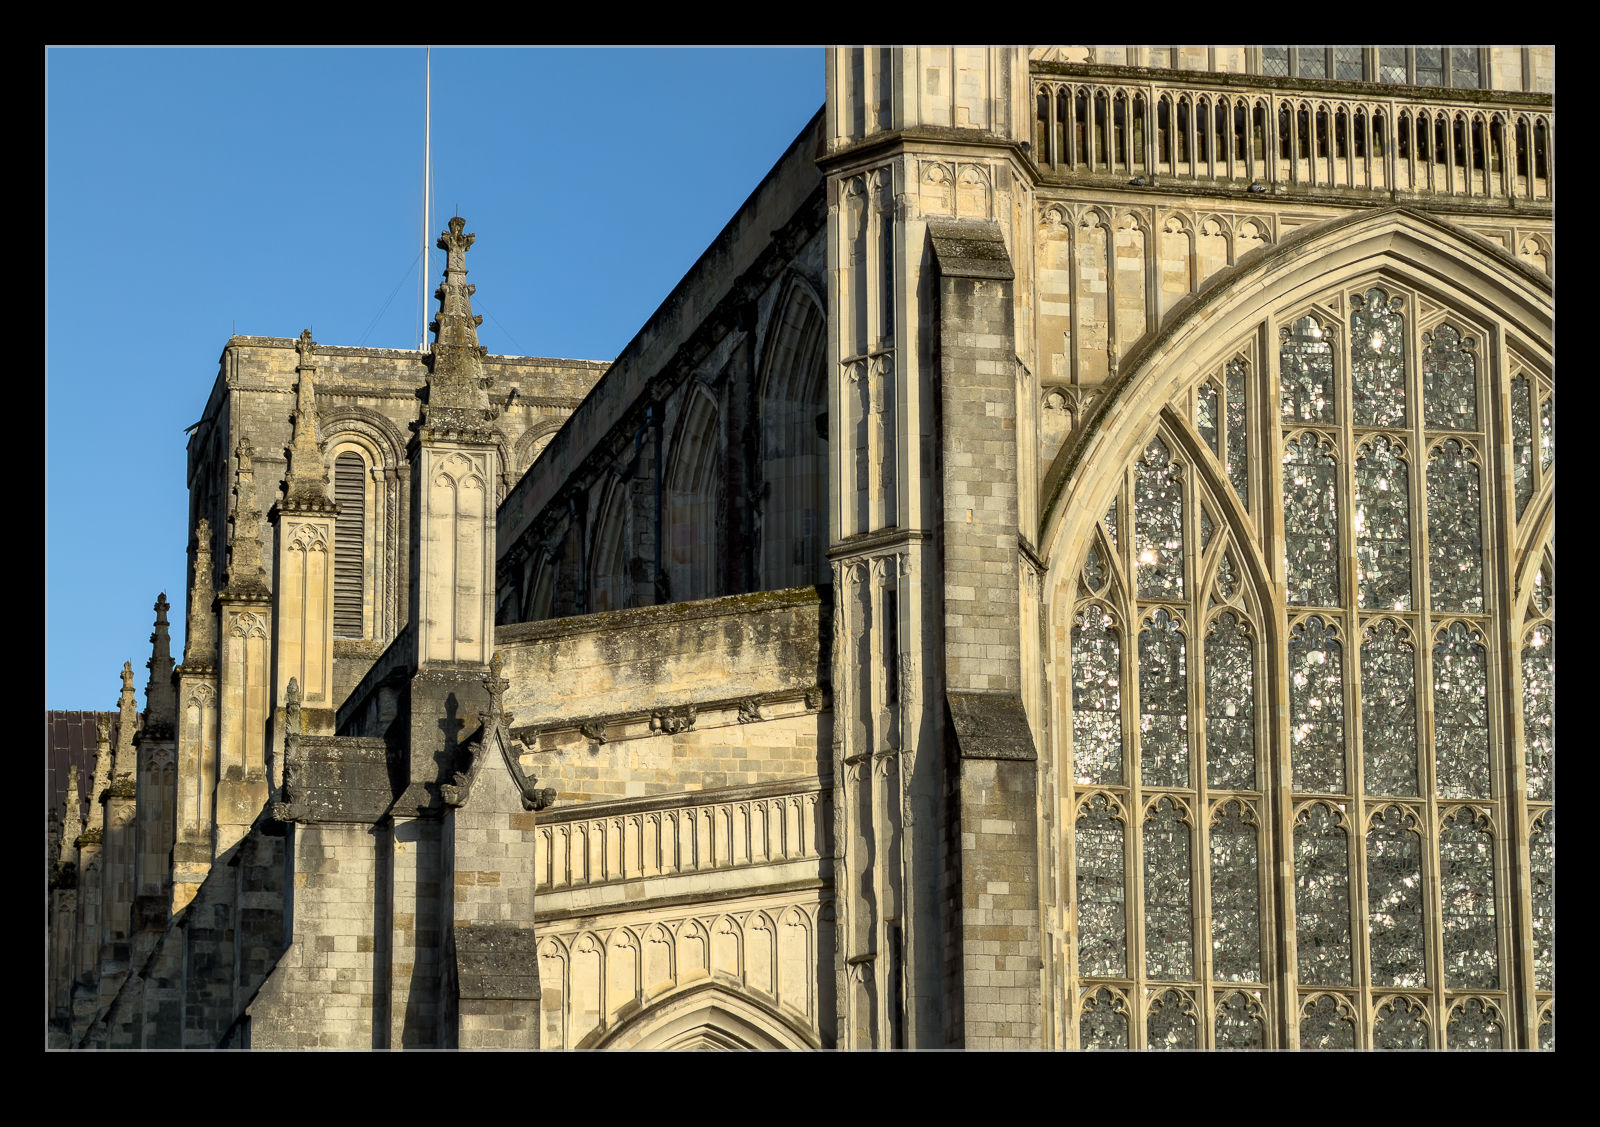
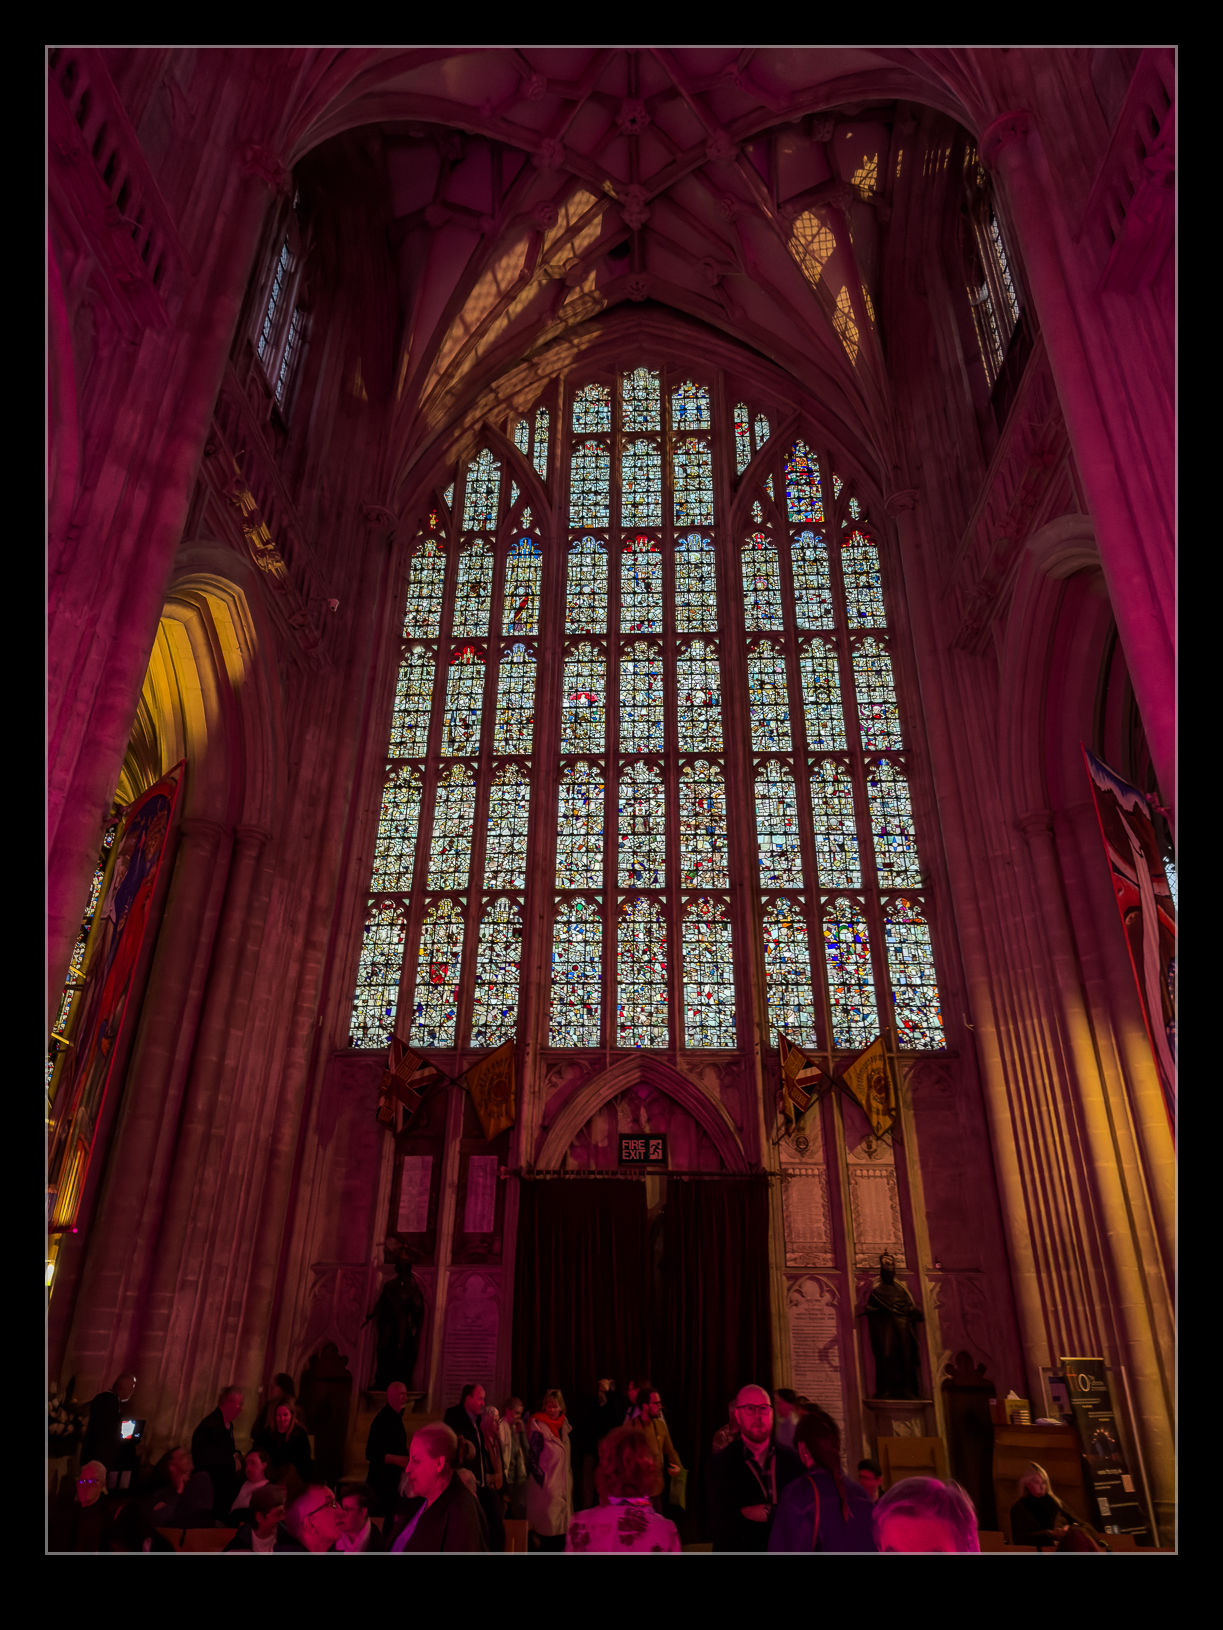
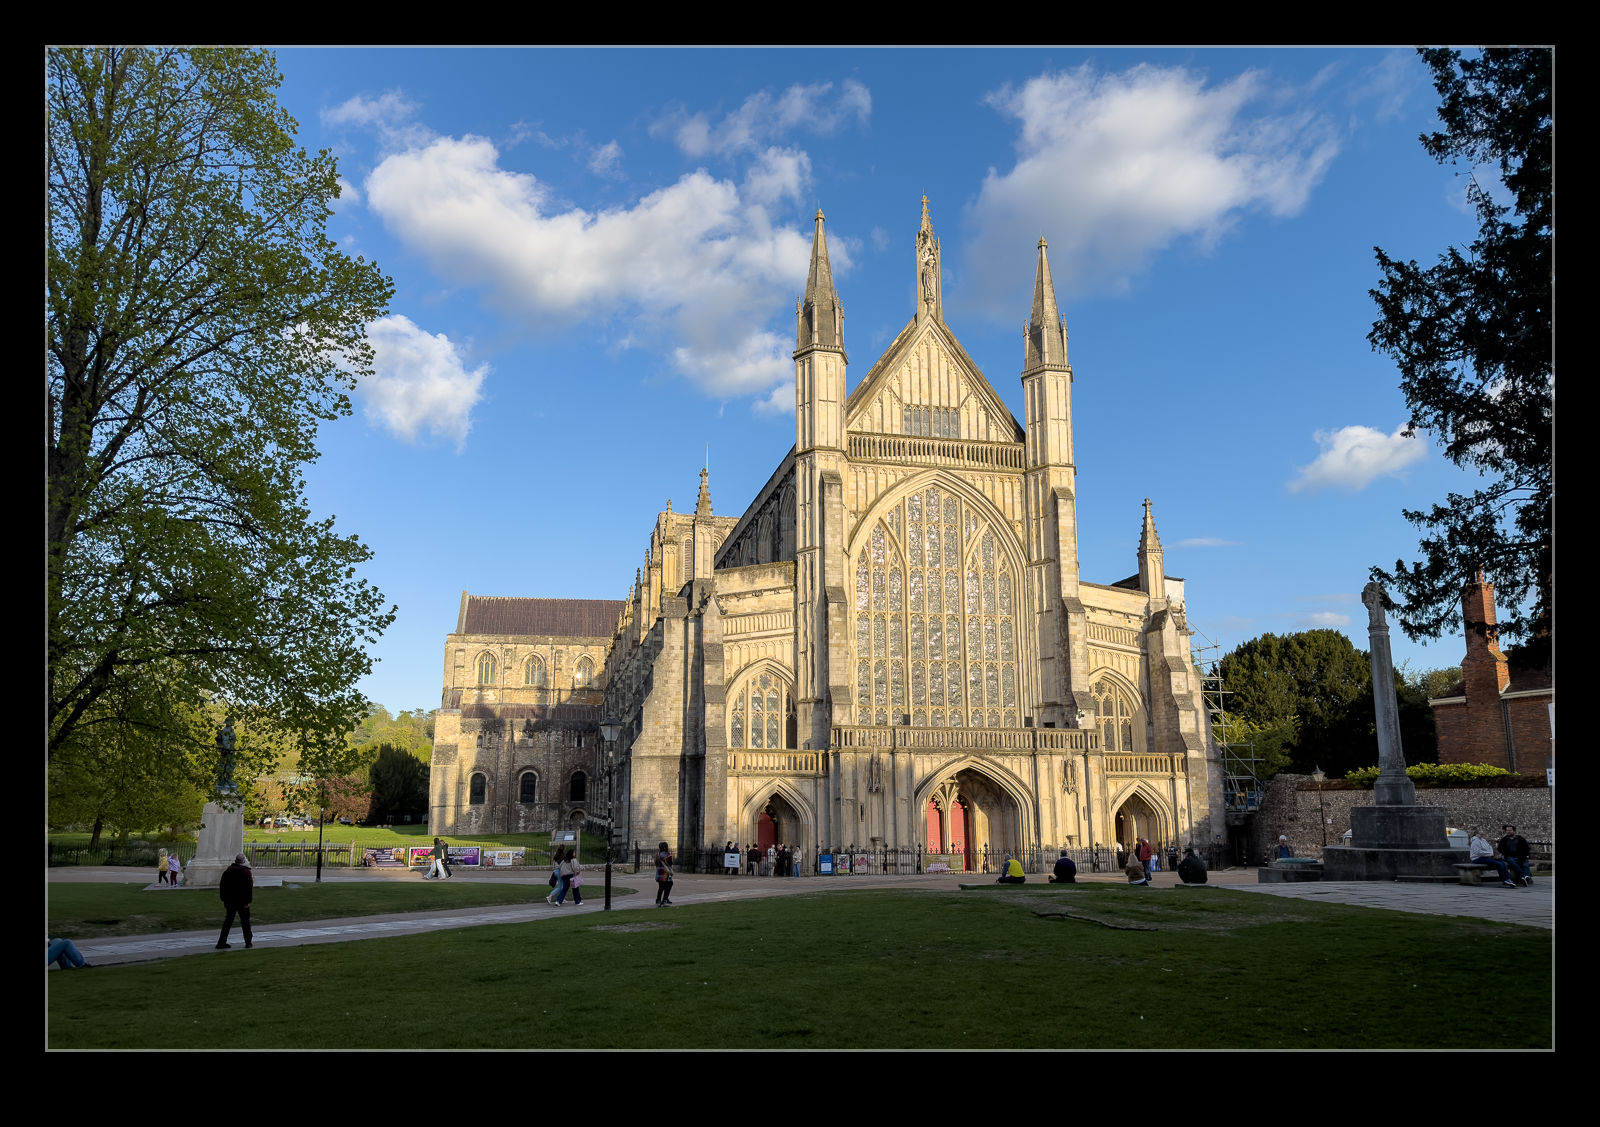
We bought tickets for an orchestral performance of The Planet Suite at Winchester Cathedral. It was still daylight when we went in before the start of the event but, by the time it was over, it was dark outside. The illumination on the cathedral was really nice and the ability of a modern phone to compile an image in those conditions still amazes me. I stitched together some shots to make this image. I also took a few inside the cathedral between the parts of the performance. Low light really does make for more interesting shots.
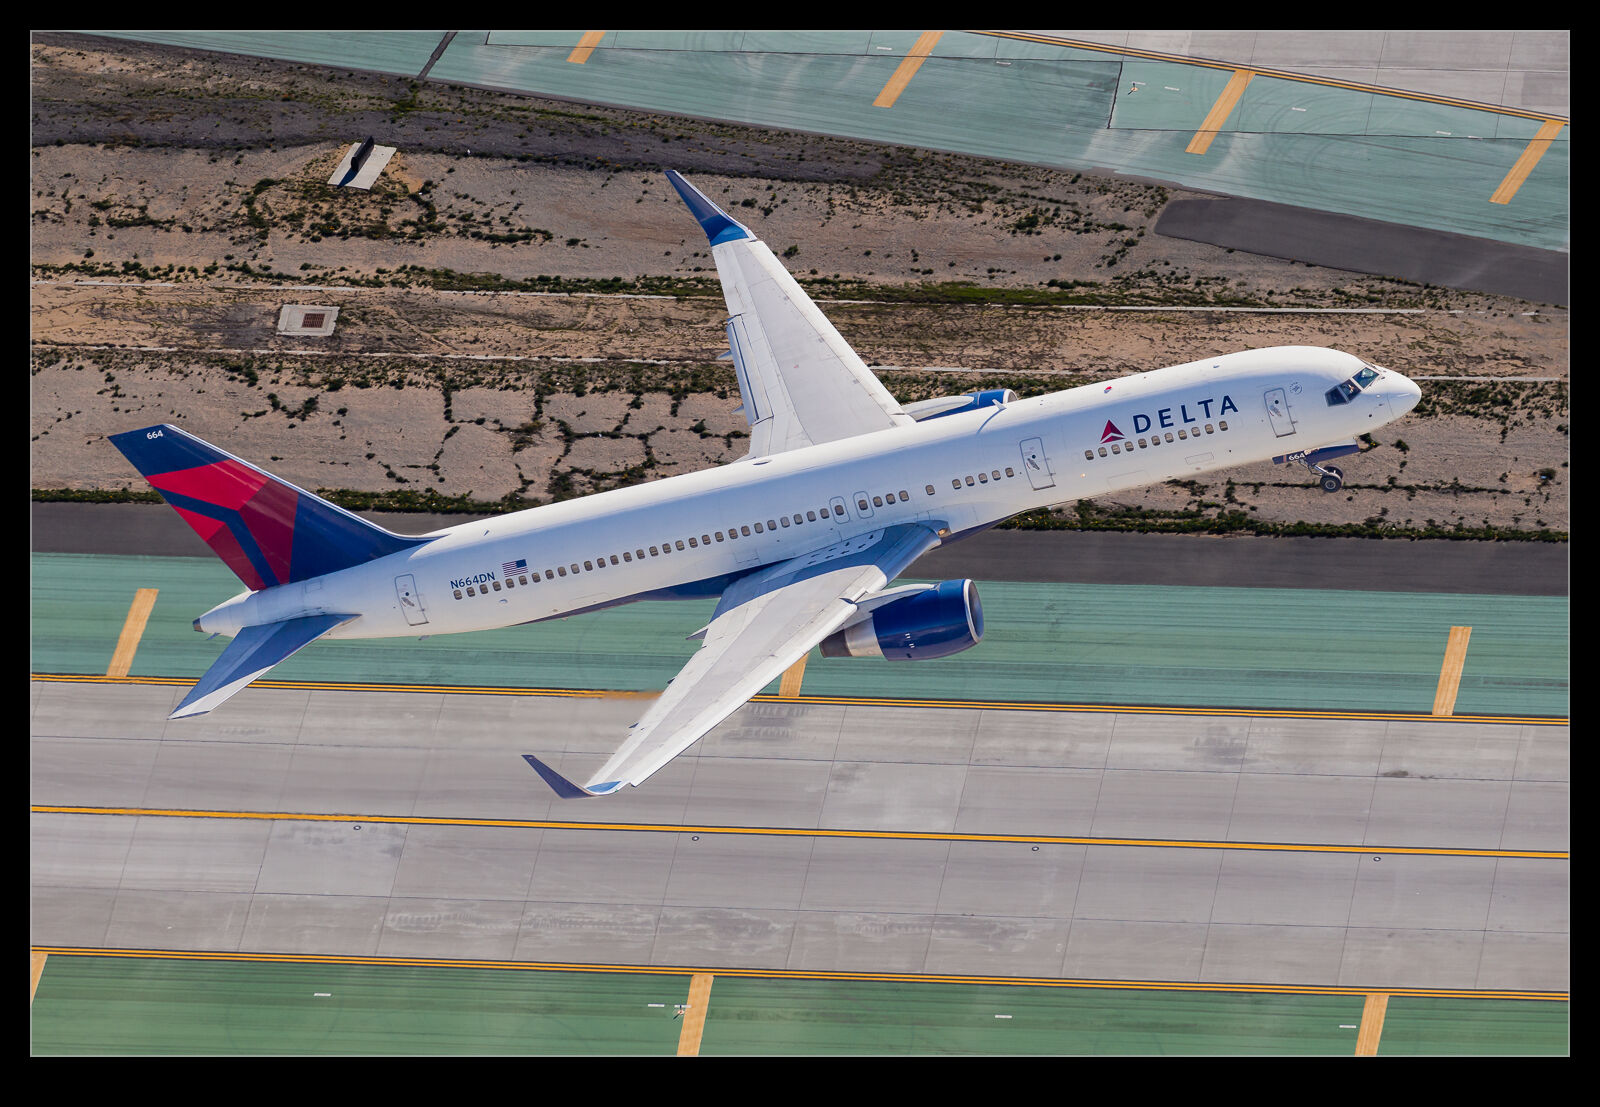
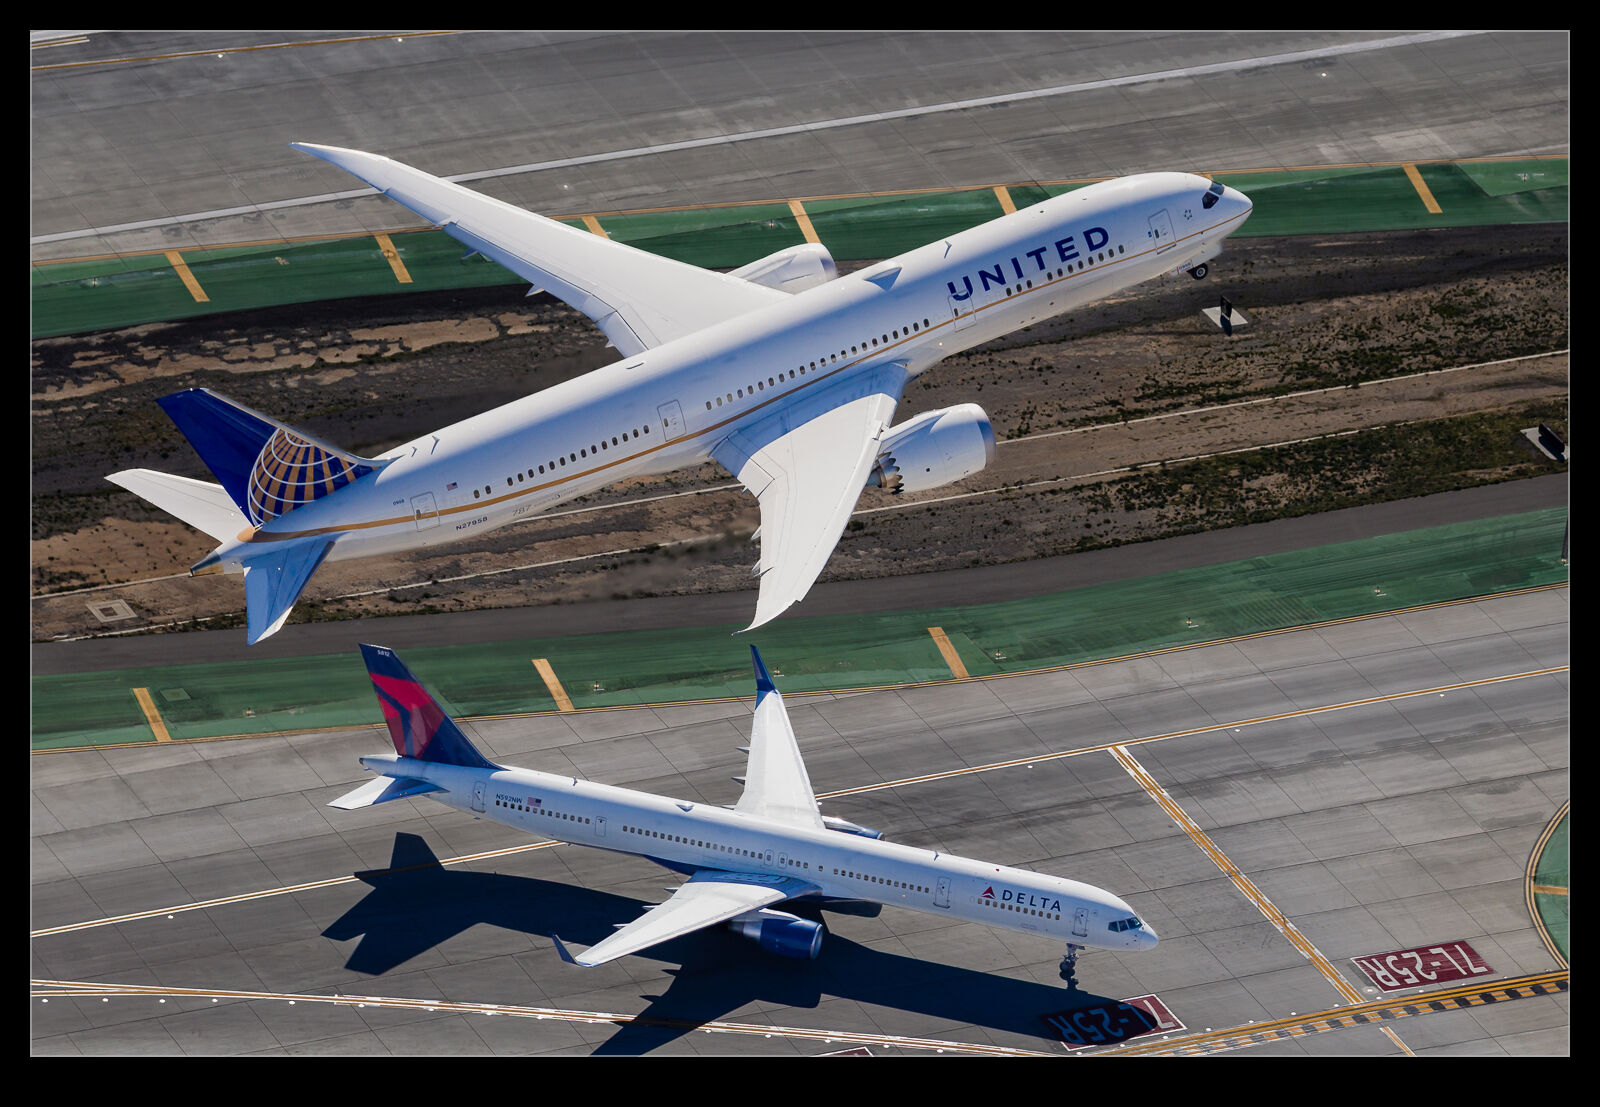
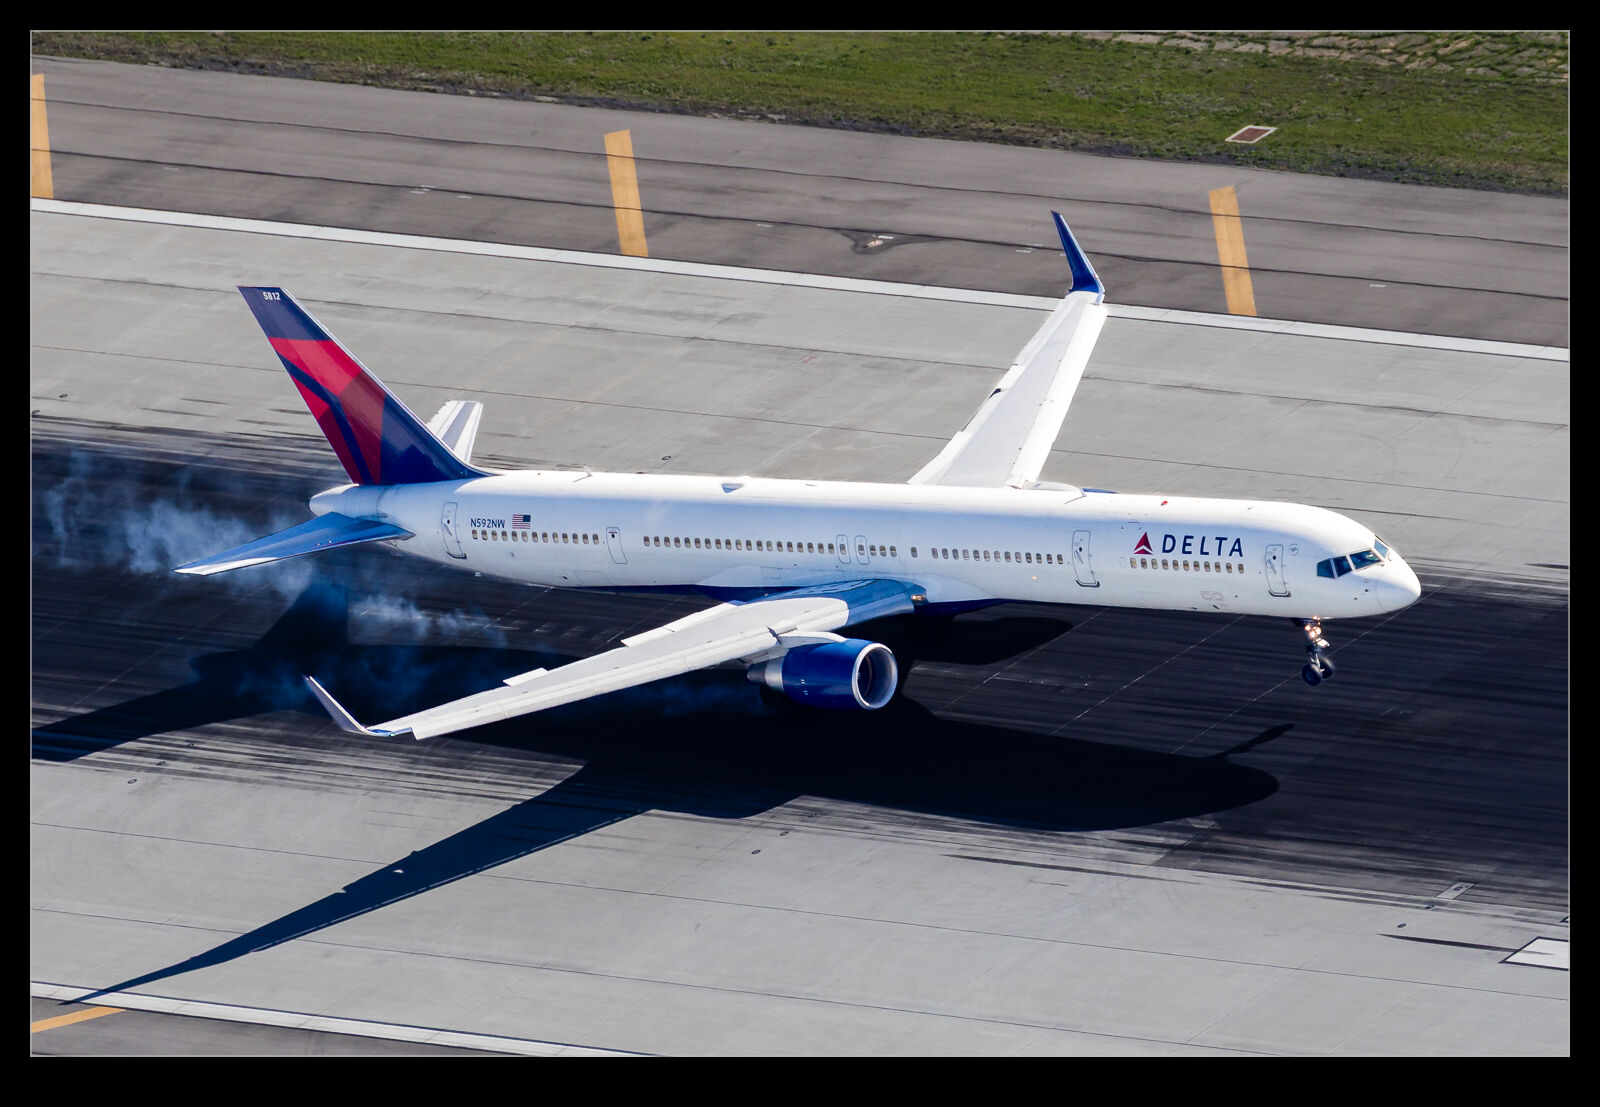
Every once in a while, I put together two things that I hadn’t previously connected. I have been playing around with the masking tools in Lightroom for ages to put different processing on aircraft versus the sky in the background. When I had done some photography from helicopters over LAX, the lighting had been good on the northern complex but the planes arriving and departing the south complex had been quite harshly backlit.
The processing approach I was using at that time did not make for very good results and so I had tended to ignore the shots I had taken on that side and focus on the north complex instead. Then, while looking at something from another photographer, it got me thinking that the masking tools would be a good option to revisit these backlit shots and try and get a more balanced looking image.
You can’t escape the fact that, if the original shot is not great, you aren’t ever going to turn it into something marvellous. However, there is the potential to come up with something significantly better than I had previously managed.
Selecting the airframe with a more cluttered background is a bit tougher for the automated tools so a fair bit of manual addition and subtraction was needed. However, because you are against a ground background rather than a sky, there is a certain amount of tolerance that you have for not getting the selection absolutely perfect. You don’t want glaring issues, but it won’t be as conspicuous as it is with a sky behind.
With the masking applied, it is a lot easier to come up with an exposure for the planes that looks a lot more like the eye would have perceived whilst still having a background that is okay. I can actually darken it a bit more in order to make the plane pop. On one of the shots, there was a second plane on the taxiway in the shot, so I selected it separately to give it a reasonable look without it taking over the image as a whole. This was a very satisfying process with some images I had previously left alone.
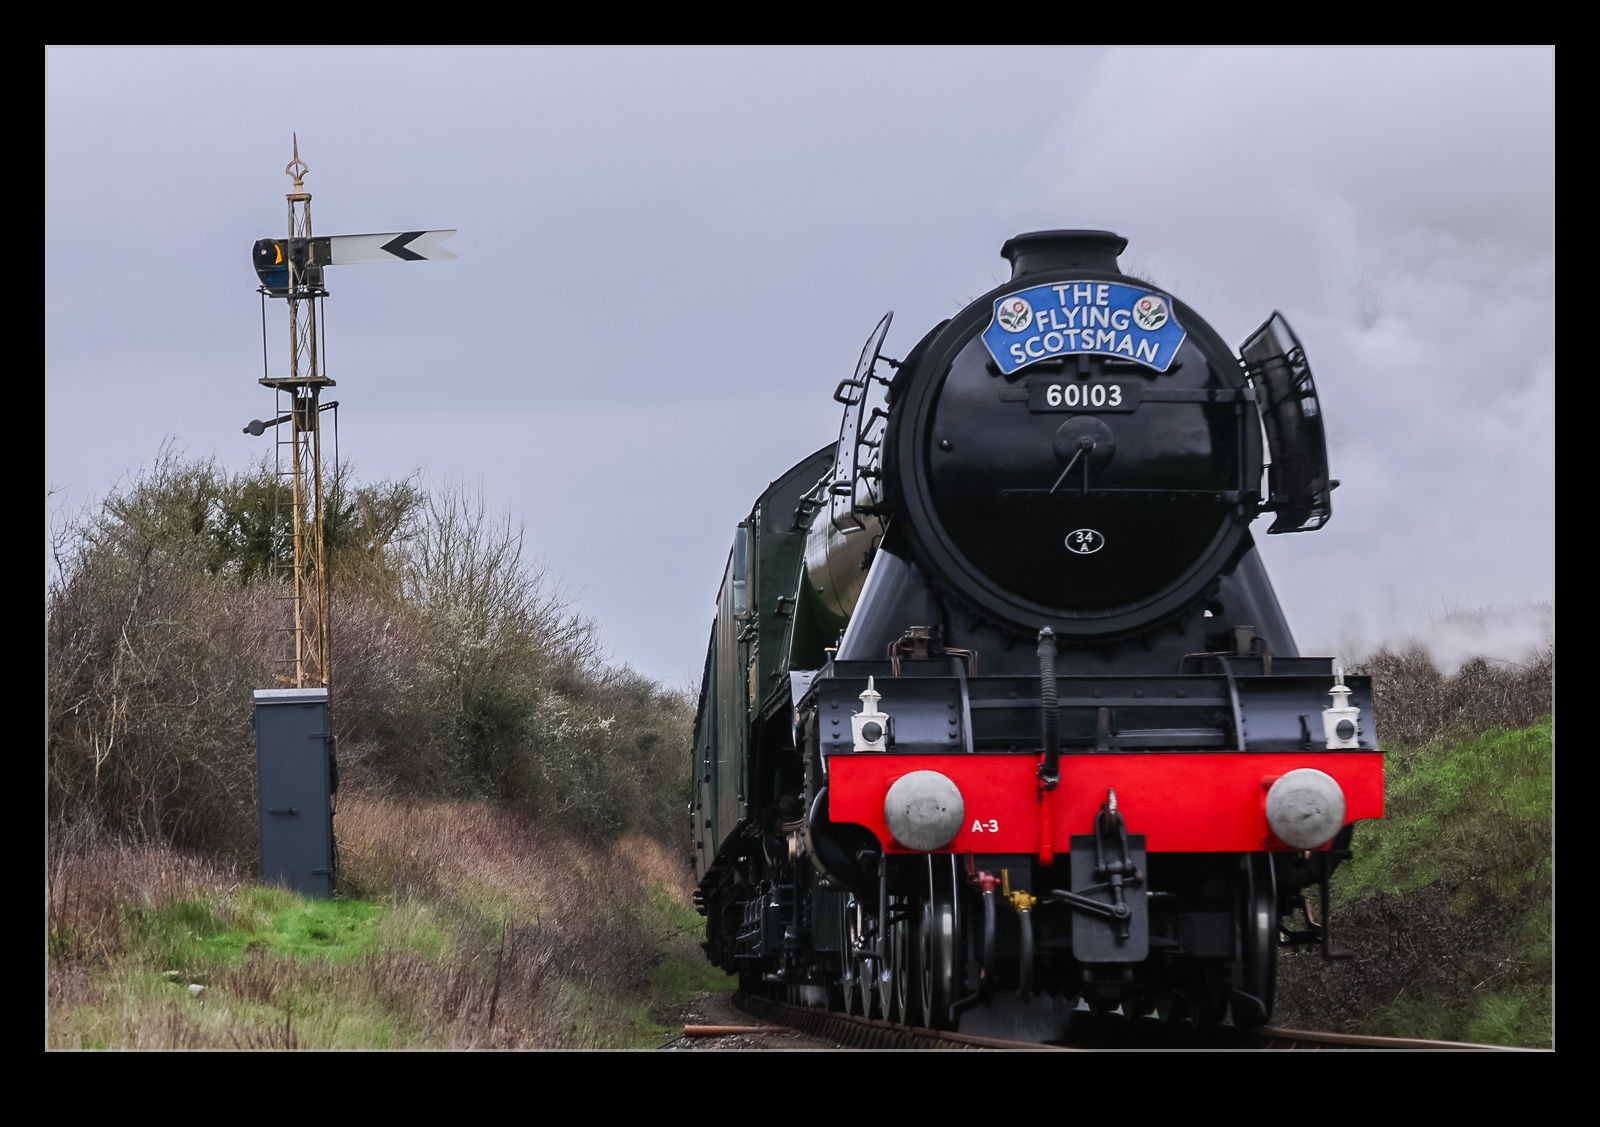
I had spent a bit of time preparing to photograph the Flying Scotsman on a Saturday morning at the Watercress Line. Once done, I had gone home and picked up Nancy so we could head to an appointment that we had in Itchen Abbas. When we finished there, the plane was to head to Alresford for some other stuff. This was going to take us by the bridge in Bishop’s Sutton that goes over the track. I thought it was about the time that another of the Scotsman’s planned runs should take place. Consequently, we drove by that way.
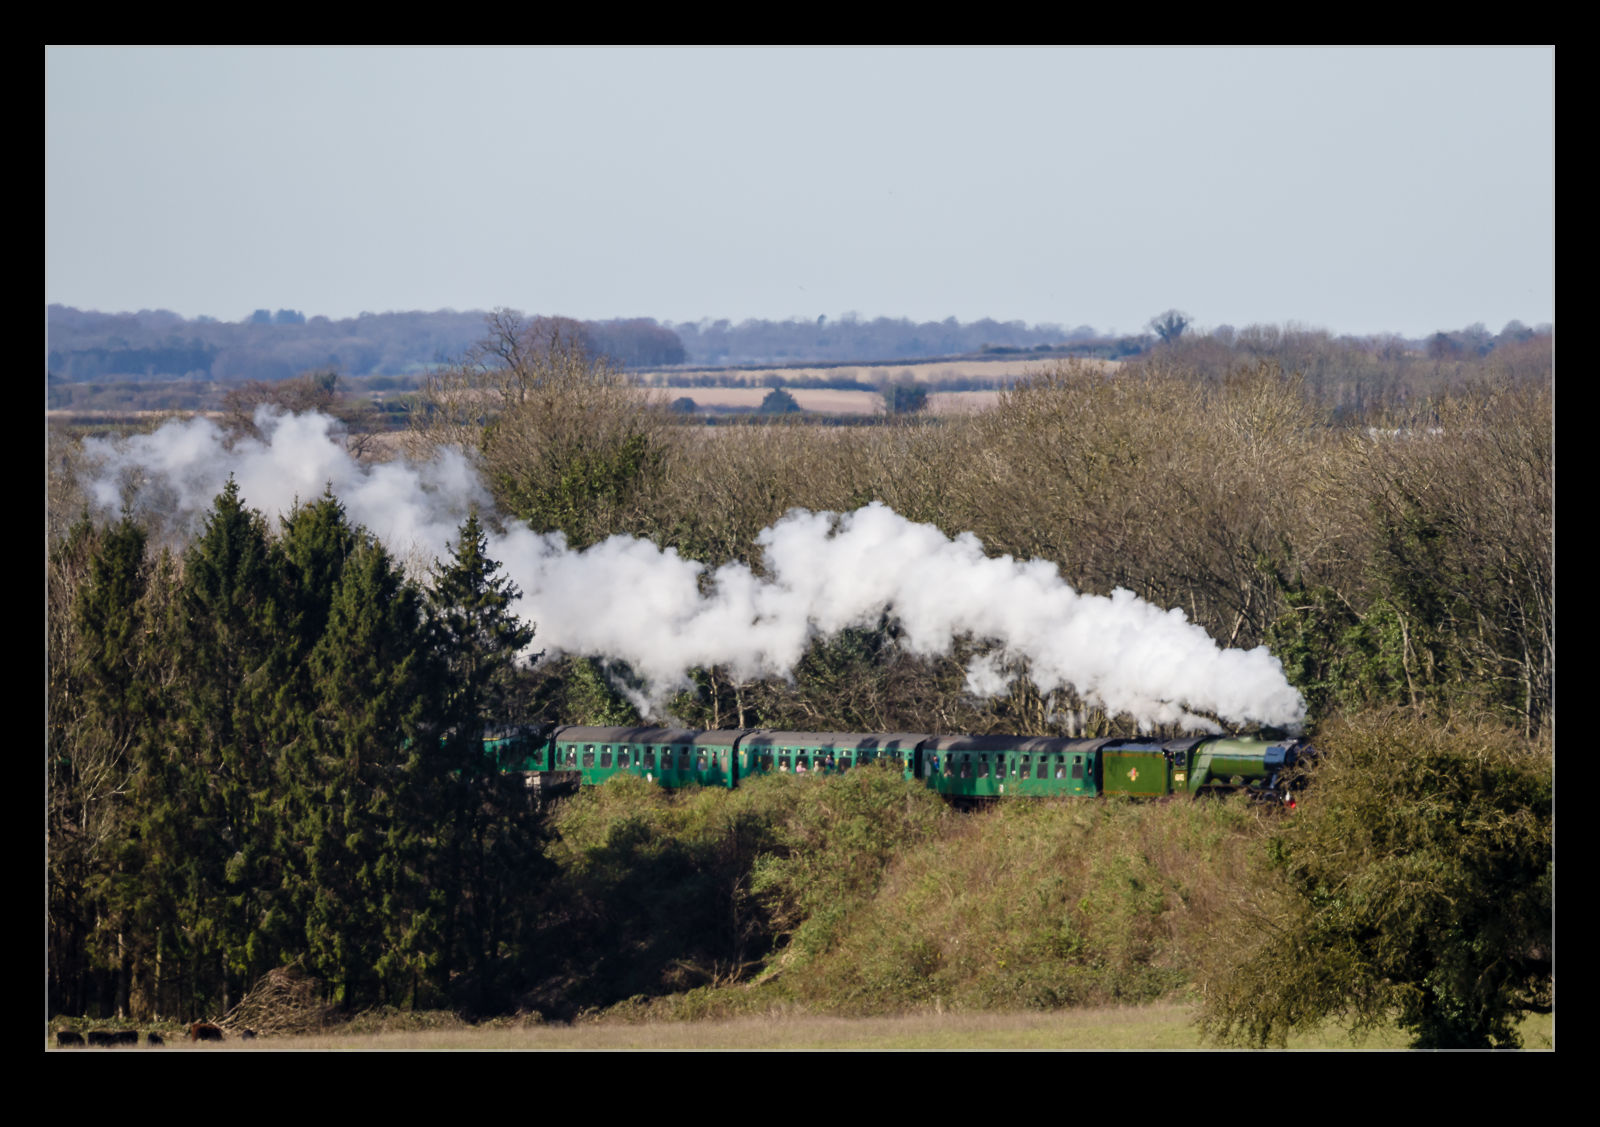
There were plenty of people on the bridge when we got there so I parked and asked if it was due. Someone said five minutes, so I grabbed the cameras from the car. As I did so, I saw people lifting cameras to their eyes so zipped back. The train was already climbing the hill out of Alresford. The longer shots were not great because the heat haze was already showing itself, but they were okay. As it came up the cutting, it was making plenty of power. Then it was gone. We were back in the car and off to our destination and it had barely taken five minutes out of our day!
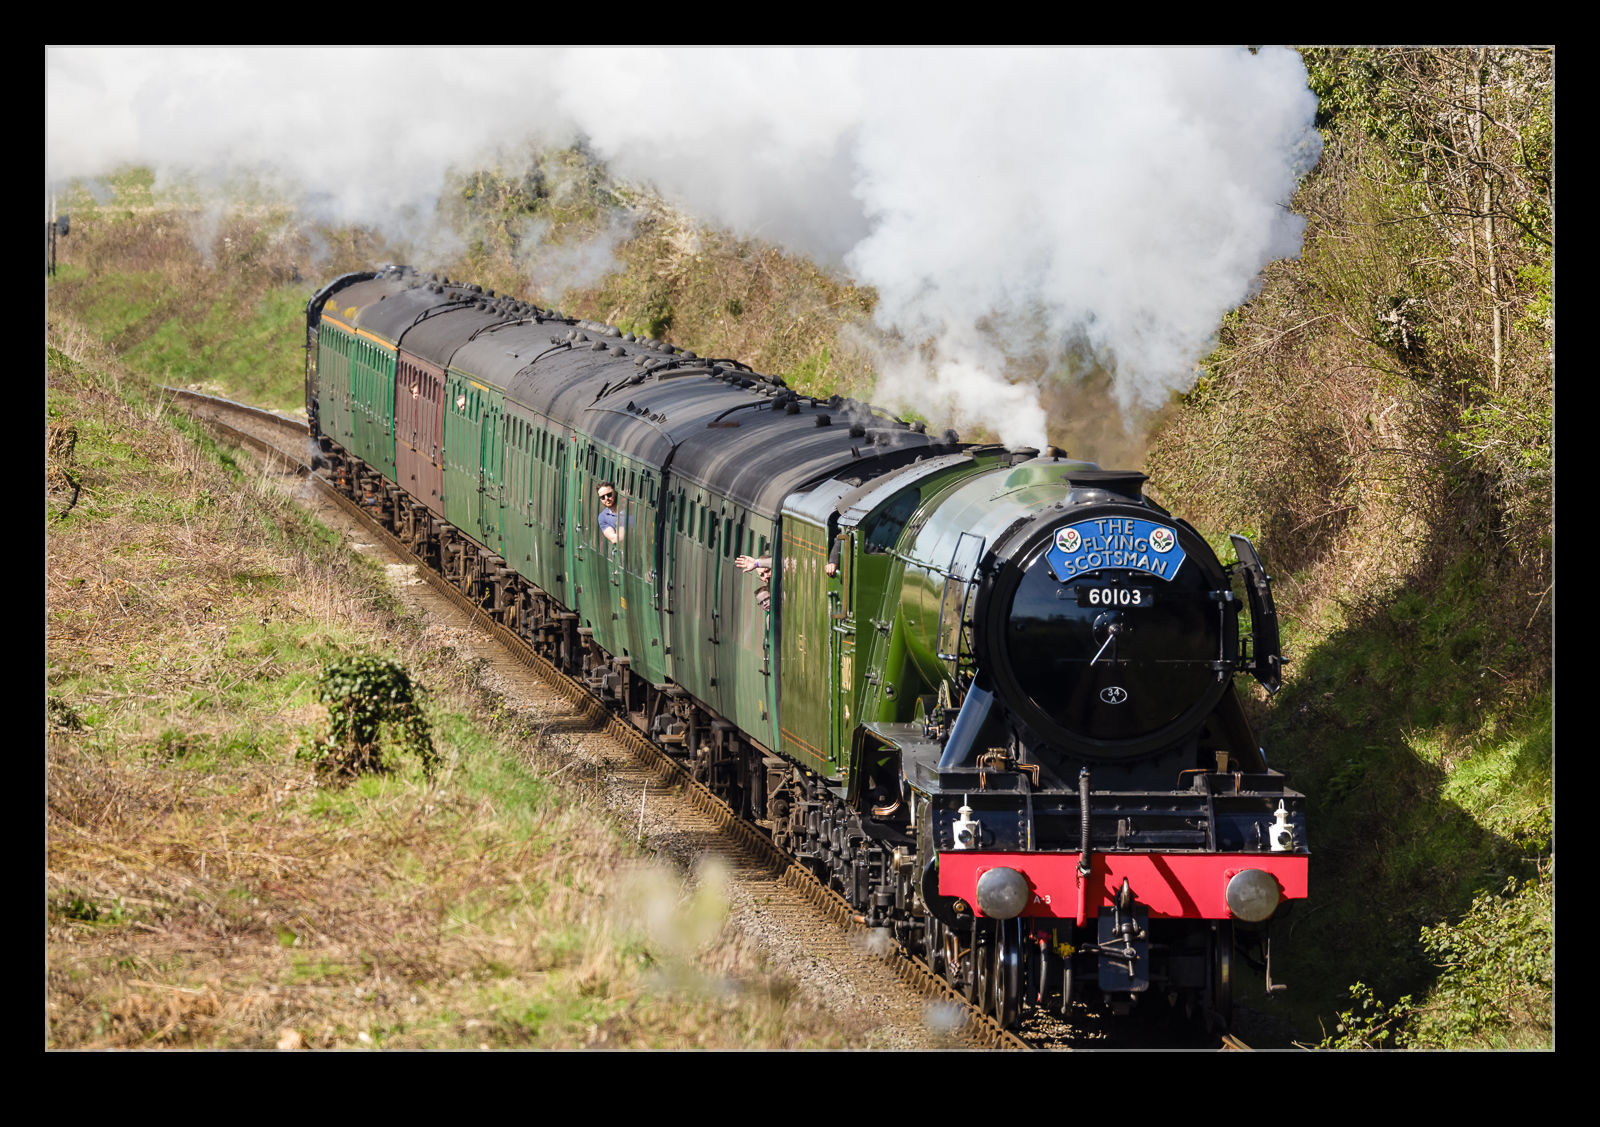
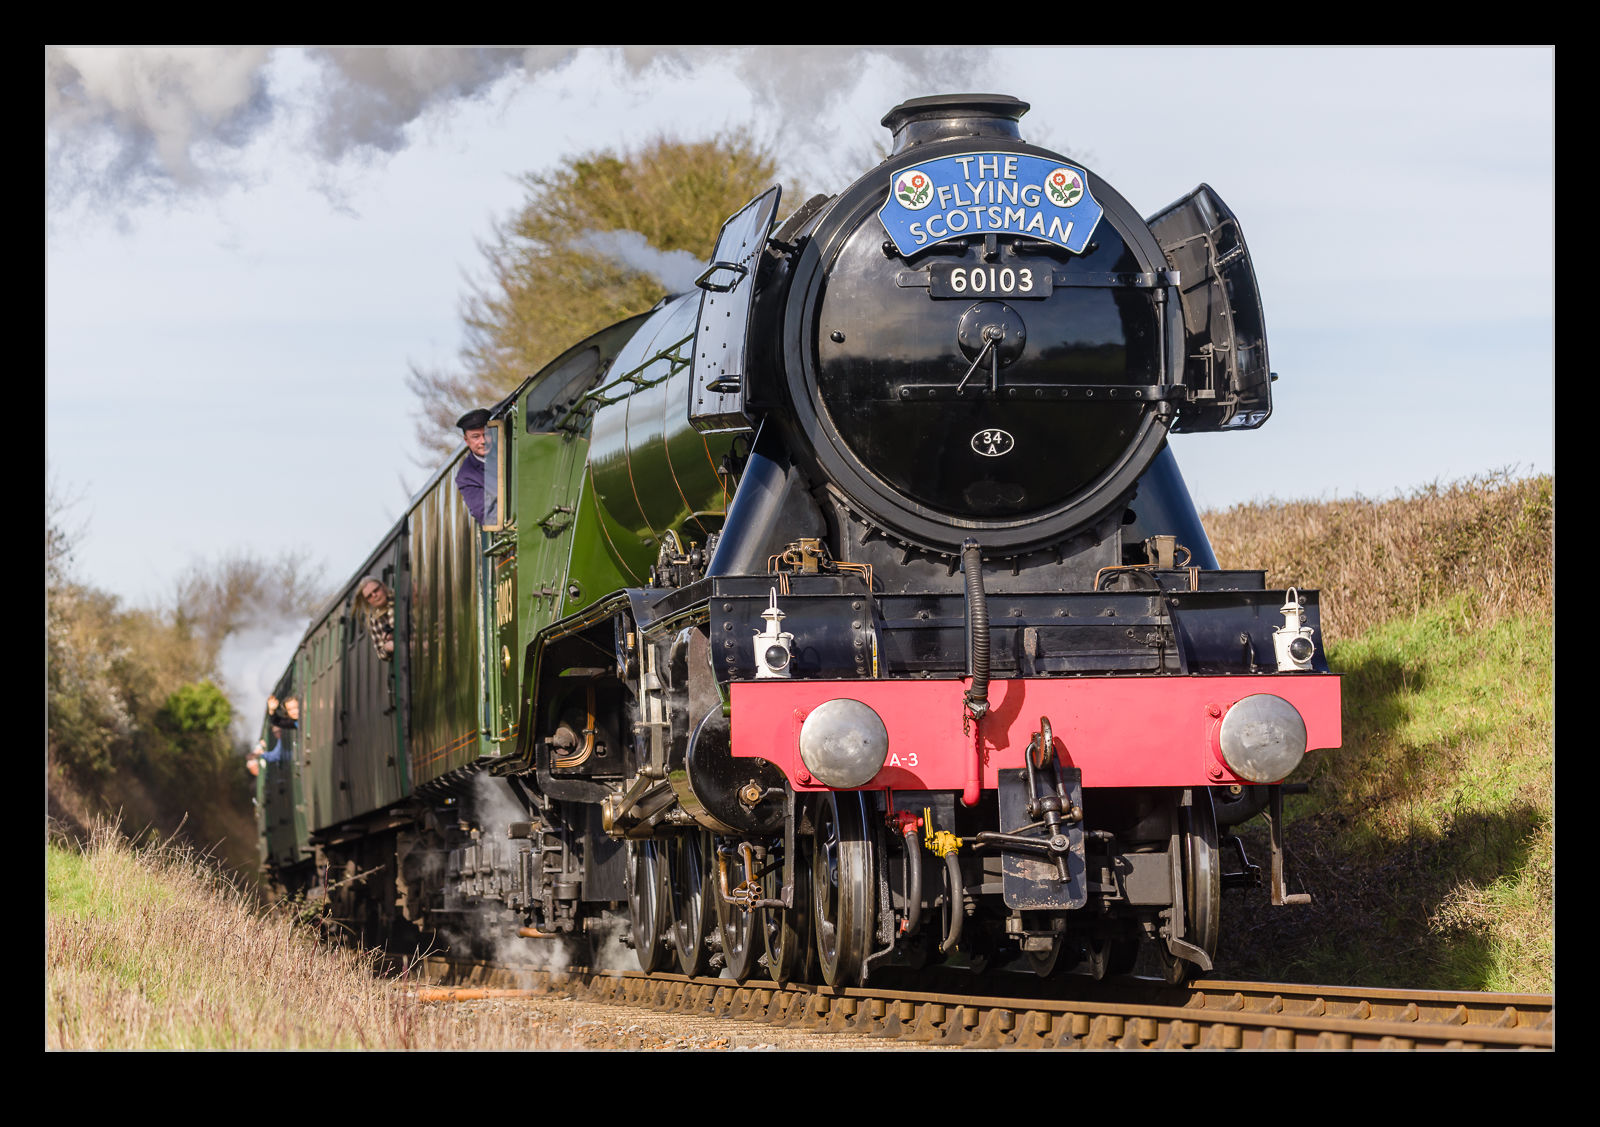
In a recent post, I told the story of my less than successful efforts to photograph the Flying Scotsman at the Watercress Line. In that entry, I mentioned how much public attention the loco gets. Given the number of large steam locomotives that there are in the country, it is interesting just how much more this one attracts visitors. If it helps the railways get some additional revenue, it is surely a good thing. Seeing as I had messed up getting photos on that occasion, I decided to try again the following weekend. The weather forecast was far nicer. Moreover, I spent a load of time thinking about what I would do. Even then, as I headed out in the morning, I had a couple of options with the things I was bringing.
I took two cameras with me and the Insta360 as well. I also had a clamp mount which I hadn’t decided whether I would use for the Insta360 of the second camera. I figured I would decide when I got there. Since the weather was nice and the Scotsman is popular, I worried that it might be pretty busy. There are limited parking spaces on the lane near the crossing I was going to, so I headed out in plenty of time. Of course, when I arrived, there was no one else around. Plenty of time to now kill!
I walked up to the crossing and found it empty. This gave me loads of time to decide on what to do. I had brought some PocketWizards with me. If I was going to use the second camera, these would be used to trigger that body.
As I unwrapped the PocketWizards, I realised that the Velcro cover I used for them would also make a nice wrap for the Insta360 handle. I attached it to the fence and wrapped the handle to the fence posts, and it provided a nice secure fit which meant I know had the clamp mount available. The Insta360 is controllable from my phone, so I was able to leave it fully extended and just activate it from the app when ready. I did a test with it when it stopped recording after 20 seconds. I have no idea why it did that so tried a couple of further recordings which all worked fine so I decided that was good to go.
While the PocketWizards can be used to trigger the second body when the first is firing, I didn’t actually want that. The two bodies were set up for different shooting scenarios – the long lens would cover the approach of the train but, during that time, it would be so far away that there would be no benefit to shooting with the wide-angle lens. Similarly, once it was close enough for the wide angle, the long lens would already be too much so I would have stopped shooting with it. Consequently, I handheld the PocketWizard and triggered it by hand when required.
I clamped the mount to the bottom of the fence with the camera at ground level looking up at the approaching train. I normally use back button focus but I don’t think that would activate via the PocketWizard, so I switched it to front button for focus and exposure. The joy of a flexible screen is that you can frame up the shot without having to be a contortionist which is good news for those of us with a few years under our belts. With everything set up, I set off a few test shots to see if everything was working. It all seemed good so now it was time to wait.
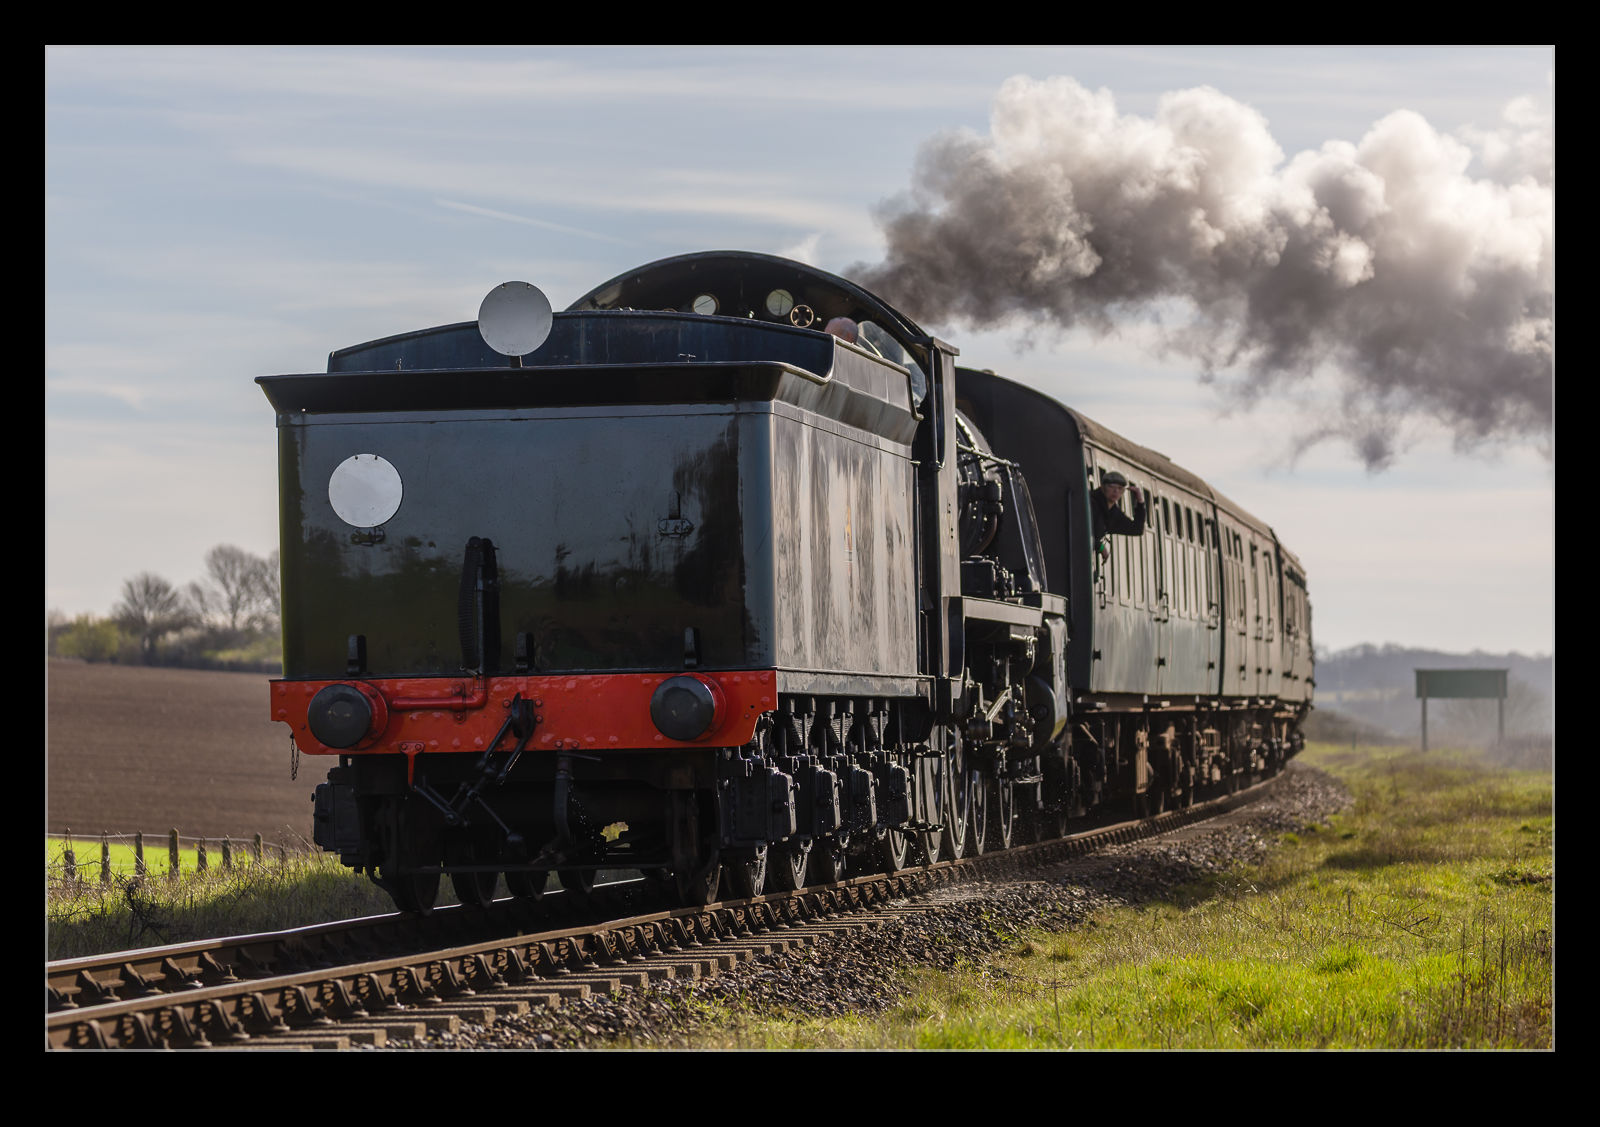
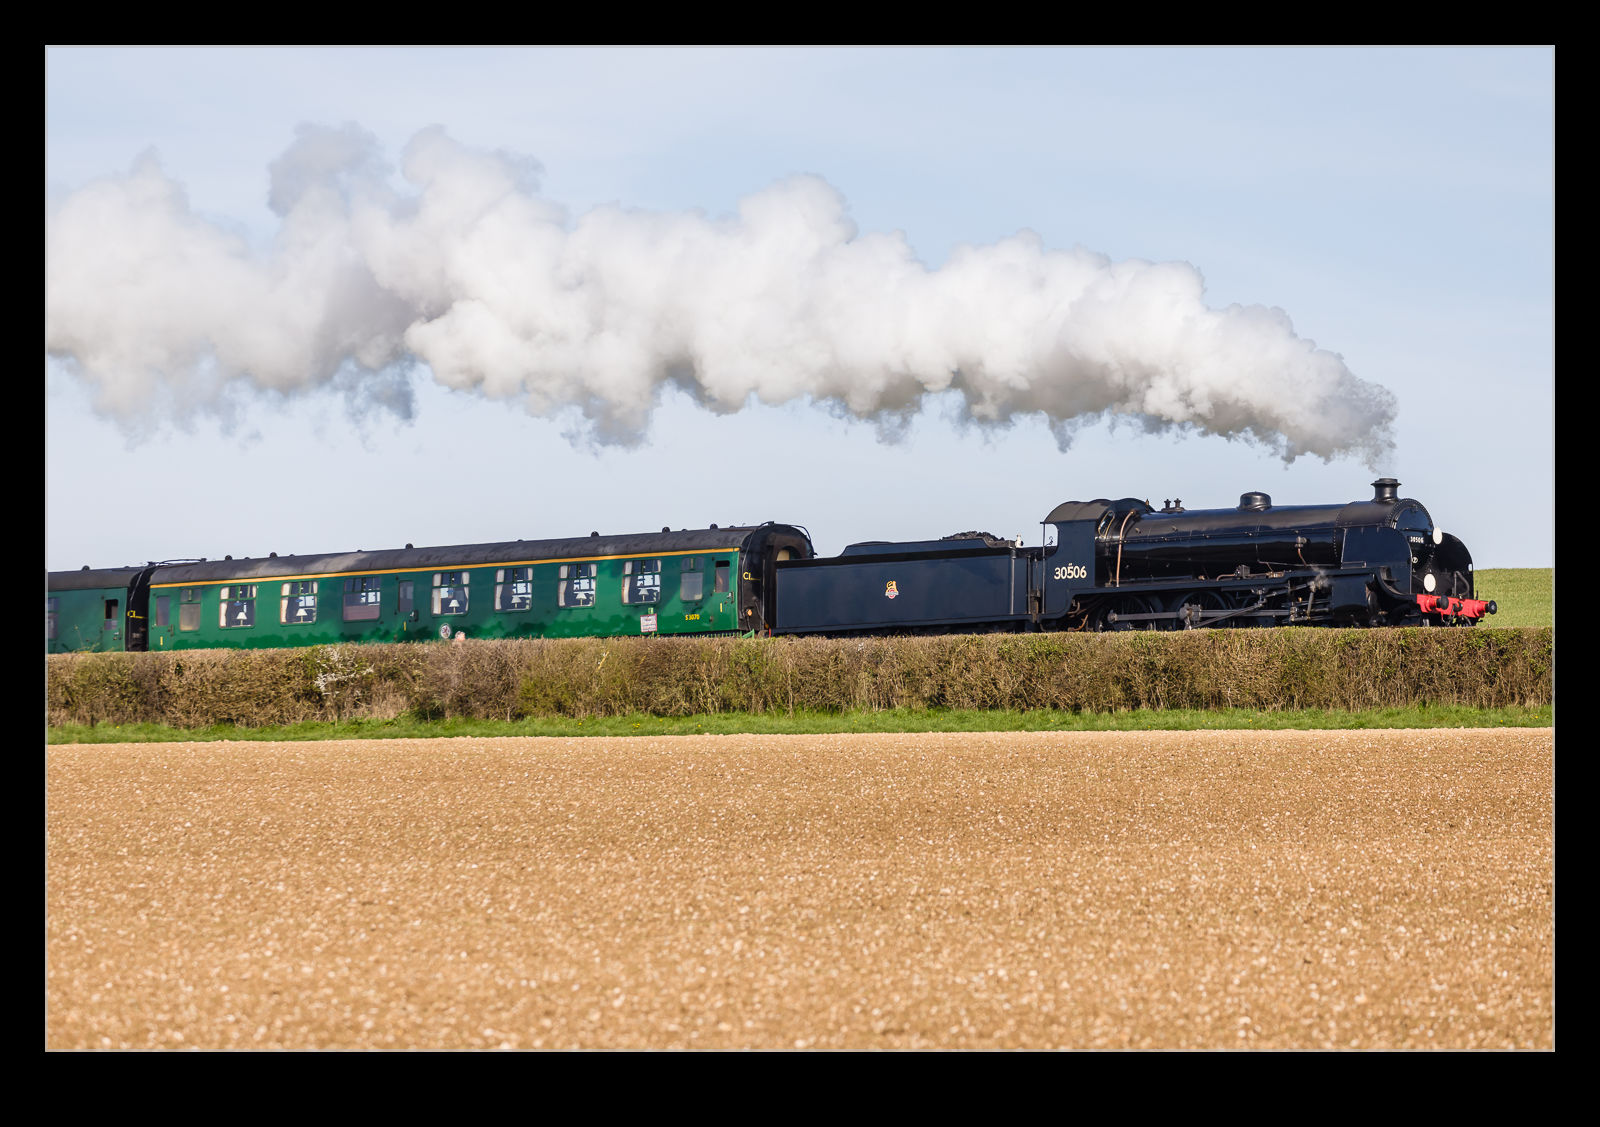
I was expecting one or two movements before the Scotsman which would give me a chance to test things out. There is a shuttle that is used to take people from Ropley to Alresford for the main event so I figured that would come through. It would be going the wrong way but would allow some practice. However, there was more than I expected. The first thing to appear was a steam loco running light in reverse from Ropley. Turned out that it was the Scotsman heading from Ropley to Alresford to join the train. That was a nice option but, of course, it had no coaches and, since it was running downhill, it wasn’t making much power. The shuttle also ran back, and forth which gave me some practice while another train rain down to Alresford for a service that would come after the Scotsman had departed for its first run.
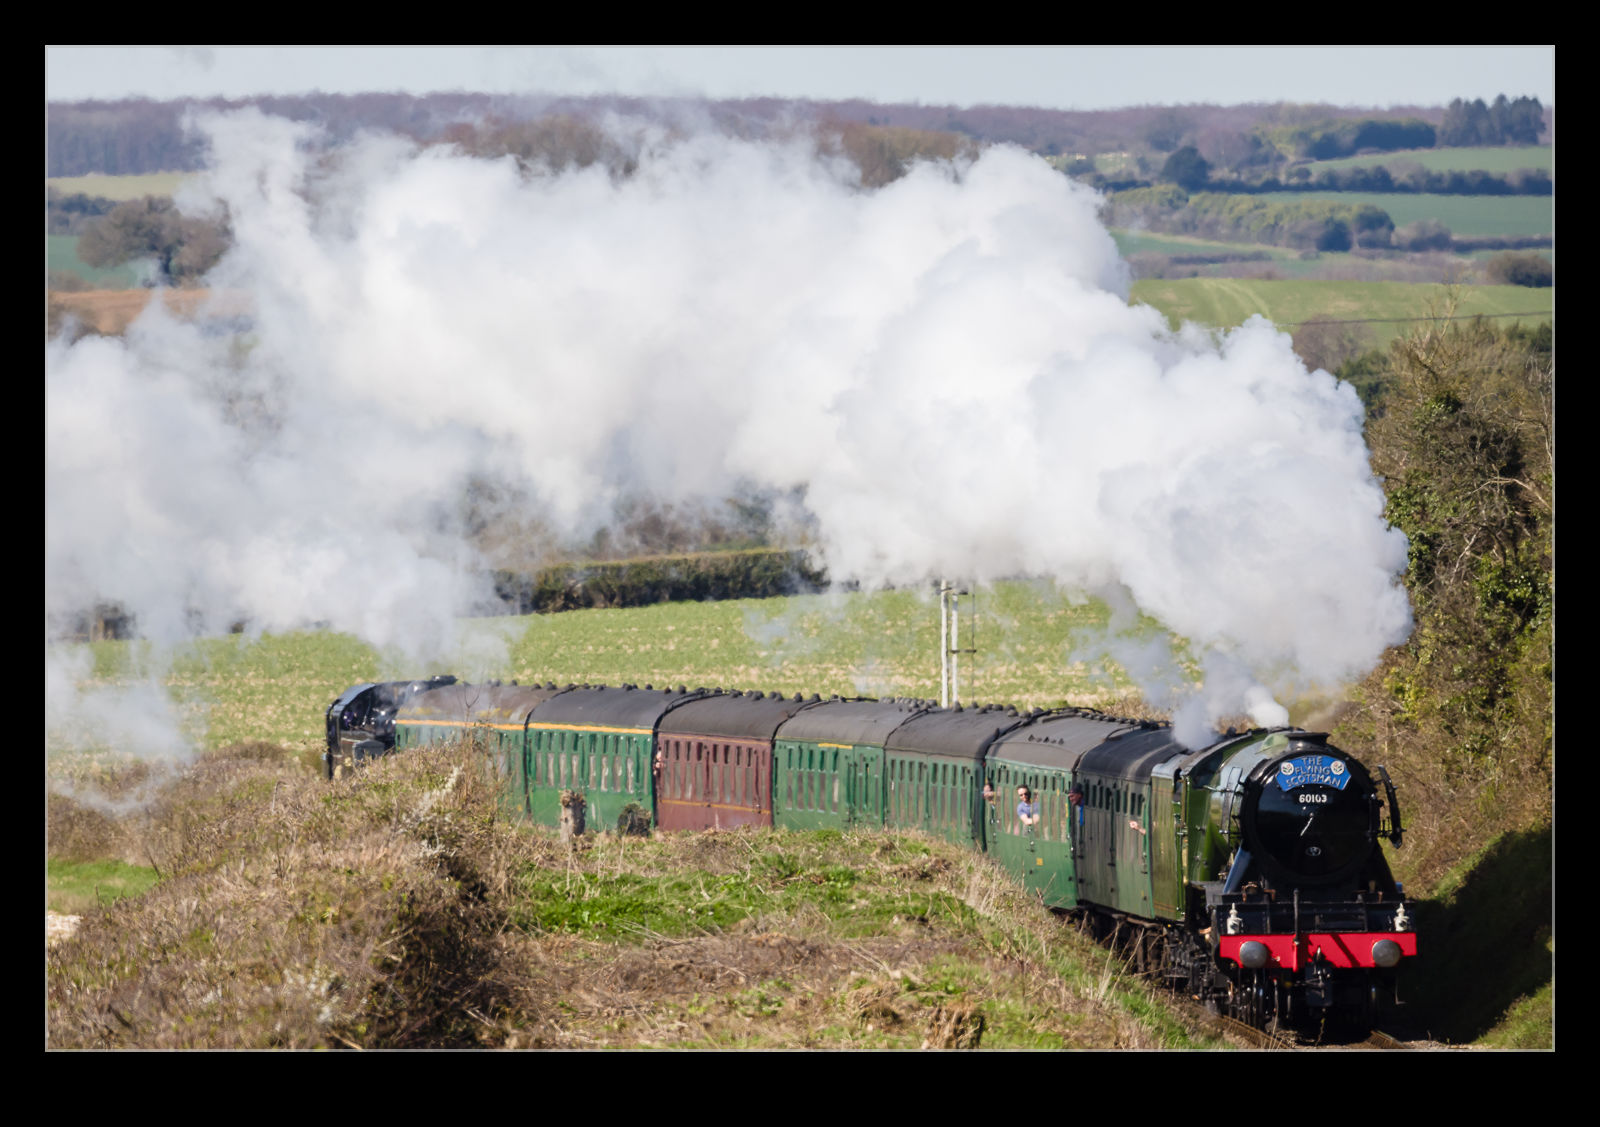
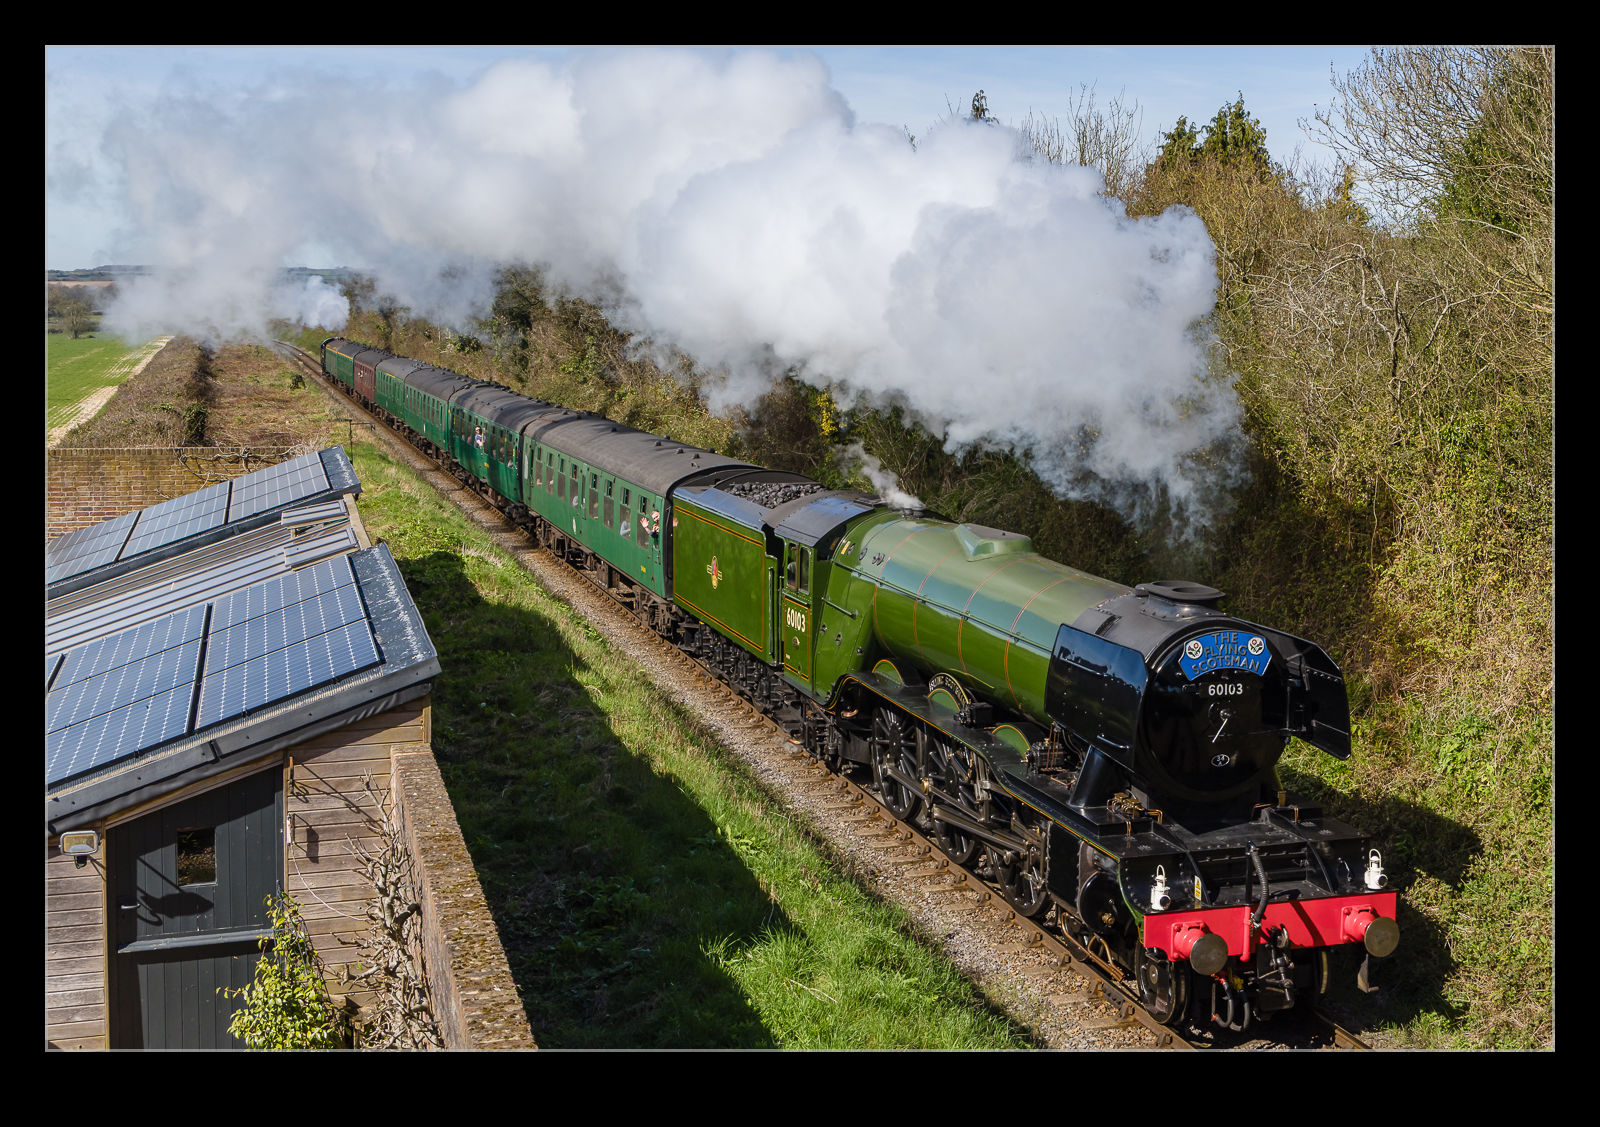
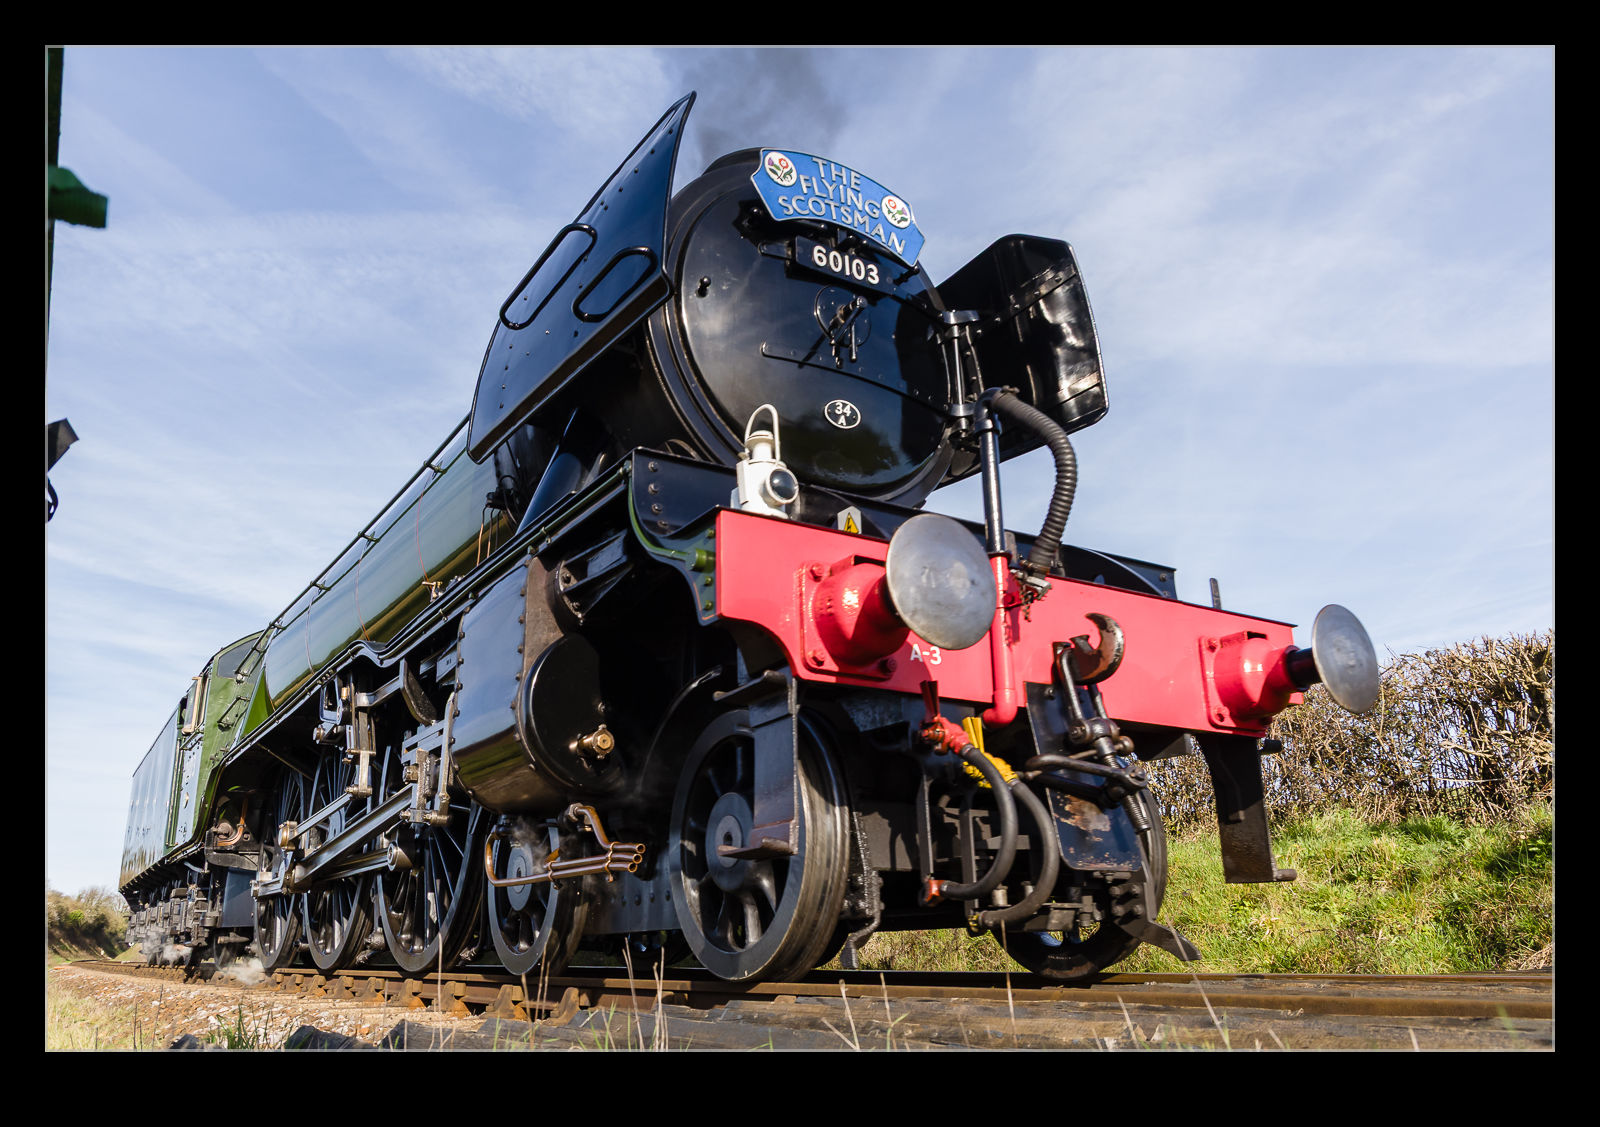
All of this provided me with time to play around with the set up and make sure all was working the way I wanted. Then it was time for the reason for being there. The train departed Alresford pretty much on time. Since it is quite a climb up to Ropley, the loco was making lots of power and there was a banking engine on the rear too. The smoke could be seen through the gap in the trees, so we knew it was coming. Eventually it came around the corner in the cutting, and we could get some shots.
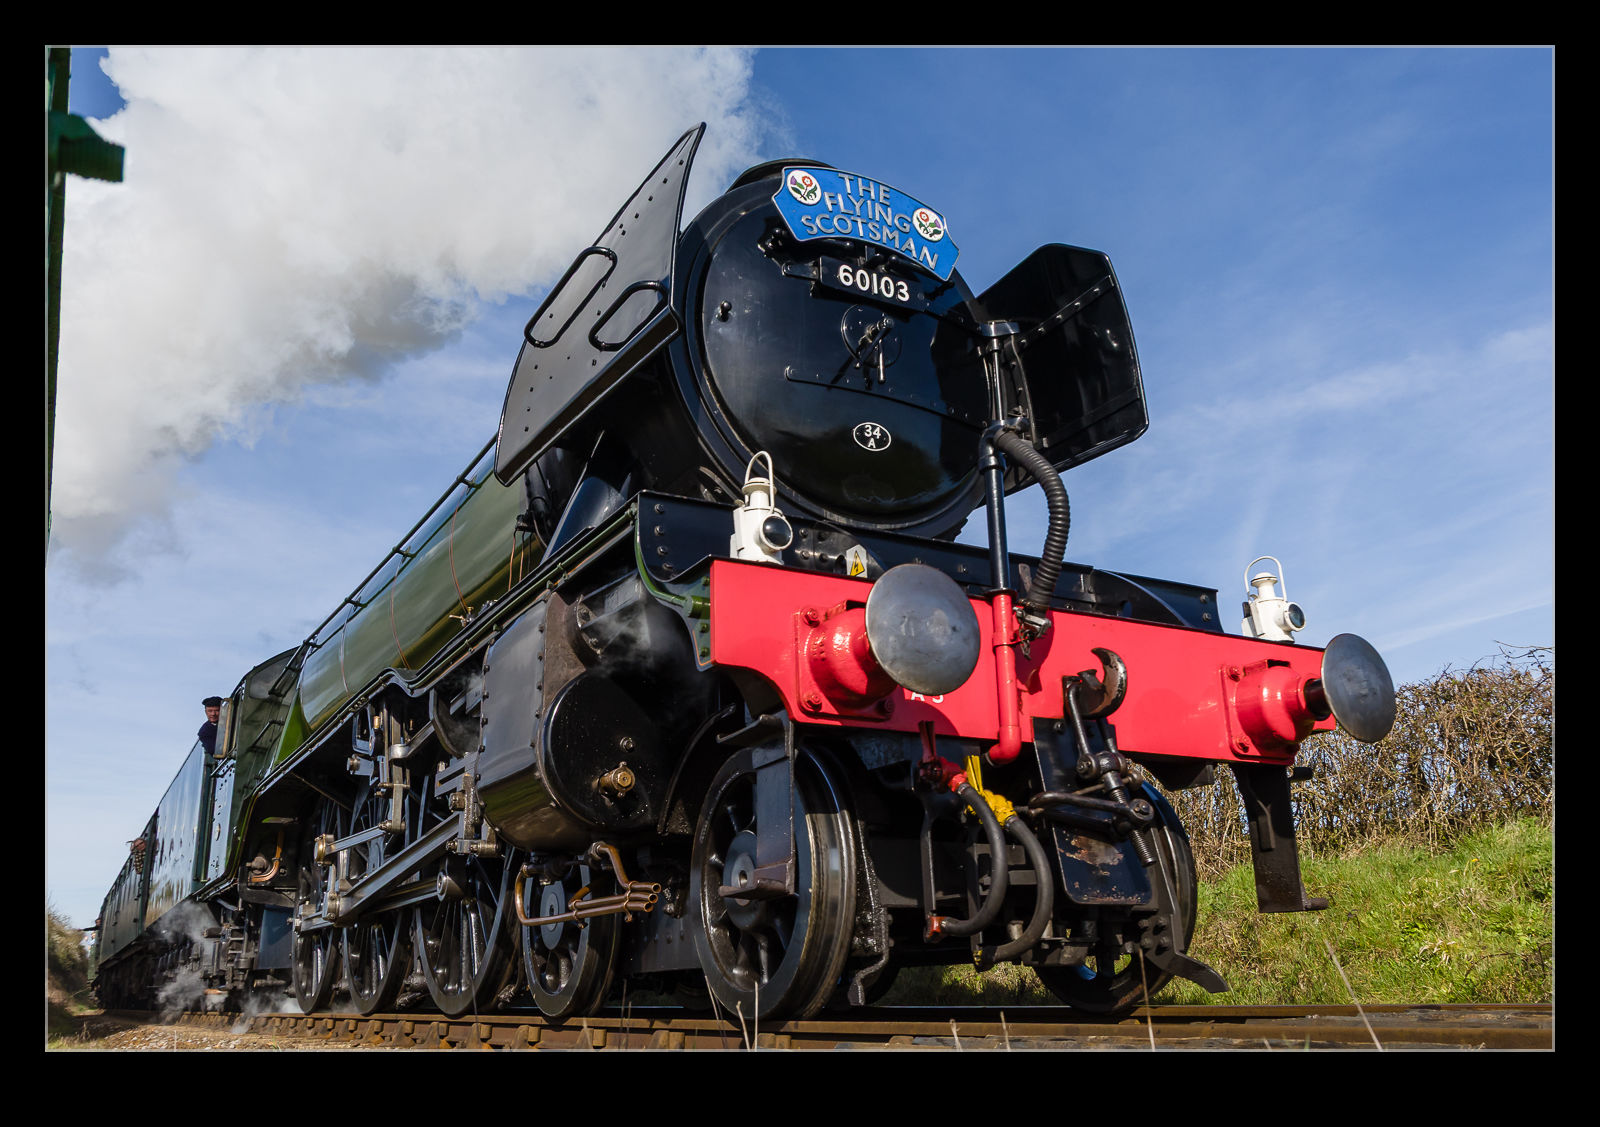
I started the Insta360 first and then proceeded to get some longer shots as it approached. As it got closer, I dropped down and photographed through the fence to look up at the loco as it came closer. Then I switched to the PocketWizard and took a bunch of it as it passed. I have no control on where the camera chooses to focus in that situation, but I was rather happy with the results. I even got some interesting shots of the driver and one of the passengers leaning out of the window. Then I took a few shots of the train as it retreated. That was very backlit, but it still made for an interesting view. And then it was done! All of that prep for a brief moment.
The people rapidly scattered and I started disassembling the things I had put in place. I had brought a small stool with me but that had never been used. Too much messing with gear or chatting to the others that had come alone. It was a very friendly atmosphere and made you feel good about being out on a sunny Saturday morning. I retraced my steps to the car. As I walked along the lane, I heard another whistle and pulled up the camera I had on a strap around my shoulder. The train that had run down to Alresford earlier was now making its run. It was skylined on the ridge above me and I just happened to be by a gap in the hedge so was able to grab a few remaining shots. Then it was time to head home.
The Watercress Line had arranged for the Flying Scotsman to make a visit to the railway. This locomotive seems to really capture the attention of the public, so it was a major event for them. They even lengthened the platform at Alresford to allow longer trains to be formed meaning more passengers could be carried. They were running on two consecutive weekends, and my sister was interested in seeing it. I was always going to be game for a photo trip. She could only do one weekend of the two and I only had one day free that weekend so that was going to be the one.
Sadly, the weather wasn’t being very cooperative. It was very overcast and there was a decent chance of rain. Even so, there were plenty of people out at the crossing we were going to when we got there. Plenty of space for everyone but definitely popular. As the time for the loco approached, I changed a setting on the camera for a higher frame rate and got in position. I decided to take a couple of quick shots before it came in to view just to check all was well. It wasn’t!
As soon as I hit the shutter button, the screen was covered in a “Busy” message. This caught me out. It wouldn’t go away quickly. I turned the camera off, but it still took a while. When it came back on, I tried again and the same thing. This time I pulled the battery and reset. Third time the result was the same. By now the loco was coming into view. Since I didn’t know what the issue was and time was ticking, I tried switching over to video and that worked so I instead videoed the train as it came by.
The video was fine but not great and, if I had planned for that, I would have done things slightly differently. However, it did recover the situation to some extent. The video I took is below.
Once the train had gone, I went home and then pulled out the camera to see what had occurred. I had made a very dumb error. It would have been easily fixed too. When changing the frame rate, I had accidentally switched to the HC mode on the R3. This is the mode that allows 194fps in short bursts of up to 50 frames. Once you shoot like this, it locks up the buffer until everything has been written to the card. Then it is ready to shoot again. What a dope. Oh well, it wasn’t a total disaster and my sister got to see the train which was the main point of being there in the first place. However, now I was thinking about a second effort. More to come…
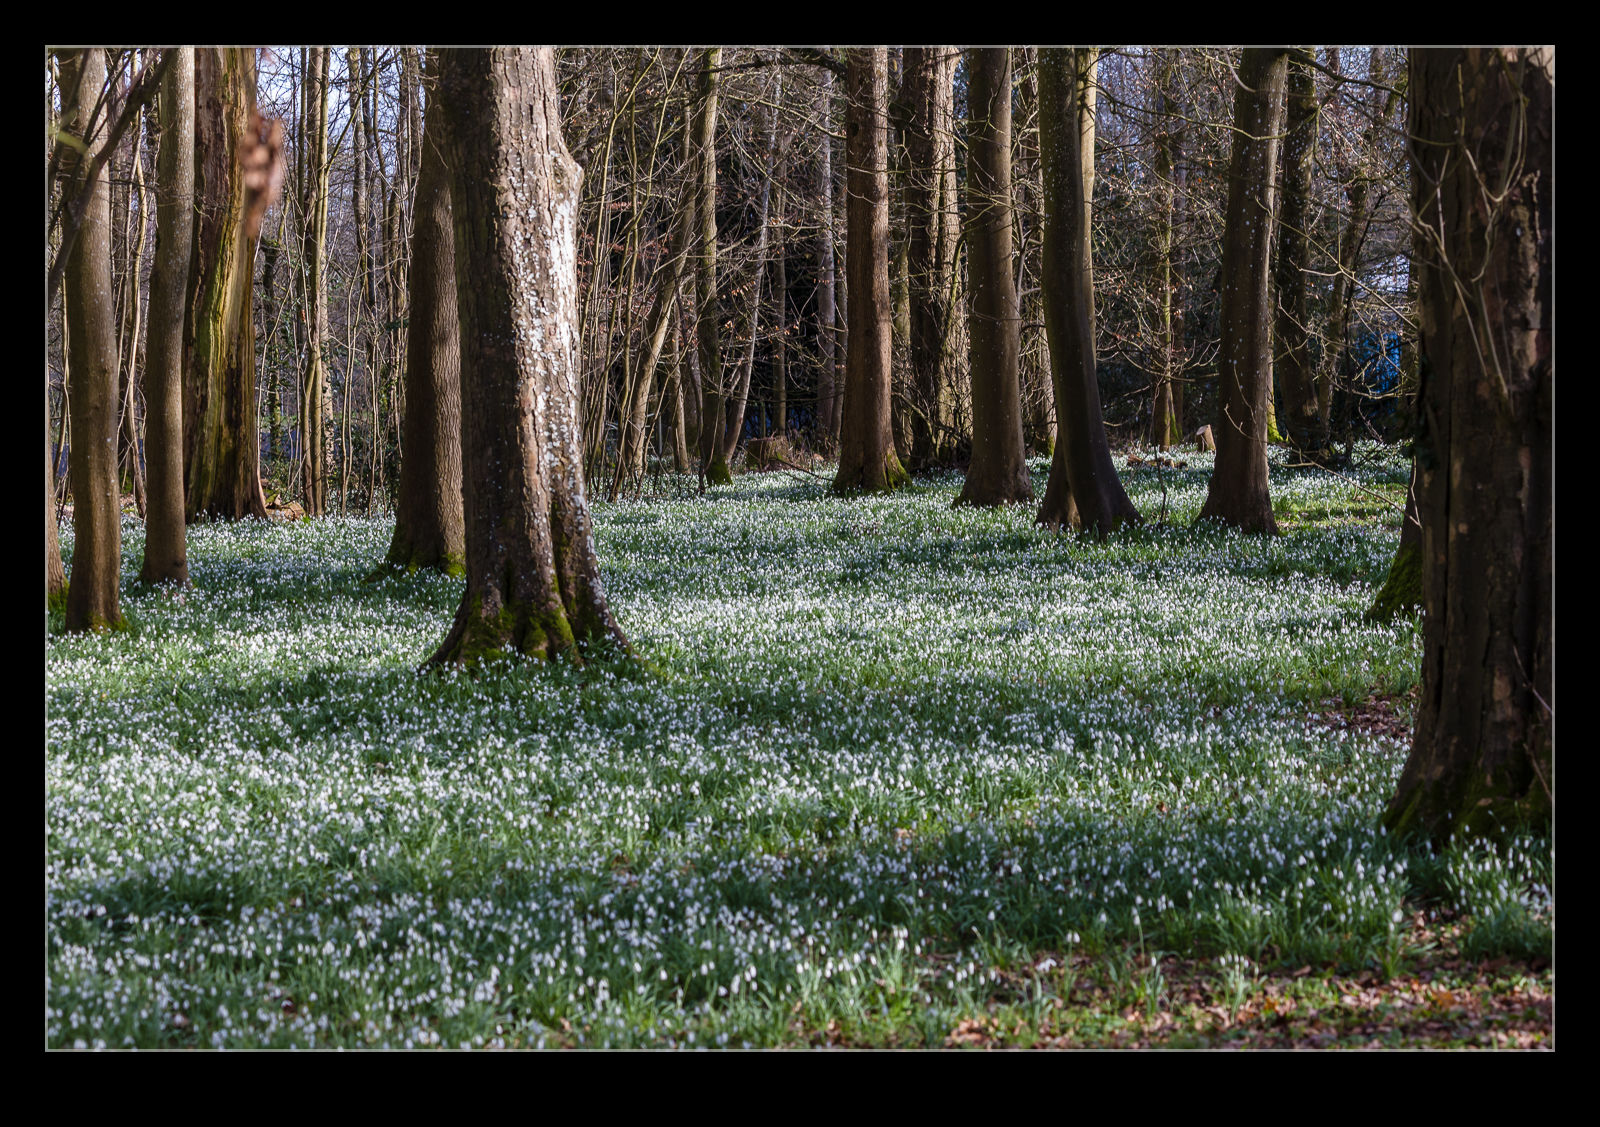
I am going to be repetitive on the blog for a while. I have already photographed some snowdrops on my bike rides and posted about it. Then I made a more specific visit to see some snowdrops. This will not be the last snowdrop post this year either. In Longstock, there is the Leckford Farm Shop run by Waitrose. Last year I saw lots of bluebells in the grounds when we visited. Dad told me it is a good place for snowdrops too, so Nancy and I diverted in there as part of a walk we were doing in the area.
At first, I only saw a few small clumps on flowers along the path. It had me wondering whether we had missed the peak. However, I just needed some patience. As we got closer to the shop, the area under the trees was covered in snowdrops. They looked really great. With snowdrops, if you are close, they appear to be quite well spaced. Taking shots from further back and lower down helps make them look really dense. They feel that way when you look at them but getting the photo to reflect that sense is a bit more of an effort.
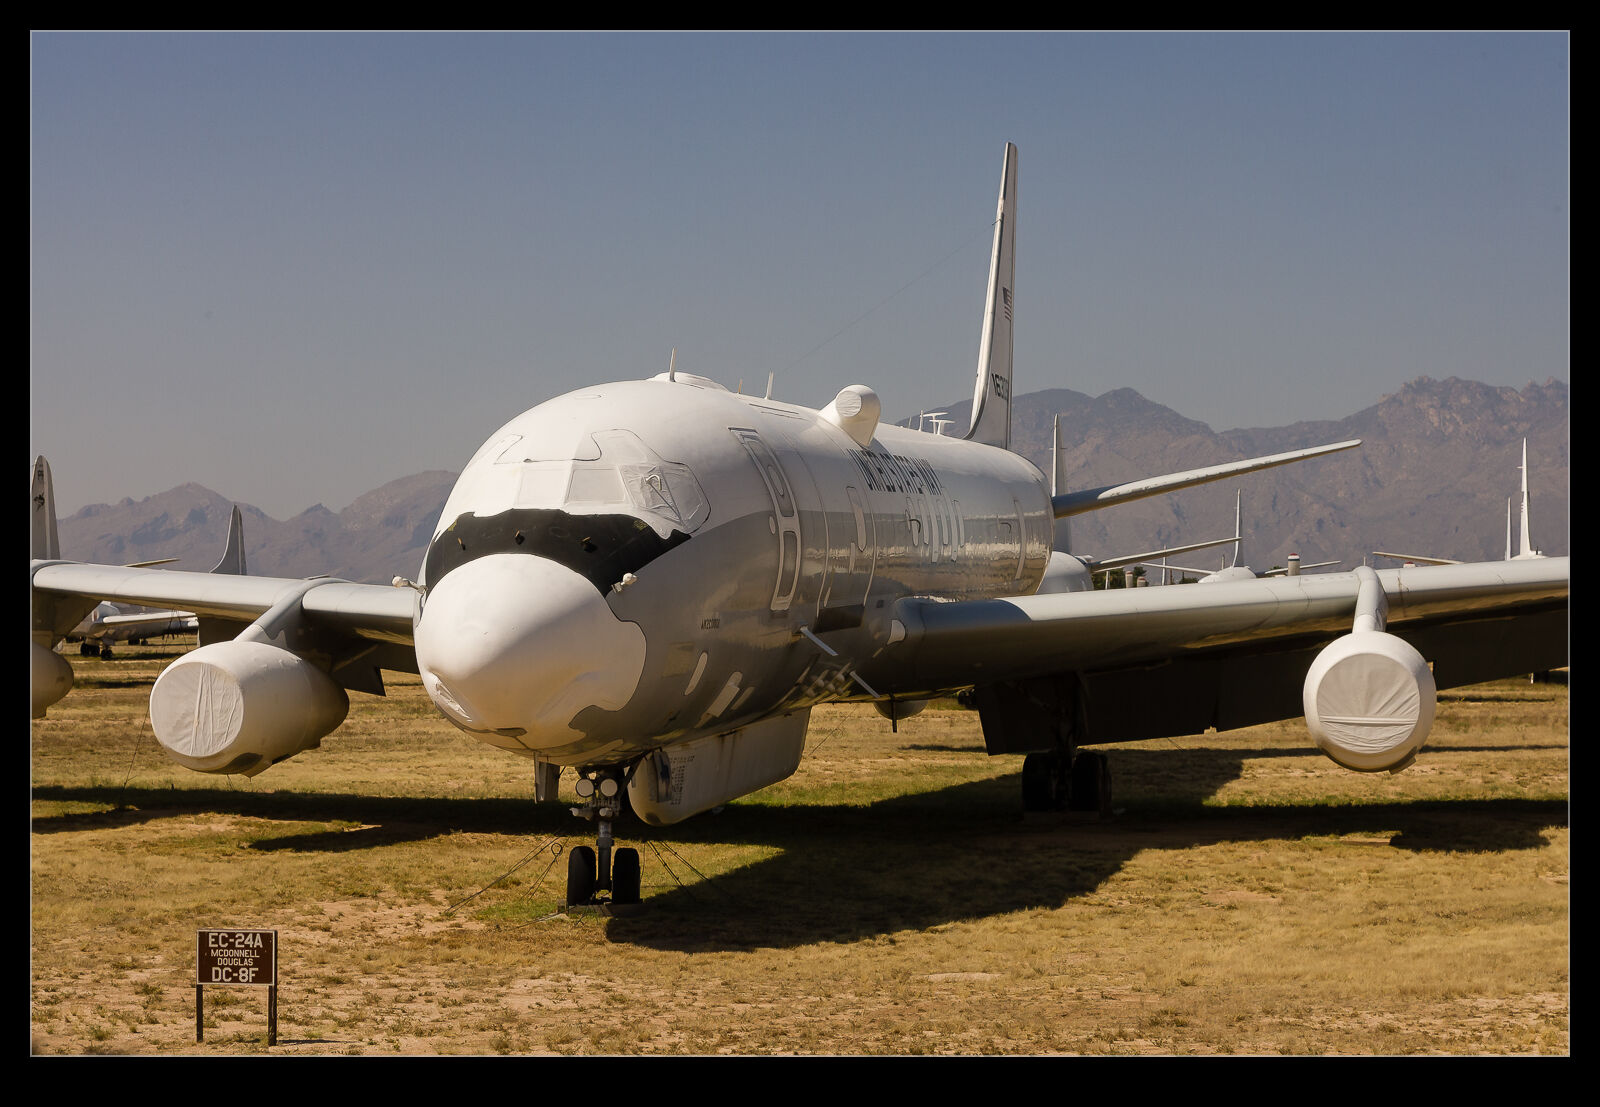
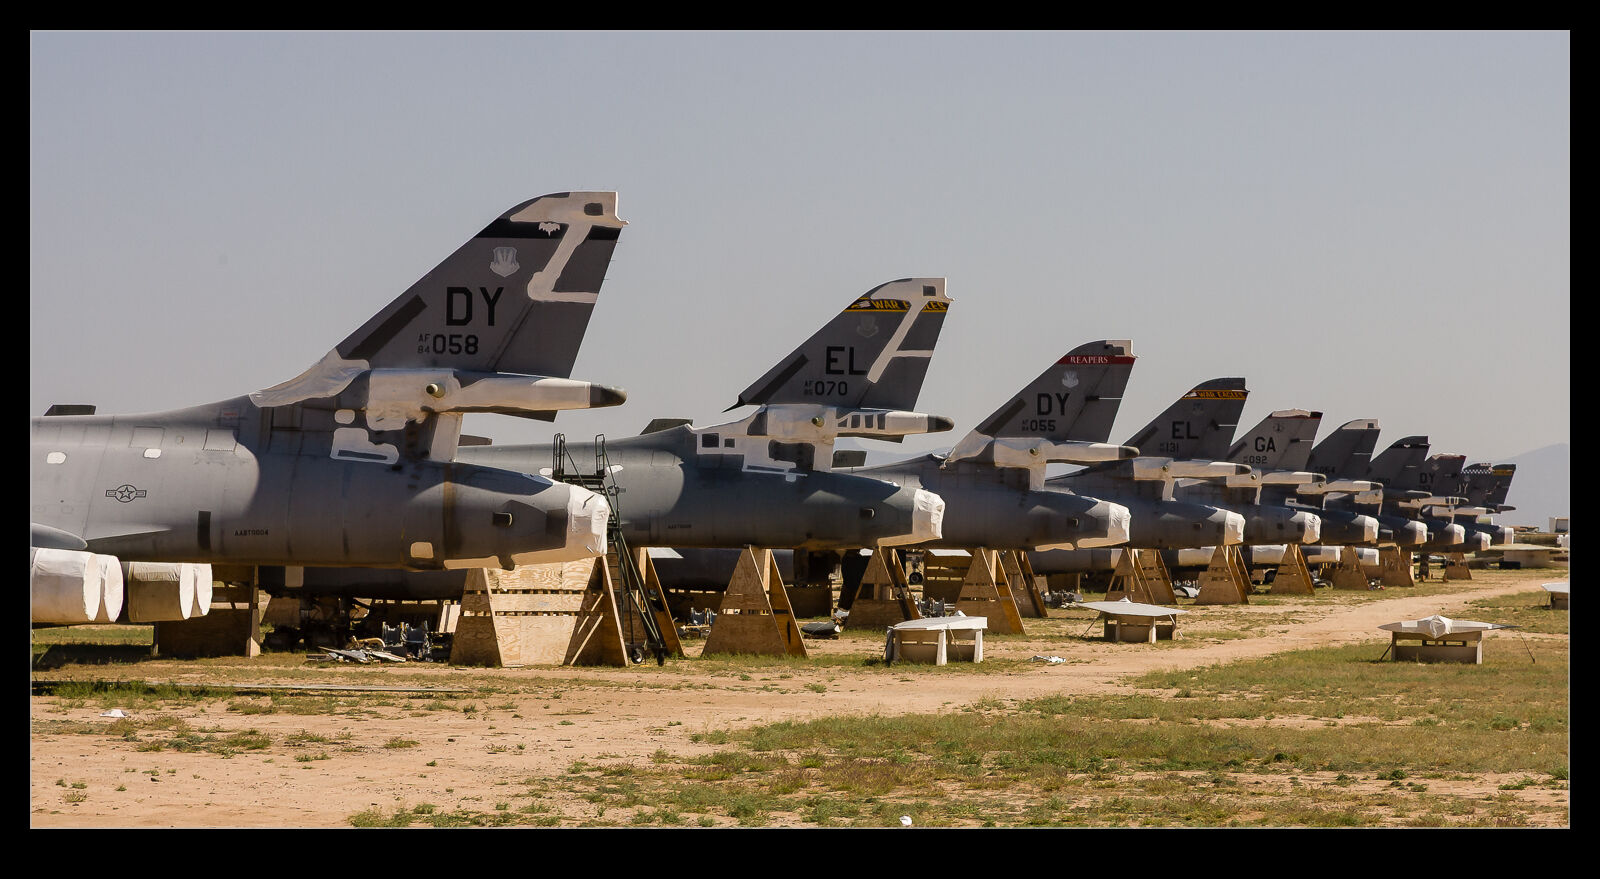
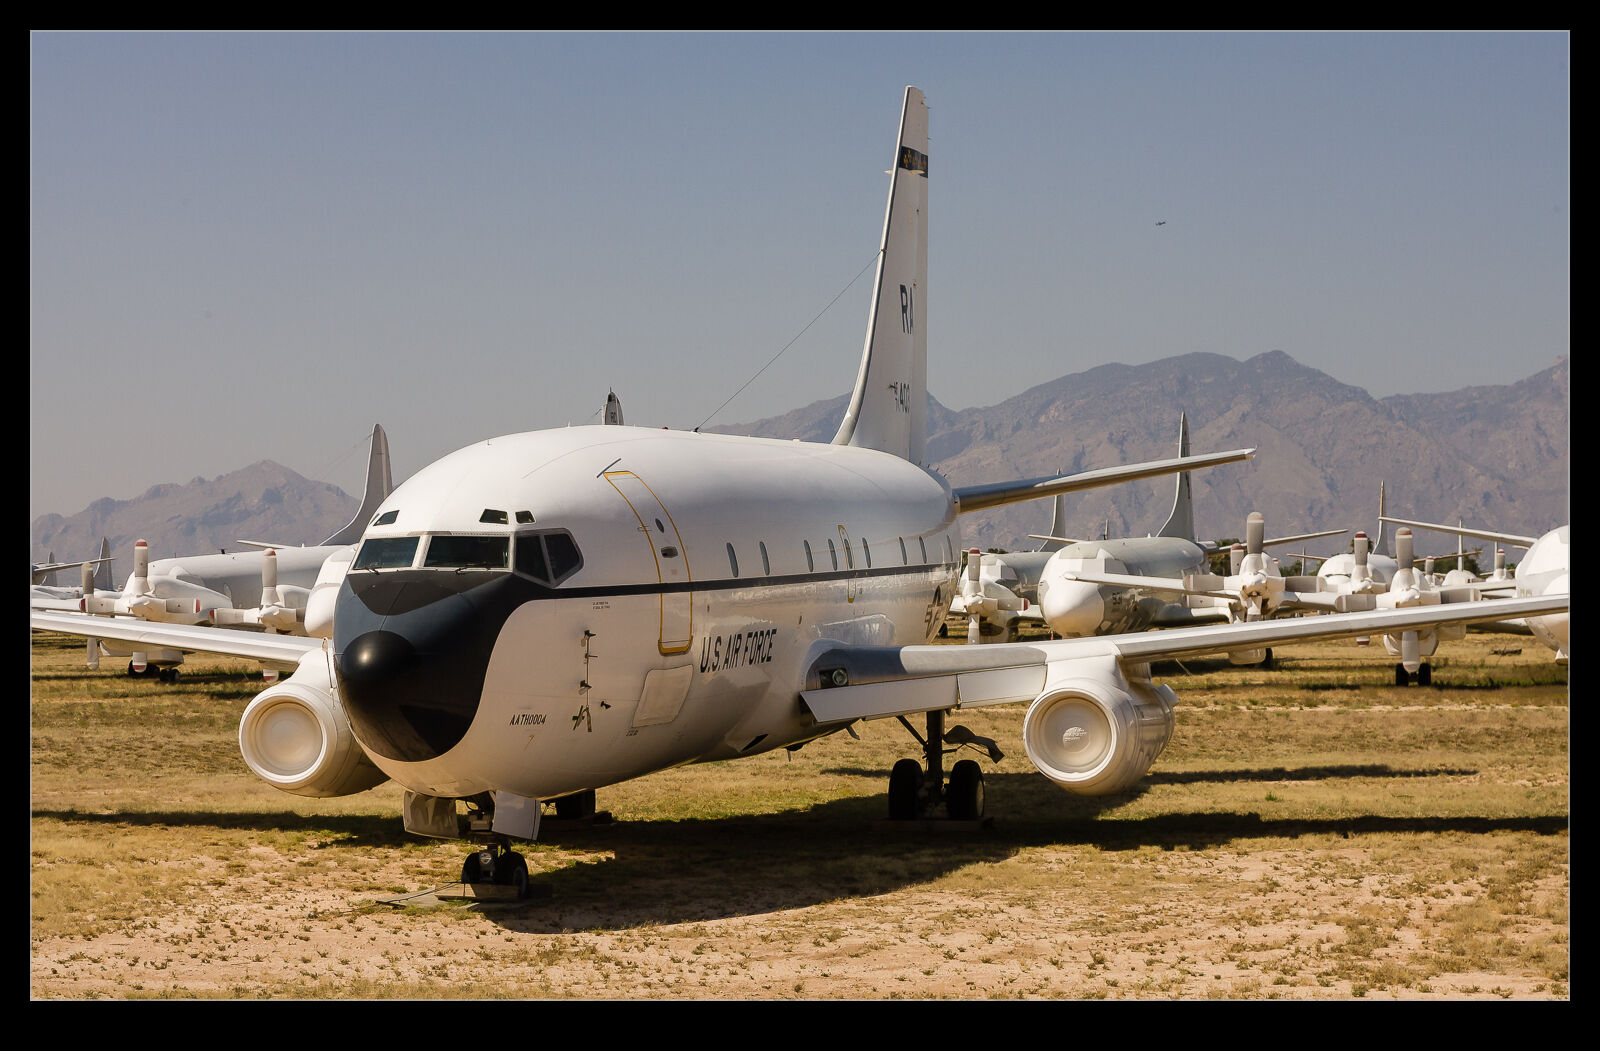
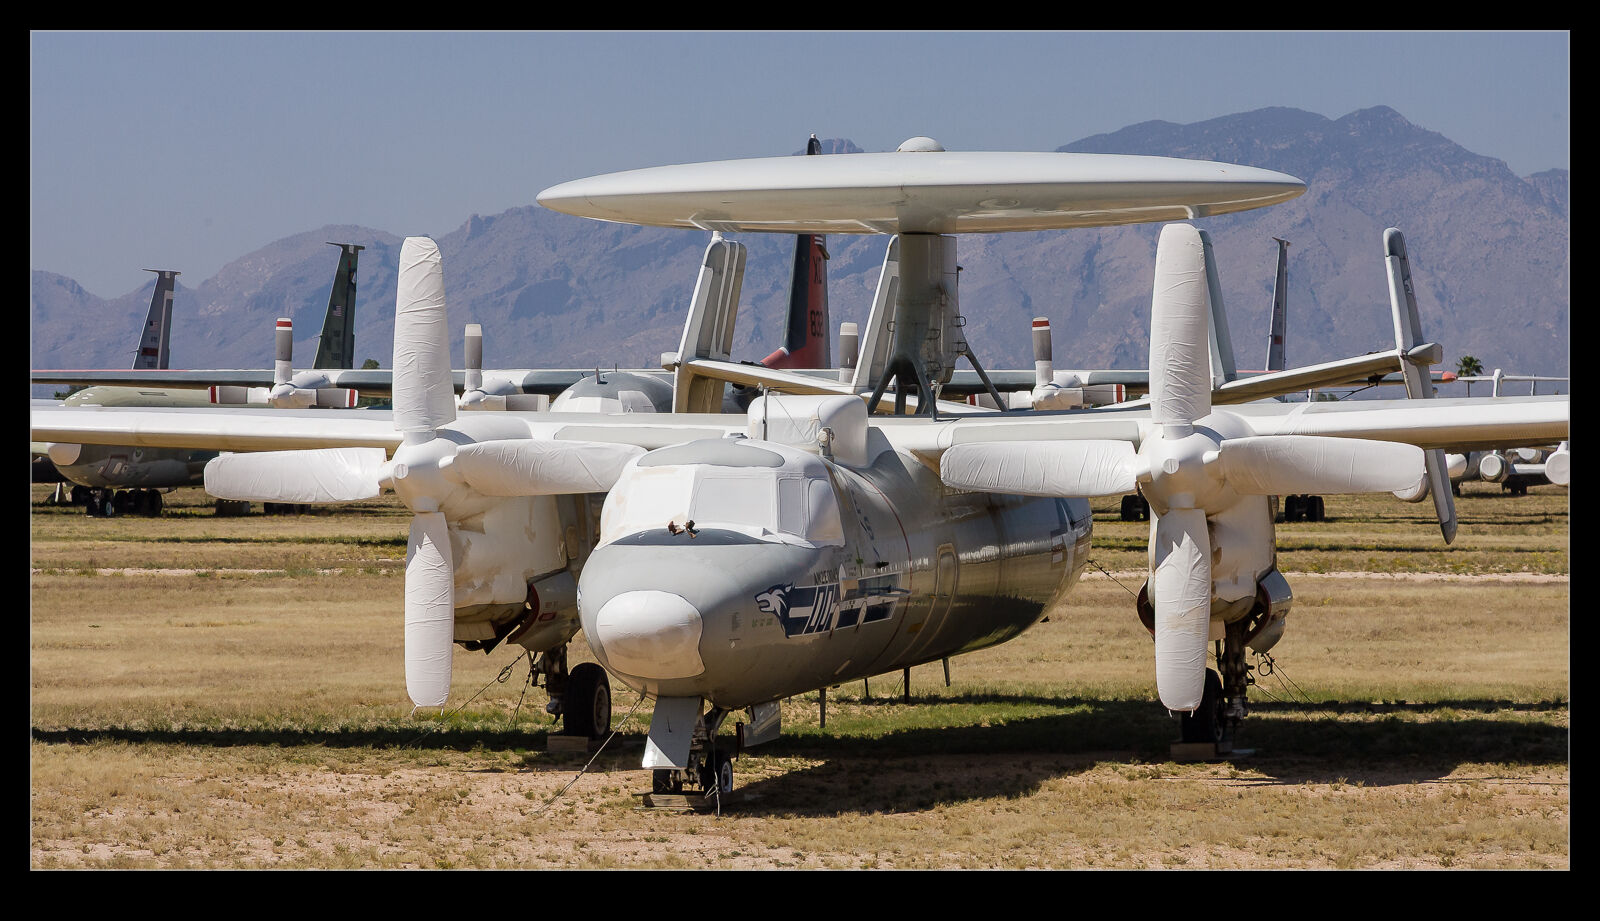
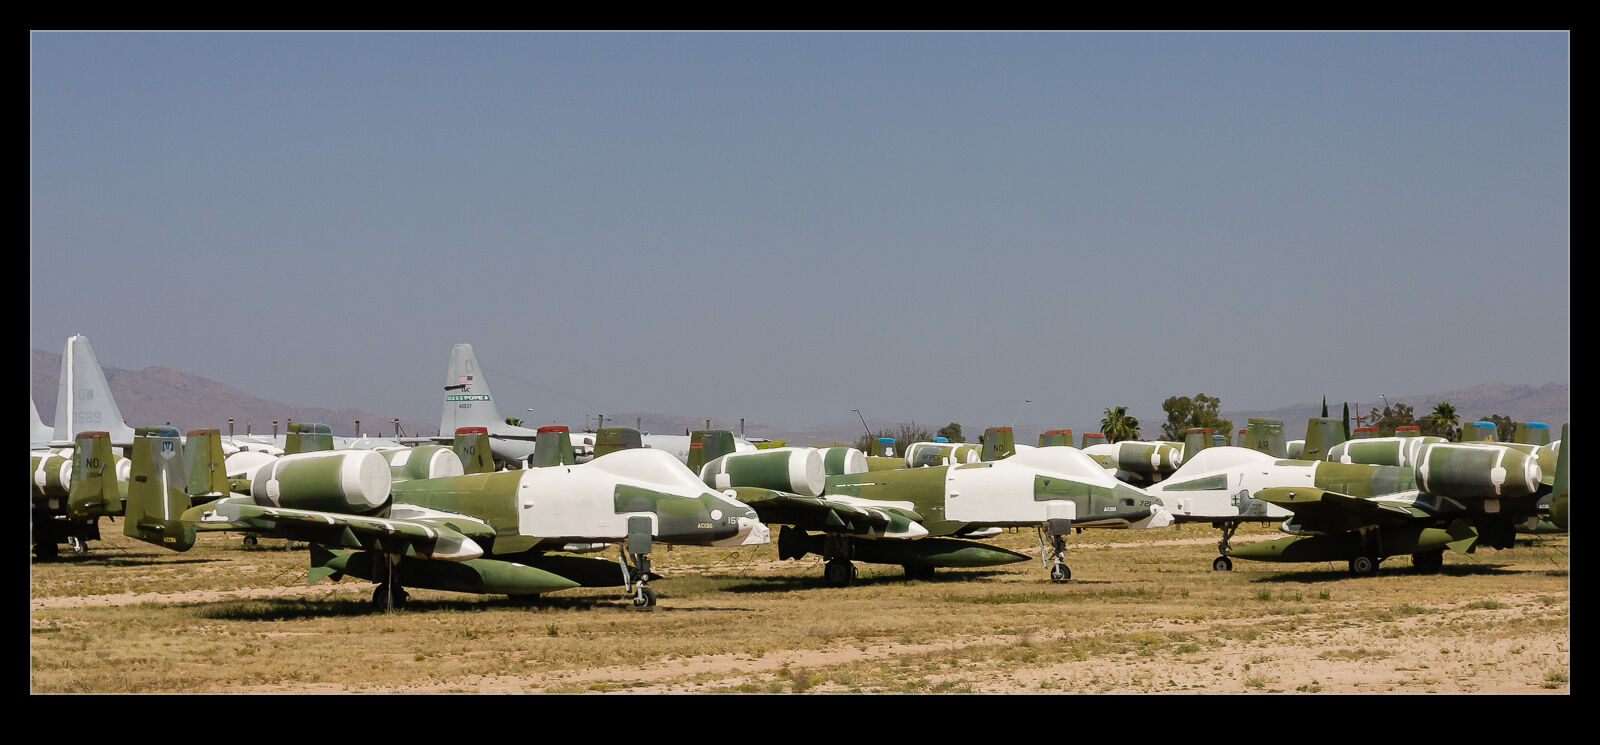
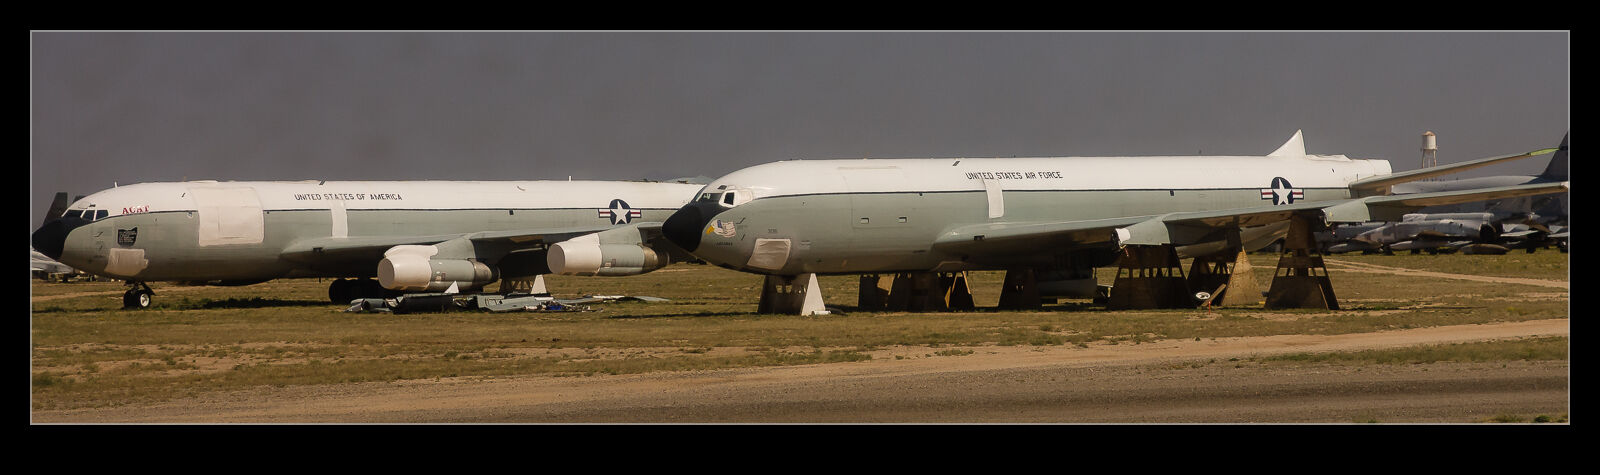
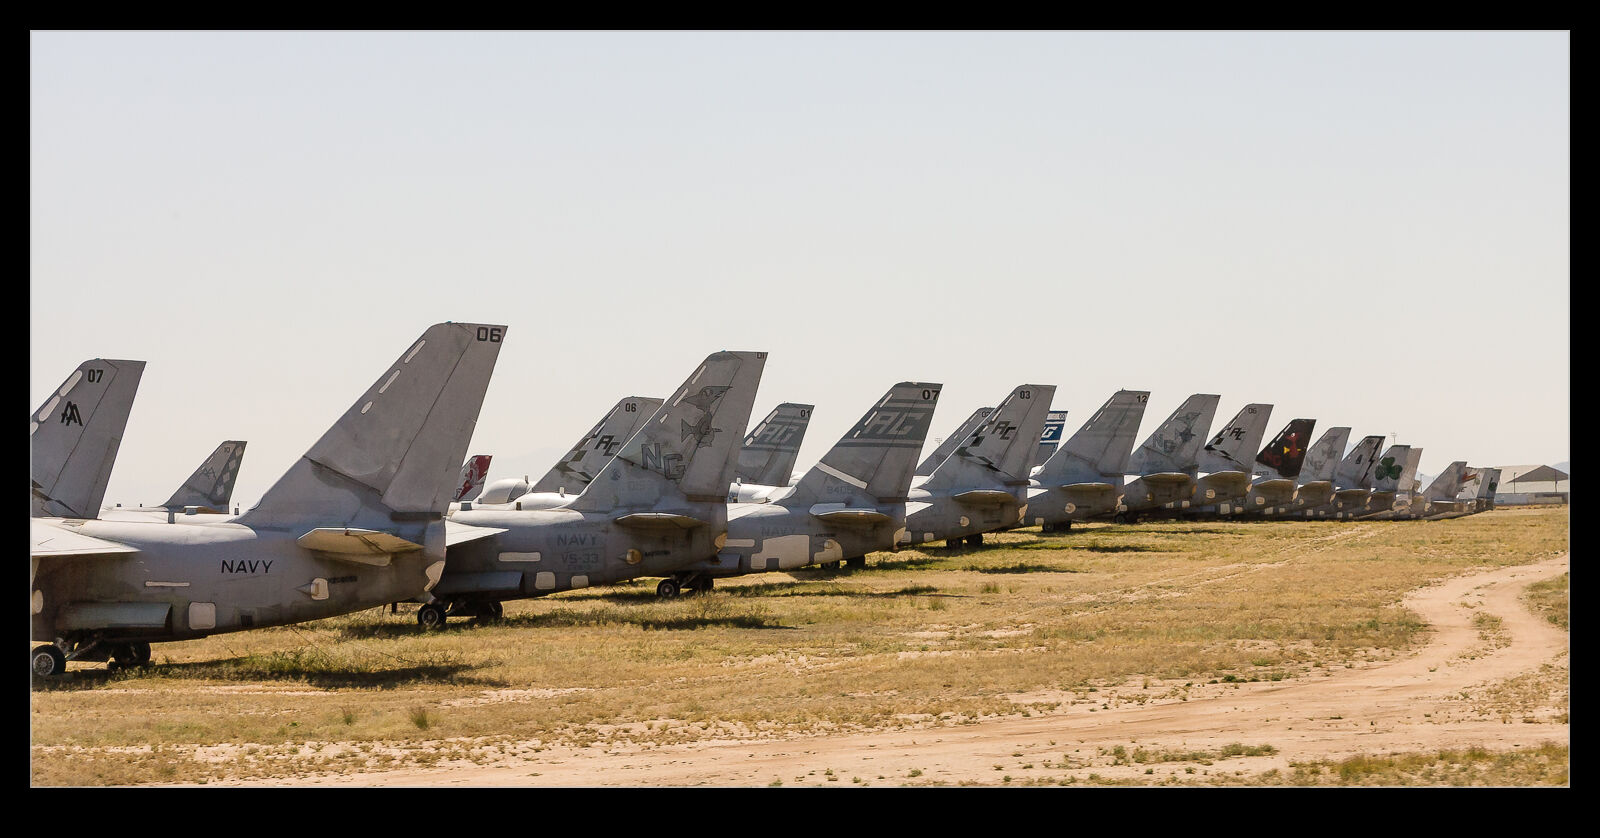
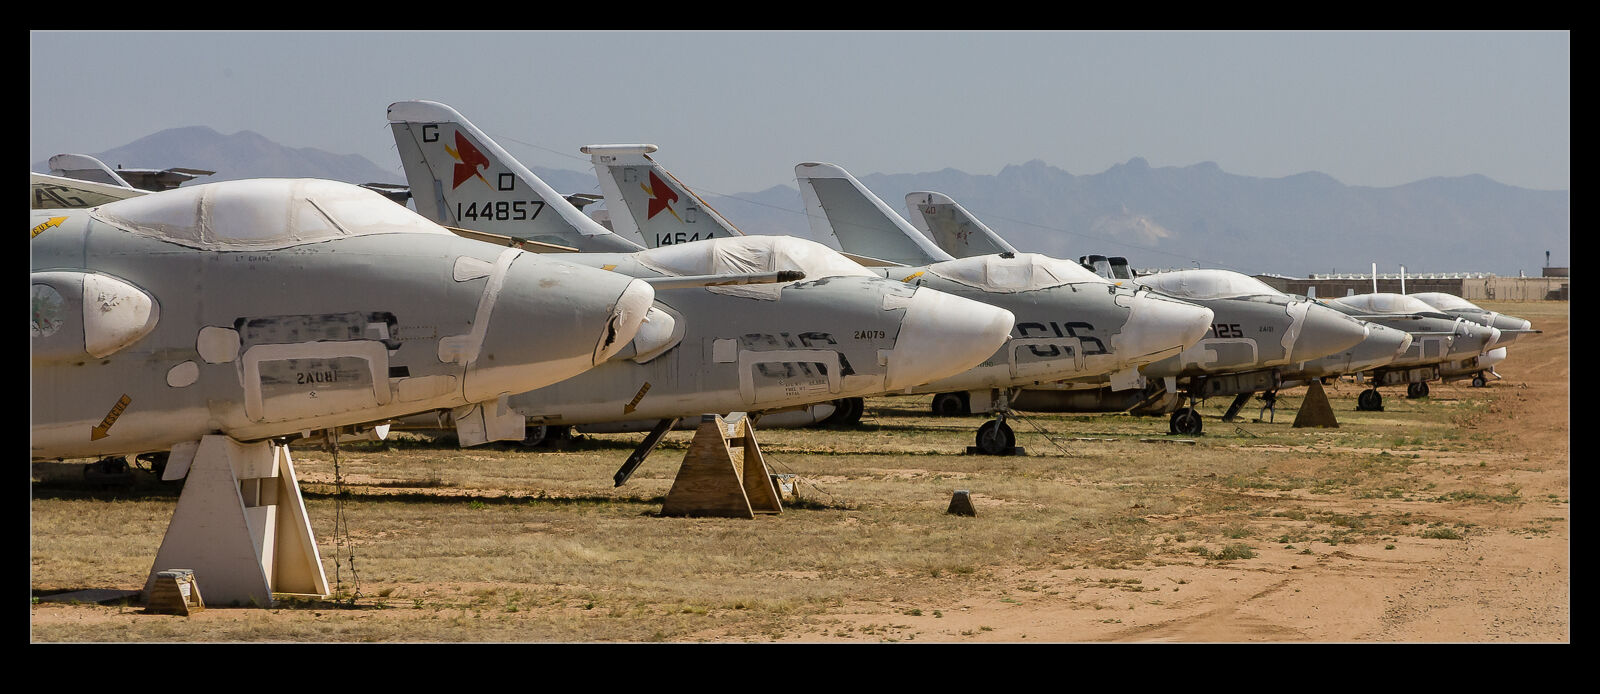
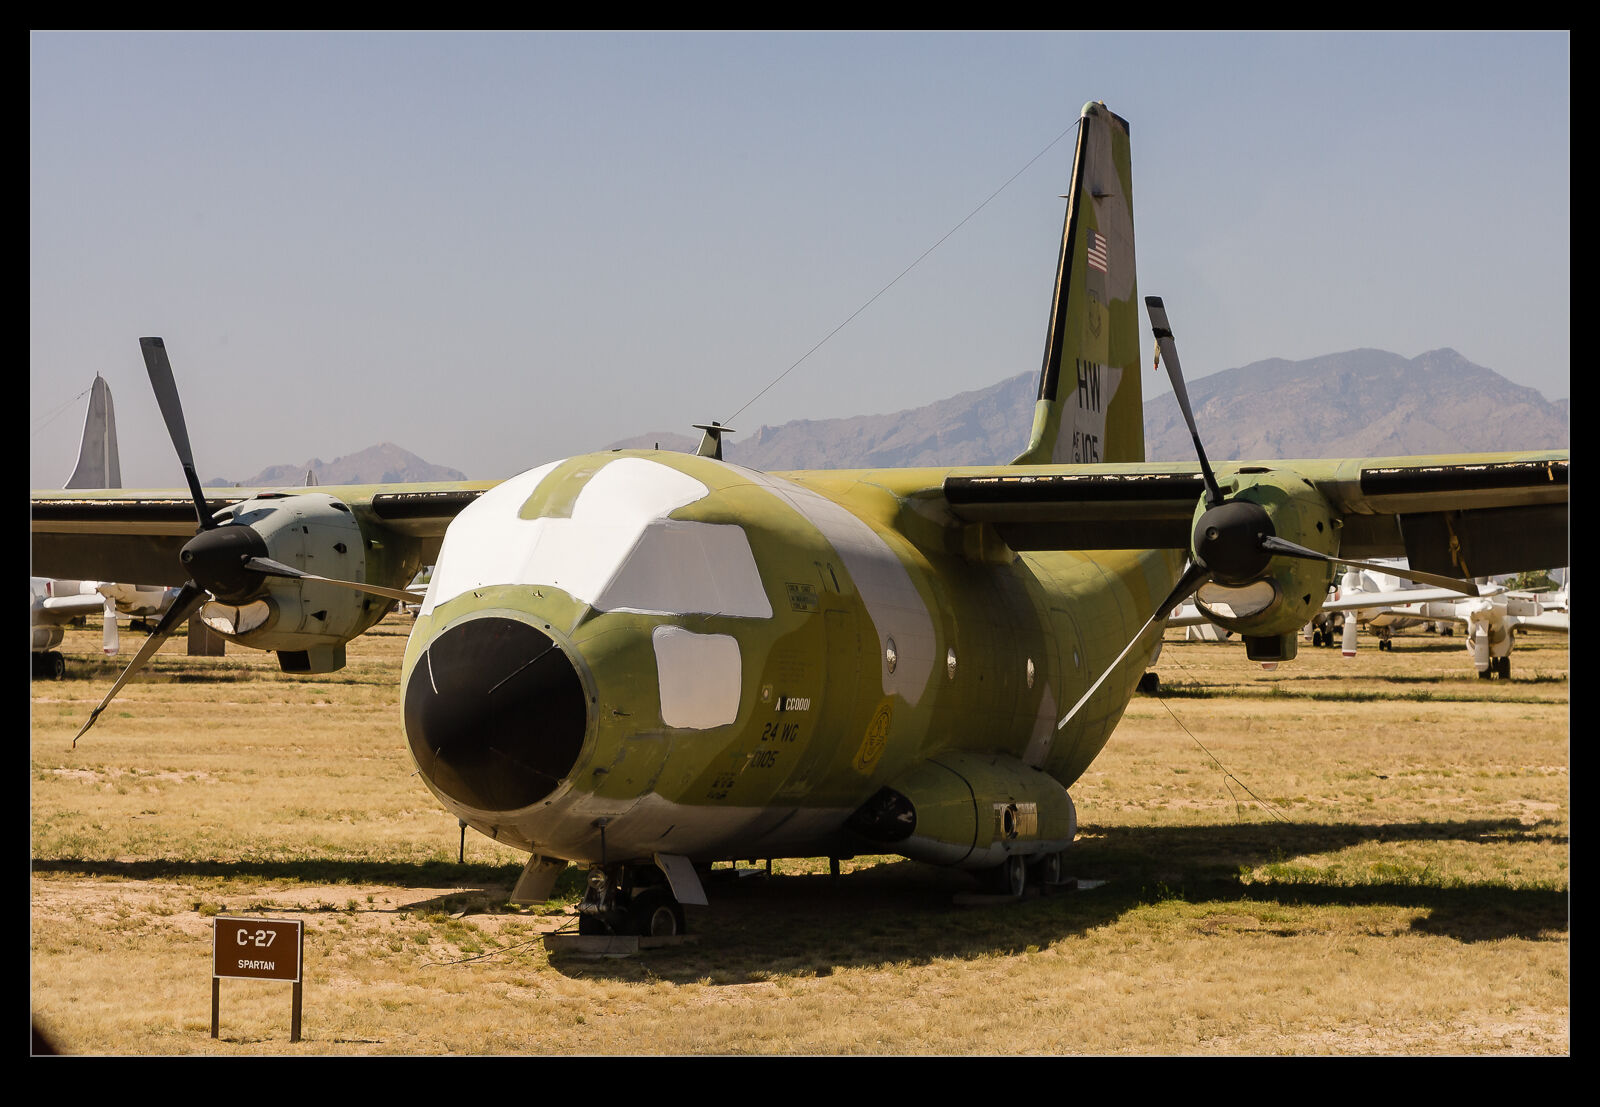
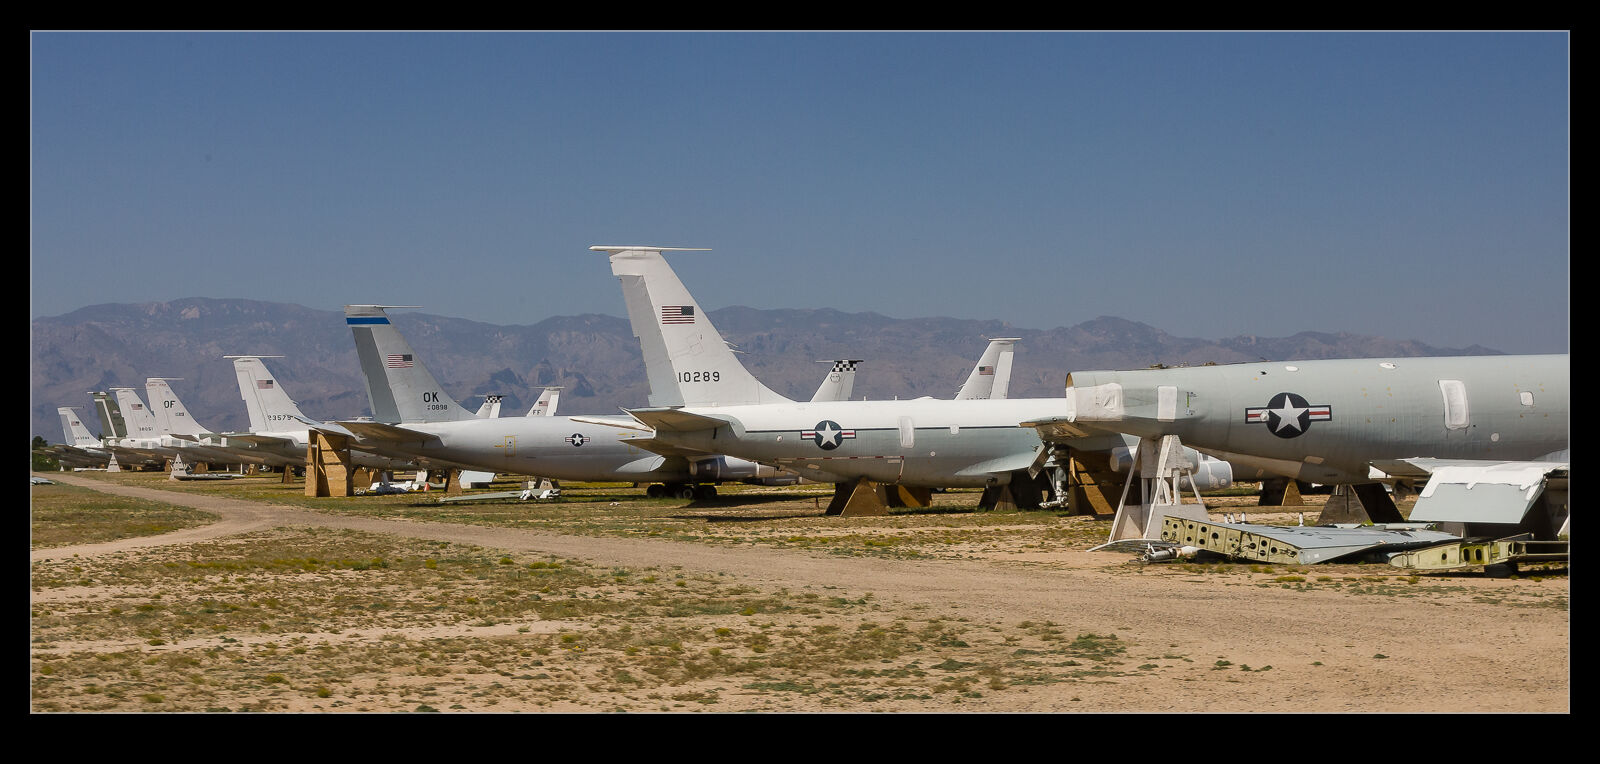
I have been a bit critical of the reflection removal tool in Lightroom but, while it seems to have become less effective on some shots, it still can do the job on others. This got me thinking back to my visit to Davis Monthan AFB’s storage facilities in the days when the Pima Museum was still able to operate a bus tour of the rows of stored aircraft.
I tried my best to get clear shots through the windows of the bus and often did okay. However, when something of interest was on the opposite side, I was taking a lot more chances when trying to get a shot without any reflections in it. A friend of mine, Karl, regularly posts images from the day and month many years before and he recently had some DM shots, and this was what triggered this idea. I worked my way through some of the original shots that I wouldn’t have previously used because of the reflections. I managed to rework some of them to make something far more usable.
 It was the Red Bull RB17 where I was playing with this. When I went to stitch the images together, Lightroom gave an old result. Instead of either having the whole person or no person, it managed to have parts of them only in the shot. I decided to use Photoshop’s photo merge function instead, but it gave the same results. However, it did this by outputting layers with masks which were then editable. I was able to go into the shots and get rid of the bits I didn’t want while bringing out the bits I did. Some of the blending is not perfect in the revised versions but, for a quick solution, it works fine. If I needed to do more with the images, I would fix the flaws with more care.