Tag Archives: processing

Lightroom Performance Upgrade

ightroom has been an integral part of my photography work for as long as it has been around. I was an early adopter of it when it was added to the Adobe portfolio, and I remain a daily user. I built a new computer when we were in Seattle, and it was happily zipping along when I built it whether it was working on photos or rendering video edits. However, in recent times, I found that Lightroom was getting very sluggish.

This was becoming very frustrating. The idea of building a new machine wasn’t top of my priorities right now. I didn’t want to be going through all of the migration issues again. It has got easier over the years and is now not too onerous but there are still things that need to be done that I forget until something minor doesn’t work. Before embarking on that, I did start paying attention to the performance metrics of the current machine.

As I was using Lightroom, I noted that the processor was rarely getting heavily used and I have a ton of RAM and, while that was getting quite well used, it also wasn’t getting maxed out. However, the offload to the graphics card did seem to be making that get used a lot. I took a look online at recommendations for graphics cards and decided that my first port of call would be a card upgrade.

Graphics cards are not cheap. The demand for the AI sector has put pressure on graphics chip pricing. I am also competing with the serious gamers which means even more upward pressure on the price. However, I got something that was identified as having good capabilities for Lightroom. It showed up quickly (doesn’t everything these days – how strange it feels when something is going to have a long lead time) and I went about squeezing it into the case. The previous card was considerably smaller and required a lot less power. I had to remove some of the internal elements to get this to fit. It also needed three power cables versus the one for the previous card. All of this was relatively easy although far less so than it would have been if I was putting the thing together from scratch.

I powered the system up and, after a few driver installation processes, the machine was ready to fire up Lightroom. It opened up and I immediately noticed the difference. Scrolling through the catalogue, previous rendered immediately and the log in scrolling was gone. I opened up an image and created a virtual copy to play with the masking functions. The first mask model was rapidly created and then the brush functions were tried. Absolutely no lag and great responsiveness. It was like a had a new computer.

Looking at the performance metrics, the processor and RAM were much as before but the new card was working away busily and was using a load of RAM. It was certainly doing what was hoped. This wasn’t a cheap upgrade to make but it has effectively given me a new level of performance by changing one component and leaving everything else as was. That seems like a win to me.
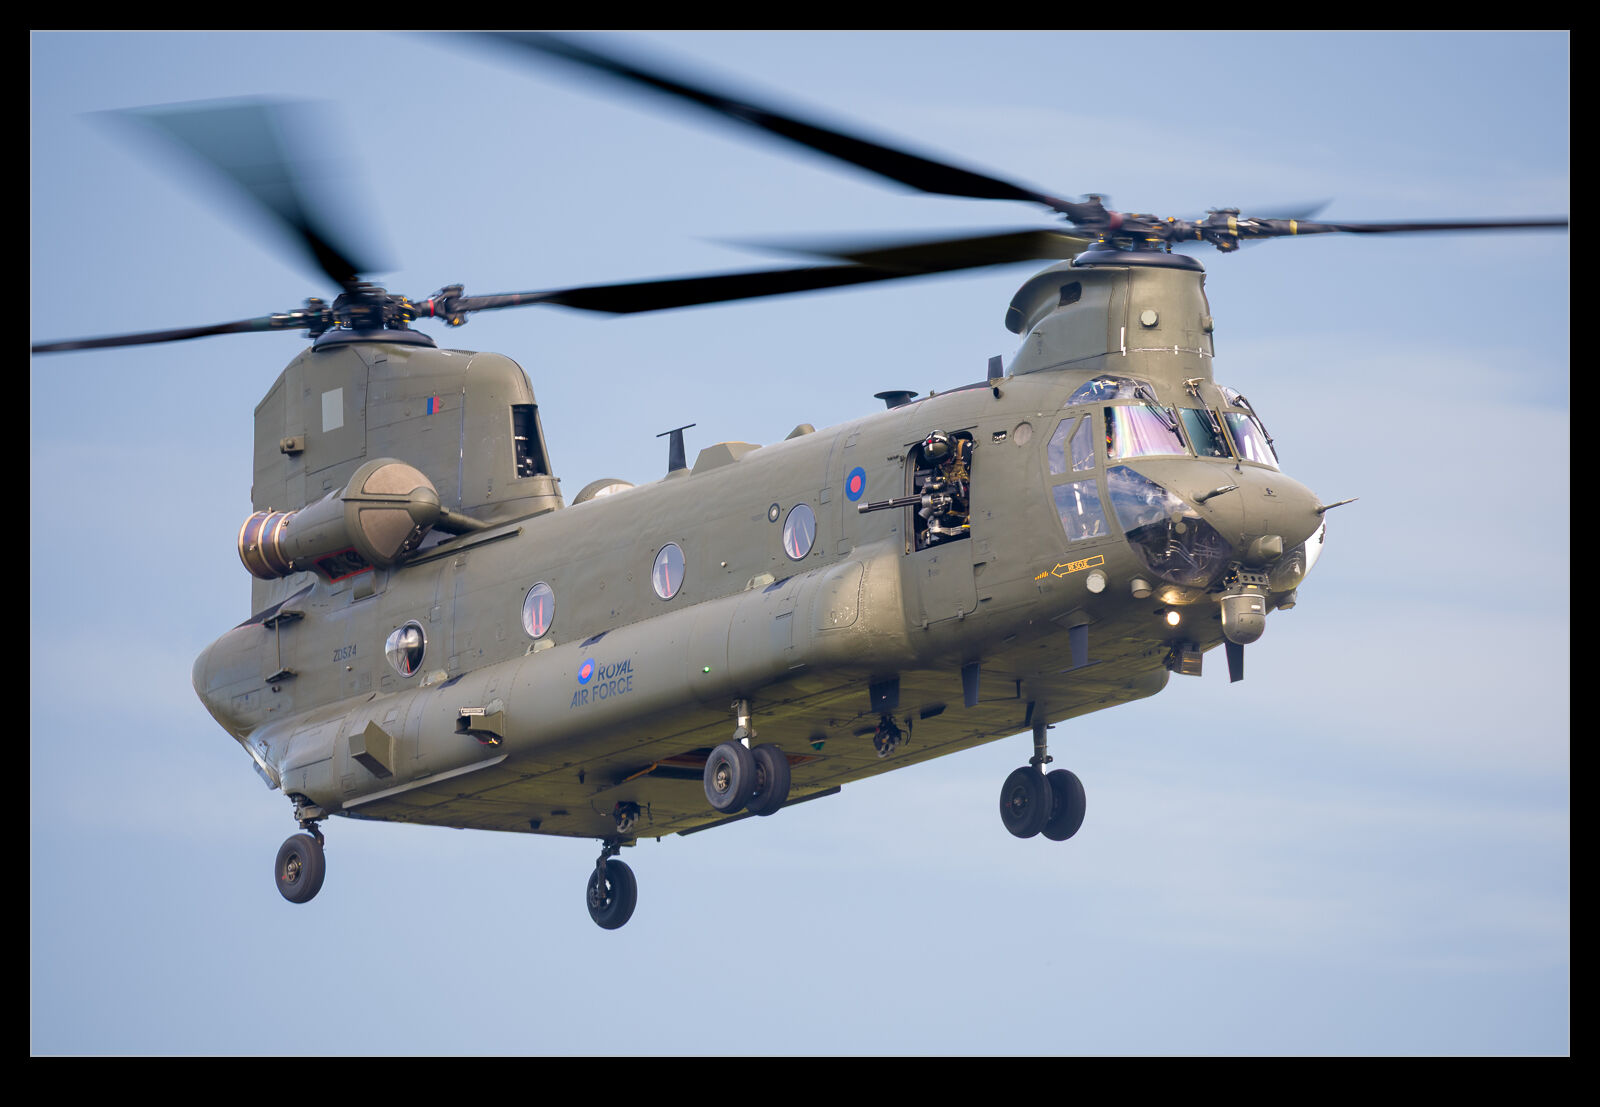
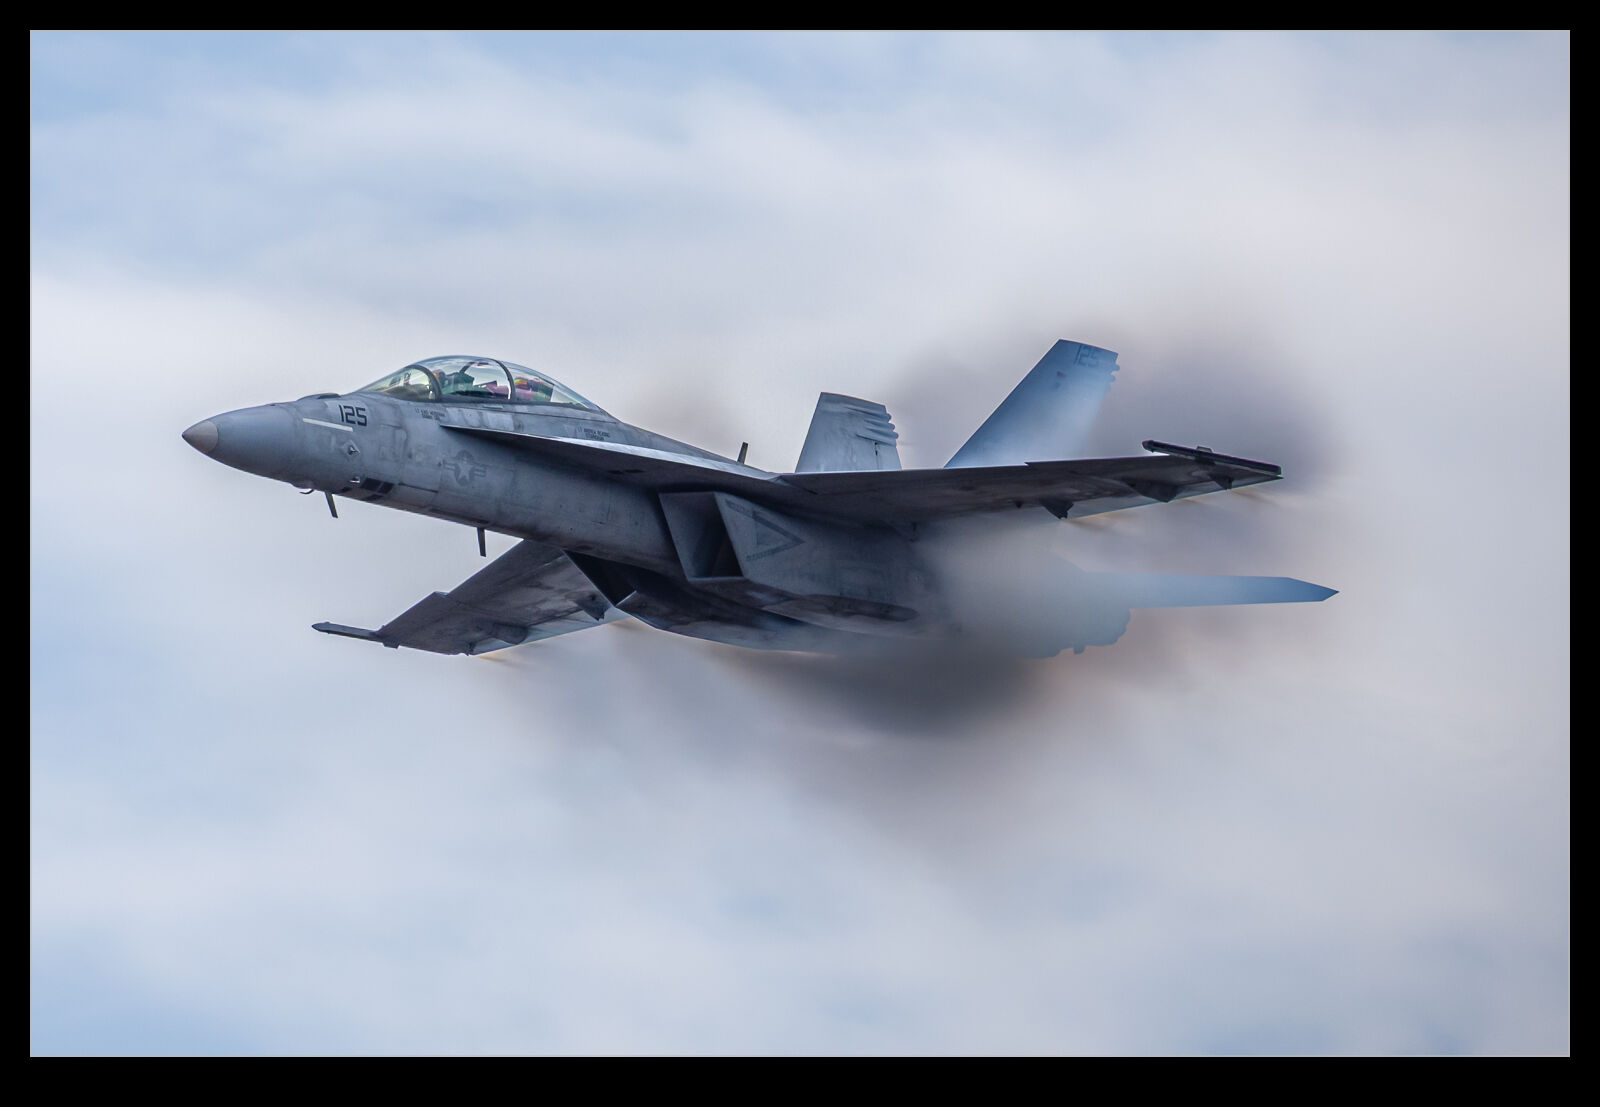
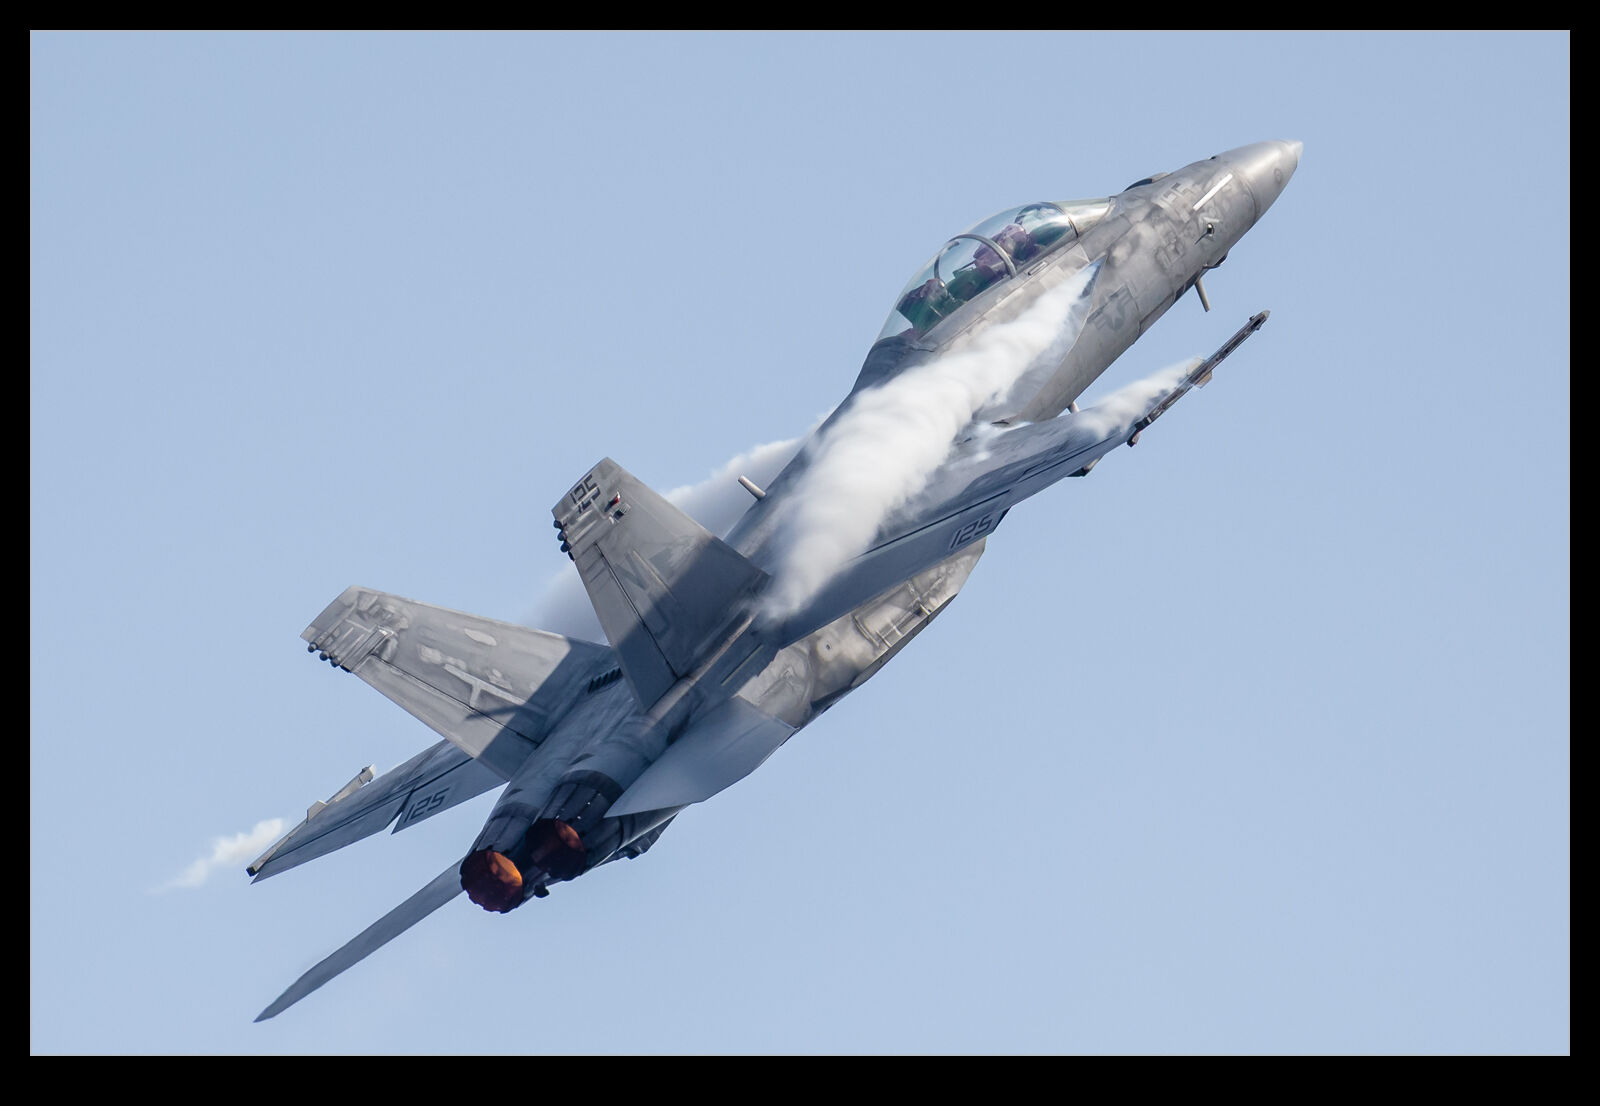
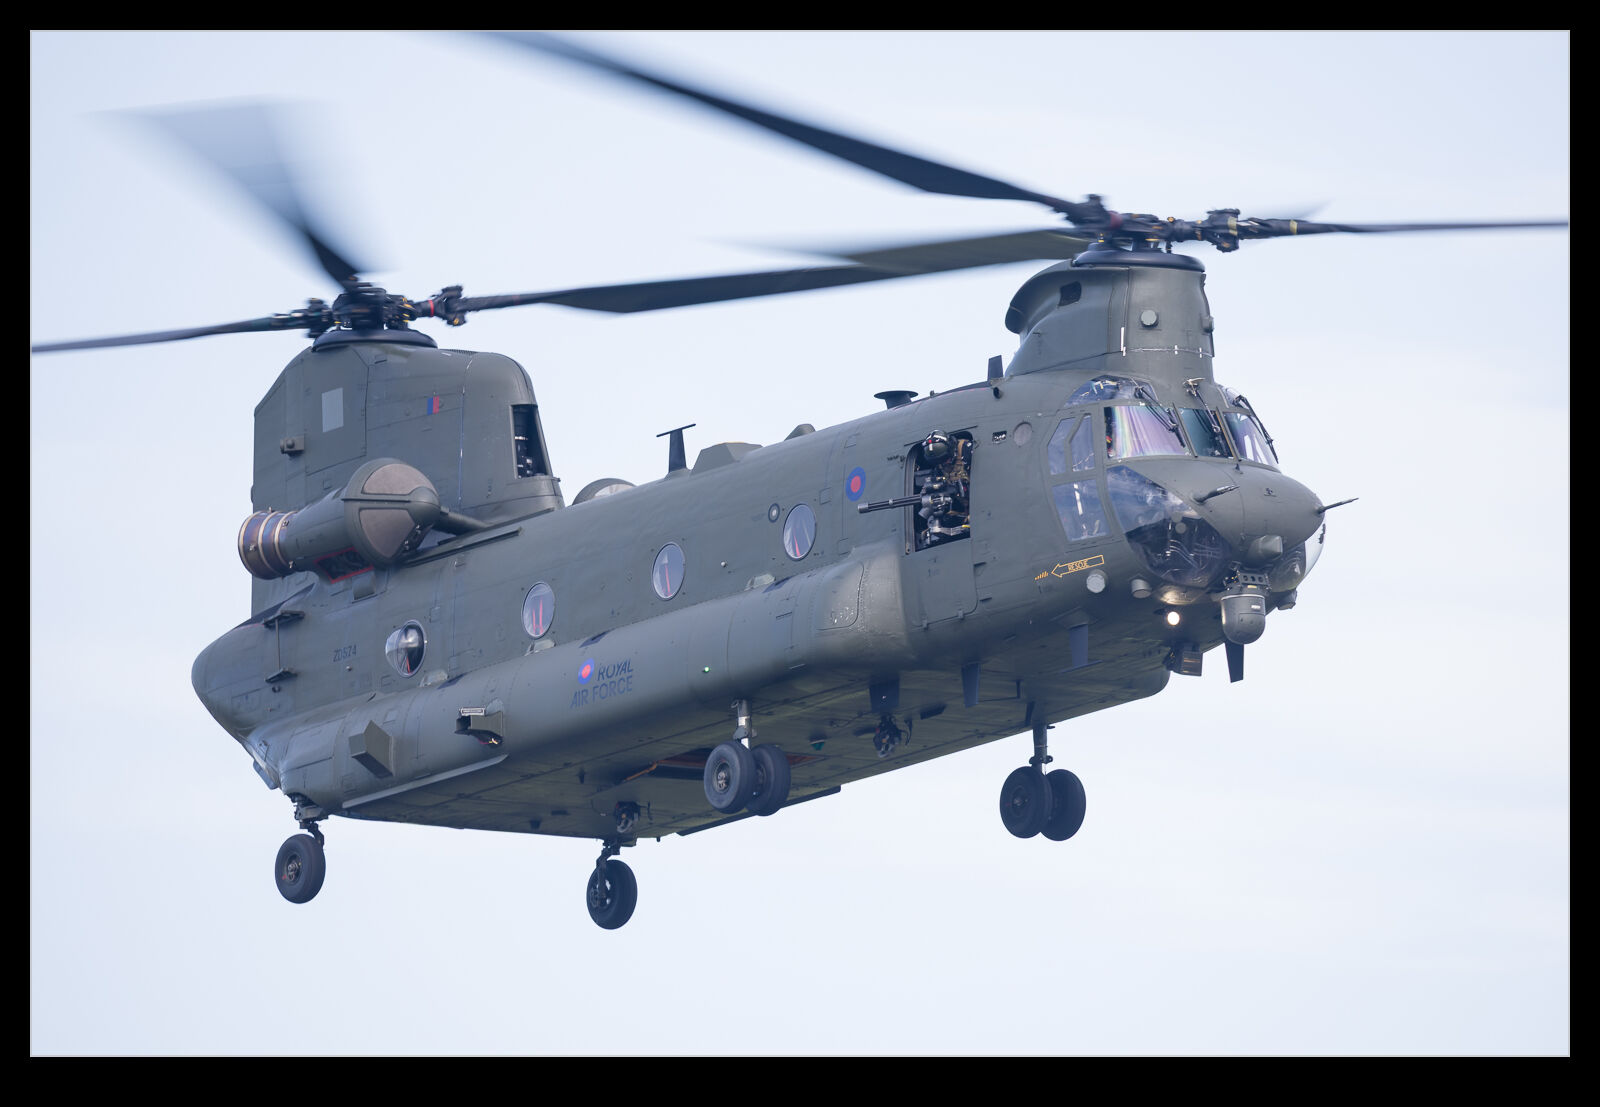
Reprocessing Some Backlit Shots from LAX

Every once in a while, I put together two things that I hadn’t previously connected. I have been playing around with the masking tools in Lightroom for ages to put different processing on aircraft versus the sky in the background. When I had done some photography from helicopters over LAX, the lighting had been good on the northern complex but the planes arriving and departing the south complex had been quite harshly backlit.

The processing approach I was using at that time did not make for very good results and so I had tended to ignore the shots I had taken on that side and focus on the north complex instead. Then, while looking at something from another photographer, it got me thinking that the masking tools would be a good option to revisit these backlit shots and try and get a more balanced looking image.

You can’t escape the fact that, if the original shot is not great, you aren’t ever going to turn it into something marvellous. However, there is the potential to come up with something significantly better than I had previously managed.

Selecting the airframe with a more cluttered background is a bit tougher for the automated tools so a fair bit of manual addition and subtraction was needed. However, because you are against a ground background rather than a sky, there is a certain amount of tolerance that you have for not getting the selection absolutely perfect. You don’t want glaring issues, but it won’t be as conspicuous as it is with a sky behind.

With the masking applied, it is a lot easier to come up with an exposure for the planes that looks a lot more like the eye would have perceived whilst still having a background that is okay. I can actually darken it a bit more in order to make the plane pop. On one of the shots, there was a second plane on the taxiway in the shot, so I selected it separately to give it a reasonable look without it taking over the image as a whole. This was a very satisfying process with some images I had previously left alone.

Revisiting Boneyard Tour Shots With Reflection Removal

I have been a bit critical of the reflection removal tool in Lightroom but, while it seems to have become less effective on some shots, it still can do the job on others. This got me thinking back to my visit to Davis Monthan AFB’s storage facilities in the days when the Pima Museum was still able to operate a bus tour of the rows of stored aircraft.

I tried my best to get clear shots through the windows of the bus and often did okay. However, when something of interest was on the opposite side, I was taking a lot more chances when trying to get a shot without any reflections in it. A friend of mine, Karl, regularly posts images from the day and month many years before and he recently had some DM shots, and this was what triggered this idea. I worked my way through some of the original shots that I wouldn’t have previously used because of the reflections. I managed to rework some of them to make something far more usable.

Thinking Back to LAX and Old Favourites

I’m not sure what it was that got me to these pictures. I was working on something other project and then found myself looking at some shots from a visit to LAX a long time ago. Two planes jumped out at me from that day. One was a Lufthansa A340-300 and the other was a British Airways 747-400. Both were taking off later in the day and the light was very nice. I decided both deserved a re-edit.

The backgrounds for both jets were a little busy and so I decided to try something similar to my processing for airborne shots but that I hadn’t done much on the ground. I used the smart masking tools to select the aircraft. Then I inverted the mask to select the background. This allowed me to take the lighting down for the background and also make things a little cooler with the white balance. Then I could warm up the plane a little more and brighten it up. This helps to separate the aircraft from the background and make it more the focus of the shots.

The BA fleet of 747s are long gone now and passenger 747s are definitely a rarity. The Lufthansa A340s are still operating but only because of the delays to new aircraft deliveries. It won’t be too long before they are heading to the desert. This will be a nice reminder of the fun stuff I used to be able to photograph.

Reworking an Old Shot with Modern Denoise

Periodically, when thinking about the latest processing tools that I have available, it takes me back to some older shots that would be interesting to rework. This shot of one of the Blue Angels jets was taken at NAS Oceana during one of their air shows. I was shooting with the 1D Mk IIN and at ISO 800. At the time, this was a really high ISO and resulted in a lot of noise in the images. (As an aside, I did find that printing did not show the noise at anything like the level that was apparent on screen.) Even without the denoise function, the latest raw convertor makes a decent job of the file but I figured I would use the denoise too. I think the file comes out really cleanly as a result. It also helps that, as an 8MP file, the processing is a lot quicker!

The Reflection Removal Tool Seems to Have Broken

When Adobe introduced the reflection removal tool, I was really impressed by its capabilities. I played with a number of shots that I had taken through windows, and they worked out really well. There have been some updates that Adobe has made, and it feels like it isn’t working as well as it should. I was at Glasgow Airport waiting for a flight home and an Emirates A380 was taxiing out so I grabbed a few shots through the glass. There was a really obvious reflection in the sky area of the shot. I figured that the tool would knock it out easily. Instead, it didn’t even recognise it was there. That is the first of these images. I tried a couple of different shots and none of them worked. I wonder what they have done to the tool that has made it struggle here. I ended up making manual selections and using the AI remove tool to try instead. It was okay but not a great result.

Processing With Masks – A Video

Every once in a while, I post about some change I have made to my processing techniques for my images. I have posted in the past about how I have been using the masking tools in Lightroom to work on images – particularly those with poor lighting conditions where the background and the subject need significantly different edits.

I have recently tweaked my approach to improve it. This involves an extra step to try and get a better selection of the subject and the background. This also addresses some of the issues I find with Lightroom’s selection algorithms. Sometimes it picks things that just don’t make sense. Anyway, I did a full process of an image and recorded the whole thing with my explanation as to why I was doing what I was doing. It is not a short video so only for those with a serious interest. However, if you want to check it out, here it is.

Super Bugs at Bremerton

One of the last air shows I attended before we left the Pacific Northwest was at Bremerton. The unusual thing about this air show was that I didn’t head there alone. Instead, Nancy came along with me. It is a long time since she last came to a show with me, but the good news was that she enjoyed it! One of the parts of the show that she found the best was the US Navy’s Super Hornet display. They ripped up the sky for a while. Their blast across the field from crowd rear particularly amused her!

The conditions not ideal from a lighting point of view but there was humidity in the air with the upside that the jet was created plenty of spluff. One of the passes in particular created a lot of cloud activity. It made for a difficult image to process given the contrast with the cloudy background and that its own clouds needed not to be over exposed. I suspect I shall probably try reprocessing this again in the future as either my techniques improve, or the software gets more advanced. I did have a bit too much lens for the closest part of the pass – oh well…

Hurst Castle and the Needles

I don’t know for certain whether I have ever previously taken the ferry from Lymington to Yarmouth. Something tells me I might have done so at one point, but I have no idea why I would have done so. Anyway, I definitely have made the crossing now because we took a trip across to Yarmouth. As we were crossing the Solent, there were some interesting views down the water towards the Needles. Hurst Castle marks the narrowest point between the mainland and the Isle of Wight. Getting both the castle and the Needles in view was possible. The distance difference meant a little careful processing was necessary to have clarity of both elements, but I loved the compression a long lens provided of this view.

Stormy Sunday Atlas 777F

A stormy sky doesn’t immediately inspire you when going for some aircraft photography but, if the light on the subject can end up being okay, a dark background can suddenly seem like a great option. One Sunday an Atlas 777F was up on test at Paine Field. The sky was dark and gloomy but not a solid cloud background. Instead, the clouds were stratified so there was more detail and texture to see.

As the 777 came down the approach, it was not brightly illuminated but it was picking up a good amount of light compared to what I had expected to be the case. This did require some thought about the camera settings. When the sky is dark, I often significantly over-expose. This is because the clouds will dominate the metering response and the subject – which is usually quite dark – really disappears. In post processing I can then bring the exposure back down but there is sufficient light on the subject to get a good image of it against the sky.

In this case, I had to be more careful. With good light on the subject, the dark sky would result in blowing out the plane. Therefore, I had to keep the exposure compensation off to allow the subject to not get too overexposed and not leave enough latitude for processing it to where I wanted it to be. The results came out okay. This was more important for the longer shots. Once the plane was close in, it started to dominate the metering response and, once on the ground, the illumination was more balanced.

Once they touched down and brought in the reversers, you could see that the conditions had not long ago been wet as the runway still had plenty of water on the surface and the reversers kicked it up in the air.