Tag Archives: noise

Lightroom Noise Reduction Update Testing

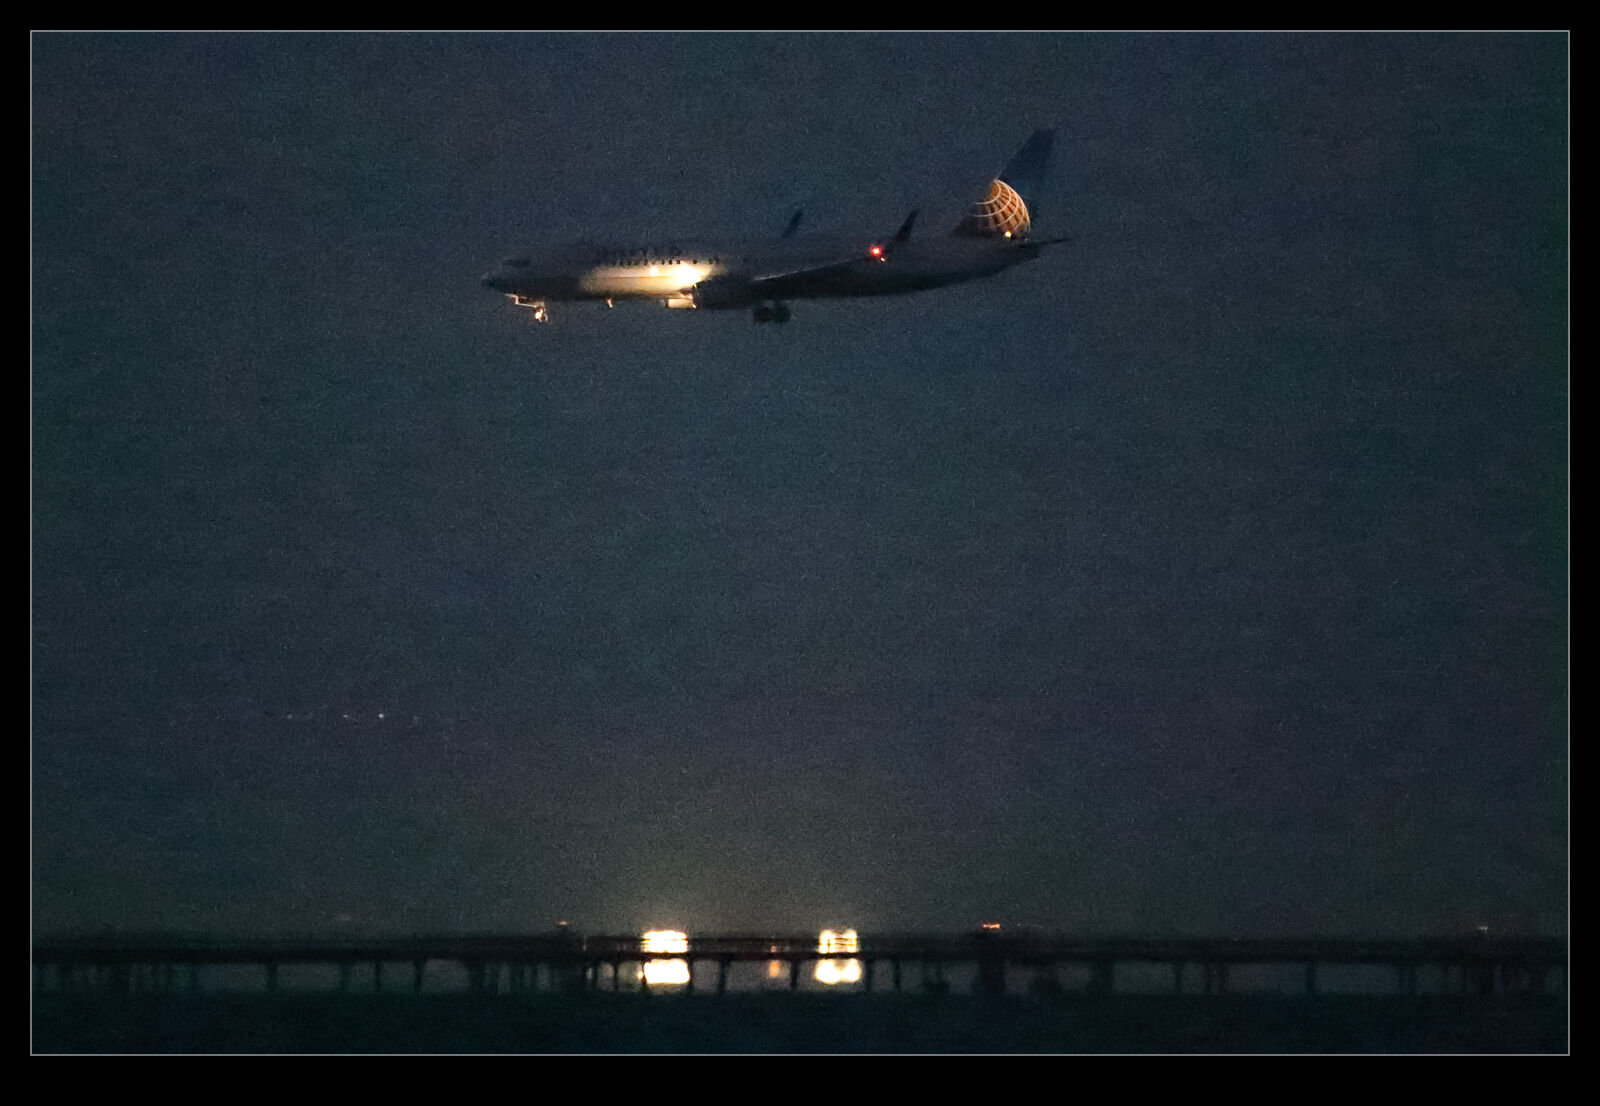
One of the software tools that I find a lot of people talking about these days is DeNoise from Topaz.  I have never been terribly bothered by noise in my images.  Modern cameras do a pretty remarkable job of handling noise and, for most usage purposes, the noise is not really an issue if it is there.  I have posted my efforts with PureRAW in its various forms where I have tried it out to see how the noise reduction comes out and, while I have seen strengths and weaknesses in it, I have never seen it as something I needed to spend on.

Lightroom Classic had one of its periodic updates recently.  The big new feature was their own denoise functionality.  Much like my experimentation with PureRAW, it analyzes the shot and creates a new DNG file with the noise suppressed.  I was curious to see how it would perform and, seeing as it is included in the price of my subscription, I have it anyway.  I decided to take some shots I had recently used for the PureRAW3 trial I had done and compare with the Lightroom version.

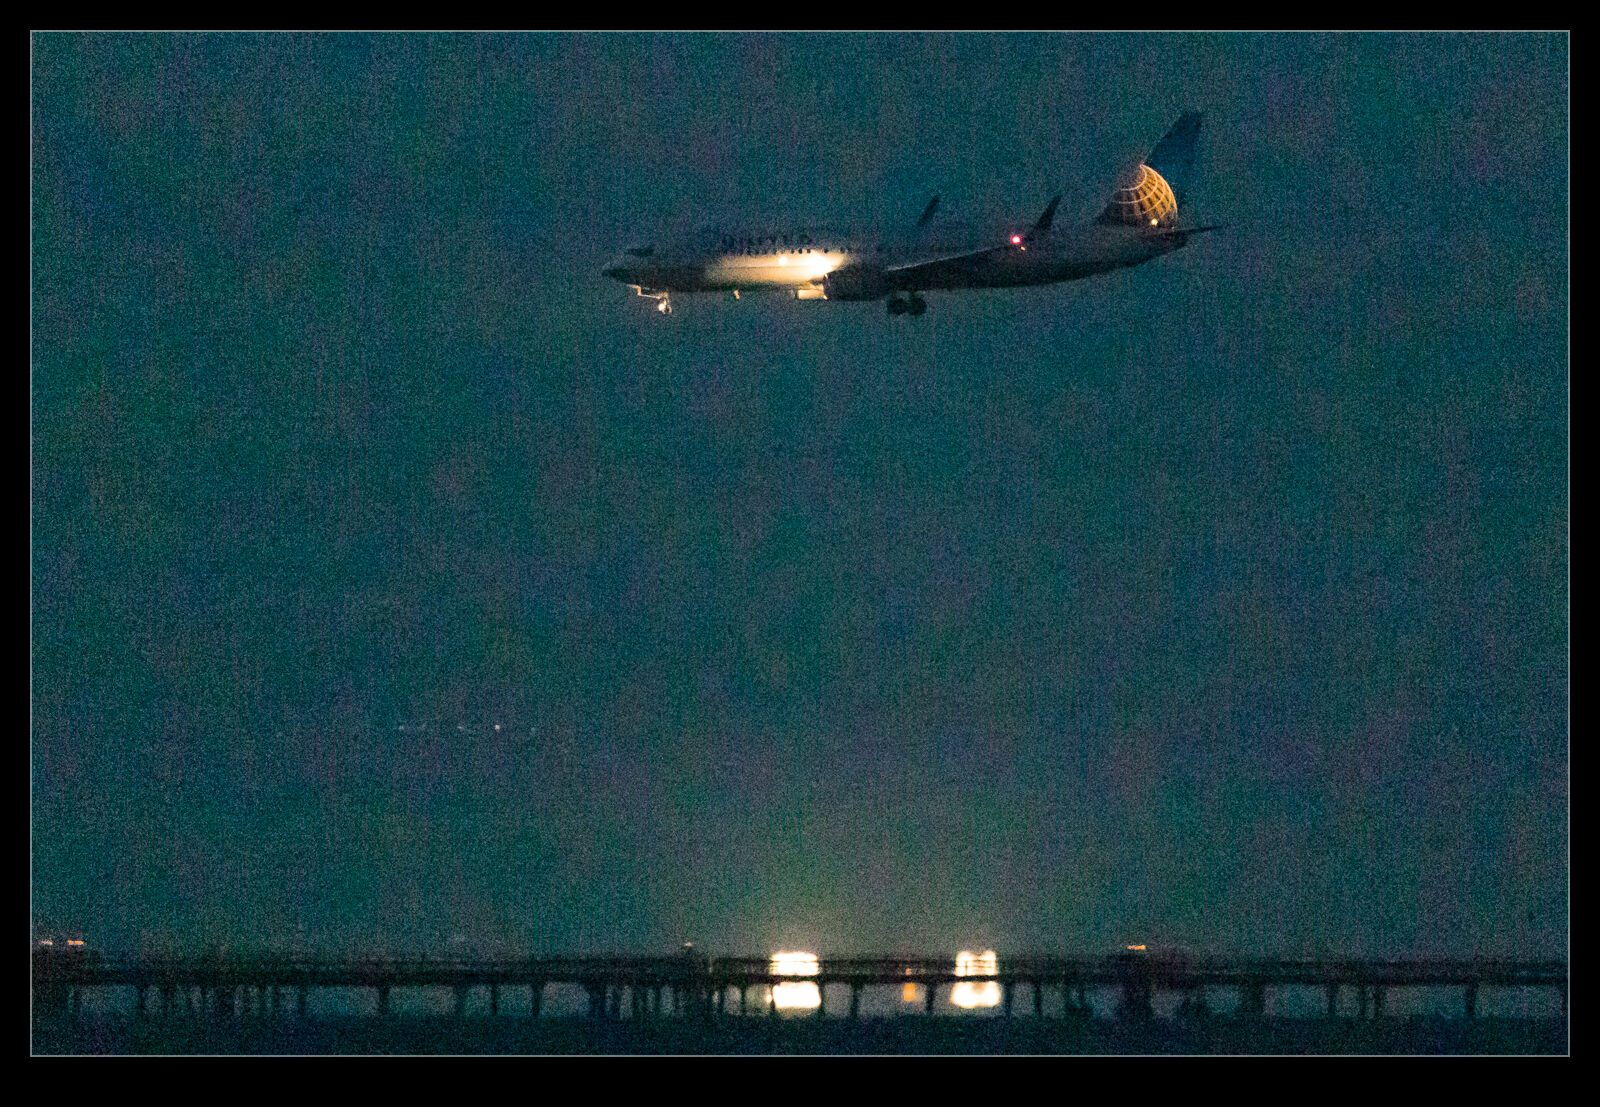
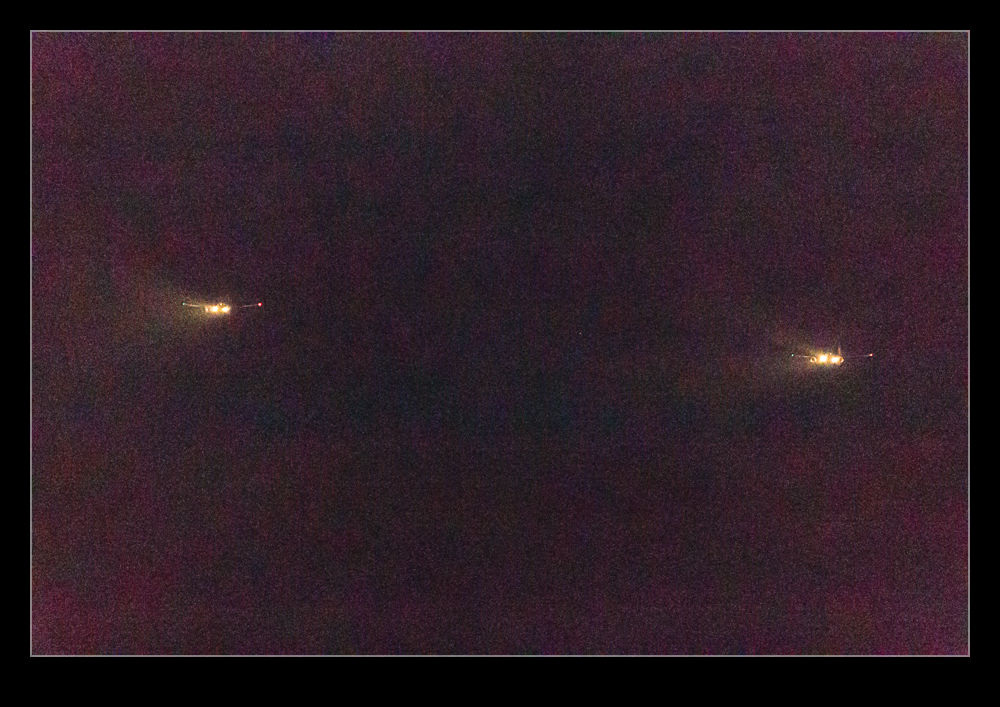
It defaulted to a 50 level of noise reduction.  I don’t know whether this is a percentage and what of but it is a scale so I played with it.  I did some at 50 and some at 75 to see whether more aggressive noise reduction had detrimental effects on other parts of the image.  Comparing these things and then sharing the results is a touch tricky so I have created a single image from four layers.  They are the original Lightroom develop settings, the PureRAW3 version, the 75 denoise settings and the 50 denoise settings.  I mask them to make the image into four sections.  Then, to make it useful on here, I have zoomed in to show the borders between them to provide some sort of comparison.

The PureRAW3 result is very aggressive on noise reduction.  However, I find it can make some odd artifacts in the images where details were not that clear to begin with.  The 75 setting in Lightroom provided a very similar level of noise reduction to PureRAW3.  It is slightly noisier but barely enough to matter.  A setting of 50 does show more noise.  It is still a significant improvement over the basic Camera Raw settings and very usable.

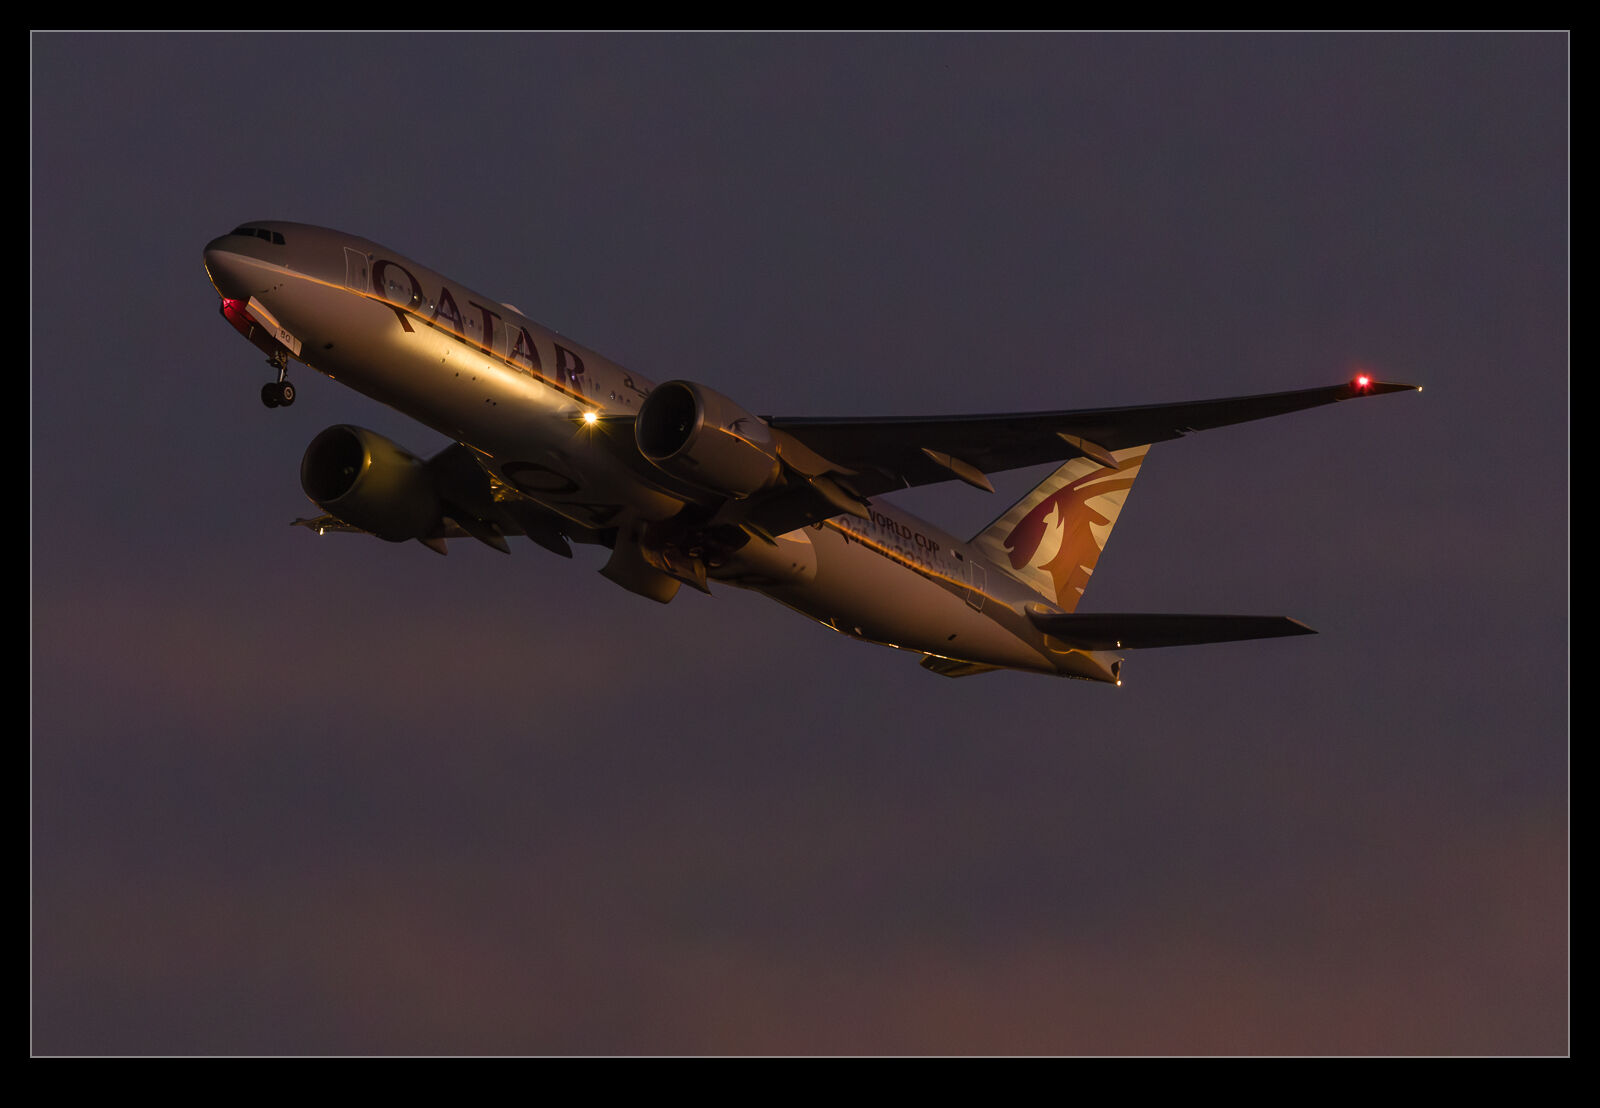
What do I conclude from all of this?  First, as I have said before when testing the PureRAW trials, it provides some interesting results but it is not relevant to enough of my work to matter to me sufficient for me to spend a bunch of money on buying it.  Having denoise in Lightroom now provides me with a very similar option but within the existing price I am paying for Lightroom.  Therefore, I will make use of it when the situation dictates.  It would be a regular part of my workflow because really high ISO shots are only an occasional thing for me but having it there when I want it will be handy.

Experimenting with PureRAW3

This blog includes a very infrequent series of posts reviewing the processing powers of PureRAW.  The third version of this raw image processor has just been released and I downloaded the trial to see how it performs.  I was impressed by what the previous version did to clean up some high ISO shots but the need was limited and the price was high enough that I didn’t see the point in signing up for it.  I was curious as to whether the third version would change my mind.

When I download one of these trials, I always try to avoid installing it until I have time to play with it.  The trial last 30 days so I want to make sure I make good use of the time.  Once I got around to installing it, I put it to work.  I was disappointed to find the trial was limited to 20 images at a time which is a little restrictive but, for the purposes of evaluating it, I could work around this.  I had two things I wanted to do.  First, I wanted to convert some shots that I had previously tried for PureRAW2 to see how different they were.  Second, I had some recent night shots which I also wanted to try.

So, how did it perform?  Results were mixed.  I found the conversion process was quick sometimes and would slow down or stop on others.  This was annoying but I suspect is something that they will fix before too long so I wasn’t that worried.  What I was surprised about was that, when starting the process in Lightroom, the new DNGs will be reimported into Lightroom.  However, this was unbelievably slow.  I would set it off, the conversion would finish and then, a long time later, they would suddenly get added.  Again, something that is probably going to get fixed but bloody annoying in the mean time.

As for the output, I was quite amazed by the results.  I will show here some of the Lightroom edits along with PureRAW2 and PureRAW3 versions of the files.  As you can see, the latest version really does clean up images a lot.  However, I don’t think it is all good.  Some of the shots feel like they have been over sharpened and look too crunchy.  Also, the algorithm seems to get imaginative when it comes to lettering on airframes.  Some of the results have created shapes that just are not there in the original shot.  For some shots, this might not be an issue but, when something is supposed to be recognizable, the odd artifacts show up conspicuously.  If the shot had been soft and noisy, you wouldn’t have worried but, because it is supposed to be clear and sharp, the weird results stand out.

Is it worth it?  Not for me.  I used it on some more normal exposures and couldn’t really see much benefit.  Certainly not enough to make the effort worth it.  For high noise, it does provide some nice results and some odd side effects but, I don’t shoot enough of them to make that really worthwhile.  For now, it shall sit in the interesting but not interesting enough category.  Maybe we shall have the fourth installment of this series when PureRAW4 comes out!

High ISO Shooting and Processing Technique

I watched a video on YouTube about a way to process shots taken in low light with high ISOs to improve the noise performance.  I wasn’t particularly interested in the approach until I was down on the shore as the sun was going down and I was using a long lens.  I figured this might be a good time to try it out.  The approach is to shoot a lot of shots.  You can’t have anything moving in the shots for this to work but, if it is a static scene, the approach can be used.

Shoot as many shots as you can.  Then import them in to Photoshop as layers.  Use the align function to make sure that they are all perfectly aligned and then use the statistics function to do a mean calculation of the image.  You can do this a couple of ways in Photoshop.  You can make a smart object and then process it or you can process through Statistics.  The averaging function takes a lot of the noise out of the shot.  If you have lots of images, you can make it effectively disappear.  I wasn’t prepared to make that many shots but I tried it with a reasonable number of images.  The whole image isn’t really of interest.  Instead, I include one of the images cropped in and the processed image similarly cropped to allow you to compare.

Blue Angels at Oceana (And High ISO)

I have only been to the Oceana show once.  I headed down there with my friends Ben and Simon.  We weren’t terribly lucky with the weather.  There was flying during the show but things were overcast and deteriorated as the show went on.  The finale of the show was, naturally for a big Navy base, the Blue Angels.  I was shooting with a 1D Mk IIN in those days and that was a camera that was not happy at high ISO settings.

The problem was, the light was not good and the ISO needed to be cranked up a bit.  Amusingly, if you were shooting today, the ISO levels would not be anything that caused concern.  Current cameras can shoot at ISO levels without any noise levels that would have been unthinkable back then.  However, I did learn something very important with this shoot.  The shot above is one that I got as one of the solo jets got airborne.  I used it as a test for processing.

I processed two versions of the image, one with a lot of noise reduction dialed in and one with everything zeroed out.  I think combined them in one Photoshop image and used a layer mask to show one version in one half of the image and the other for the second half.  When I viewed the final image on the screen, the noise in one half was awfully apparent.  It was a clear problem.  However, I then printed the image.  When I did so, things were very different.  If you looked closely, you could see a little difference.  However, when you looked from normal viewing distances, there was no obvious difference between the two.

My takeaway from this is that viewing images on screens has really affected our approach to images.  We get very fixated on the finest detail while the image as a whole is something we forget.  We print less and less these days and the screen is a harsh tool for viewing.

How Low Can You Go?

The high ISO capabilities of modern cameras are a constant source of discussion whenever a new camera comes out.  It was quite funny to see everyone get so excited about the multi-million ISO range on the Nikon D5 when it was announced, only to see that the high ranges were nothing more than moose with a bit of an image overlaid on them.  Not a big surprise but still funny to see how much everyone was going nuts about it before the reality set in.

Consequently, I was interested to see what the new bodies I bought were really capable of.  I have already posted a little about some of the shots I took as the light faded at SFO.  I was shooting with a tripod and a gimbal mount to make things easier but I was also working within the ISO range of the camera.  I went with auto ISO and exposure compensation while shooting in aperture priory and wide open to get what I could.  However, I really wanted to see what was possible so I changed to manual mode, exposure compensation and auto ISO to see what could be done.  Auto ISO is not going to use the extended ranges of ISO.

AE7I2701.jpgAE7I2701jpeg.jpgI don’t know about the Nikon cameras but the Canon cameras tend to have three extended range ISO settings at the high end.  There is the highest ISO setting that it recognizes and then there are H1, H2 and H3.  They don’t name them with the actual ISO settings but you know what they are based on what you see on the camera.  The manufacturer does not label them as normal ISO settings because they do not stand behind them as a capability.  There is a good reason for that.  They are just like the highest Nikon settings.  Useful if you have no option but not very good otherwise.

The same was true with my older bodies.  They had a very high ISO range that was not great but it would do in a pinch.  At the Albuquerque Balloon Fiesta I shot an Aero Commander in the pitch black that flew over and I saw stuff in the shot I couldn’t see with the naked eye.  This is with a camera that is ancient by modern standards.  I expected a bit more with the latest generation.  Certainly, there is more to be achieved with what we have now. However, post processing becomes a part of the story.

My first experience with these shots was in Lightroom.  The shots did not look good at all.  However, there was a clue in all of this.  The first view in Lightroom is based on the JPEG that is baked into the raw file.  It looked okay until it was rendering by Adobe at which point it looked a lot worse.  This piqued my interest.  Sure enough, at the extended ISO ranges, the shots looked pretty awful.  Lots of purple backgrounds.  These were not going to be any good.  However, the initial preview had looked good., is this a case of Lightroom not being able to render the shots well?  I figured I should try going to the source.

AE7I2747.jpgAE7I2747jpeg.jpgAt various ISAP symposiums, the Canon guys have talked about how their software is the one that you should use since only Canon know how to decode their shots properly.  They have the recipe for the secret sauce.  Since Digital Photo Professional (DPP), Canon’s own software for decoding raw files, is so terrible to use, I never bother with it.  The raw processing in Lightroom (and ACR since they are the same) is so much easier to use normally and works really well. DPP is just awful in comparison.  However, we are now dealing with the extremes of capabilities of the camera.  The embedded previews seemed better so maybe it is possible that DPP will be able to do a better job.

You can now be the judge.  Here are some pairs of shots.  They are the same shot in each case.  The first is processed in Adobe Lightroom and the second is processed in DPP.  I think it is clear that DPP is better able to work with the raw files when it comes to extreme ISO settings.  The shots certainly have a more normal look to them.  The Lightroom shots look really messed up by comparison.  It doesn’t mean I will be using the extended ISO ranges on a regular basis.  Jumping to DPP for processing is not helpful on a regular basis.  However, if the need arises, I know that I can push the camera a lot further and use DPP to get something that is okay if not great.  This could be handy at some point.

High ISO Raw File Size

On my previous camera bodies I had occasionally shot at very high ISO settings as a result of the lack of light.  I had not paid a huge amount of attention to any secondary effects of doing so.  My current cameras had a work out in some very low light when I decided to test them in some rather unfriendly conditions.  When I was at home, I was running some disc backups and I found I could not get the normal number of files onto a single disc.  A quick bit of investigation and I could see why.  The high ISO shots had a significant increase in file size.  As I understand it, RAW files, while containing all of the data from the sensor, do have an amount of compression applied.  I imagine that the noise inherent in high ISO shots means that the compression is less effective as there is so much variation across pixels.  As an example, a shot at ISO 320 will average at about 22Mb.  The shots at ISO 51,200 are coming in at over 30Mb.  At ISO 204,000, the files can hit 40Mb. That is quite an increase!  Something to keep in mind when planning to shoot in very low light conditions.

Playing with Noise Reduction

One of the biggest developments that there has been in digital imaging in recent years has been the improvement of performance in low light.  A few years ago, it was hard to get a decent image at above ISO400 and much post processing work was required to try and make the images workable.  Plug-ins for noise reduction were very popular.  However, the camera manufacturers have been very aggressive in developing chips and processors that allow shooting at ISO levels that would have been unthinkable a while back.  You hear of cameras being perfectly acceptable at ISO6400 and above.

My cameras are not the newest on the market but there are certainly not slouches in low light.  However, I have never been terribly happy with the performance at high ISO settings with the image breaking up a bit when viewed up close.  This is where I have to admit that I can be a complete idiot sometimes.

I shoot RAW all of the time and then process the images in Lightroom.  I have created some presets of development settings that I apply each time I import an image and which then acts as the starting point for any additional editing.  This is where my problem lies and why it has taken me so long to realize it I can’t imagine.  Anyway, enough of the self-flagellation and on with the topic.

The problem lies in the Detail section of the Develop module.  This is where sharpening and noise reduction are applied.  I have some basic settings I start with here and, when I was importing shots taken at high ISO settings, I was not changing them.  I would play with the noise reduction but things still didn’t look right.  The problem was, of course, the sharpening.  The basic setting I had entered was sharpening far too much for the ISO setting and was causing some odd breakup of the image.  I finally realized this one morning while lying in bed – I have no idea why I was thinking of this but it suddenly came to me.

I got up and opened some high ISO images and went to the detail area.  I zeroed out the sharpening and the noise reduction.  Everything looked awful.  Then I brought back the noise reduction and things suddenly started looking a lot better.  When I was happy with the noise, it was time to bring back some sharpening.  Things were a little soft after the noise was taken out so the sharpening brought back a bit of punch to the image.  A tweak on the amount and opening up the radius a bit made things look good.  Then a more aggressive level of masking of the sharpening and suddenly the image was looking way better than before.

When I was happy with things, I saved a new preset that was just sharpening and noise reduction and labeled it as High ISO Detail.  Now I can apply it to any images that need it and be in a far better starting position for further processing.  Each image will require its own approach if I am going to make more effort on post processing but I will now be starting from a far cleaner place.  The samples above are comparison of approximately 100% crops with my original settings and the revised approach.  Hopefully you can see the difference.  It might be annoying to realize you have been missing something for so long but at least I finally worked it out!

When Does Noise Matter?

I will freely admit I am as much of a gearhead as the next photographer.  New toys always catch my attention and then it is a matter of time before the battle is won between my sensible side or my not very sensible side as to whether I am going to get something.  The price of said item may well have an influence on which side wins that battle.

One thing that is a popular discussion for the pixel peepers is noise.  Having started off with a Canon EOS10D when I first went digital and worked through a number of bodies since – none of which have left my ownership I must confess – I have seen some steady improvement in noise reduction capabilities although not always with as much benefit to the final image as I might have liked but I digress.

A while back I was shooting at the Oceana air show with two of my buddies, Ben and Simon.  We had trekked down from DC for the show and were greeted by less than ideal weather.  The cloud base was solid and low and a bunch of displays didn’t take place.  Some did though and we still had a good day.  Given the heavy cloud, though, we were struggling for light.  I was shooting mainly with the MkIIN and was up at ISO 800 for a lot of the time.

The MkIIN is well into the noisy range at 800 and I knew that was the case but there was little option.  A while after this show, Lightroom 3 came out and it had a lot of noise reduction built in that wasn’t in the previous version.  I took a look at some of the Oceana shots to see how much better they might look.  There was a noticeable improvement and I was happy.

Why am I discussing this now, over a year later?  I was mulling over this topic for some reason, probably related to another acquisition decision, and I wondered how the printed version was affected by this noise.  There are plenty of things that I fret over in an image when looking at it on screen, usually zoomed in far too close, that really don’t become apparent at all when printing.  Is noise one of those things that looks better on paper?

I picked one of the shots from that day to experiment with.  The shot in question is this one of one of the Blue Angels taking off.  Since there was the treeline behind, the gray sky was not an issue and the burner plumes show up nicely given how dark it is so I like the shot.  Now to check it out on a print.

One of the nice features of Lightroom is the ability to mess with the print layouts.  I made a couple of virtual copies of the image and one one of them did my best to optimize the noise reduction and on the other switched it off for the most part.  On screen, it did not look great.  I then set up a page in the print module with two cells right next to each other and put the left side of one image in the left cell and the right side of the other in the right cell.  It looks like a full aircraft if I get the positioning just right.

First I printed it on an 8.5×11 sheet.  If I look closely, I can see the divide.  It actually shows more in the background than on the aircraft.  It is visible but it isn’t as noticeable as you might expect.  This had got my interest!  What about the size of the print.  I repeated the layout on some Super B (13×19) paper of the same type and printed it again.

As you might expect, this time is is a little more noticeable – hey, it’s twice the size!  However, even now, while it isn’t great, it really isn’t that bad.  We are talking about turning the NR almost off.

So, what do I conclude from this?  Well, technology is going to always get better, both in camera and on the computer processing it and I am still going to be a sucker for a new piece of kit.  However, while there is a noticeable noise difference on screen, the print is really a lot more forgiving.  Maybe I should relax about it a lot more and just enjoy the shooting, even when the light is limited.