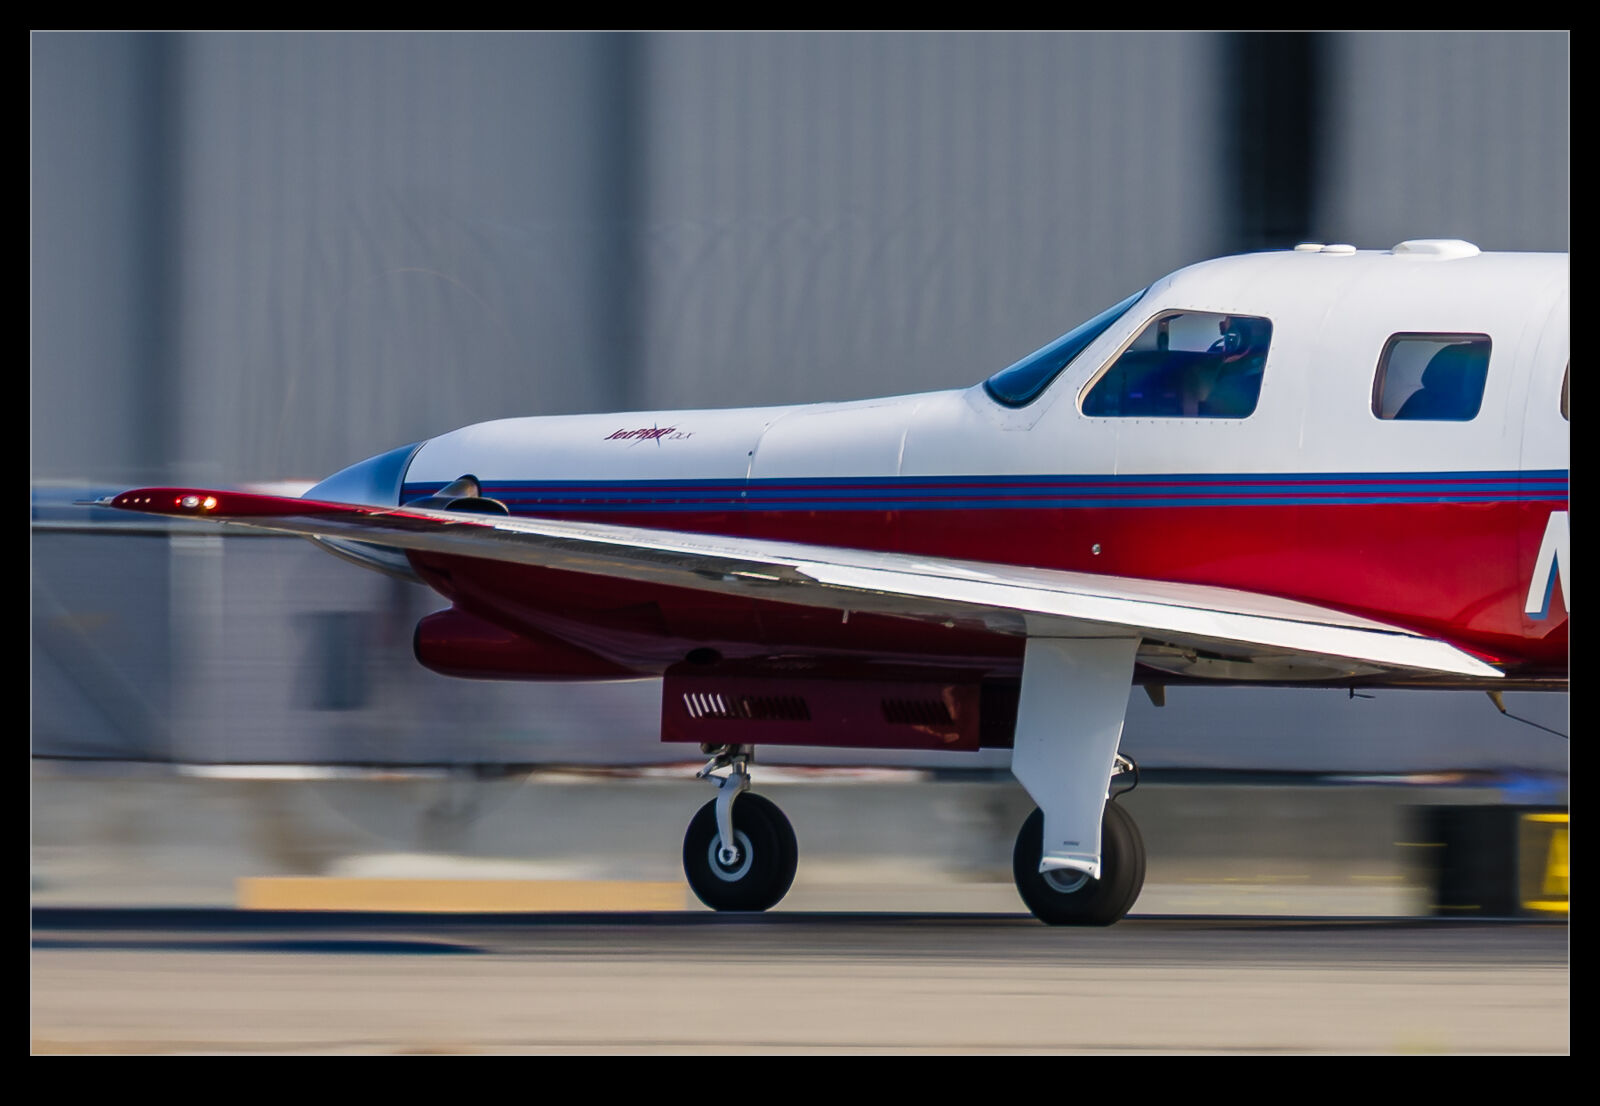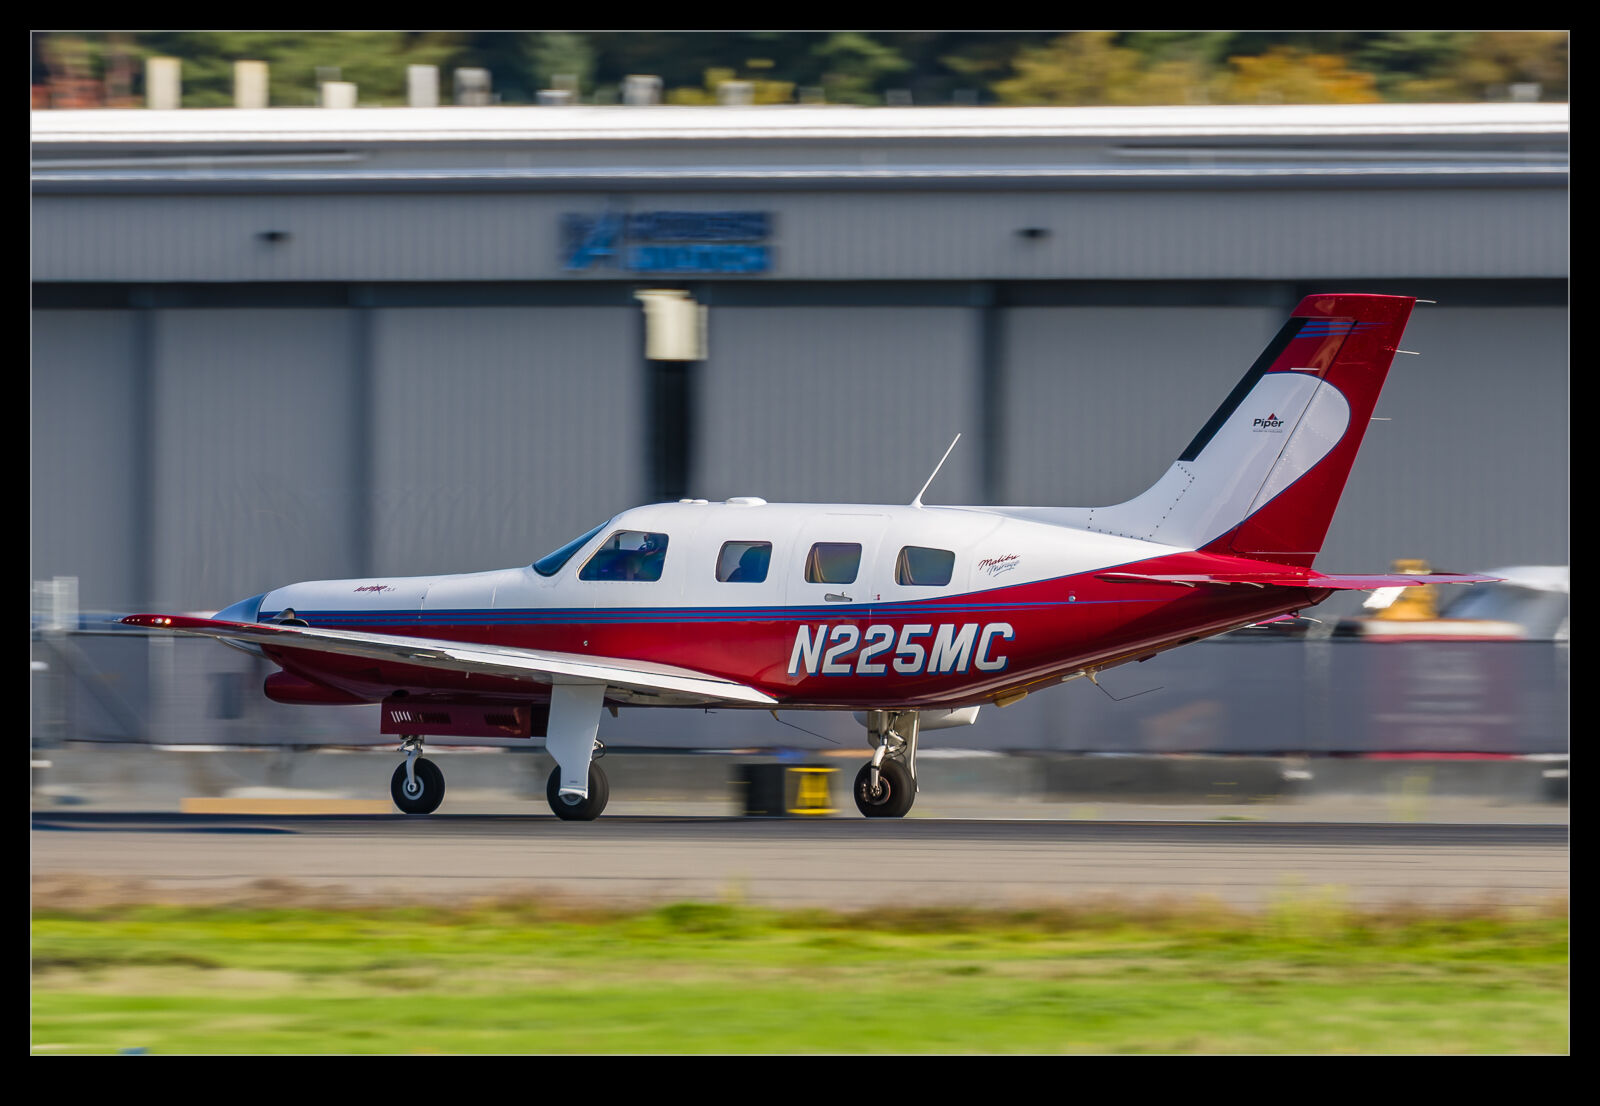
The aerodynamicist in me gets a little happy when I see shots that have the visible effects of the flow fields around a plane. Shock waves will be the most obvious example, but a trailing vortex can also cause some interesting refraction. The propeller produces a strong vortex from each blade and every once in a while, you can get a shot where the background provides enough of a pattern to allow the prop vortices to show up. I was reviewing some shots from Boeing Field of a Malibu Mirage with the PropJet turboprop conversion when I saw exactly this. Head on it can show quite well but getting it from more of a side on position was a nice surprise. Thankfully, the hangar doors in the background have vertical corrugations and this allows the flow to be seen in both directions due to the upward and downward moving blades.
Category Archives: technique
Messing Up the F-35B Departure
Since I switched to my R3 bodies, I have been playing a lot more with low shutter speeds to emphasise speed in images. This has been a topic in multiple posts on the blog in recent years. However, it doesn’t always work out well. I know that the keeper rate will fall when shooting fast moving objects at low shutter speeds, but you hope/expect that you’ll get something worthwhile from the ones you take.
However, that doesn’t always happen. During Seafair last year, the US Marine Corps F-35B departed Boeing Field for its display. I decided to go low with the shutter speed from my location up on the tower with the aim of having the airfield background blurring out and leaving me with the plane as the dominant element in the shot with little distraction. However, when I came to go through the sequence of shots that I took, I had some sharp ones as it approached me and as it flew away but nothing that really pleased me as it was closest and alongside me.
Some of them weren’t terrible but it was a huge disappointment as I clicked through the images and came to the realisation that I had blown it. You can’t always get lucky, and I knew what I was doing so I can’t be totally surprised that it didn’t work out, but it was still a bit galling. Does this mean I won’t do it again? No. Getting the record shot is fine, but I am more bothered about having a shot I really like these days. Might as well give it a go!
Reflection Removing – Choose Settings Wisely
A previous post had looked at what was, at that time, a development feature in Photoshop that removed reflections from images. Adobe puts development items in Photoshop first to get user experience with them before rolling them out to the software suite. Since Camera Raw and Lightroom’s develop module are basically the same, once it becomes a production item, it also makes it into Lightroom. Such is the case with the reflection removal tool.
I have used it a few times on shots, and it does work pretty well. It isn’t perfect but can be effective. I tried it out on a Typhoon that was refuelling from a Voyager. Shooting through the windows of the Voyager can be a bit tricky and the reflection removal tool can really help. I gave it a go, and the reflection was swiftly taken out. However, when I checked the rest of the image, I saw that a lot of detail in the shot was gone. It was at this point that I realised that the tool has three settings. I was on Preview. I switched to Best and, while the processing took a lot longer, lo and behold the detail was restored.
I have the overall photo above with the before and after versions for a comparison. Beneath I have two crops of the larger image with the Preview and Best settings. I won’t say which is which, but I think it should be pretty obvious. The tool defaults to Preview when you use it so, if you give it a try, don’t be put off if the initial results are disappointing. Make sure to experiment with the settings.
What a Difference the Angle Makes
I shared some shots from a brief visit I made to Feltham to get some airliner departures from Heathrow when they were on an easterly flow. Some of the planes turn to the south shortly after takeoff giving you a view that is not quite a topside but is close to it. When photographing them, you are naturally shooting them at an angle as they are climbing quite steeply. However, if you want to play around with the shot afterwards, you can change the impression of the shot quite a lot. Rotate the fuselage until it appears horizontal in the shot and now it looks a lot more like you are flying alongside the aircraft. This is cheaper than sorting out and air to air sortie! Here are a couple of before and after shots to show what I mean.
Recovering a Fence Shot
In an earlier post, I had shared some images of and A340-600 operated by European Cargo that I saw at Bournemouth. What I didn’t include in that post was any images close to the rotation point, despite me having been well positioned for that. When I say well positioned, I omit one key element which is that there was a fence between me and the plane, and I wasn’t able to photograph above the fence. Shooting through it was the only option.
I tried a couple of things to mitigate the issue with the fence. First, I was as close to it as possible to take the fence wires as far out of focus as possible. I was also shooting wide open – again to try and throw the wires out of focus. The last thing I tried was to go with a low shutter speed to smear the wires as I panned. With this combination, I was hopeful that I wouldn’t really have the wires in the shots. I was wrong.
When I took a look at the shots, the fence was very obvious. I did start to wonder whether it would have been better to have the wires well defined as maybe that would be easier to remove. However, too late for that as the shots were done. Now to see if there was anything I could do to recover them to something usable (and by usable, I mean that might be shareable but nothing that was going to be a great publishable image).
I tried some of the healing tools in Lightroom to see if that would work. I was getting nowhere fast – possibly a sign of how little I understand the capabilities of the tools or maybe they are just not the right thing. Then I decided to try something else. Because of the way I had shot the image, none of the airframe was obscured. There was just the grey overlay from the fence. That made me think that it was more like a darker area of the shot. I decided to use the brush tool in the masking panel and draw some lines that were heavily feathered across the lines that the fence wire created. Having made a grid of these, I then bumped up the exposure for the mask.
The result was surprisingly effective. However, I then ended up with some overly bright areas at the edge of the mask. A rework of the mask to change the size and the feather amount and this time the result was pretty good. There were a few areas that were still a touch dark and I used a large, soft brush to address those parts. If you know what the original image looked like, you will probably spot the remnants of the work. If you had never known before, it’s possible that you might not notice how much work had been done on this.
Time Lapse into National
This is some older footage I took a while back when I was making a work trip to DC. I have done a bunch of these over the years. The phone allows you to get a good time lapse video (or I should say hyperlapse since it is a bit different) of the approach to landing. The countryside zips by in this type of video and you get the rapid changes in aircraft configuration along with the taxi in and shut down at the end of the flight. For those of you familiar with the northern Virginia area, you might well recognise some places. I did the same on the return leg into SEA as the day was ending.
Inside the Spacious Vulcan Cockpit
I remember reading a piece about the cockpit of the Vulcan a long time ago that focused on just how cramped a space it was. The B-52 cockpit was a spacious place while the Vulcan was incredibly tight and had very limited glazing. Despite this, the jet was flown at low level and would be thrown around at air shows.
The two pilots up front are sitting on ejection seats while the three crew behind them are not so, if things go south (and they did sometimes), those three were out of luck. However, until I went to the Bournemouth Aviation Museum, I had never been in to the cockpit in person. They have the cockpit section of a Vulcan that looks out over the approach road to the museum. You can climb the ladder into the cockpit and stand right behind the two ejection seats. It is unbelievably cramped in there. Looking back at the three fixed seats, I was struck by how claustrophobic it could feel and wondered what manoeuvring in the jet would feel like back there. Might be a touch nauseating!
Comparison of a Couple of Edits
Every once in a while, while I am searching for something specific in the Lightroom catalog, I will come across a previous shot that catches my eye for some reason. This might be because it was something interesting, something I had forgotten about or just something that I think might benefit from a re-edit. Sometimes I have changed the way in which I approach edits and in others there is a new tool that has been added which I think will benefit the edit. This image was exactly that. I thought that the masking tools now in Lightroom would make for a more flexible approach to balancing the different parts of the image. I played around with it for a while. Because Lightroom allows you endless virtual copies, you can try something new out without having to lose what was there before. I then created a combination of the two edits to show how differently the same raw file can end up.
Longer Angle on Alfred
There is a statue of King Alfred in the centre of Winchester. When we had previously visited, I had taken some shots of it. However, because it is quite high up, you got a distorted look at him with the sky behind. I figured I would try a longer lens shot from further away to get a more normal look at the statue and have a darker background with the hill behind. This was the result!
Taking Out Reflections – Photoshop Experimental Features
I have been using Lightroom since the initial version was released. It used to be quite a simple application and anything complex was undertaken in Photoshop. As Lightroom has got more and more capable, the number of times I go into Photoshop has reduced. What I didn’t realize until recently was that Adobe uses Photoshop as the proving ground for some of the features that will ultimately make their way into Lightroom. I thought that Camera Raw and Lightroom’s Develop module were identical and they almost are. However, not quite.
In Photoshop, they have a check box to allow you try experimental features. I found out about this related to a feature designed to remove reflections. Anyone who has taken a photo through a window will know that you can get reflections off the glass of things your side of the window and these can ruin an otherwise usable image. (Photographing through a window is not a great option but sometimes it is all you have to work with.)
This feature analyses the image to see what it thinks might be artifacts from inside the window and allows you to remove them. Interestingly, the slider that comes with it can be moved either way. You can fully remove the reflection or can fully remove the rest of the image and leave only the reflection. This can be rather fun to play around with.
I was interested in what this would do for some shots I had got while inside the airport at Narita a few years ago. It was a dark and rainy day and I did try to avoid reflections but was not always successful. Some of the shots I liked most from an action point of view were the ones with light from inside intruding into the shot. These were the ones I worked with. You can judge the results. As I have the before and after versions here. It isn’t perfect but it does work rather well for an experimental feature. I hope it gets productionised soon and finds its way into the Lightroom Develop module too.