Washington State Ferries have opened their first new terminal in 40 years. Calling it a new terminal is a bit deceptive – it is a replacement for an existing terminal – but it is definitely a new place for the ferries to come in. It is the new Mukilteo terminal and it is located about a third of a mile from the previous terminal. That one was right at the end of Mukilteo Speedway next to the lighthouse. The new location is east along the shore near the old Air Force tank farm location.
 The construction has been underway for a while and the switch over happened on December 29, 2020. The ferries didn’t run for much of that day as they moved some key equipment across from the old location. Additionally, the crews took the opportunity to get practice with berthing in the new facility. The transition was done ahead of the holiday to make sure that the surge in traffic over New Year wasn’t affected.
 I took a walk along the shore on two days later to see what it all looked like. The weather was hardly delightful but it was December in the Pacific Northwest so no great shock there. Additionally, not everything was complete. The main facilities are open but they have yet to install the passenger footbridge. That will go in around February/March time. For now, passenger walk across the road access (not while cars are there, of course!).
 That also means some of the construction equipment is still in place. A large floating crane is still there and will be, I assume, until the footbridge is completed. They are also tidying up some of the other elements but they should be done pretty soon.
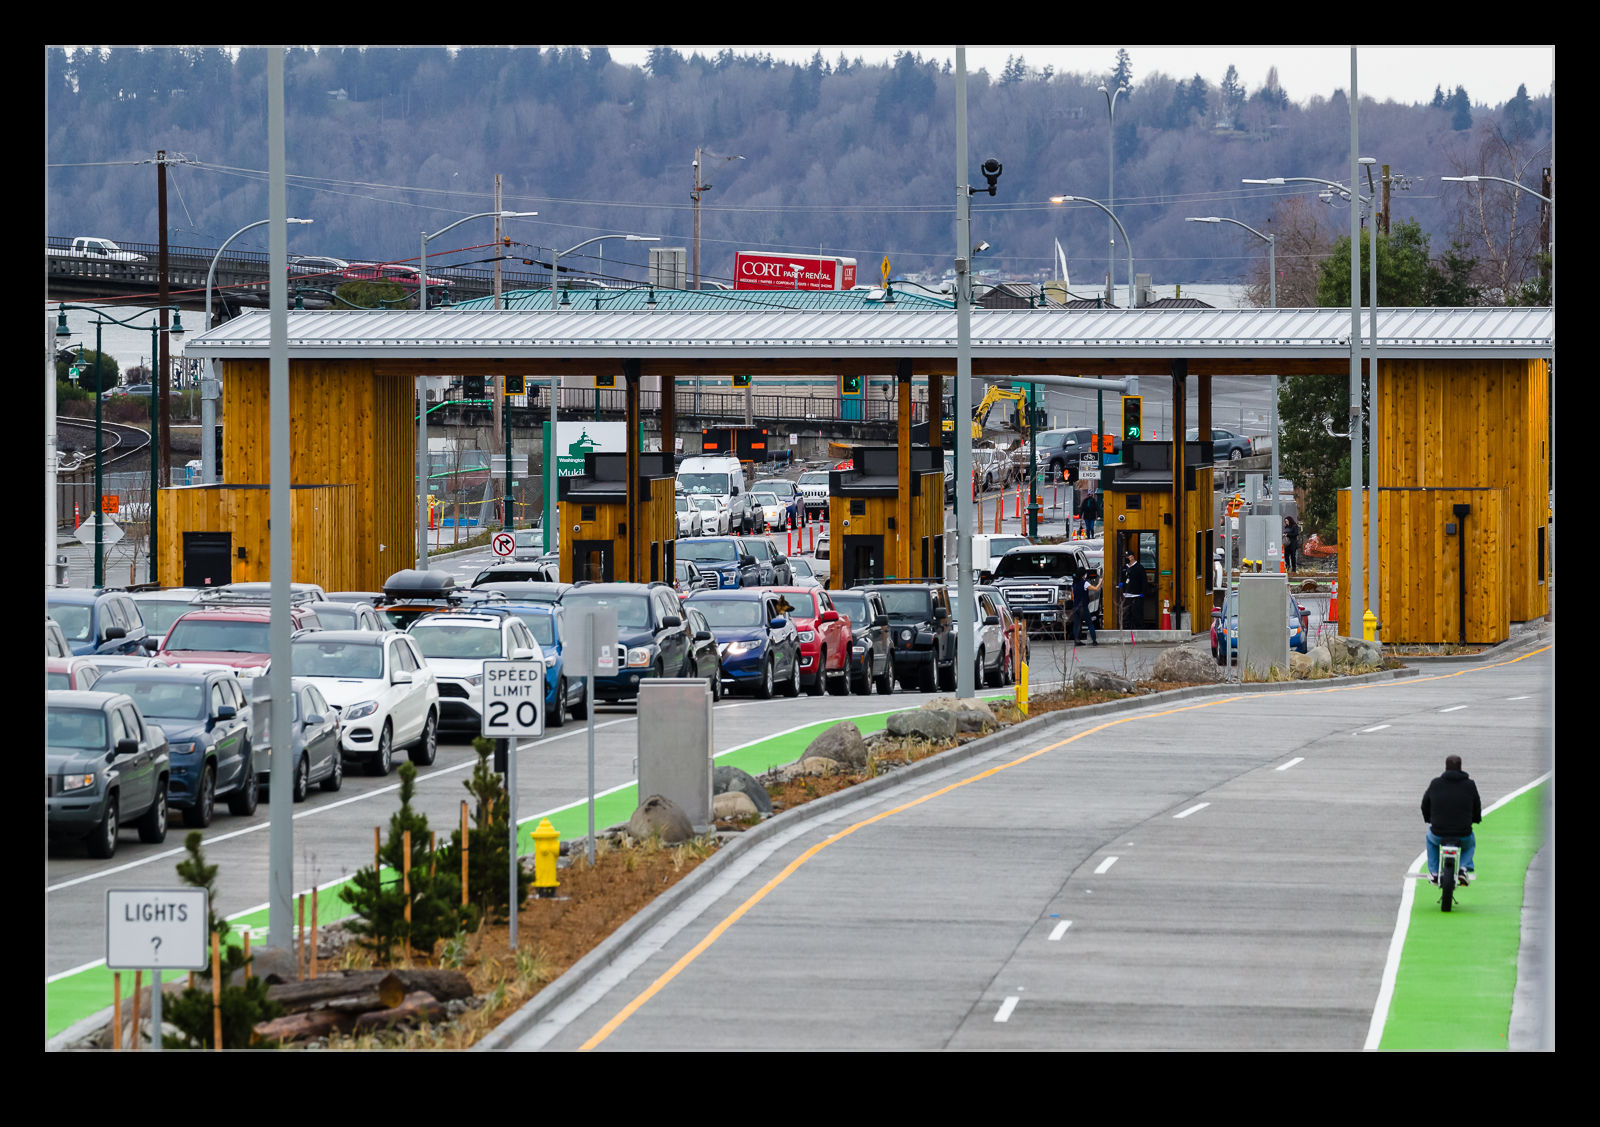
 There is a new toll plaza on the entrance to the holding lots. I didn’t go up to take a look at that but I did get some photos from a distance. The demand for service was really high on this day with everyone heading home for their New Year celebrations. Despite the large holding lanes, it was full and traffic was waiting beyond the plaza and up the hill.
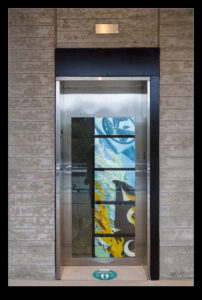
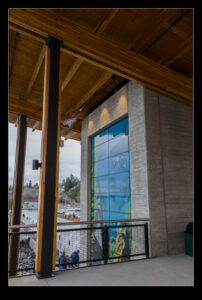
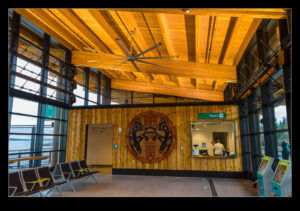
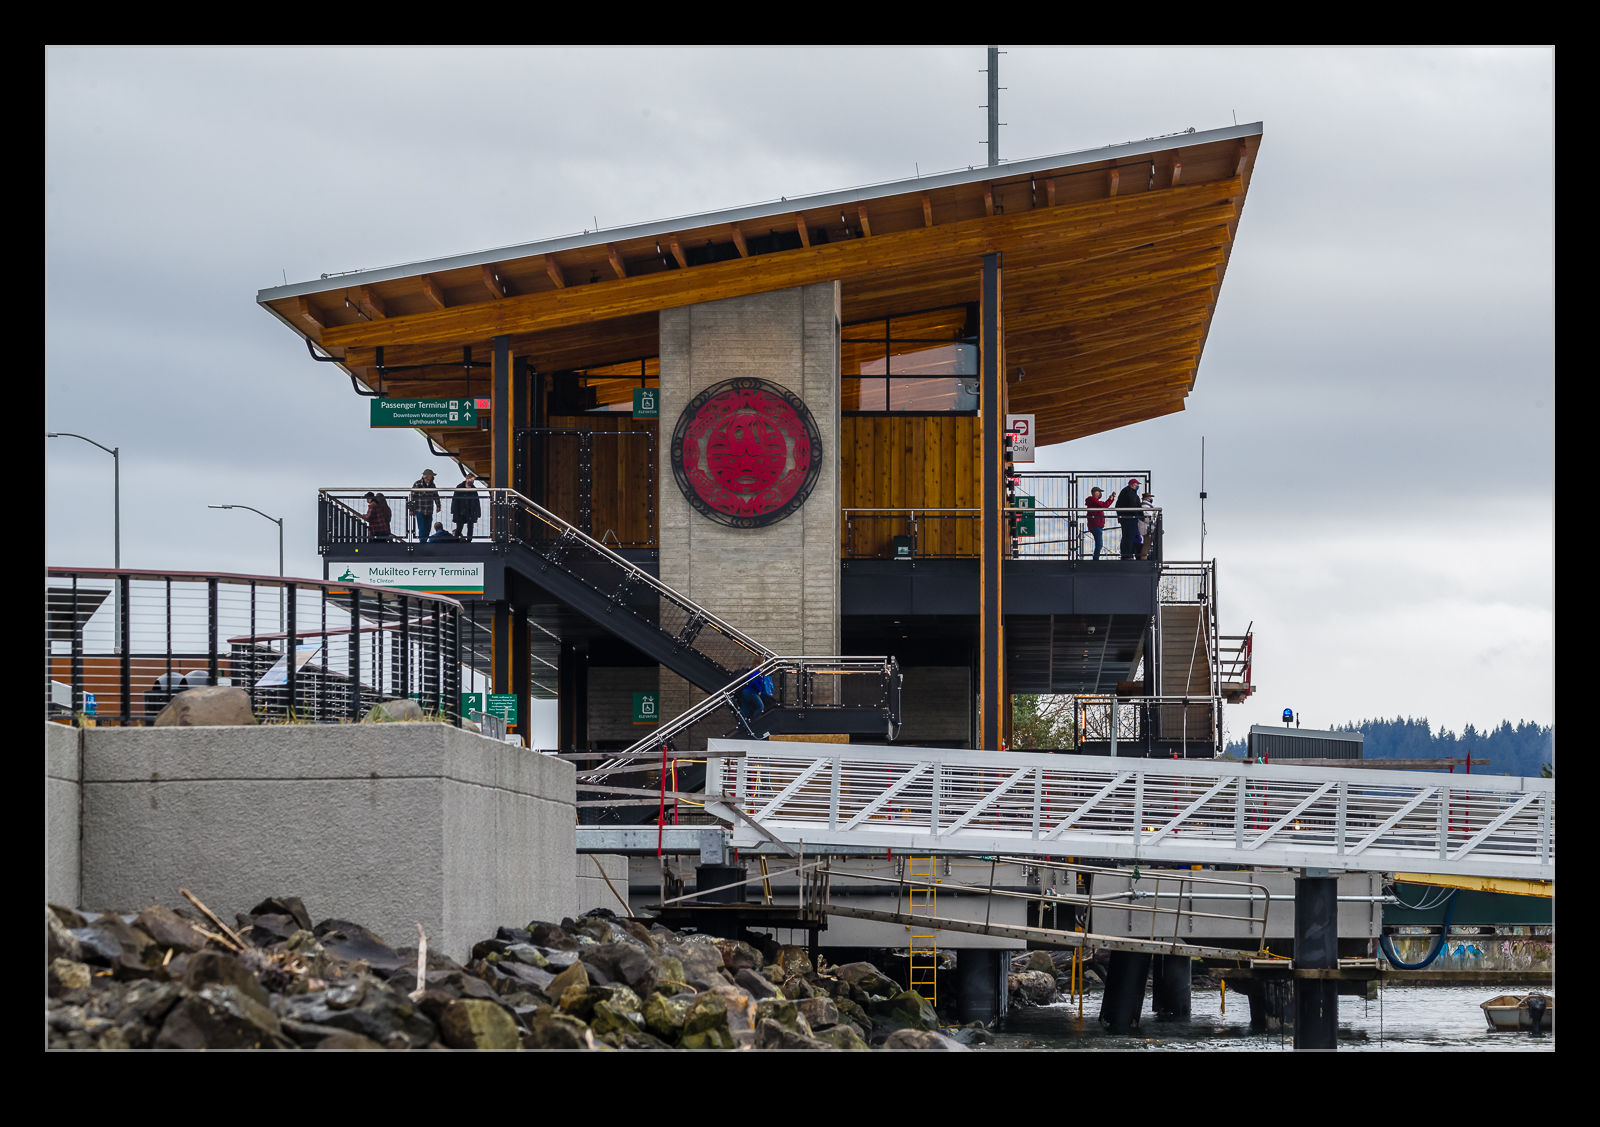
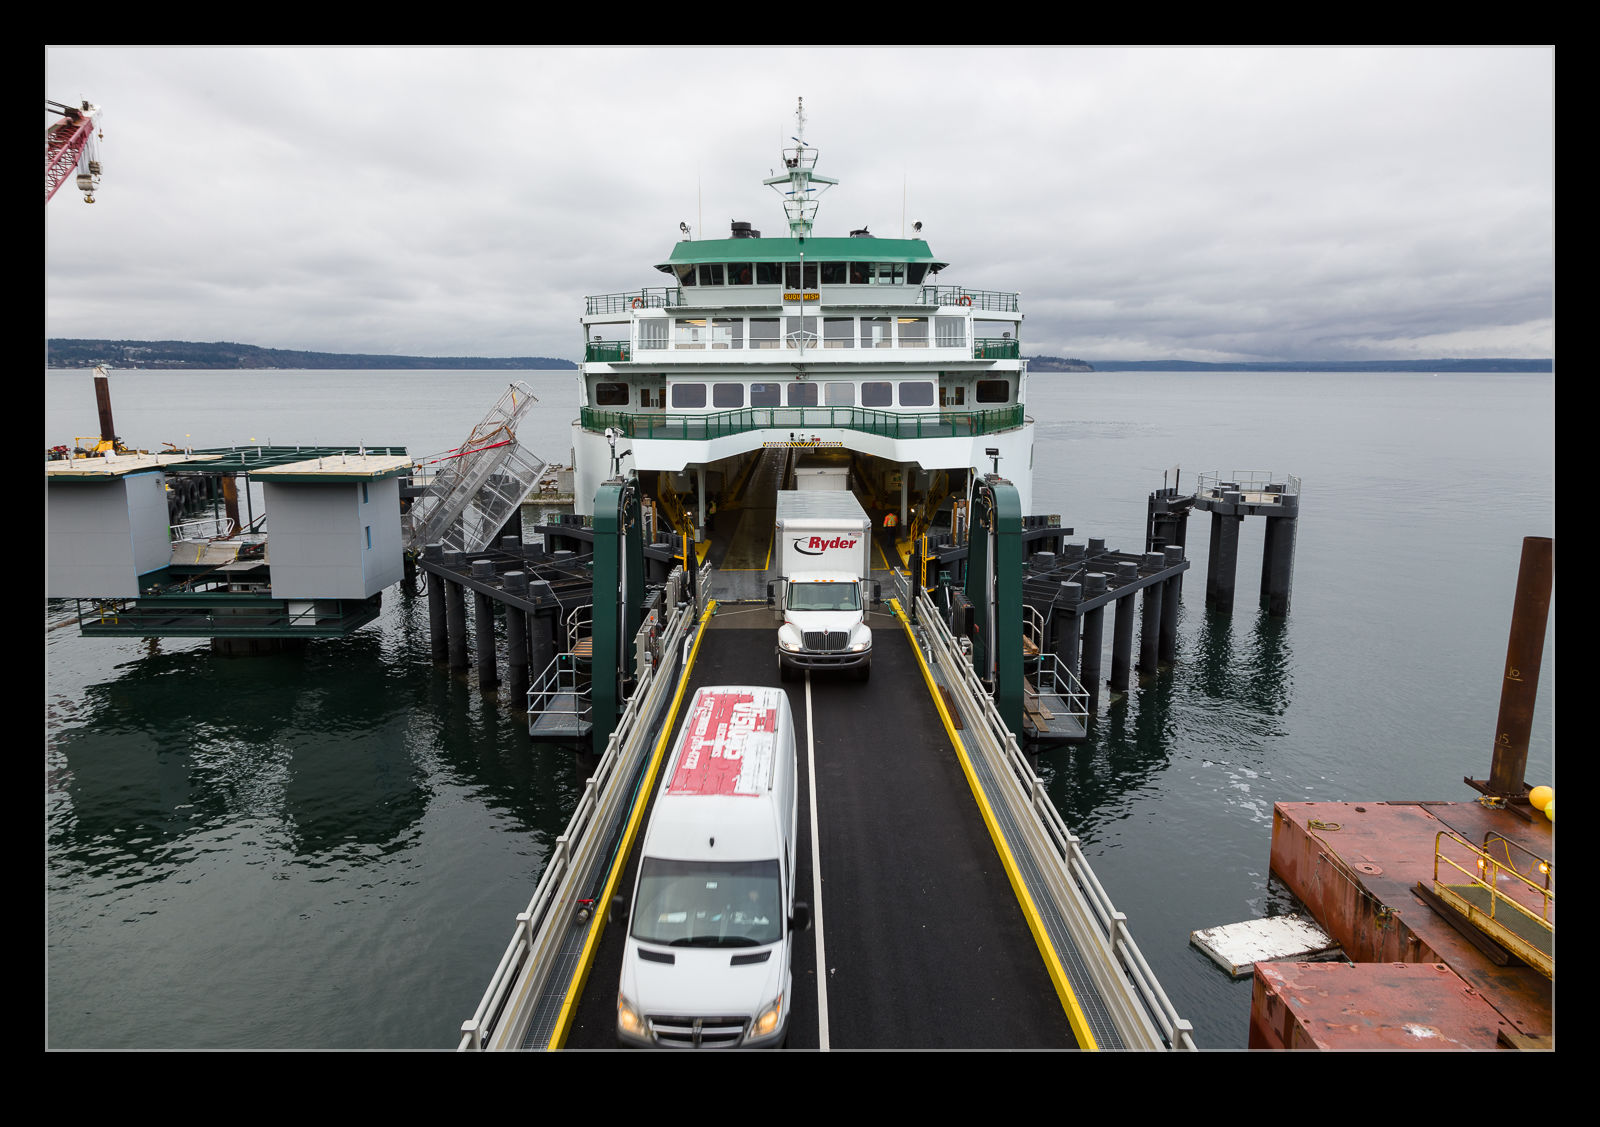
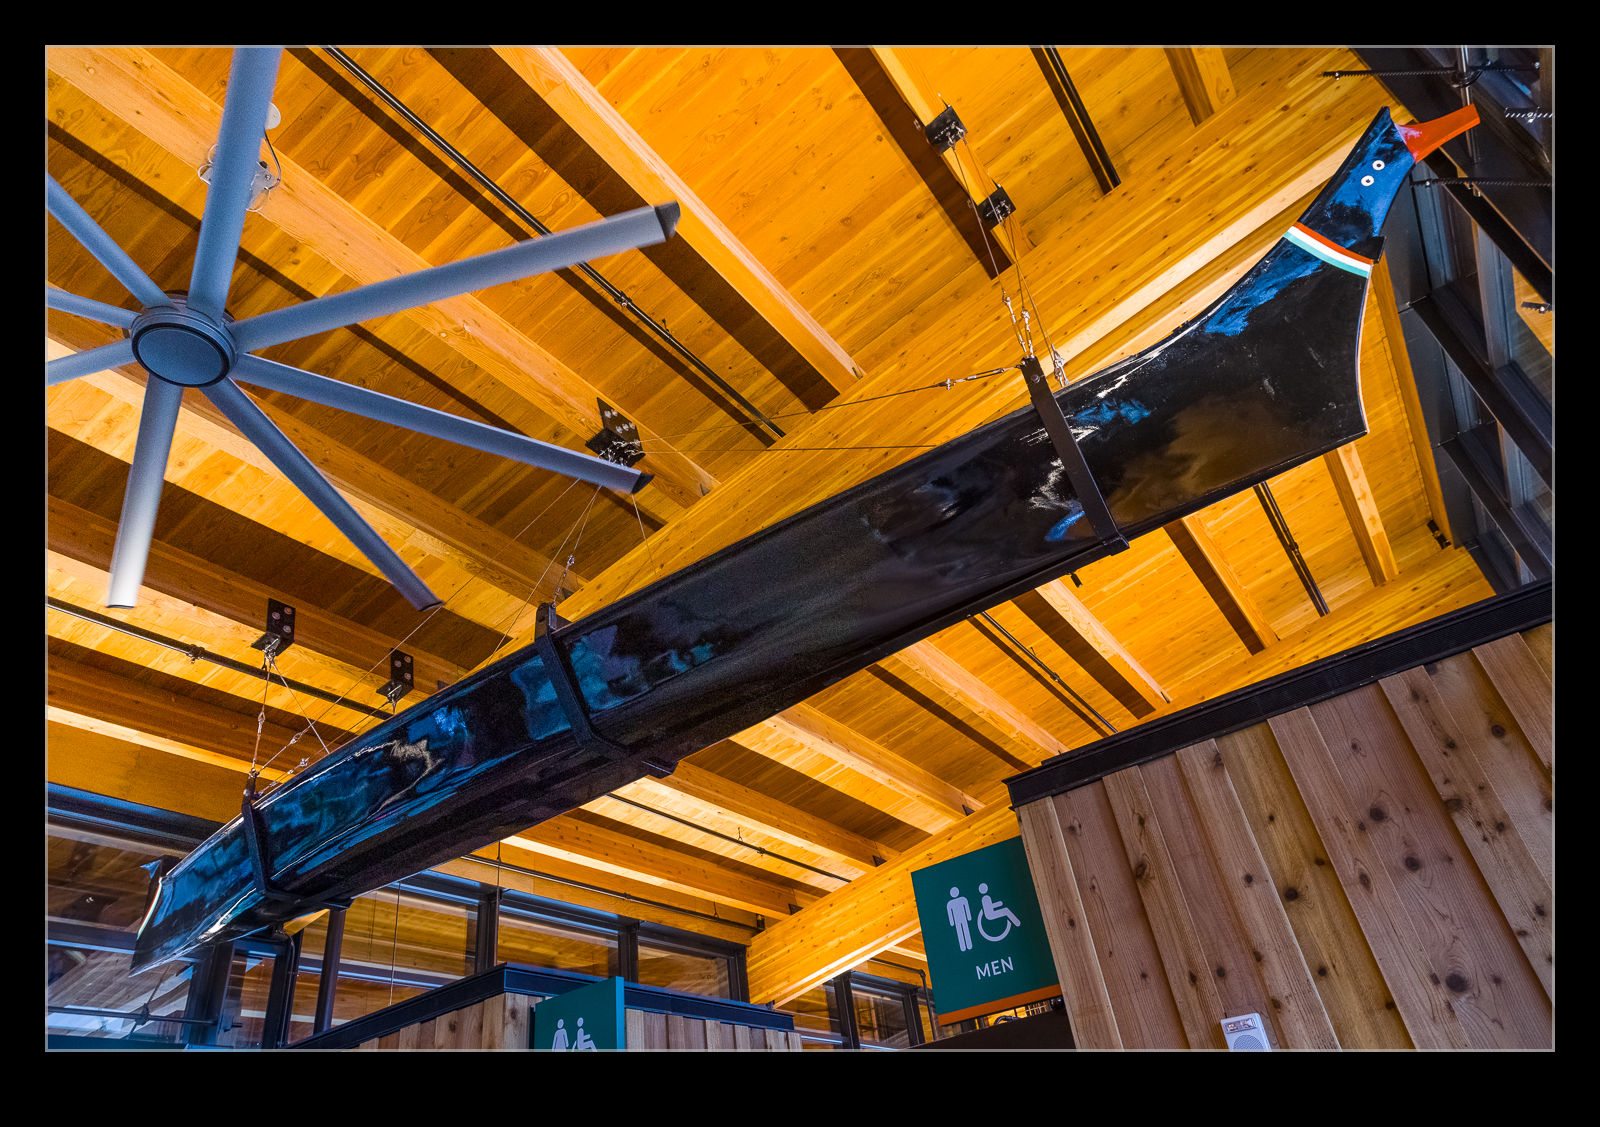
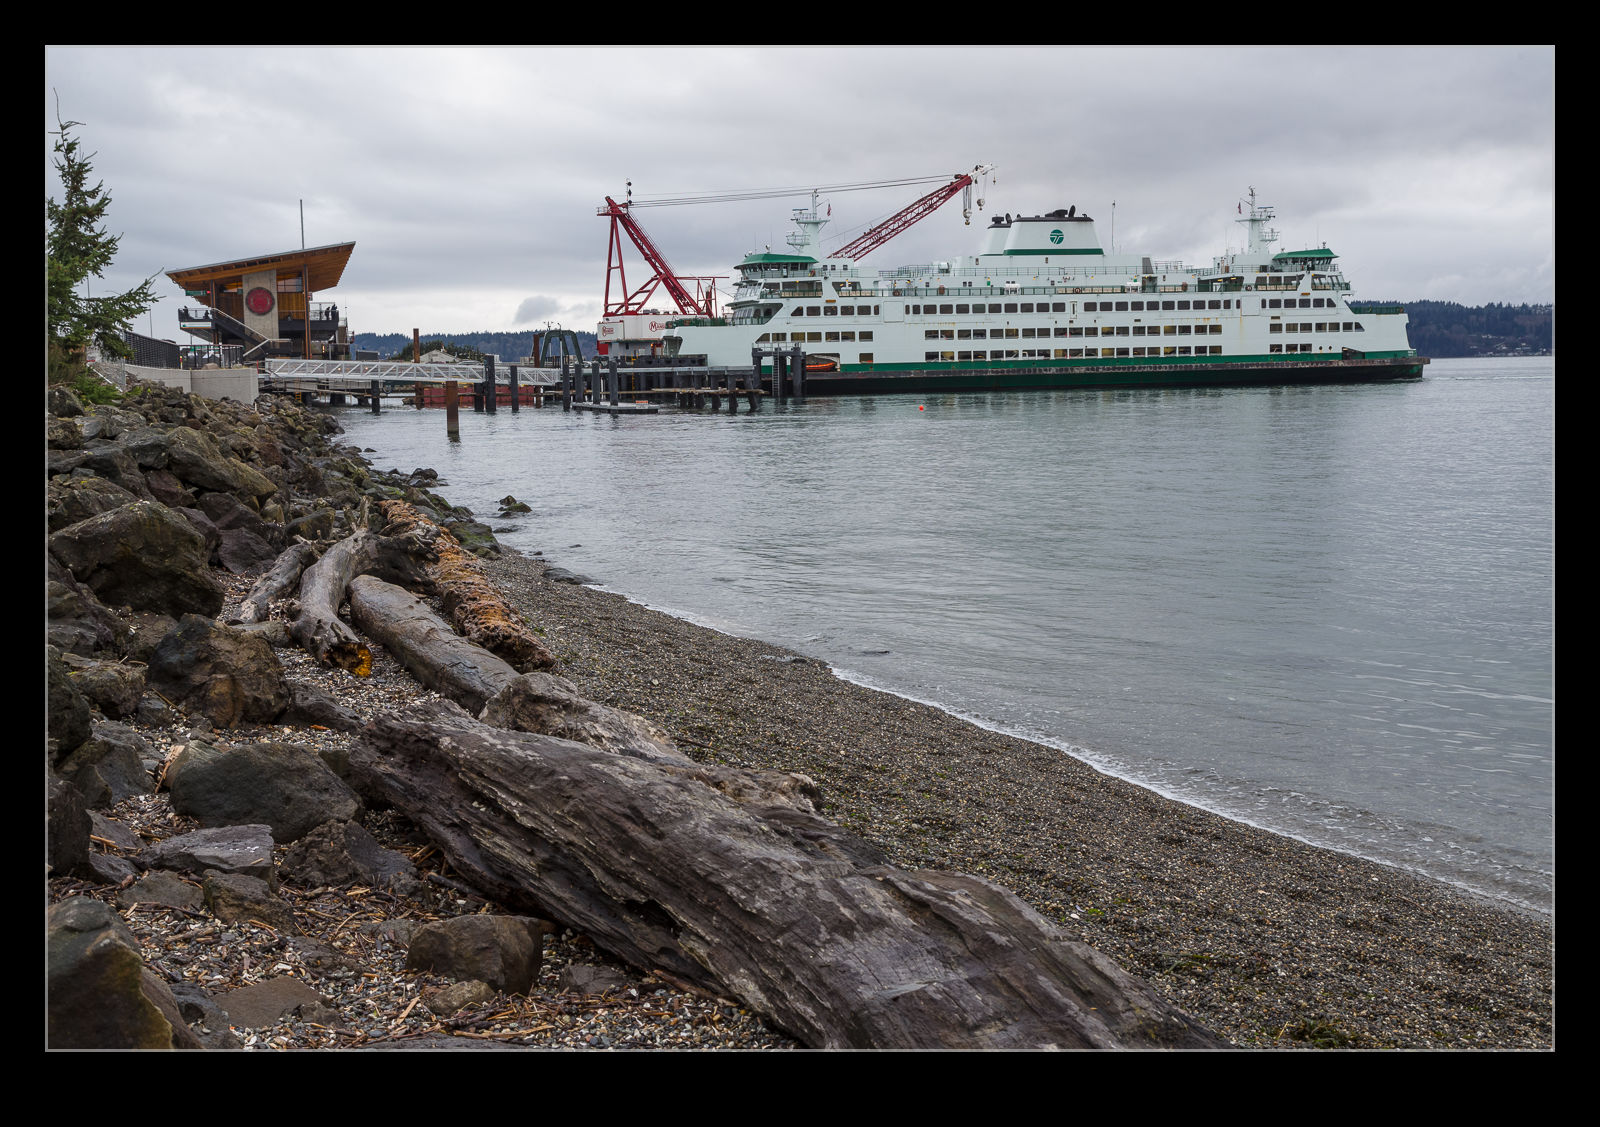 The main building is a really elegant structure. Lots of wood construction and styled on a native long house, it contains an information center, a ticket office and some other facilities. There is lots of native art decorating it both inside and out including a cool boat hanging from the roof. The building is elevated over the road access. The ramp for loading comes straight in to the shore and leads directly under the building. It means you have a nice elevated view of the boats as the come and go.
 There is a waterfront trail that runs from up near the lighthouse to a park further to the east so you can walk along the shore to see the facilities and watch the boats. Near the terminal, there are many information boards giving some history of the region and these are quite educational. On a sunnier day, I can imagine there will be plenty of people enjoying this part of the shoreline and checking out the ferry traffic.
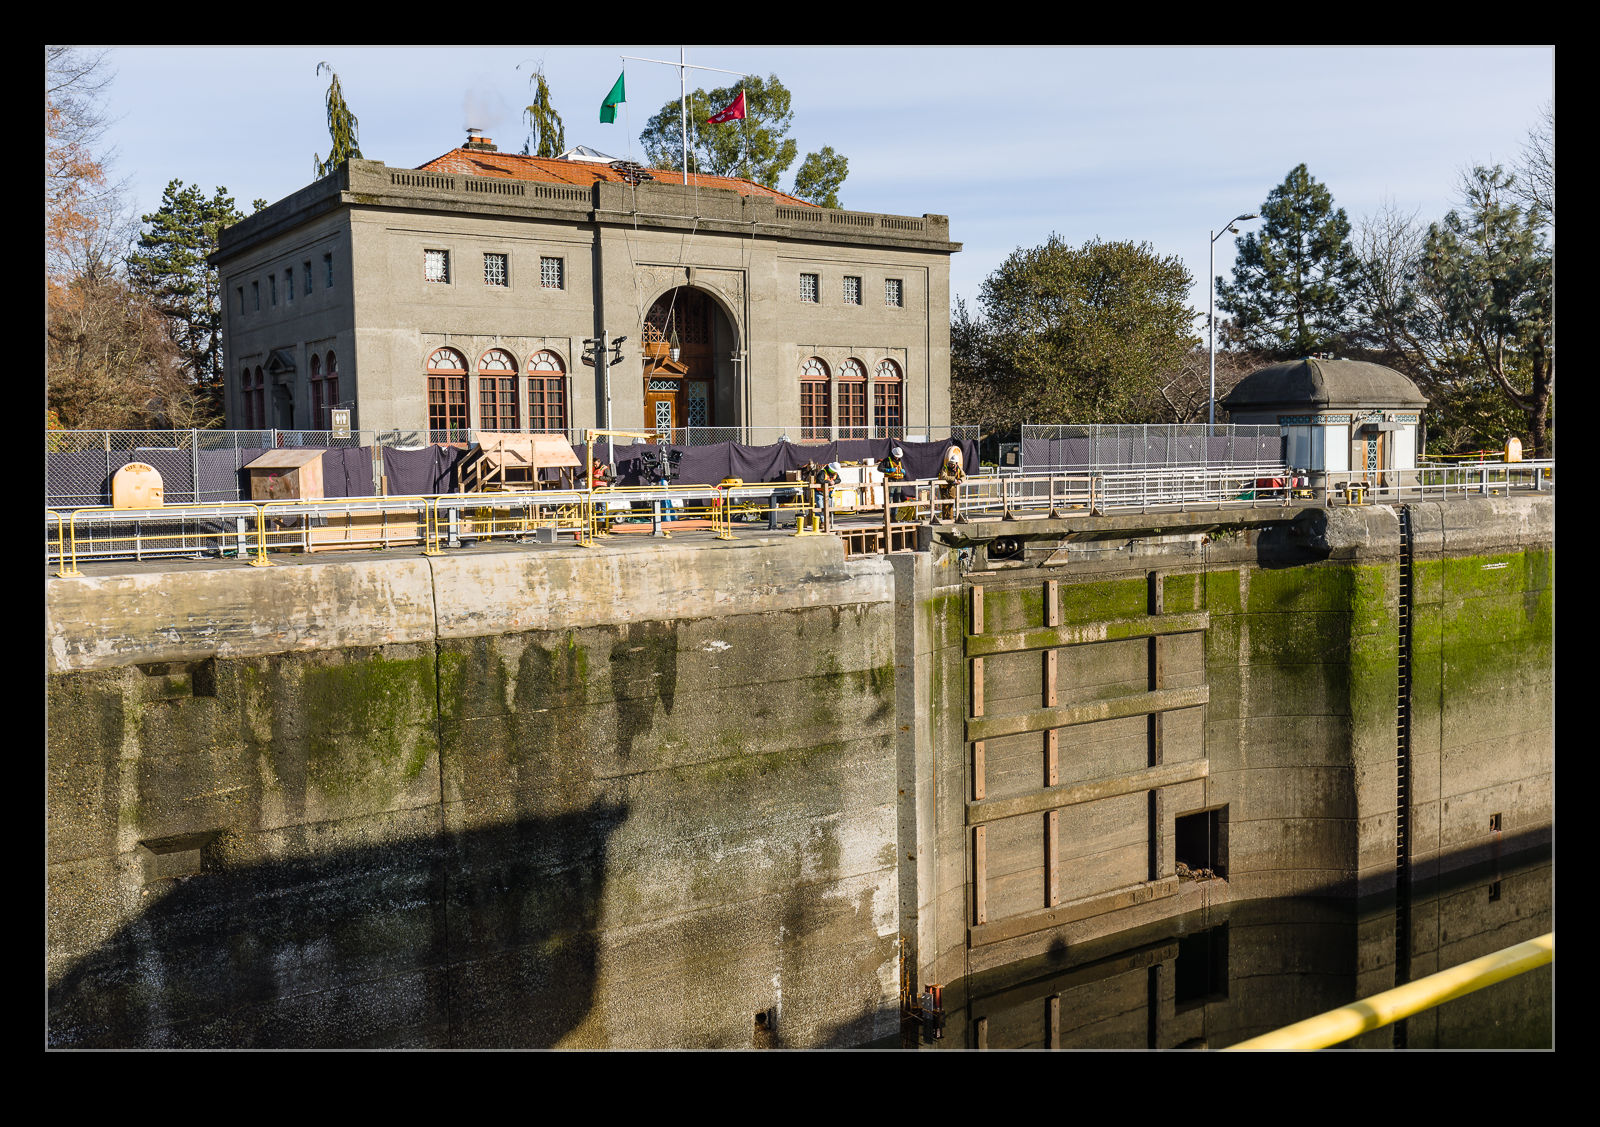
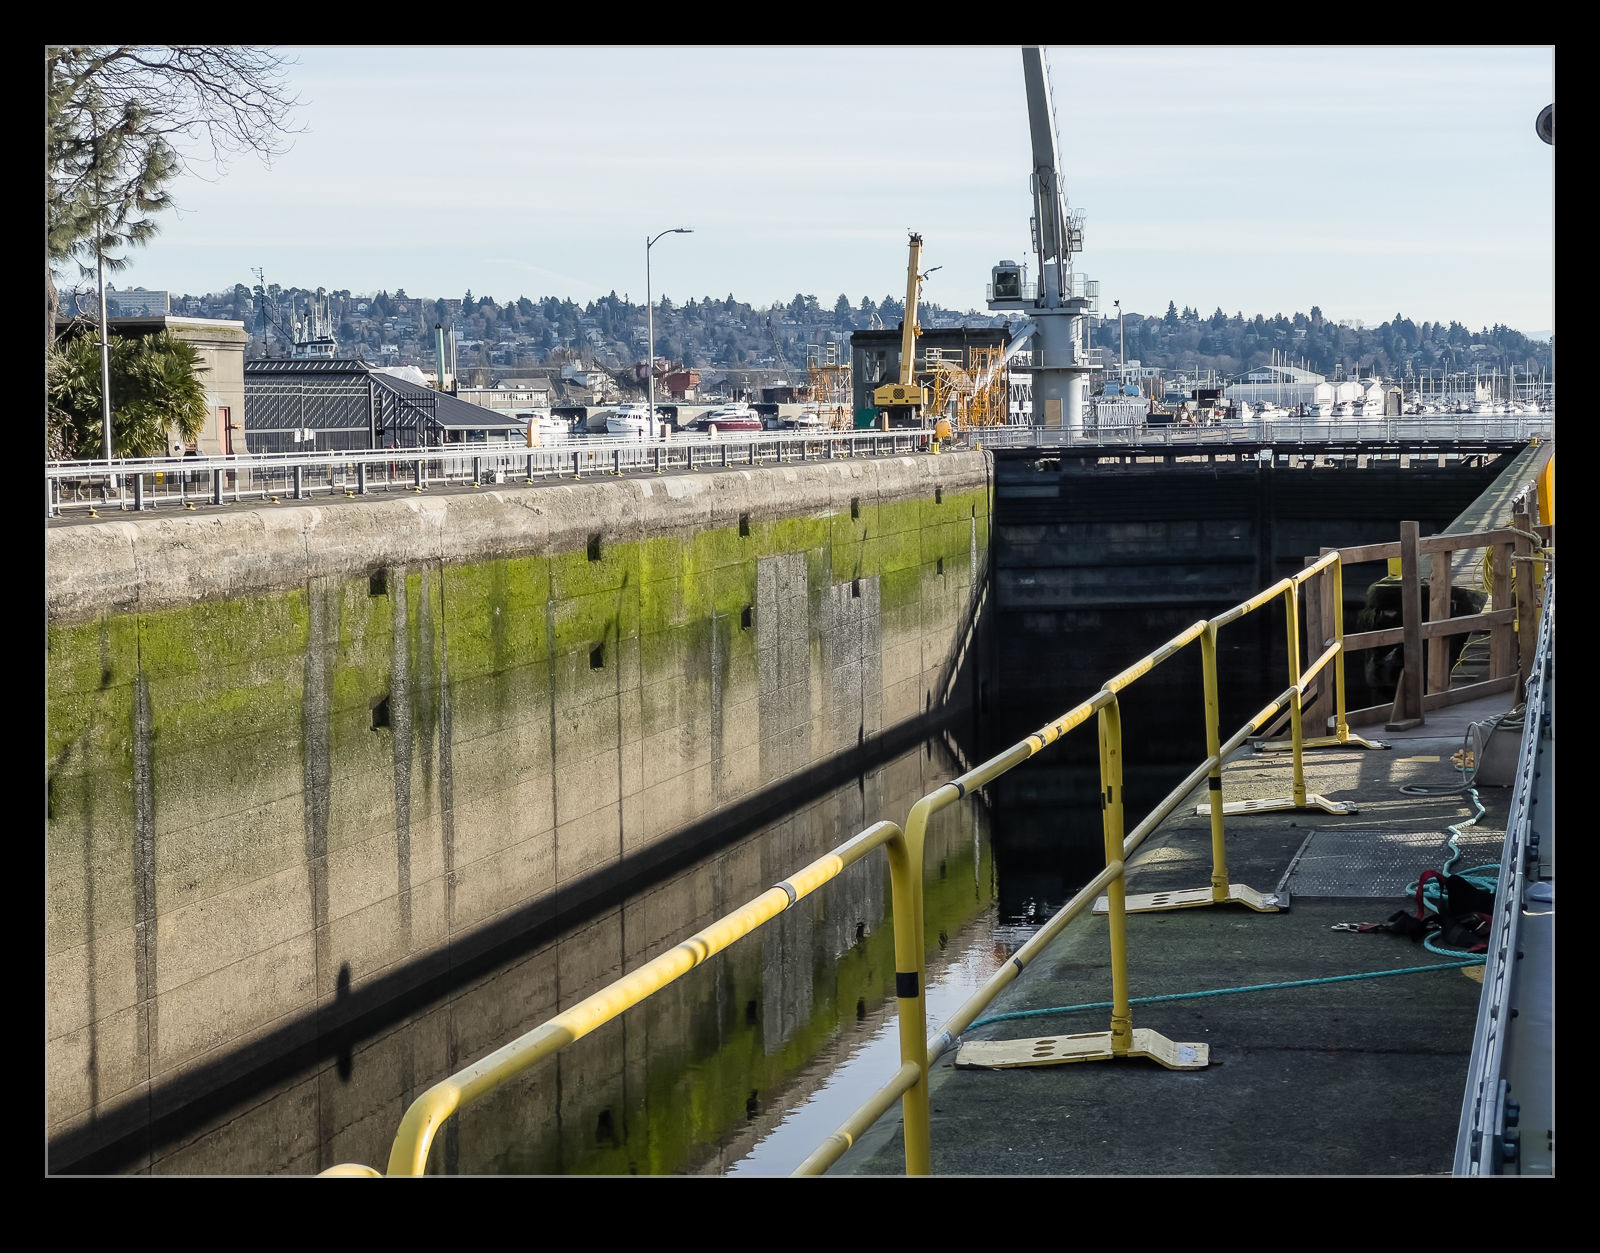 The gates on the locks in Ballard are getting old and they are due for replacement. I had seen that they had drained the locks to start this process and went down to have a look. However, they had finished the first phase of work and reopened the locks to traffic, so they were full again. I was pretty disappointed but was told that there were more phases to come so I headed back at the beginning of the second phase. They weren’t fully drained but most of the water was gone. You could see the portals where the water flows when the locks are in use.
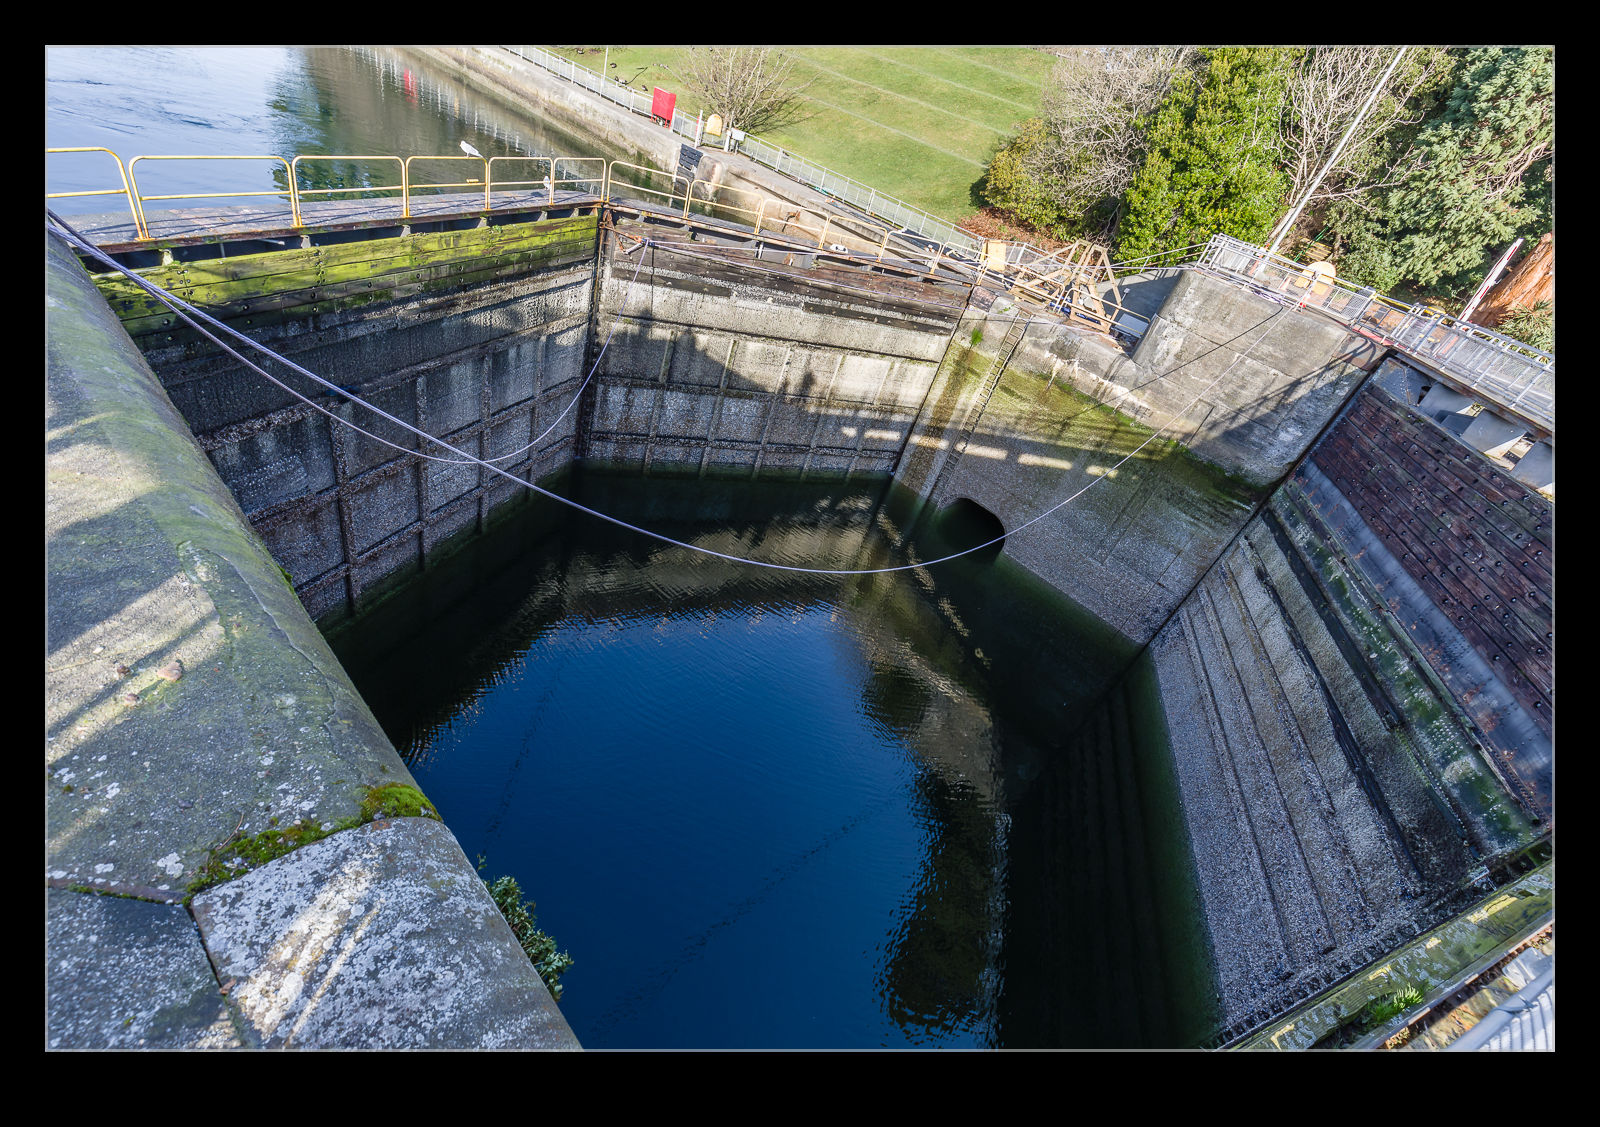 There are gates outside the normal gates which can be used to close off the water when the main gates need work done. These were closed off. The main gates are not the initial focus. The intermediate gate is the first one to be replaced and it was already gone when I was there. There will be more chances to check this out so I shall go back at some point.