 Get to the run up to Christmas and, if you have a heritage railway near you, there is a good chance they will be advertising that they have illuminated trains in operation. The trains will have lights all across the outside and probably within the carriages too. I’m sure they are fun to ride on but, from my point of view, seeing the outside lights is more appealing than being inside.
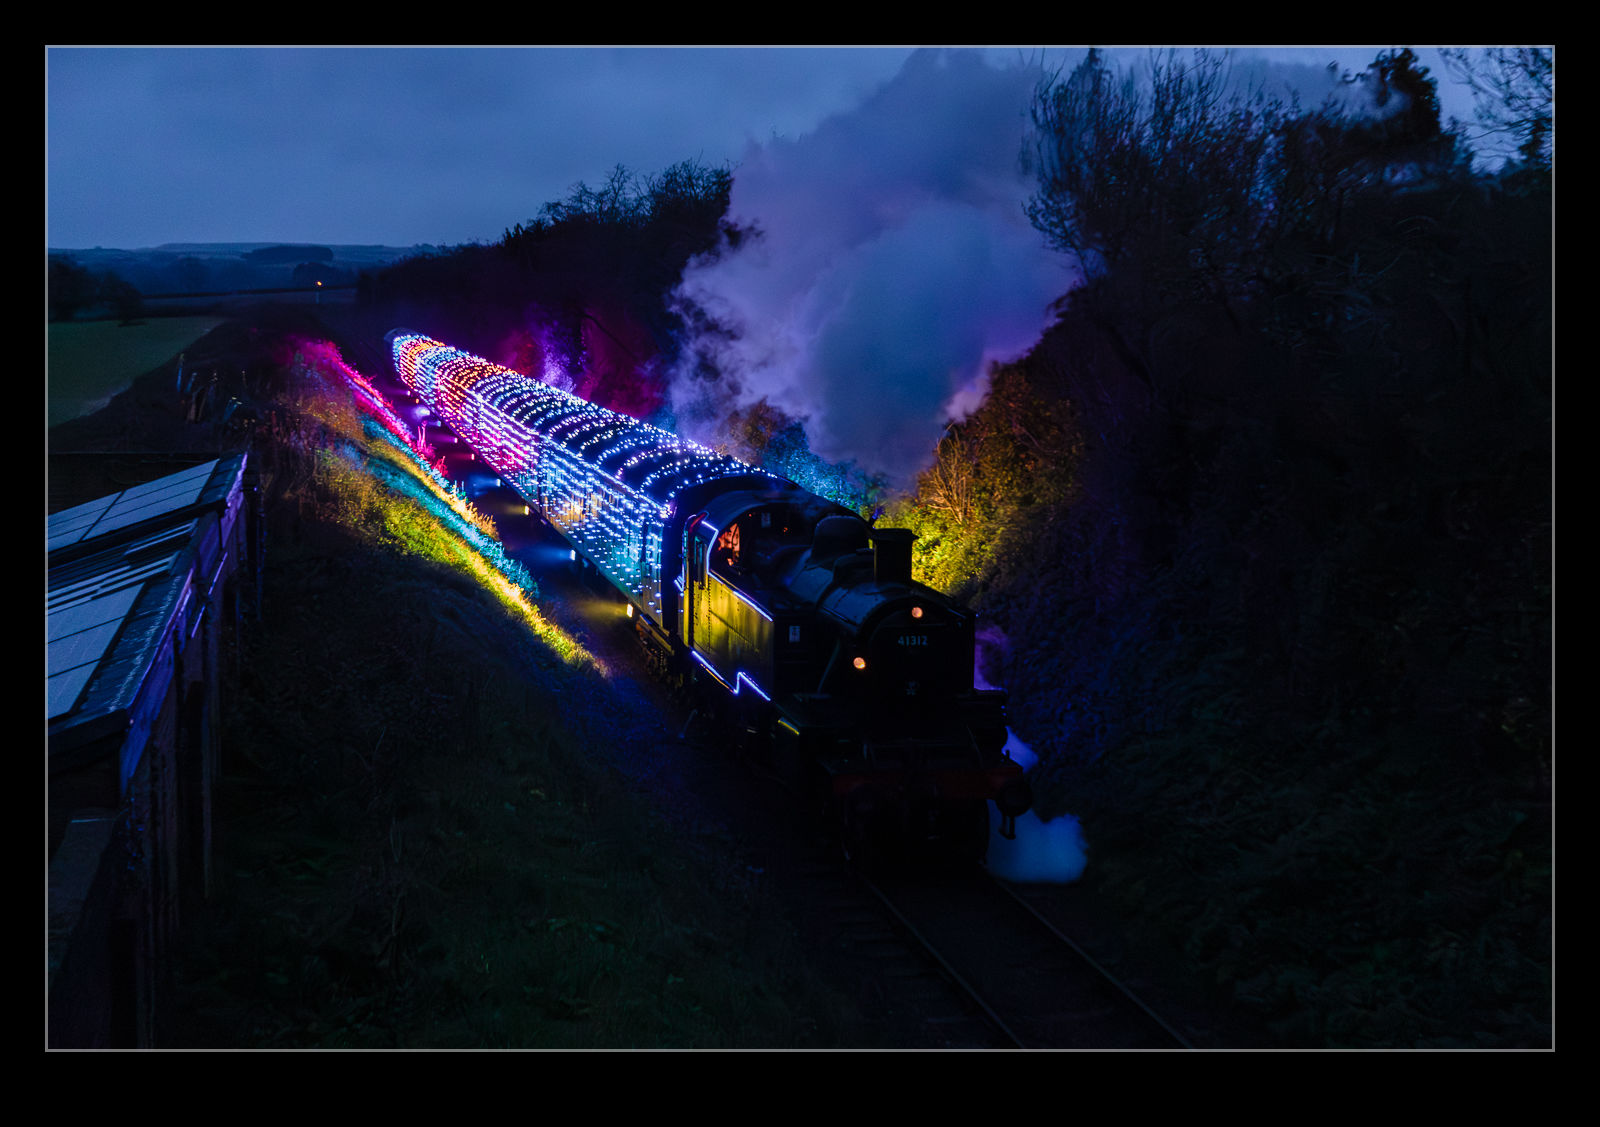
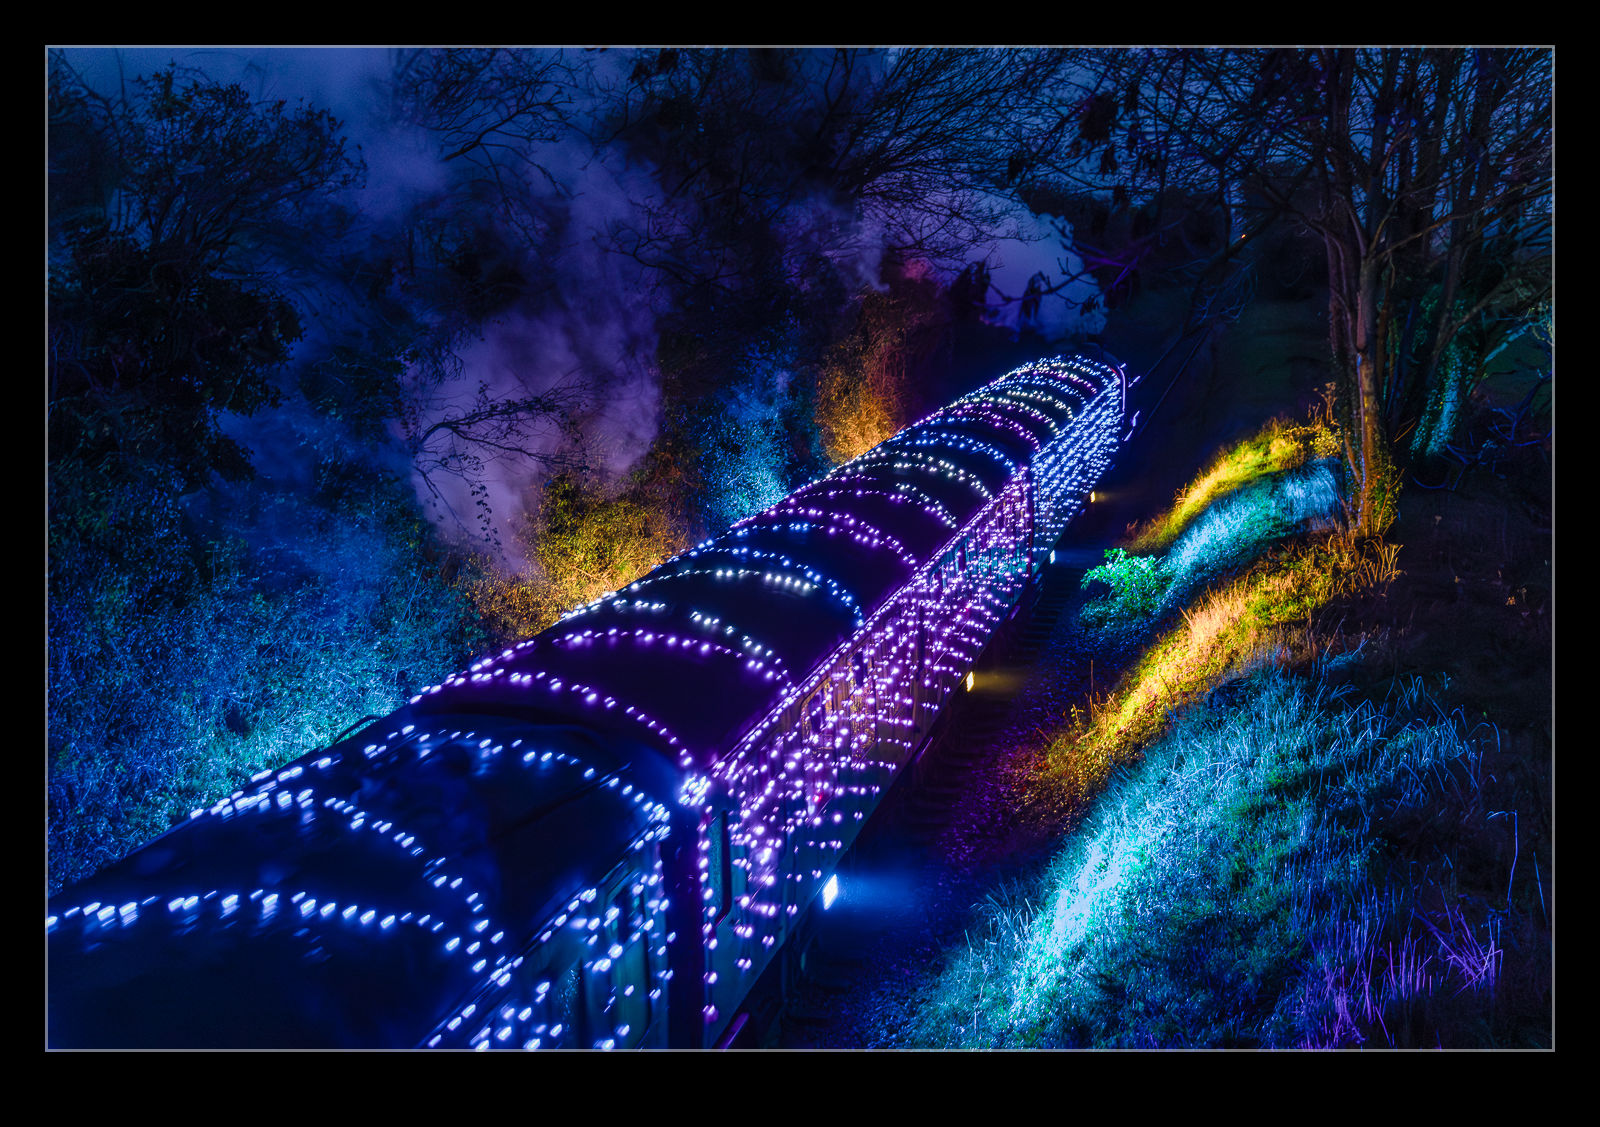
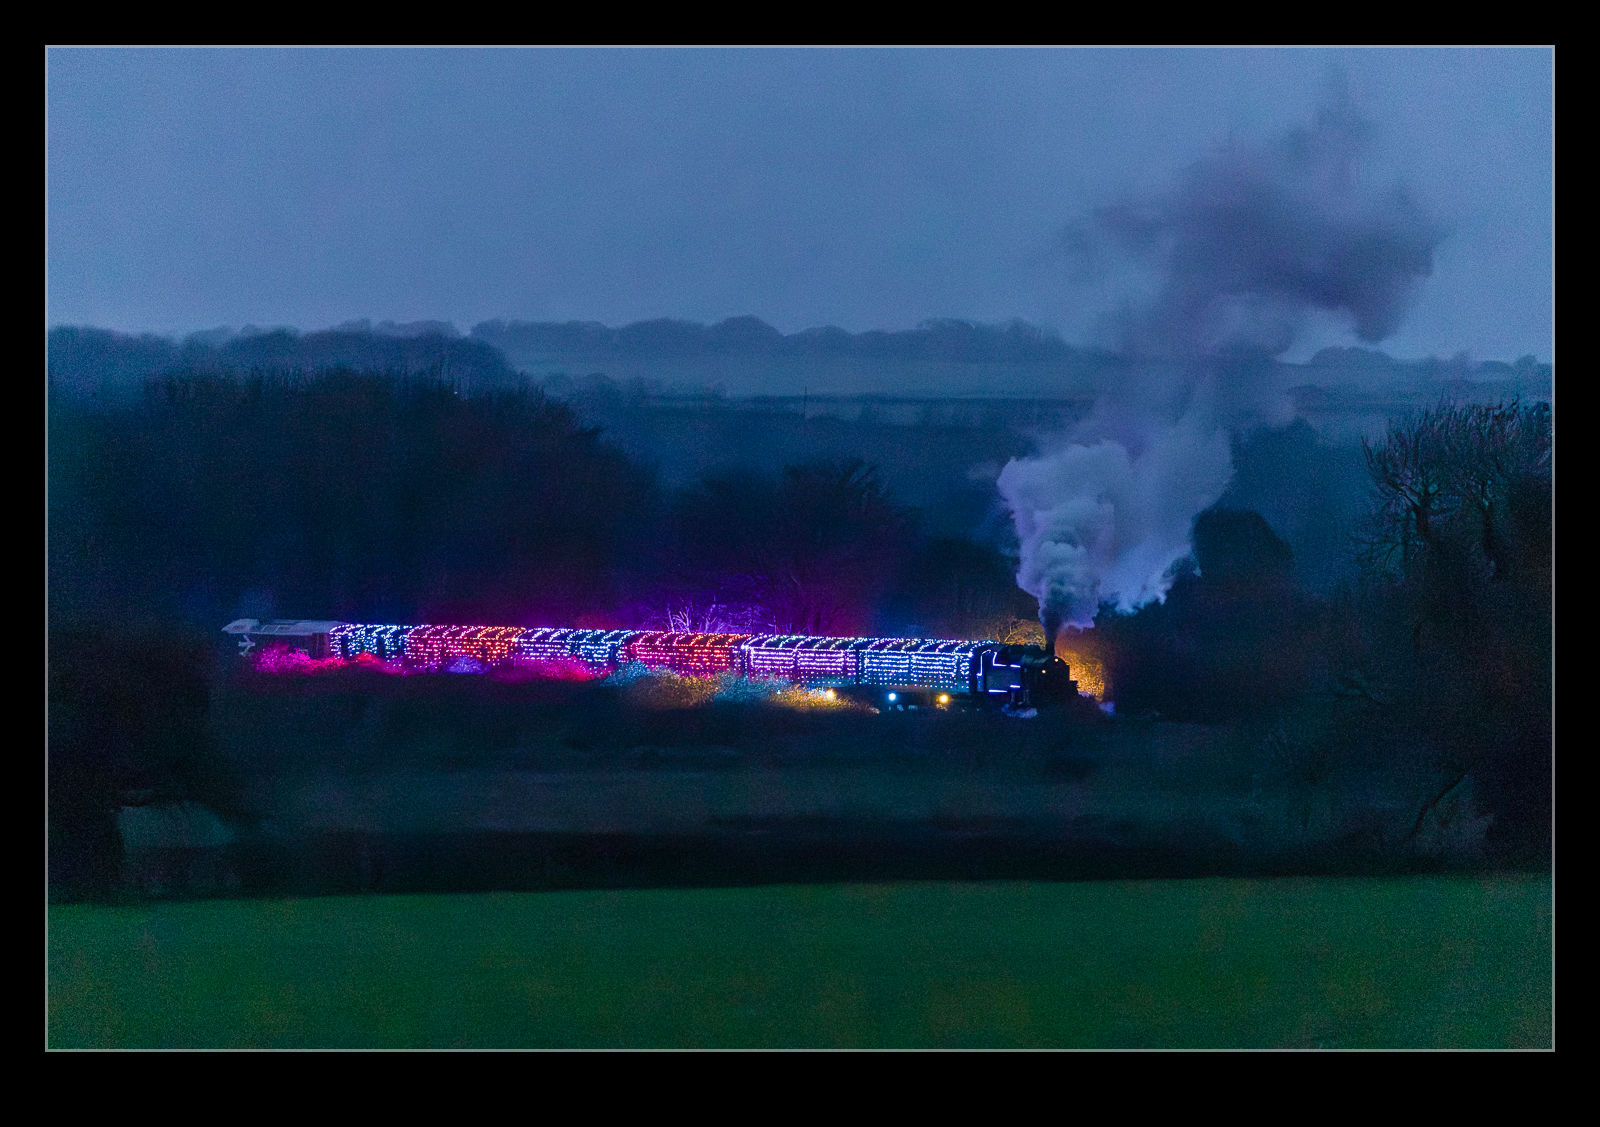
 The Watercress Line is close to Winchester, and they had an illuminated service. In fact, they had more than one. My mum was visiting, and she was also interested in the lights so, late in the afternoon, since it was already getting dark at that time, we popped out to see the train go by. Sure enough, we soon saw it coming up the hill out of Alresford. There is a long stretch where the trees have been trimmed back when you get a good view of it coming our way. Even with the lights, the exposure is still a stretch for the camera. It did okay, though, and a bit of noise reduction software helps.
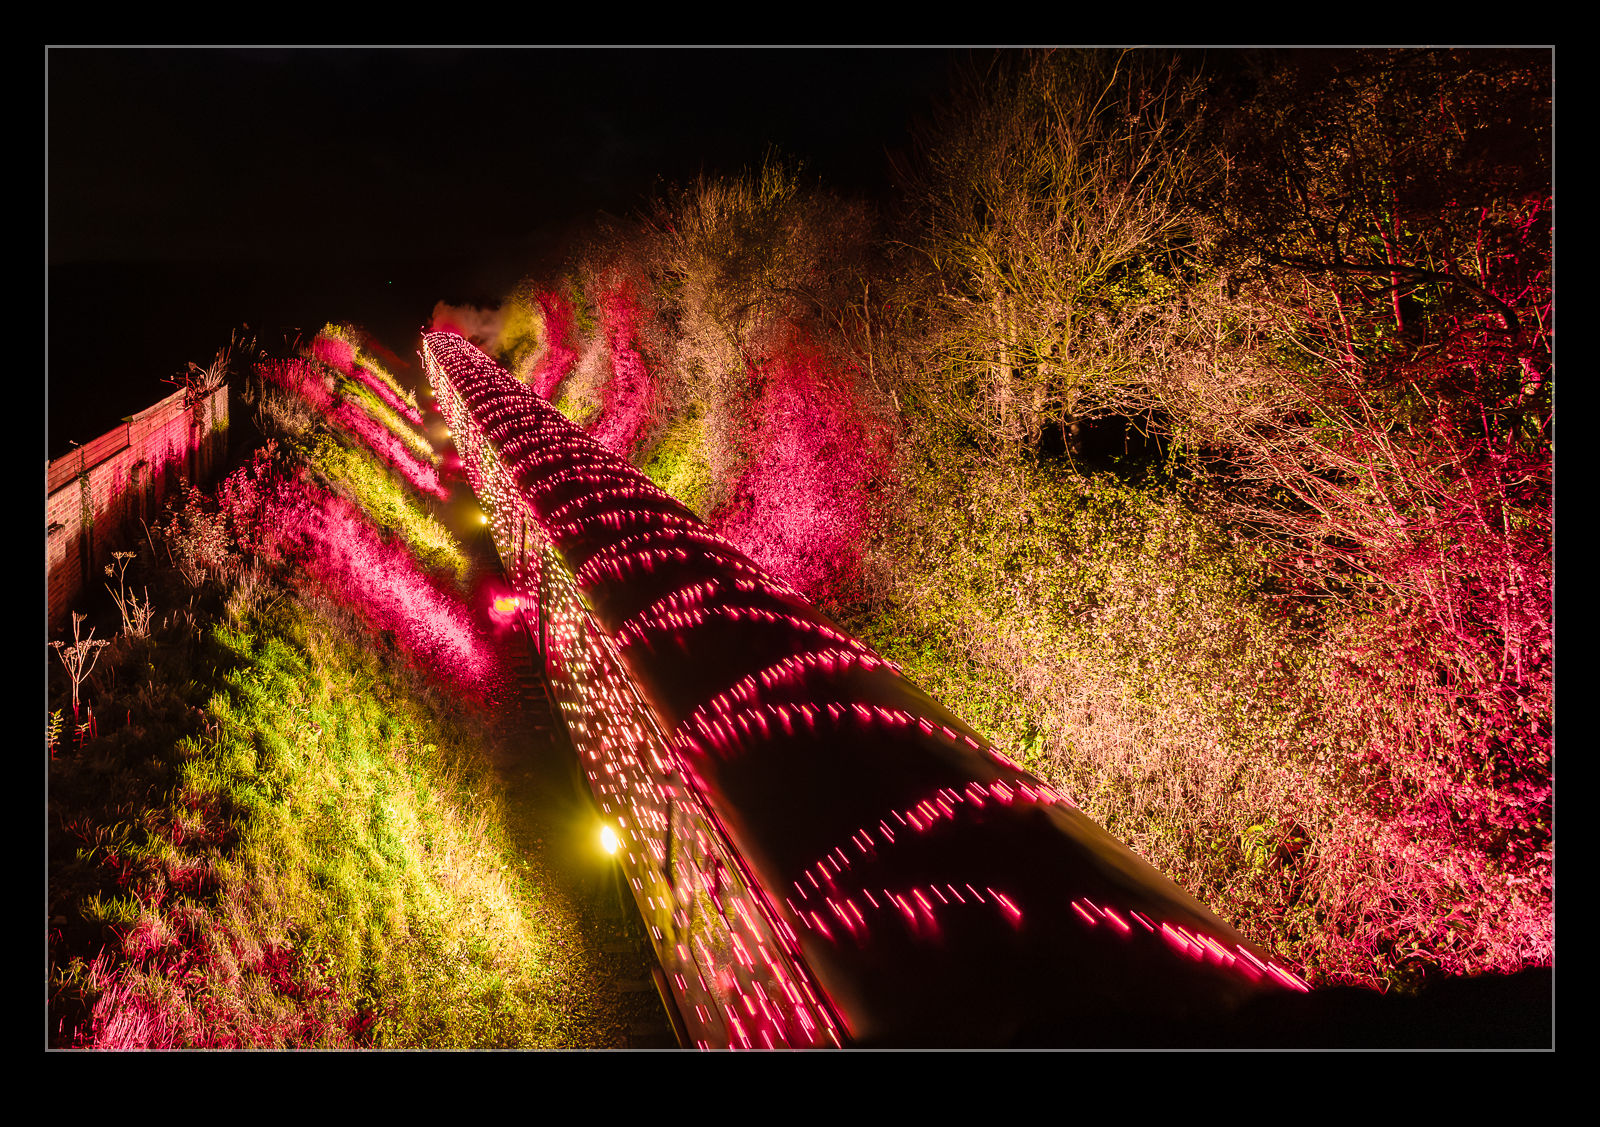 As they came around the corner into the straight heading at us, the lights would illuminate the embankment on either side of the cutting. There was also a strong yellow glow which, I assume, came from the firebox. The colours were constantly changing and it looked really impressive as the loco pulled hard up the bank. I think that they had swapped to a smaller loco because they had a diesel on the back of the train to support.
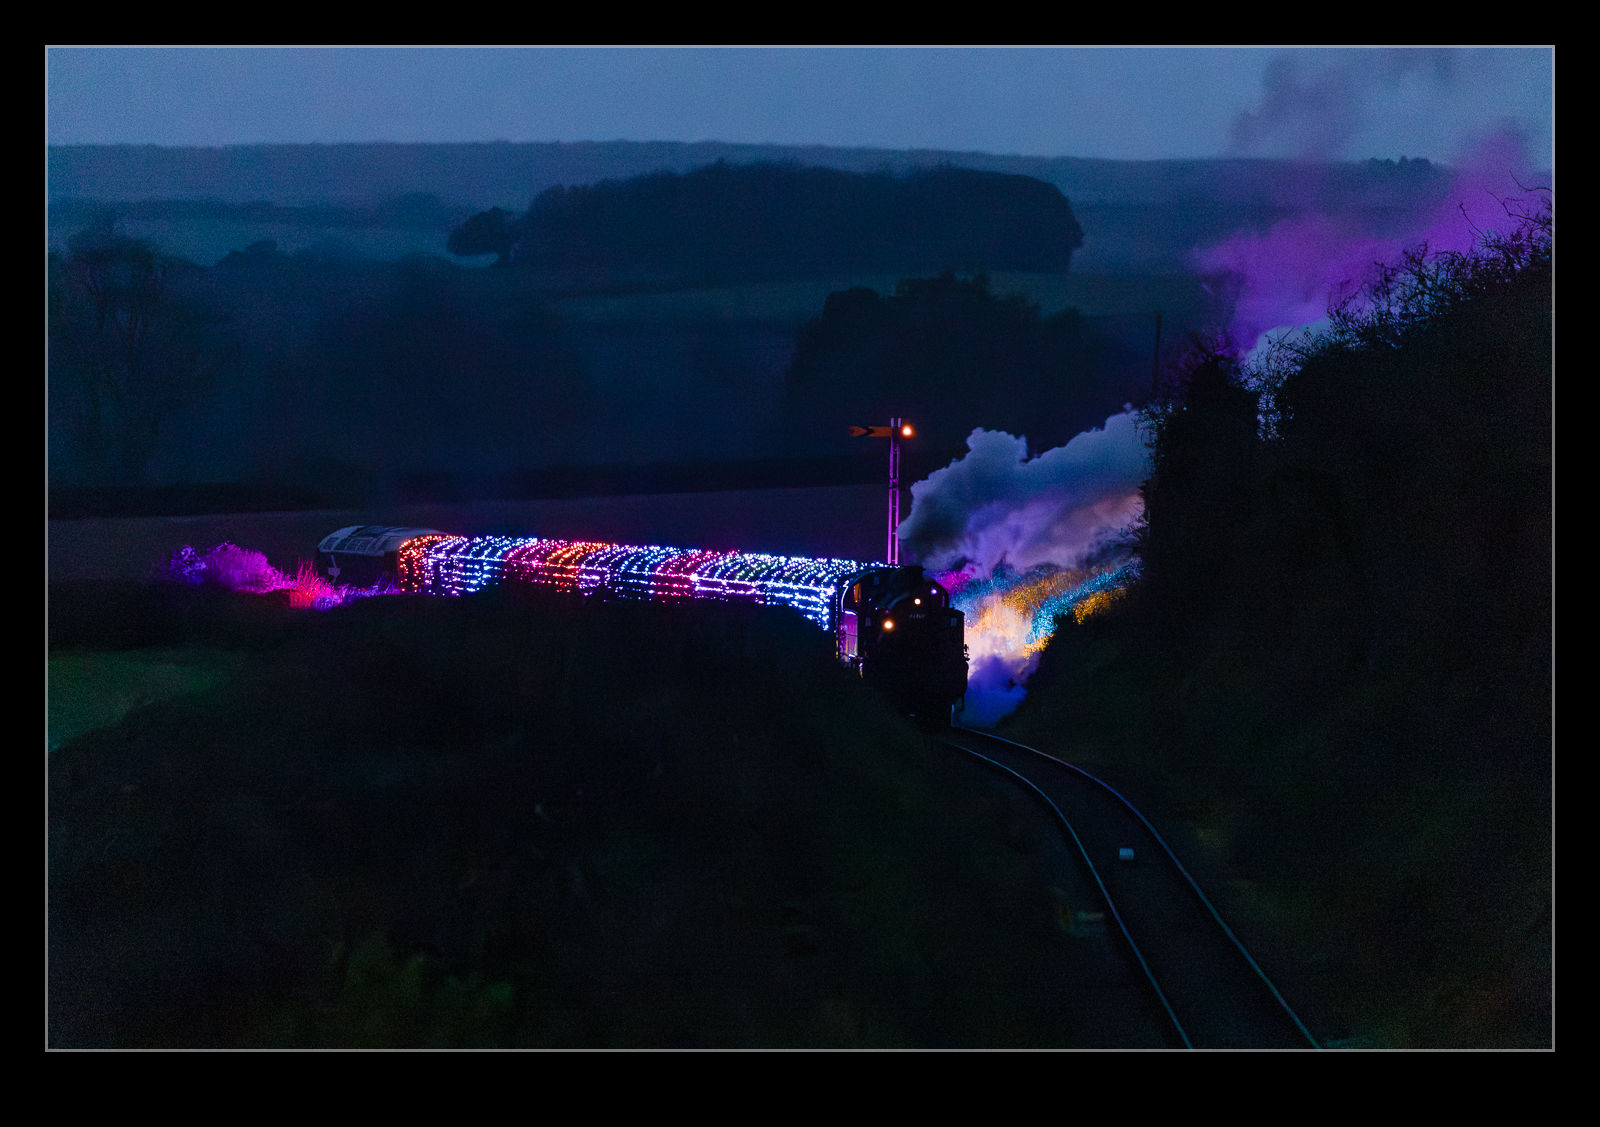
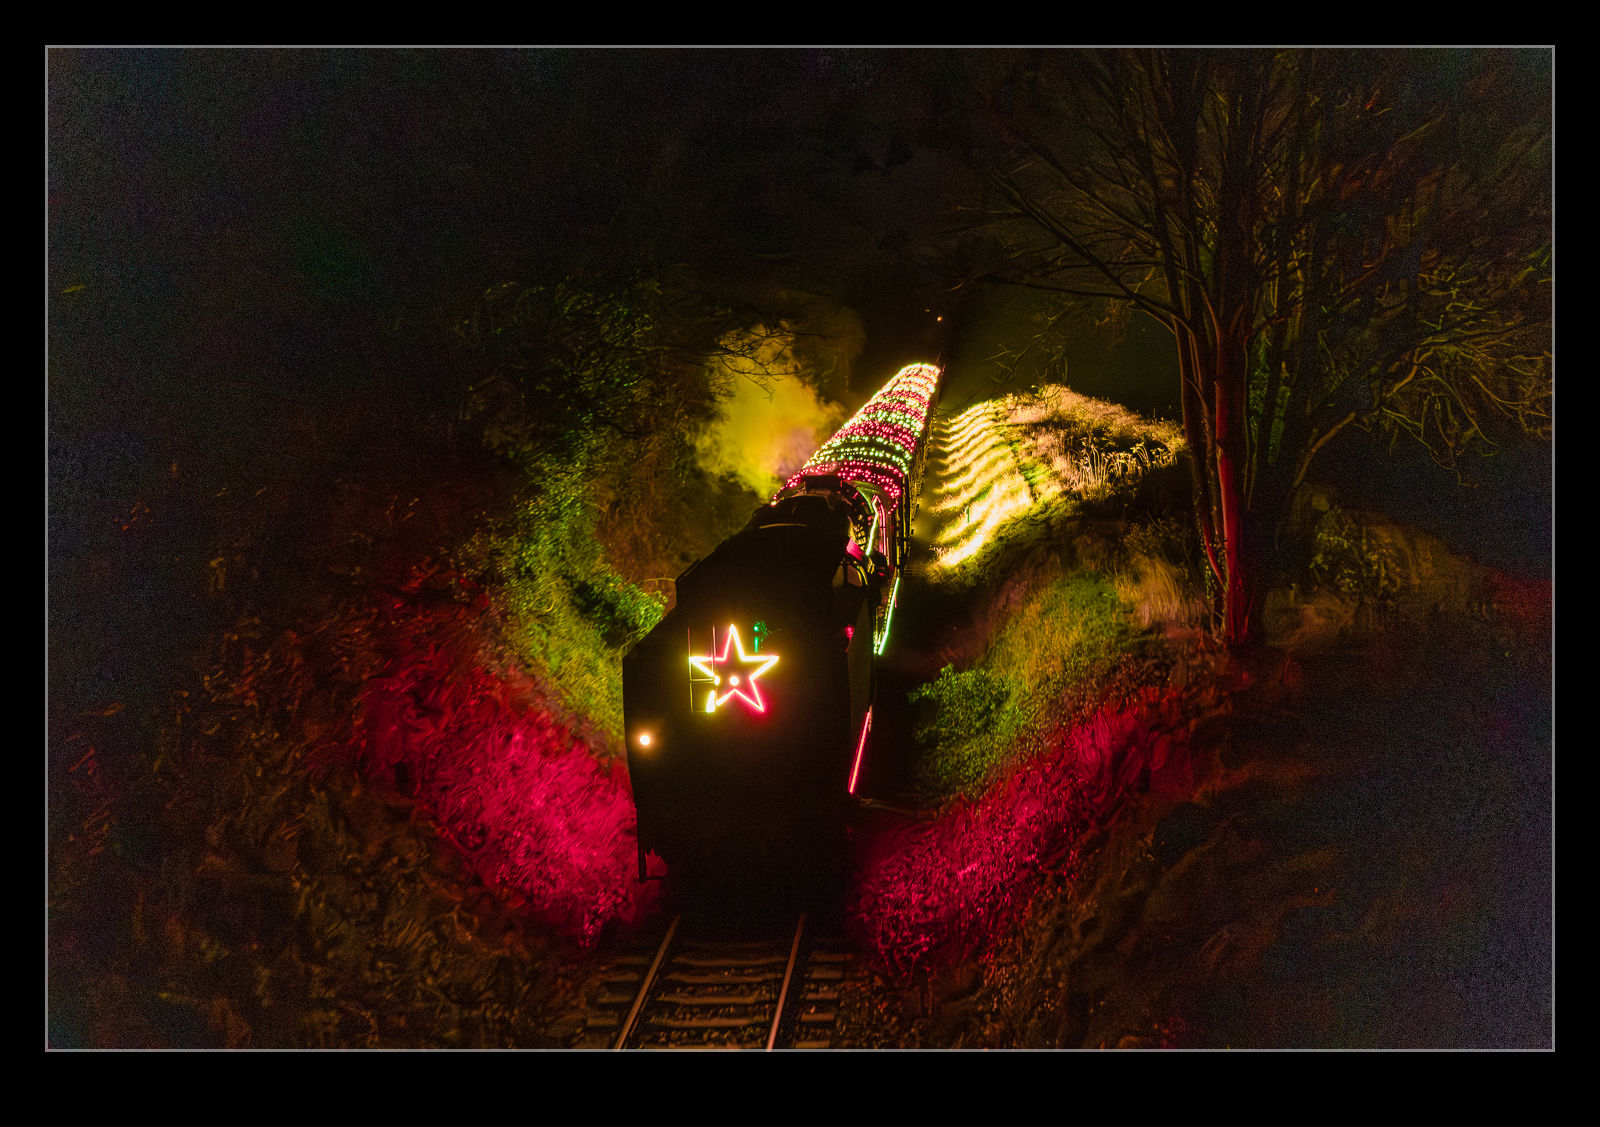
 We were going to head straight home but one of the other people there told us there was a second train coming down from Alton a little while later. While it was getting a bit chilly and definitely dark, we figured there was no harm in hanging around. We did get the second train as it came down the cutting and then headed back the way the previous train had come. Going that way, they are going downhill so the loco is barely working to get them home. No plumes of smoke and thundering noise.
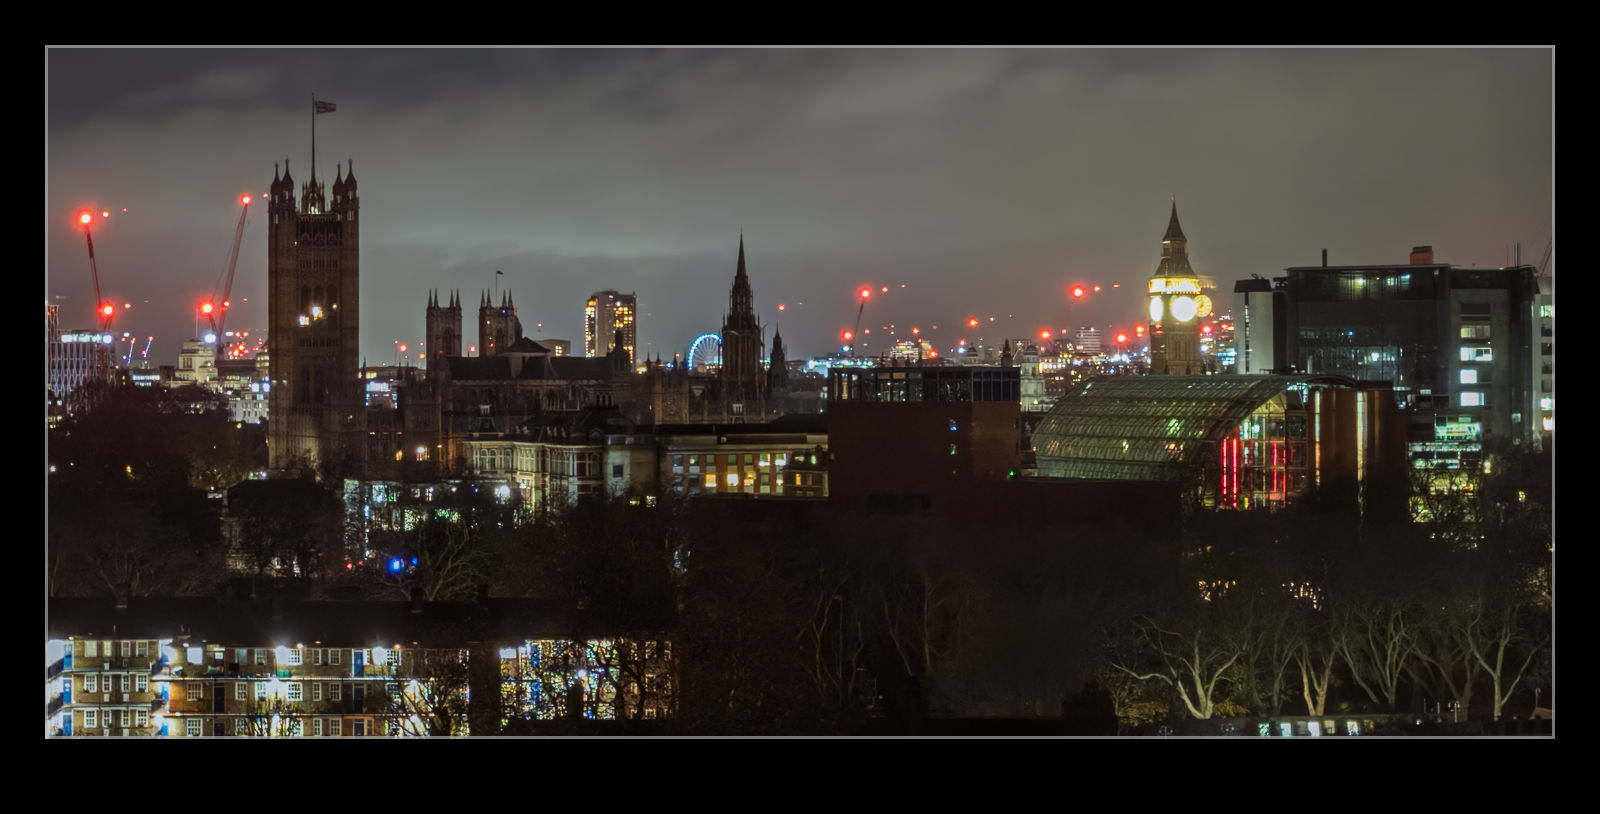 I had been to an event in the east of London which finished late and required an overnight stay up in town. Instead of staying near the venue, I stayed back in Lambeth to be located conveniently for getting home the next morning. When I got back to the hotel, I went up to my room. I hadn’t really paid much attention to the view from the room when I had been there earlier but, now that it was dark, the illuminated view of the city caught my eye. The view across to the Palace of Westminster looked really nice and the blocks of flats in front looked far better. Getting shots through multiple layers of glazing with such contrast is always a bit of a mess but the overall result was not too bad.