Tag Archives: Lightroom

Clever Feature of Lightroom CC

This one is something that I can attribute to the Kelby media juggernaut. I did not discover this myself but, if you are a user of Lightroom CC and use either the HDR or the panorama functions, this could be of interest. One of my issues with them was that they took a while to bring up a preview. Once you had got this, the processing would work in the background.

It turns out, if you don’t need to tweak the settings and are happy with what you used previously, you can hold Shift and Ctrl and press either M for panorama or H for HDR and it will launch right into processing the whole thing in the background. You can set multiple versions off if you wish and they will all get to work out of sight while you do something else. While my feelings on the outcome of the processing are not universally great and I covered this in some previous posts, it does a reasonable job most of the time and this is an even better feature that is well concealed!

Time Lapse Tutorial

I have mentioned in the past some of my interest in time lapse. I recently posted a sequence on here and a friend of mine asked me to put together a guide to how I had gone about doing it so here you go.

When putting together a time lapse, the first thing is trying to establish what will be special about what you are shooting a sequence of that will make a time lapse more interesting than any other form of presentation. Usually this involves something that changes slowly in real time but becomes more dynamic in a time lapse such as a sunset or storm cloud development. Alternatively, it is something where a lot happens over a long time that isn’t terribly dramatic on its own but, when speeded up, becomes far more impressive. This could be a sequence of activities with multiple people or launching airplanes as was the case for the one I recently made.

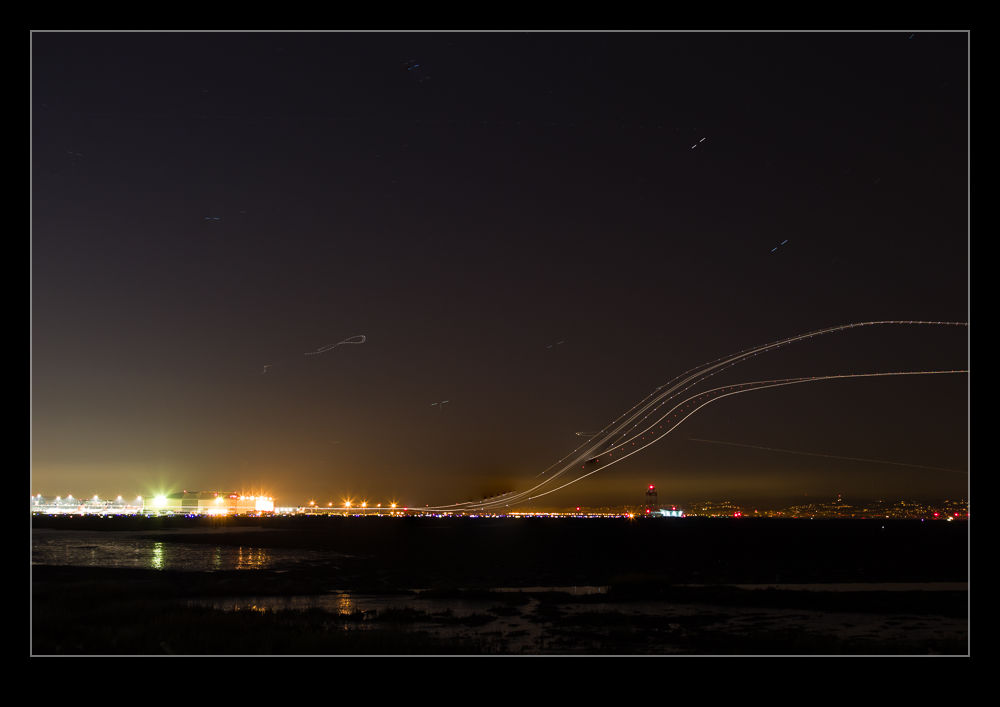
Once you have established what it is that makes it interesting, then you have to decide how best to portray that. Choosing your location and your angle of view are the next challenges. I was shooting departing and arriving aircraft at SFO so I needed an angle that gave me a good view of them and a field of view that allowed plenty of the movement to be seen without everything being too far away to be noticeable. In this case, shooting at night works well because the lights stand out far more making the aircraft more conspicuous than would be the case during the day.

Now it is time to get into the technical issues. How long a clip do I want to make? Shooting time lapses means getting a large number of still shots which will each be a single frame of video. Video frame rates vary but I used 30fps for the sequences I make. Therefore, 30 shots will give me a second of video. If I want a minute of video, I need to shoot 1,800 shots. That’s a lot of shots. Also, figure on shooting more before and after the main action since it is nice to have some spare video at each end to play with in future editing.

You know how many shots you need but how long in real time do you want to cover? Are you starting before sunset and finishing well after sunset? Do you have a peak period of activity that you want to cover? Now you can see how many shots you need over a given amount of time so you will work out how long the interval between each shot can be? The interval between shots is critical but you must also factor in how long a shutter speed you want. This is where shooting at night is a lot nicer because you can get nice long shutter speeds. These make for smoother looking videos because there is no jerkiness. Shooting on a sunny day with a very short shutter speed and a few second interval will result in a jerkier output. The “rule” is to have the exposure time at least half the interval. Doing that during the day may require some neutral density filters. At night it is a lot easier to manage.

Now to mount and control the camera. Obviously a tripod is a necessity to make a stable platform for the shots. A cable release is a must have and preferably one with a timer built in so you can program the intervals. However, if you are shooting at night, you can get away with putting the camera on burst mode with a shutter speed to match your interval and then lock the shutter release open. It will then just keep shooting. The other camera thing to consider is image stabilization if you have long shutter speeds. IS can wander around for long exposures making everything blurred. Keep it turned off. I would also switch autofocus off once you are happy everything is sharp to avoid the focus getting changed by the camera. If the conditions are changeable, you might go with something like aperture priority to accommodate changing exposures. At night, manual might be your best bet. Always keep an eye on how the exposures are doing if in a programmed mode to ensure you aren’t exceeding your interval with your shutter speed. There are complex bulb ramping tools available to use if you want to get advanced. I haven’t tried these since they haven’t been necessary for my purposes so I can’t give good advice. I do have the functionality in a cable release device that connects to my iPhone called Triggertrap but I haven’t ever pushed it to its limits.

One thing you will discover is that fixed apertures are not fixed. Cameras will go to a slightly different aperture for each shot which can result in slight variations in exposure. This “flicker” can be managed by clever manipulation of the lens position but I prefer to use software to fix it. The software will also help if you end up tweaking the camera settings during the capture sequence.

Last piece of equipment advice is bring a chair. Once everything is at work, you don’t have much to do. You can shoot with a second body of course or you can sit back and relax. If you have a buddy along, that is not a bad thing! I shoot all of my sequences in RAW format. For night shoots this gives you a lot of latitude for tweaking the exposures. It does use up a lot of memory but storage is cheap these days. With charged batteries and big cards, you are good to go.

Once the shoot is done, you get home with a ton of images that look remarkably similar. First I import them into Lightroom. I will keyword them in the same way as anything else from a shoot including adding a time lapse keyword. Then I will make sure all of the time lapse shots are in one subfolder before jumping over the LRTimelapse. I am not going to try and write a tutorial on using LRTimelapse. The website for the software has far better guides to how to use everything. However, I will focus on the key elements I go for.

The main one is the Deflicker process. This is a routine that analyses each shot and applies little tweaks to the exposure to avoid any visible flicker. You can draw out a box in the image preview to tell it where to analyze. This means you can pick an area that is constant in the image as a reference and avoid areas where there is a lot going on. If the image exposure is gradually changing, it won’t affect that. It will just take out the individual variance. You can see a trace of how the overall exposure tracks during the sequence.

The other element I sometimes use is panning. You can define keyframes in the sequence and jump back into Lightroom to crop each one as you wish. Back to LRTimelapse and it will calculate the individual crops for each frame to make a smooth pan between your chosen keyframes. Quite nice to provide a little variety if you wish. I always crop the images to a 16×9 format since that works nicely for HD output formats.

When all of your tweaks are fixed, you save the metadata files and go back to Lightroom to reload them. (There can be a bit of back and forth like this throughout the process.) In Lightroom, there is an export dialog from LRTimelapse which then renders out the individual files from each shot. These will then be taken by LRTimelapse and rendered as a video clip.

Sounds really simple that way and, to be honest, it is pretty straightforward. A little practice helps of course. When it works out, the result can be very satisfying. Of course, a lot of times, you see something that you really wish you had done differently. That is something you will have to put down to experience and try to remember next time you are out shooting.

One last thought – if you are shooting something that involves light trails at night, consider making each image a layer in Photoshop and blending them together as a stack to see what happens. It can work pretty nicely sometimes. However, you can end up with a pretty huge Photoshop file so your computer may groan while processing it. Happy shooting!
HDR 32 Bit and Lightroom

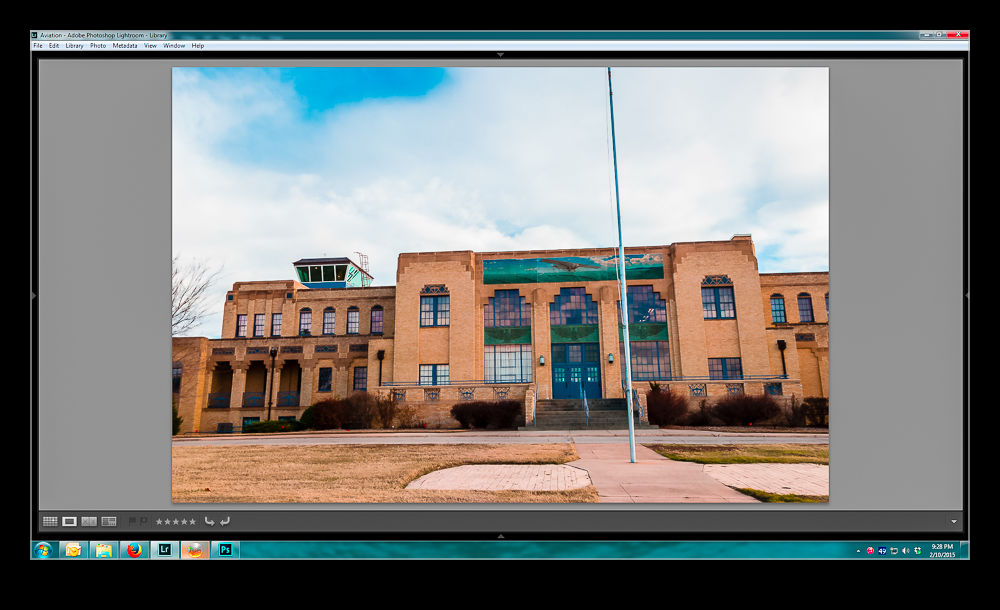
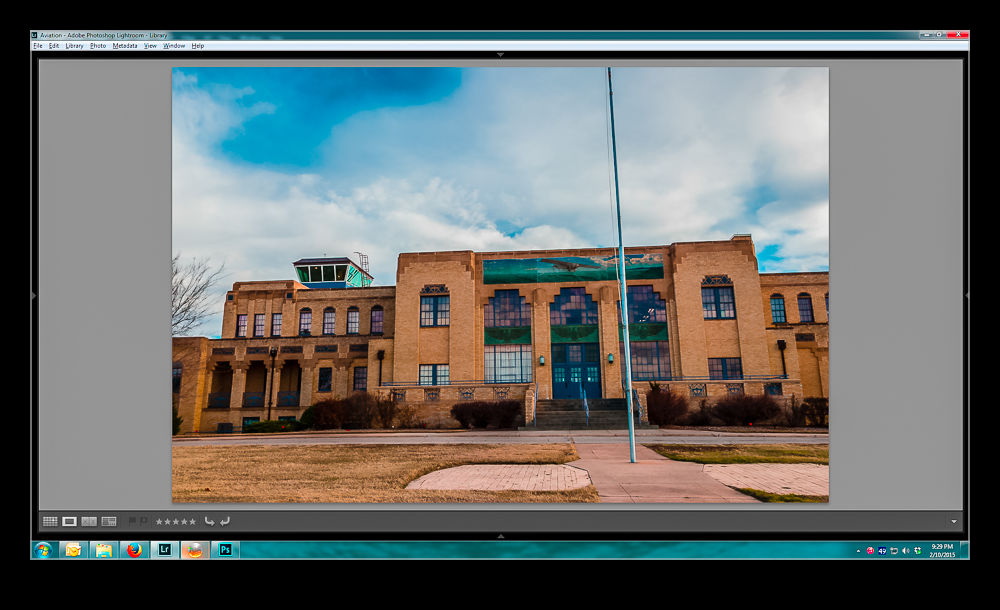
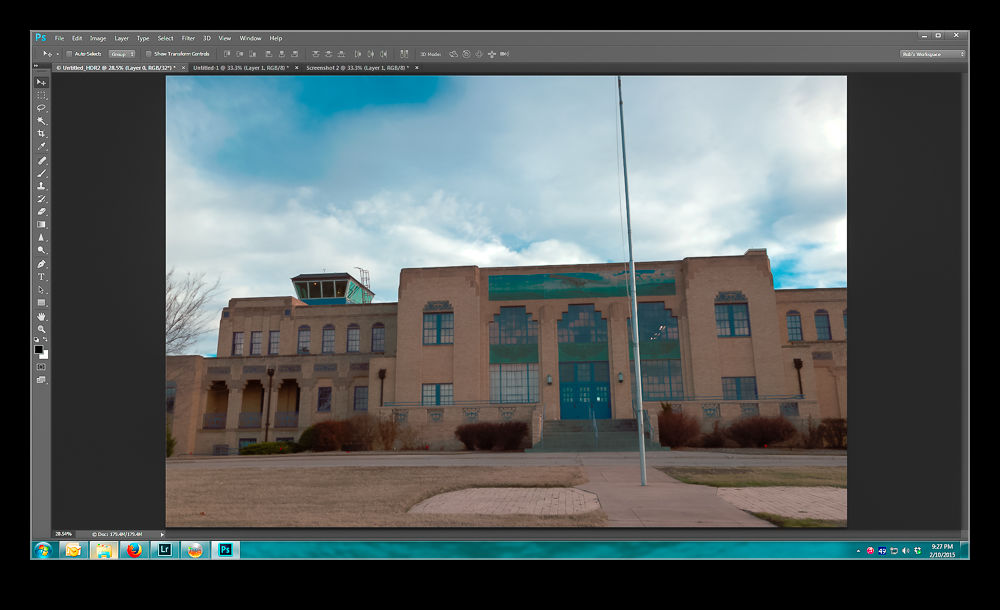
This post is a plea for help. Anyone who is a regular user of Lightroom and Photoshop may be in a position to educate me a little. I use Photoshop to process my HDR shots. I start out in Lightroom, select the shots and use the Edit Photo>HDR Pro method to open them up in Photoshop. I then use the 32 bit version of the HDR Pro processor to create the file. I then take the Edit Using Adobe Camera Raw option for opening the file to undertake the final mapping. This works pretty well and I can usually get something I am happy with.

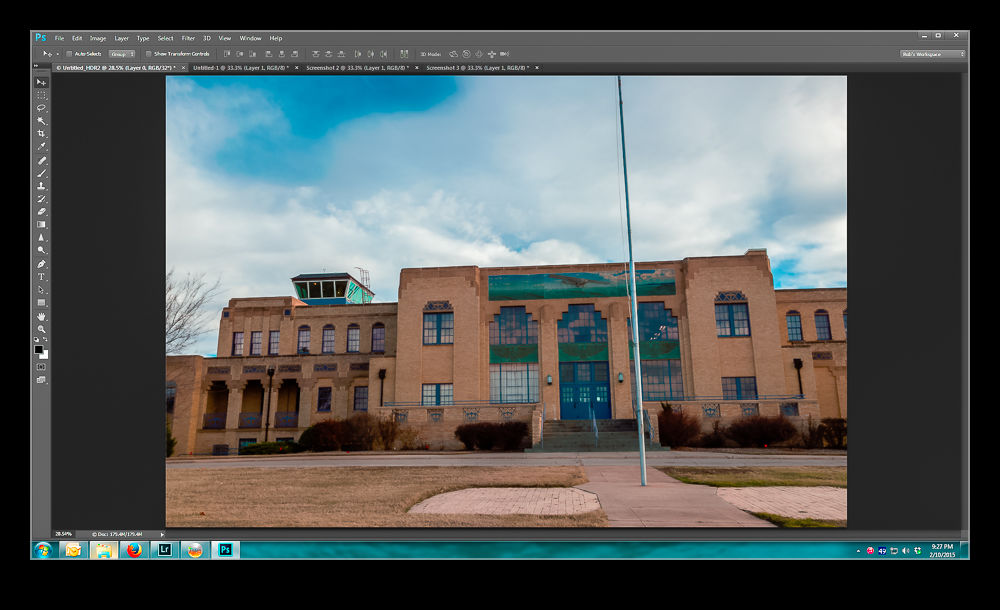
I then close the file and save it which automatically reimports the finished file back into Lightroom. This is when things go wrong. The view of the file in Lightroom doesn’t appear to make use of any of the edits I had done in ACR. The highlights are too bright and the shadows too dark. I can then use the Lightroom Develop settings to get something close to what I want but surely that should not be necessary. I might make further tweaks but shouldn’t it look the same when I close out of Photoshop.

Below is a sequence of screen captures to show you the unprocessed shot in ACR, the finished version, what it looks like in Lightroom and then what I can tweak it to. Any suggestions are gratefully received.  (Note, I didn’t make this exactly match the two edited versions.  It is aimed to illustrate the disconnect and the recovery process.)

Original HDR merge pre tone mapping

wpid12810-Screenshot-3.jpg

HDR with ACR tone mapping appliedwpid12808-Screenshot-4.jpg

How the saved image appears when imported to Lightroomwpid12806-Screenshot-5.jpg

Using Lightroom to get back to something like I had in Photoshopwpid12804-Screenshot-6.jpg

Funky Cloud Processing

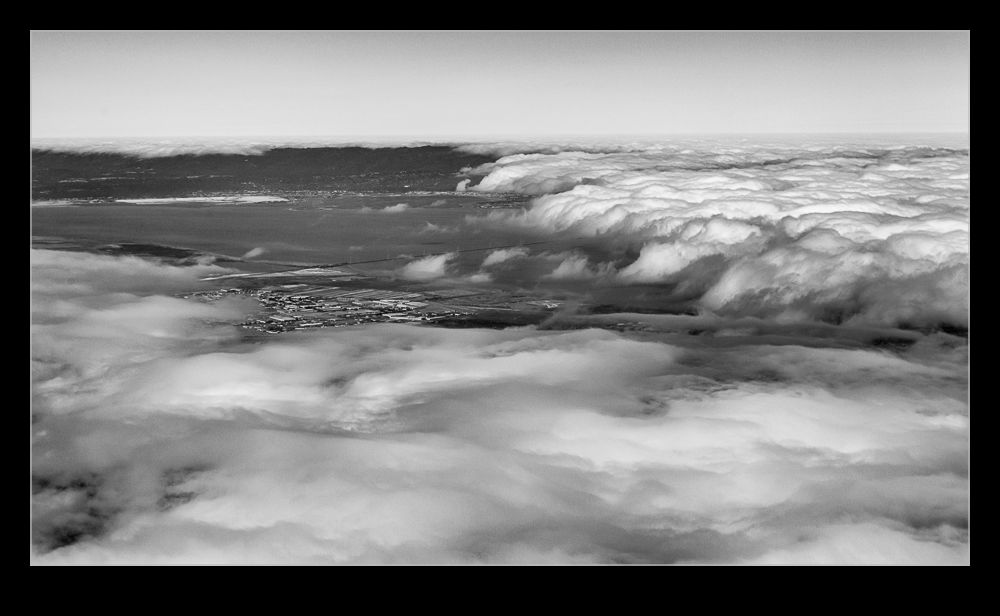
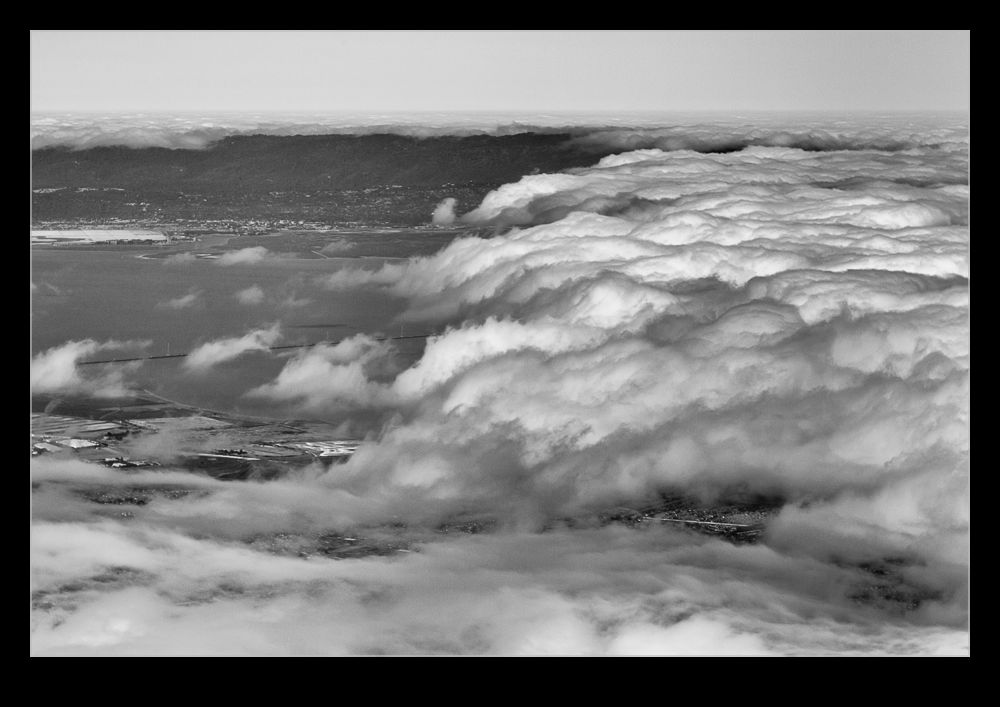
wpid10424-C59F1221-Edit.jpgPart of a run back into Oakland recently came across the bay but it was unfortunately covered in cloud. However, the cloud was sitting in very distinct locations with a clear edge as you headed down the bay and a similar edge near the shoreline on the Oakland side. Since we were not high above it, this looked pretty interesting. Even as I photographed it, I figured the shots would need something a bit different when I got around to processing them. Having a more contrasty look seemed the best bet and a black and white conversion also seemed likely. That is what I went with and I was quite pleased with how it turned out. See what you think.

wpid10422-C59F1217-Edit.jpg

HDR Panoramas

wpid10158-C59F8190-Edit-Edit.jpgAnother one of my processing technique posts today. For those of you interested in pictures of places, today will probably be one you pass on. You have been warned. This is about my first venture into the realm of HDR panoramas. I know at least one of you who knows exactly how to do this sort of thing and does it on a regular basis. You also will probably skip the rest of the post. However, you have some specialized tools for doing the job and I am playing with Lightroom and Photoshop so here is how it goes.

My initial thought having taken the shots was which order to carry out the processing. HDR first or pano first. I concluded that it had to be pano first. All of the pano exposures were consistent and would stitch properly while I wasn’t convinced that each of the pano frames would be consistent if I had done the HDR blending first. However, this left me with a second concern. Would the pano merge produce images that would align for the HDR merge. I use the pano tools built into Photoshop and, while I select the algorithm it uses, I did not have confidence that it would produce an identical alignment for each set of exposures. However, this was the route I tried.

Stitching the panos was straightforward enough. I created each of them from Lightroom and ended up with five panos with differing exposures. At this point I could have taken them directly to HDR Pro within Photoshop but, since I wanted everything to end up in the Lightroom catalog, I decided to save the files and go to HDR Pro from there.

Here I encountered my first hiccup. As expected, the panos produced were not identical. There were very close but not identical. HDR Pro only works on files that are the same dimensions. I imagine some more specialized HDR applications might be able to handle this but I was stuck with Photoshop. Since the panos were thousands of pixels across and only a few pixels different, I opened them back up in Photoshop and changed the canvas size to be identical in each case. HDR Pro is able to manage alignment of slightly misaligned shots anyway so I wanted worried about the positioning. Also, with such small changes in dimensions, I didn’t fear that I would have distortion.

With this change made, Photoshop went to work and created the HDR file. Amazingly, it worked just fine. I didn’t have any problems with the files being distorted relative to each other and it did a great job of blending them. All that was left was to crop everything in to clear up the empty corners from the pano creation (I didn’t get rid of those in the first instance since I was trying to keep the pano files identical in size and alignment) and then a few tweaks back in Lightroom had the job finished. I was pretty pleased with how it worked and, with the experience of this time, should be able to turn them around quite quickly next time.

Updated Approach to Lightroom Catalogs

I have been a user of Lightroom since Adobe release version 1 quite a few years ago.  It has been a very useful tool for me and something that dominates my workflow.  In the early days, there were issues with the number of images that a catalog could have before it started to respond sluggishly.  Consequently, I created a series of different catalogs for different subject areas.  Military aircraft were in one, civil in another, wildlife in a third, sports in a fourth and so on.  This system was fine to use although it had a few minor drawbacks in that some images would be in more the one catalog.  I would import them to one and then export them to the other.  However, as I edited one version, the other one did not always keep up despite saving the sidecar files to disc.

At some point, Adobe updated the functionality of the application and it was no longer so constrained by the number of files in a catalog.  However, I had a series of catalogs that I was familiar with so I didn’t pay much attention to this change.  However, over time, it occurred to me that I was making my life more complex than it needed to be.  I could probably cut down the number of catalogs dramatically and make the workflow a bit simpler.

I decided to have one catalog for all of my aviation related imagery and the other for everything else.  To do so, I created a new catalog for each of these and started importing from the other catalogs.  This was not as smooth a process as you might have imagined.  There were duplicate images as I knew and you could set the system up to make these virtual copies so nothing got lost along the way.  However, sometimes the import did not go well.  They were large catalogs coming into an even larger catalog and this caused some struggles.  I had to delete and start again at some points but ultimately I got it to work.  I did have to recreate some of the collections which did not transfer so easily in some cases but it is now done.

Did it make life easier?  Yes, it did.  Having just two catalogs is now a lot more straightforward.  Do they run just as well?  No.  The aviation catalog does seem to be a bit sluggish sometimes.  Usually it works fine but it is definitely not as responsive as the individual ones were.  I shall see how this develops over time.  A new machine is in the works so whether that will make a difference or not, we shall see.

LRTimelapse

I have previously written about some time-lapse software that I use based on a recommendation from my friend Jo Hunter.  I used this software for a while before the creator, Gunther Wegner, updated it to a new version and deactivated the version I had.  I was a bit miffed by this but I was able to continue using the export settings from his application within Lightroom but with me having to manually manage the file cropping.  All transition and smoothing capability was lost but I could still make a basic time-lapse.

Sadly, the latest versions of Lightroom have done away with that as well and now I couldn’t even render the video.  Therefore, I decided to take a look at the latest version of his software.  It is now on version 3 so I have skipped a version en route to this place.  I had shot a few sequences recently and wanted to be able to manage them properly so decided to come back and have another go with his application.

There have been some improvements in tidying up the software so the workflow is a bit better.  There is still a certain amount of effort as you switch back and forth with Lightroom.  You have to put all of the images into a single folder while working on them.  This means a modification to my storage strategy but it isn’t difficult to manage in Lightroom and, when you are done, you can revert the images to their original locations and still render the video output.  It might be nicer if he gave you a more flexible approach to selecting files but this is not a hardship.

It has changed a little from what I am used to since now it starts out analyzing the files before you have created keyframes.  Once this is done, you save the xmp files out and reload them in Lightroom.  Define your keyframes and make any edits to them that you want and save xmp again.  Back to LRTimelpase to load the changes and now it does its smoothing very quickly.  Save xmp again and back to Lightroom and now there is an Export setting along with all of the other export options.  No going to the Slideshow module any more.

The results are pretty good.  The new export functionality actually generates a sequence of still images which it stores.  You then head back into LRTimelapse where you have a series of options for rendering a video sequence from those stills.  You can have it automatically delete the stills when it is done or keep them and render again using different output options.  This is pretty flexible although it means you have to pay attention to what you have used so you don’t end up with a ton of stored intermediate images.  The video output looks good.  I am not using the product commercially so do not have the full commercial license.  That will allow output in 4K formats.  I only wanted 1080p HD format for my purposes.  It is a little interesting that 4K is automatically assumed to be commercial use.  With people able to record 4K on GoPros these days and 4K TVs showing up, I suspect this is going to be a more mainstream format before too long.  Maybe it will be in the personal use license of future versions of LRTimelapse.  We shall see.

Was it worth the upgrade?  Yes.  Not least because I wanted to have the capability back that I had lost when Lightroom changed its output but, even so, I have found the new version to be quite a bit more friendly to work with.  I think it will encourage me to work on a few more projects.

Night Shoot at SFO

wpid8773-AU0E0813.jpgOne idea that Paul had was for us to have a go at shooting some light trails at SFO after it got dark.  This sounded like a good plan.  Unfortunately, we didn’t have any tripods or cable releases with us.  No matter.  Target was around the corner so we popped in there and bought a couple of $15 specials.  Hmm, these were quality items indeed.  Given how much a good tripod costs, can you imagine what a $15 tripod is like?

wpid8769-C59F4390-Edit.jpgHowever, we made the best of it.  Getting perfect alignment was tricky so some post processing cropping to level stuff up would be required.  The camera wobbled a lot on the tripod when touched so I chose to trigger it with the shutter button on a 2 second delay.  This allowed some wobbling to stop and, on a long exposure, any lingering wobble would be lost.

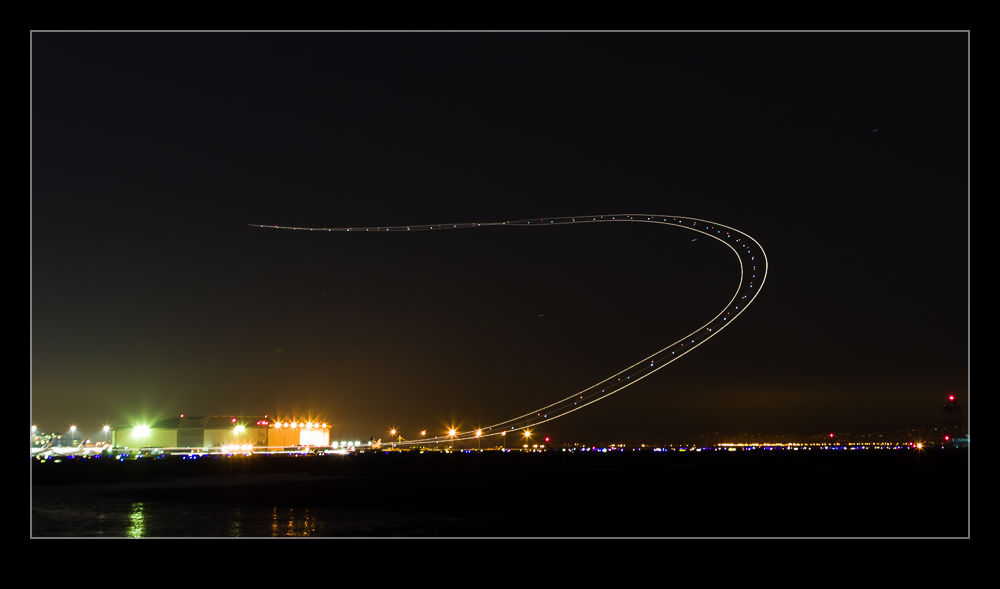
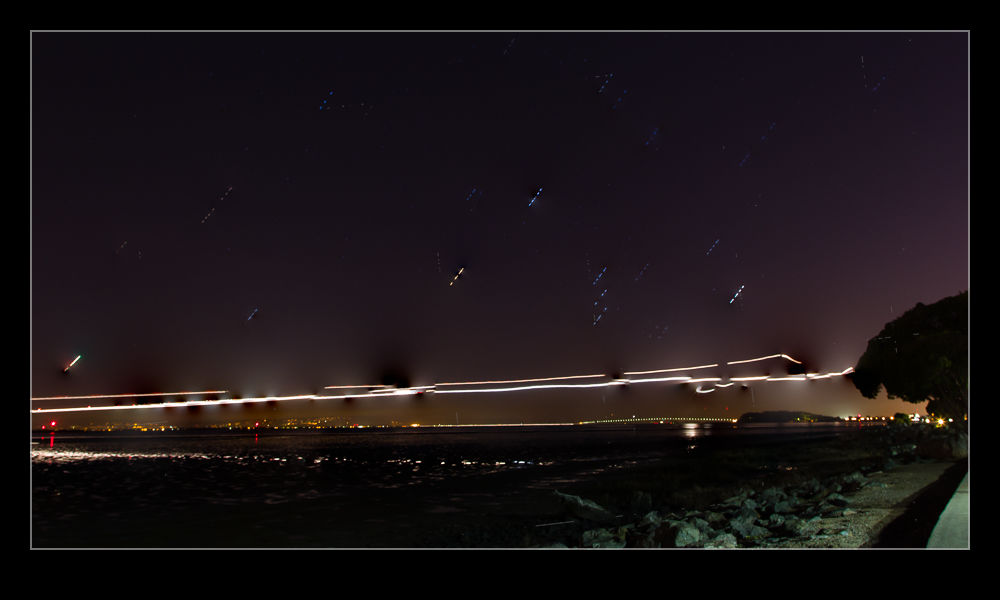
wpid8777-AU0E0811.jpgWe got some stuff but it wasn’t brilliant.  However, a short while later, I had to go to SFO to pick up some family members arriving on an evening flight so I decided to go a little earlier and try again, this time with some more appropriate kit in the form of a decent tripod and a cable release.  This time, I was able to control things a bit better and get a few shots of interest.  There wasn’t a huge amount of traffic so I didn’t get too many trails but I did get a slowly taxiing British Airways 747 which left an interesting smear across the frame.

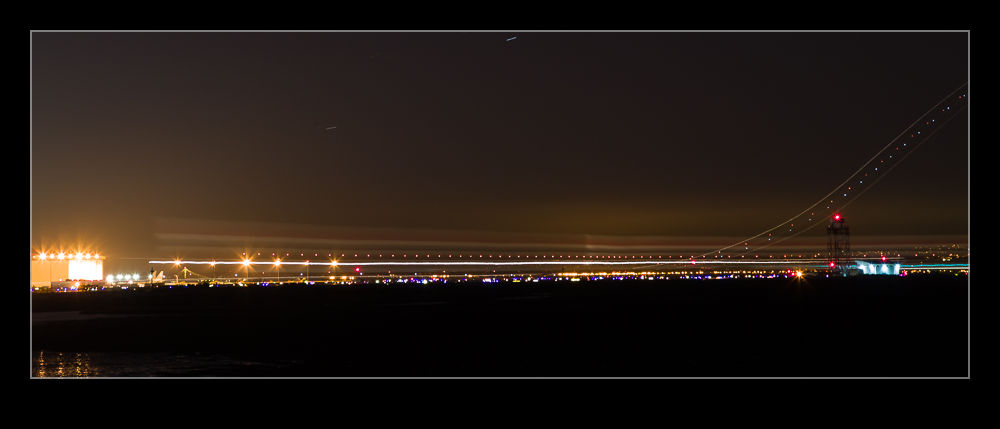
wpid8771-AU0E0793-Edit.jpgThe alignment with the moving planes is not fantastic from where I was but it was okay.  Coyote Point looks like it might be better but I think it closes at sunset so I’m not sure whether that will be possible or not.  We shall see.

Playing with Blending Layers

I have been making some shots with multiple exposures to overlay.  This is something I have posted about before and the shots here are similar to those from before.  However, this post is less about the shots and more about the post processing I used.  Previously I opened up all of the shots as layers in a single file and then auto-aligned them.  Once done, I then used the Auto Blend functionality to show each shot o the aircraft in place.

This was a lot quicker than my previous approach and was something I picked up from posts on photographing star trails.  However, recently, I have not been as happy with the results as I should have been.  Some of the planes, particularly those near to the edges, had some odd artifacts appearing.  Also, if there were any overlaps, the blending masks could give some weird effects.  Therefore, I have taken a different approach for a while.  This is slower, I admit, but I think it gives a better result.

Once the alignment of the images is done, I hide them all except the bottom layer by Alt clicking on the eye beside the last layer.  Then I add the next layer up back in but mask it out completely.  A white brush on the mask then allows me to paint back in the new aircraft positions.  This is a bit laborious but it does allow you to decide exactly what you want in and what you don’t.  if one file is not helpful to the composition, you can easily ignore it.

If the layers are not all exactly aligned from shooting on a tripod, you will also get gaps at the edges on different layers.  You can also fill these in by brushing in the layers that provide the right coverage and get a complete image.  Once you are happy, flatten the whole thing and you are done.

Changing My Approach to Panoramas

Ever since Adobe got their act together with the Photomerge function in Photoshop, it has been my default for creating panoramas.  Previous versions were a little unreliable but they cracked it a few versions back and I have not changed my approach since.  However, a recent bit of YouTube exploring has changed that again.  Russell Brown had a series of videos on making panoramas from aerial shots and, while I was watching them because they were aerials, the stuff he came up with on stitching panos was actually more useful to me.

Instead of using Photomerge, he uses the same functionality of Photoshop but in individual steps.  The technique involves opening all of the shots as layers in a single file (something you can do straight from Lightroom which maintains the re-import linkage that I like about Photomerge).  Then you select all layers and use Edit>Auto Align Layers.  This gives you the same options as Photomerge.  Apparently, according to Russell, if you have a series of shots where you have rotated position but are looking horizontally, Spherical works best.  If you are looking up or down, use Circular.

The result can be quite distorted if you use Circular but it will all get better soon.  If you aren’t happy, you can undo the step which is a lot easier than starting from scratch which is what you would have to do in Photomerge.  Once the alignment is done, Edit>Auto Blend Layers while take care of the rest of the stitching and blend everything together nicely.  It defaults to a Panorama blending option.

With the blend done, flatten the layers and open Filters>Adaptive Wide Angle.  This will default to a panorama setting and, if you have the distorted output from the Circular settings, now you will suddenly see everything come back to what it should be.  You can tweak this filter to get verticals and horizontals aligned as you wish and then you end up with a good pano output.  Some cropping and filling of blank areas with Content-Aware fill and the job is done.  I shall be taking this approach for all my panos from now on.  If you don’t use this approach already, you might want to give it a try.

Also, you can go to the original source on this and check out Russell’s videos on YouTube.