Lightroom CC comes with a number of new features. High on the list is the new panorama feature. Previously, if you wanted to stitch a panorama, you would select the shots in Lightroom, make sure you had them synced up for any exposure edits and white balance corrections and then send them to Photoshop. Photoshop had a Photomerge function that you could use or you could open them as layers in a document and carry the merge out yourself with a bit more control. This was the approach I used and I wrote about the technique here a while back.
The new Photomerge in Lightroom CC is designed to do without Photoshop. It takes your original files and then makes a new DNG file which is the stitched panorama but, as a RAW format, it still allows you to edit the image using the normal editing tools. I had to give this a go so, how well does it work?
The answer is a mixed one. In many cases, it works just fine. It stitches together the shot nicely and you can go on your way. While the initial preview process takes up a little time, the processing of the final stitch is done in the background so you can get on with something else – something I find very handy. However, it does have some shortcomings.
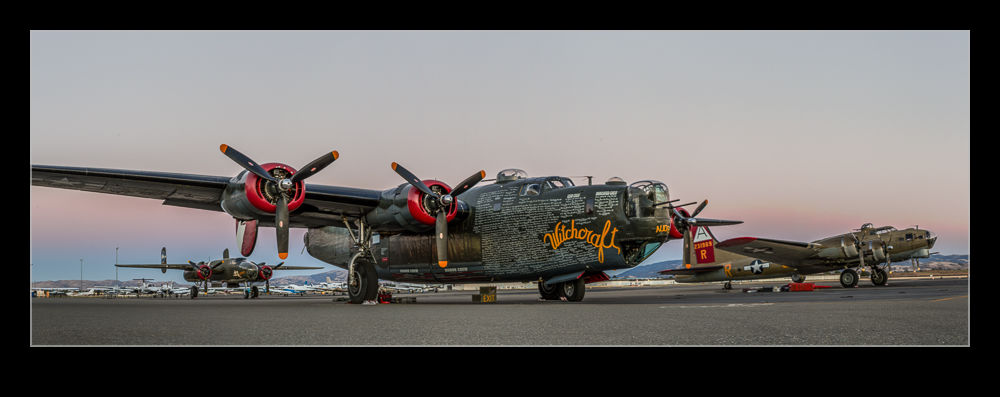
First, it doesn’t always find the way to stitch the shots. I have had a couple of times when it couldn’t work out the alignment. When I tried the same shots in Photoshop, they worked just fine. Not sure why these didn’t work but the algorithms must have some limitations. Next, it doesn’t always deal well with curvy edges. I have had a couple of stitches that I tried where the aircraft fuselage, although a smooth curve, ended up with some kinks at the area where the stitch took place. Photoshop never caused me trouble with these either. Big panos also seem to make it unhappy with some very odd alignments being chosen (after a long time processing) so they may have to stay in Photoshop for now.
The last problem is cropping. You have the option to have the whole stitch or to have it crop in automatically (or you could crop manually afterwards). Cropping pulls you in to the shot more aggressively to get rid of any blank pixels. You can fix this by shooting a lot wider to have more to work with. However, having been used to being able to fill odd little gaps using Content-Aware Fill in Photoshop, not being able to do so in Lightroom is a limitation. I can, of course, open the file in Photoshop and do just that. However, if I do so, I might as well use Photoshop to do the merge in the first place.
Overall, it is pretty good. I suspect there will be some tweaks behind the scenes as CC gets updated progressively so I might not even know that Adobe have fixed some of the issues. The Fill issue will be more obvious though. I shall probably keep using it unless I feel the Photoshop is merited and it is a good addition but I hope they take it further so I don’t have to consider Photoshop in the future. We shall see because the new update of Photoshop is out and includes Content Aware Fill of the gaps in panos which might be enough to sway me back.
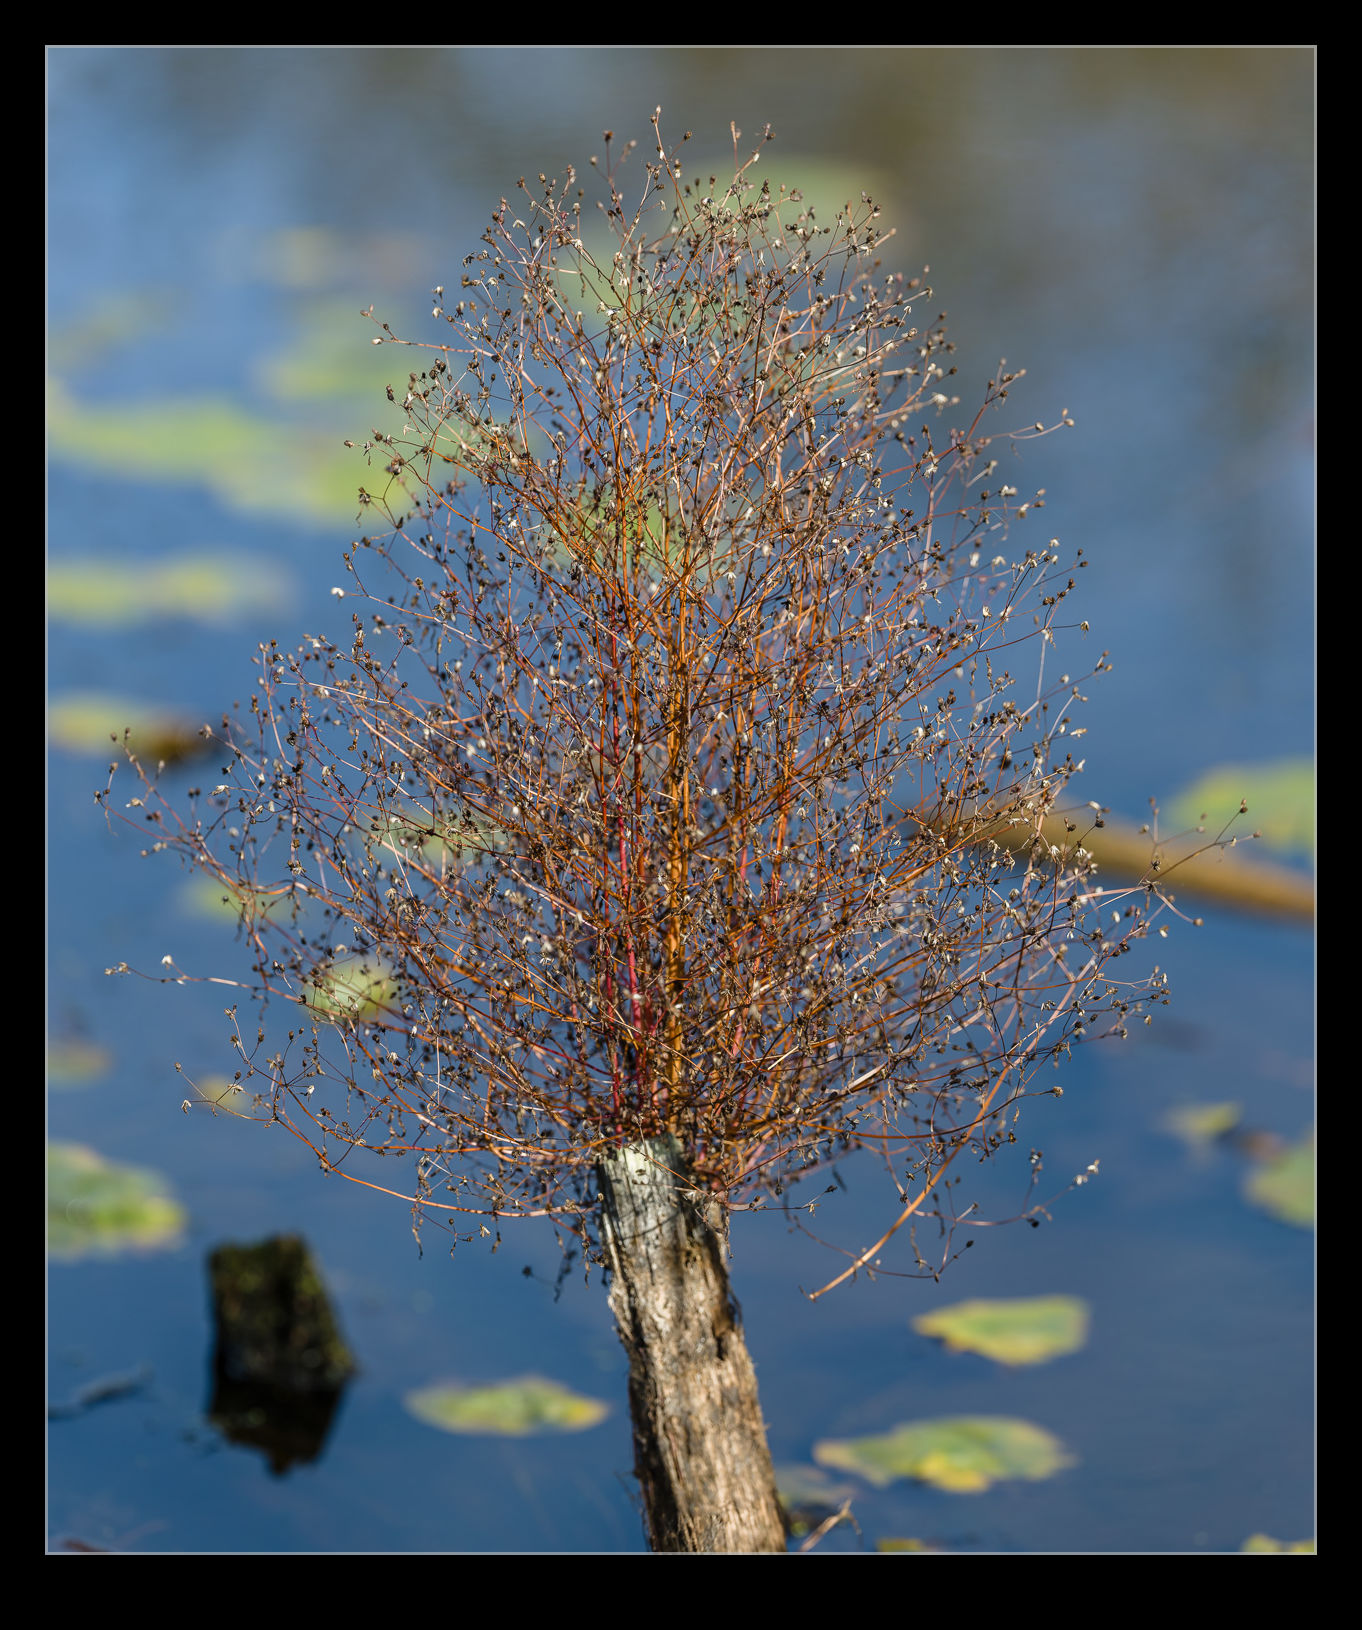 Sometimes you just don’t have the right gear with you. I had gone to Juanita Bay after work and was only carrying one camera with the 500mm on it. Looking down in to the water to one side of me, I was quite taken by a stump in the water that had a new growth of a small tree coming from the top of it. It was too far away to get a decent shot with the phone so the 500mm was the only option. I took a sequence of shots to stitch together later on. I quite like the separation that you get with using such a long lens for a shot like this. I wonder how large the tree will ultimately grow to be given the limitations of its home!