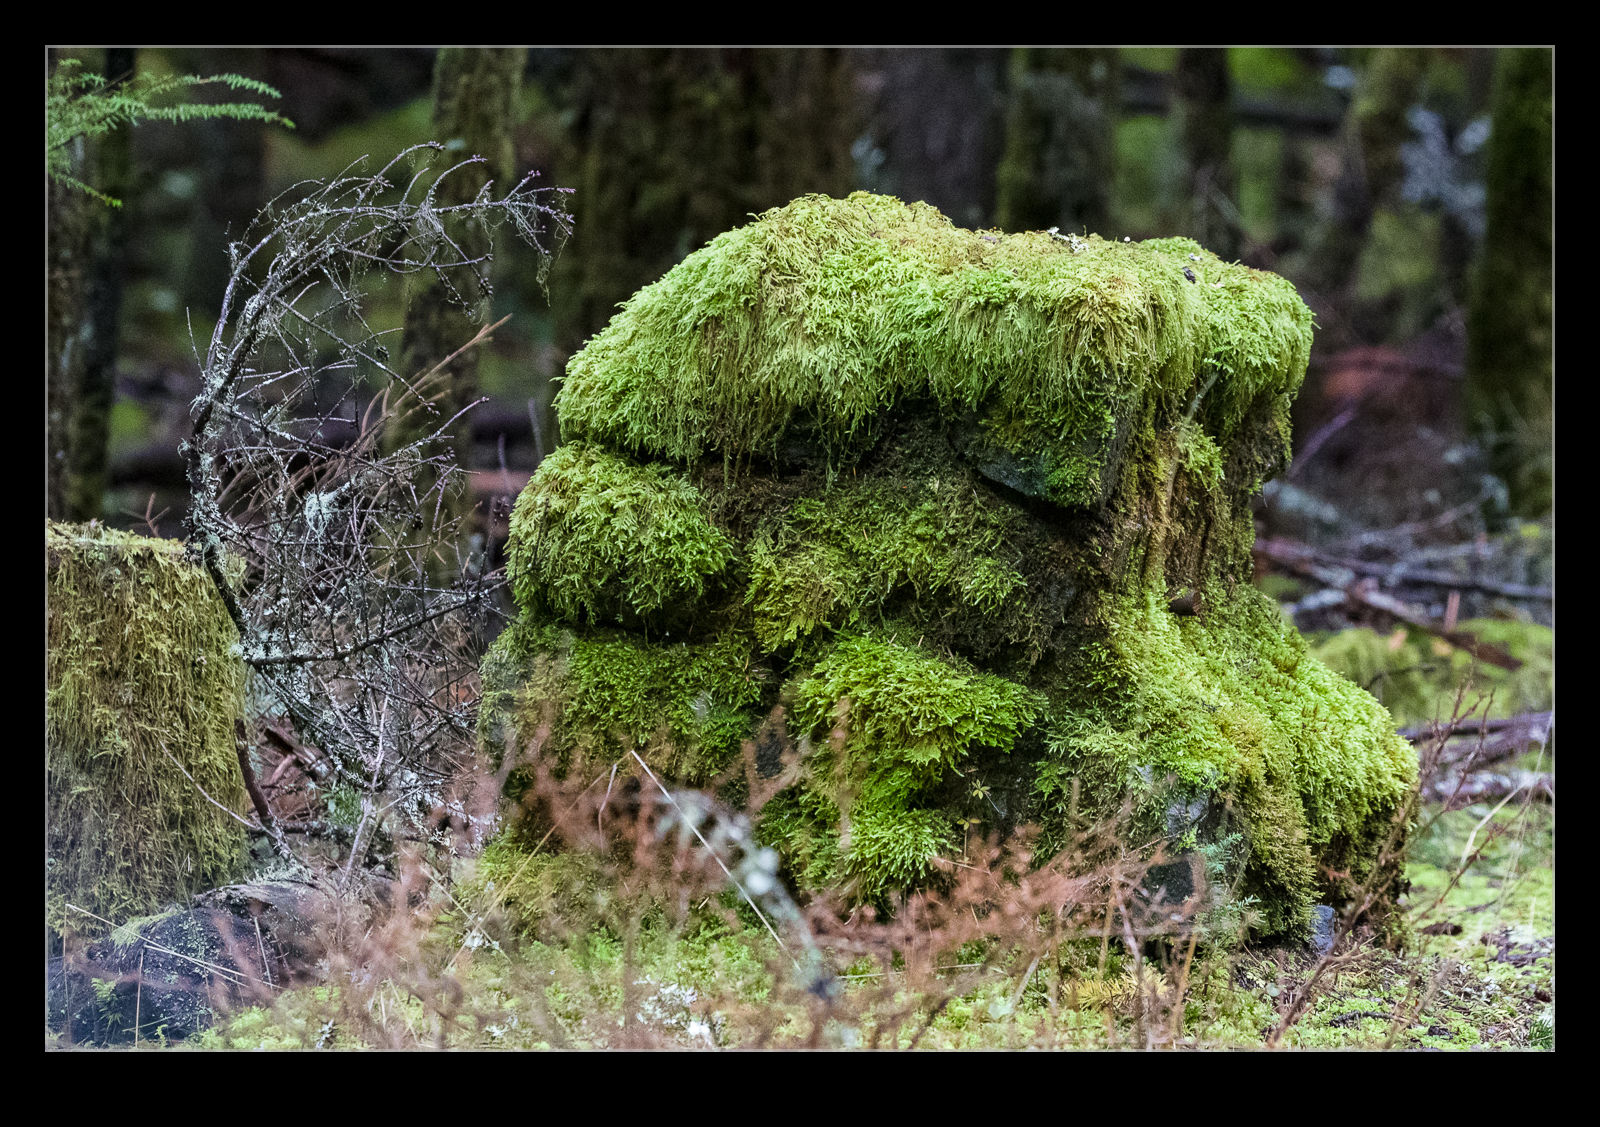
 Driving up to the summit of Mount Constitution, the road twists and turns a great deal. Some of the curves have a steep drop off which will not end well if your vehicle were to leave the paved surface. Consequently, there are plenty of concrete posts along the edge of the road to try and stop you going too far wrong. However, it is so shady and damp within the woods the cover the side of the mountain, these posts get no light and have become home for moss. It looks so thick that you wonder whether the car would even be scratched it you hit one!
Tag Archives: post
WordPress Editor Has Been Broken
You’ll often hear the phrase “If it isn’t broken, why fix it?”. In the case of WordPress, this definitely seems to be relevant. I have been using WordPress since the blog started and with good reason. It is a simple and straightforward editing tool that allows new posts to be created easily and quickly. I prepare the images in Lightroom and export them directly to the blog and text is generally – including this – created in Word and then pasted into the blog editor.
WordPress rolled out a new editor form with blocks for elements of each post. I don’t doubt that the intent of this was to create a more flexible editing environment and one that probably achieves things that previously required plugins. However, the result does not seem to have been very well tested or not be a wide enough group of users with differing requirements. Here are some of the shortcomings I have experienced.
The biggest issue is speed. The new format is unbelievably sluggish. When I am making edits, sections of the page seem to be really slow and when it decides to auto save the latest work, it seems to be stuck doing so forever. Then, there are some familiar sections now in new formats at the side. Collections is still there but clicking on it seems to require tons of time to think about stuff before it shows up – if it does!
Collections might be slow but tagging is now horrible. I create my tags in Word and paste them into the field but this no longer can be relied on to work. Sometimes they just vanish. Other times they disappear and then reappear. I can write some in to the box directly and then they vanish in front of my eyes. I often ignore this section and add the tags later in the Quick Edit view of the post lists.
Adding media is no longer so simple, While the new blocks for images and galleries have some nice elements they are slow to create. Now you have to select the source each time rather than defaulting to the media gallery. This extra click each time gets annoying fast. Also, in the old editor, if you scrolled down the media page to get to the shots you wanted, adding another image would bring you back to the same spot so you didn’t have to scroll again. That is gone. Media is added as a new block. There is no obvious way to add a block at the bottom of your post. Instead you add one and see where it shows up and then move it down as required. Meanwhile, at the bottom of the page there is a Sharing box which seems to do little other than get in the way.
Even editing the publishing date is a pain. They have moved that around a bit in keeping with the other changes but now, when you tab between fields, your cursor is at the end o the current data. Previously, tabbing would move you to the next box and select it. This facilitated rapid changes to the entries. Now you have to manually delete each entry and then type a new one. One more step for each entry which is not a big deal initially but soon becomes a nuisance.
The legacy editor is still available. However, it isn’t hard to imagine that, over time, this will become obsolete and won’t provide functionality until it is deleted so I am working with the new format to see what I can do to get to grips with it. However, it is testing my patience. It has significantly slowed down my process and made post creation more difficult than it used to be. I have got the hang of bits of it but getting used to something does not make it useful. Pull your finger out WordPress and sort this out. There are so many users of the system, it is important that it works or they will soon migrate to another platform.
Yet More on the 100-400
Here is the latest update on the 100-400 saga. As reported here, I got the 100-400 back from Canon and they had indeed found something wrong with it. This was, as I noted then, a relief as I wasn’t imagining things or just not being able to use it properly (although that is still a real issue with my photography as a whole!). However, until I had been able to get out and about and given the lens some significant use, I didn’t know whether I would really see the difference.
Now the jury is in. I went out over the weekend and shot a lot of stuff in some nice conditions. Over the last couple of days I have been going through the images from the shoot. Let’s just say I have a very big grin on my face. The problem I was seeing before is gone and now I am seeing some really nice image quality all across the frame when shooting wide open. This is great news. After having the lens for a year and feeling less than happy, it is like I have got something new to use. I am a happy camper! Expect some of the shots from this shoot to make their way on to here over the coming weeks.
Clever Feature of Lightroom CC
This one is something that I can attribute to the Kelby media juggernaut. I did not discover this myself but, if you are a user of Lightroom CC and use either the HDR or the panorama functions, this could be of interest. One of my issues with them was that they took a while to bring up a preview. Once you had got this, the processing would work in the background.
It turns out, if you don’t need to tweak the settings and are happy with what you used previously, you can hold Shift and Ctrl and press either M for panorama or H for HDR and it will launch right into processing the whole thing in the background. You can set multiple versions off if you wish and they will all get to work out of sight while you do something else. While my feelings on the outcome of the processing are not universally great and I covered this in some previous posts, it does a reasonable job most of the time and this is an even better feature that is well concealed!
Time Lapse Tutorial
I have mentioned in the past some of my interest in time lapse. I recently posted a sequence on here and a friend of mine asked me to put together a guide to how I had gone about doing it so here you go.
When putting together a time lapse, the first thing is trying to establish what will be special about what you are shooting a sequence of that will make a time lapse more interesting than any other form of presentation. Usually this involves something that changes slowly in real time but becomes more dynamic in a time lapse such as a sunset or storm cloud development. Alternatively, it is something where a lot happens over a long time that isn’t terribly dramatic on its own but, when speeded up, becomes far more impressive. This could be a sequence of activities with multiple people or launching airplanes as was the case for the one I recently made.
Once you have established what it is that makes it interesting, then you have to decide how best to portray that. Choosing your location and your angle of view are the next challenges. I was shooting departing and arriving aircraft at SFO so I needed an angle that gave me a good view of them and a field of view that allowed plenty of the movement to be seen without everything being too far away to be noticeable. In this case, shooting at night works well because the lights stand out far more making the aircraft more conspicuous than would be the case during the day.
Now it is time to get into the technical issues. How long a clip do I want to make? Shooting time lapses means getting a large number of still shots which will each be a single frame of video. Video frame rates vary but I used 30fps for the sequences I make. Therefore, 30 shots will give me a second of video. If I want a minute of video, I need to shoot 1,800 shots. That’s a lot of shots. Also, figure on shooting more before and after the main action since it is nice to have some spare video at each end to play with in future editing.
You know how many shots you need but how long in real time do you want to cover? Are you starting before sunset and finishing well after sunset? Do you have a peak period of activity that you want to cover? Now you can see how many shots you need over a given amount of time so you will work out how long the interval between each shot can be? The interval between shots is critical but you must also factor in how long a shutter speed you want. This is where shooting at night is a lot nicer because you can get nice long shutter speeds. These make for smoother looking videos because there is no jerkiness. Shooting on a sunny day with a very short shutter speed and a few second interval will result in a jerkier output. The “rule” is to have the exposure time at least half the interval. Doing that during the day may require some neutral density filters. At night it is a lot easier to manage.
Now to mount and control the camera. Obviously a tripod is a necessity to make a stable platform for the shots. A cable release is a must have and preferably one with a timer built in so you can program the intervals. However, if you are shooting at night, you can get away with putting the camera on burst mode with a shutter speed to match your interval and then lock the shutter release open. It will then just keep shooting. The other camera thing to consider is image stabilization if you have long shutter speeds. IS can wander around for long exposures making everything blurred. Keep it turned off. I would also switch autofocus off once you are happy everything is sharp to avoid the focus getting changed by the camera. If the conditions are changeable, you might go with something like aperture priority to accommodate changing exposures. At night, manual might be your best bet. Always keep an eye on how the exposures are doing if in a programmed mode to ensure you aren’t exceeding your interval with your shutter speed. There are complex bulb ramping tools available to use if you want to get advanced. I haven’t tried these since they haven’t been necessary for my purposes so I can’t give good advice. I do have the functionality in a cable release device that connects to my iPhone called Triggertrap but I haven’t ever pushed it to its limits.
One thing you will discover is that fixed apertures are not fixed. Cameras will go to a slightly different aperture for each shot which can result in slight variations in exposure. This “flicker” can be managed by clever manipulation of the lens position but I prefer to use software to fix it. The software will also help if you end up tweaking the camera settings during the capture sequence.
Last piece of equipment advice is bring a chair. Once everything is at work, you don’t have much to do. You can shoot with a second body of course or you can sit back and relax. If you have a buddy along, that is not a bad thing! I shoot all of my sequences in RAW format. For night shoots this gives you a lot of latitude for tweaking the exposures. It does use up a lot of memory but storage is cheap these days. With charged batteries and big cards, you are good to go.
Once the shoot is done, you get home with a ton of images that look remarkably similar. First I import them into Lightroom. I will keyword them in the same way as anything else from a shoot including adding a time lapse keyword. Then I will make sure all of the time lapse shots are in one subfolder before jumping over the LRTimelapse. I am not going to try and write a tutorial on using LRTimelapse. The website for the software has far better guides to how to use everything. However, I will focus on the key elements I go for.
The main one is the Deflicker process. This is a routine that analyses each shot and applies little tweaks to the exposure to avoid any visible flicker. You can draw out a box in the image preview to tell it where to analyze. This means you can pick an area that is constant in the image as a reference and avoid areas where there is a lot going on. If the image exposure is gradually changing, it won’t affect that. It will just take out the individual variance. You can see a trace of how the overall exposure tracks during the sequence.
The other element I sometimes use is panning. You can define keyframes in the sequence and jump back into Lightroom to crop each one as you wish. Back to LRTimelapse and it will calculate the individual crops for each frame to make a smooth pan between your chosen keyframes. Quite nice to provide a little variety if you wish. I always crop the images to a 16×9 format since that works nicely for HD output formats.
When all of your tweaks are fixed, you save the metadata files and go back to Lightroom to reload them. (There can be a bit of back and forth like this throughout the process.) In Lightroom, there is an export dialog from LRTimelapse which then renders out the individual files from each shot. These will then be taken by LRTimelapse and rendered as a video clip.
Sounds really simple that way and, to be honest, it is pretty straightforward. A little practice helps of course. When it works out, the result can be very satisfying. Of course, a lot of times, you see something that you really wish you had done differently. That is something you will have to put down to experience and try to remember next time you are out shooting.
One last thought – if you are shooting something that involves light trails at night, consider making each image a layer in Photoshop and blending them together as a stack to see what happens. It can work pretty nicely sometimes. However, you can end up with a pretty huge Photoshop file so your computer may groan while processing it. Happy shooting!
HDR 32 Bit and Lightroom
This post is a plea for help. Anyone who is a regular user of Lightroom and Photoshop may be in a position to educate me a little. I use Photoshop to process my HDR shots. I start out in Lightroom, select the shots and use the Edit Photo>HDR Pro method to open them up in Photoshop. I then use the 32 bit version of the HDR Pro processor to create the file. I then take the Edit Using Adobe Camera Raw option for opening the file to undertake the final mapping. This works pretty well and I can usually get something I am happy with.
I then close the file and save it which automatically reimports the finished file back into Lightroom. This is when things go wrong. The view of the file in Lightroom doesn’t appear to make use of any of the edits I had done in ACR. The highlights are too bright and the shadows too dark. I can then use the Lightroom Develop settings to get something close to what I want but surely that should not be necessary. I might make further tweaks but shouldn’t it look the same when I close out of Photoshop.
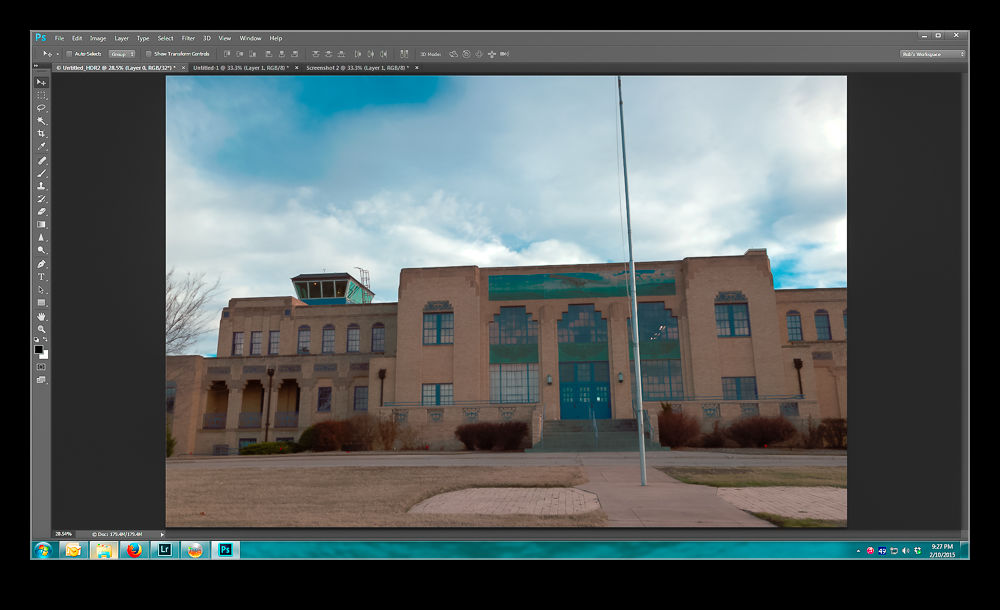
Below is a sequence of screen captures to show you the unprocessed shot in ACR, the finished version, what it looks like in Lightroom and then what I can tweak it to. Any suggestions are gratefully received. (Note, I didn’t make this exactly match the two edited versions. It is aimed to illustrate the disconnect and the recovery process.)
Original HDR merge pre tone mapping
HDR with ACR tone mapping applied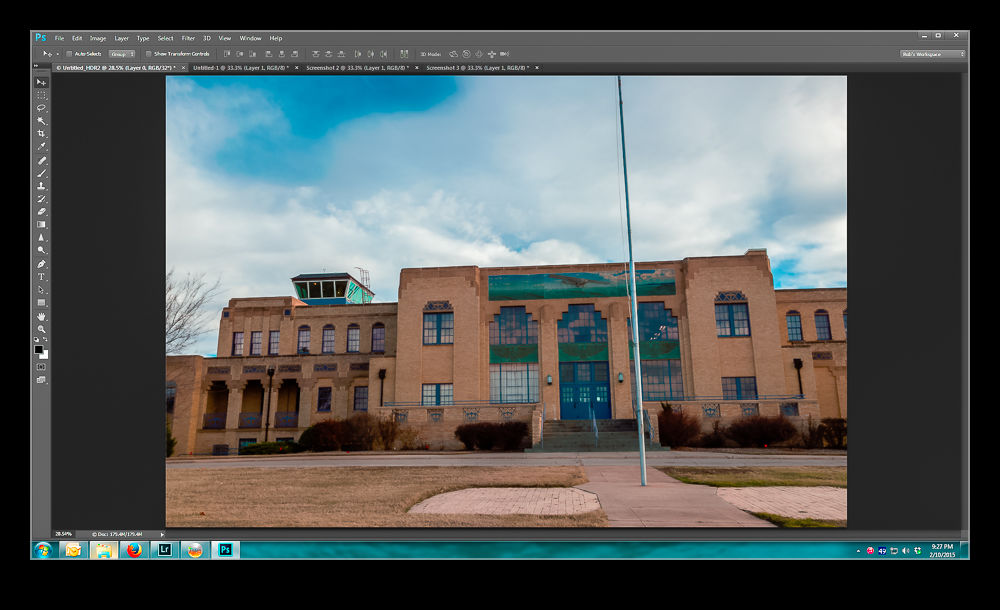
How the saved image appears when imported to Lightroom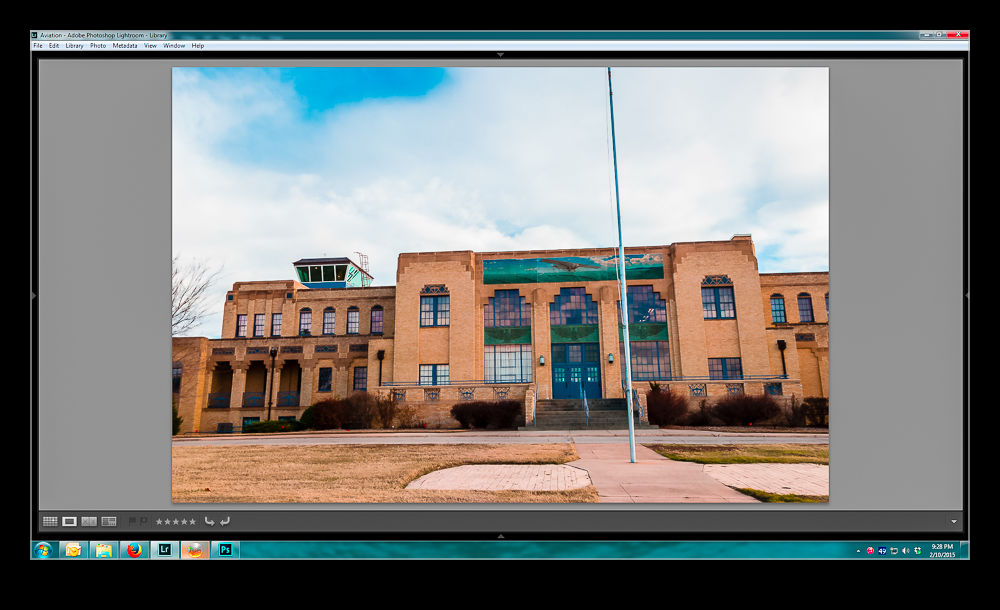
Using Lightroom to get back to something like I had in Photoshop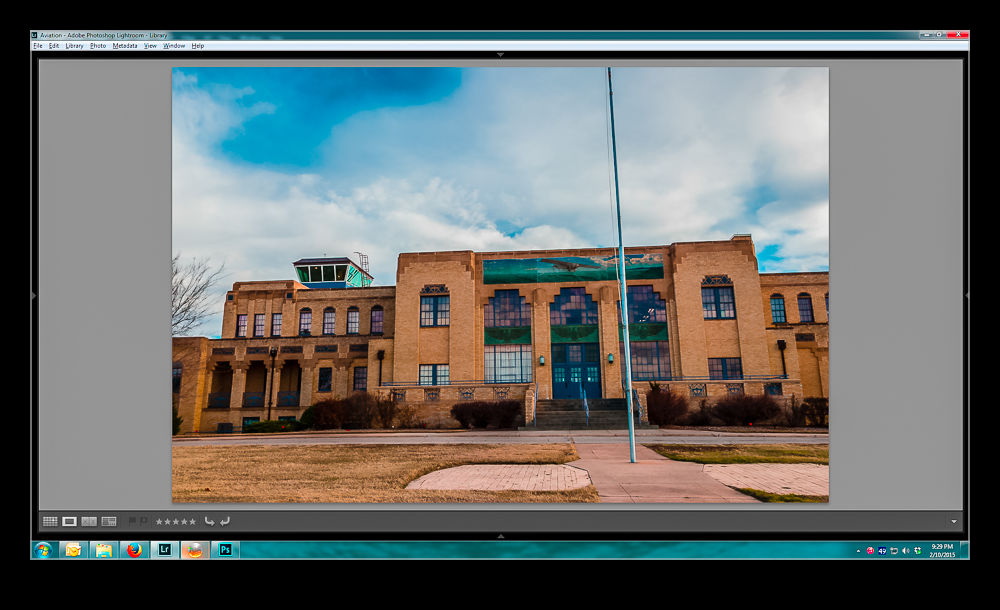
Playing with Noise Reduction
One of the biggest developments that there has been in digital imaging in recent years has been the improvement of performance in low light. A few years ago, it was hard to get a decent image at above ISO400 and much post processing work was required to try and make the images workable. Plug-ins for noise reduction were very popular. However, the camera manufacturers have been very aggressive in developing chips and processors that allow shooting at ISO levels that would have been unthinkable a while back. You hear of cameras being perfectly acceptable at ISO6400 and above.
My cameras are not the newest on the market but there are certainly not slouches in low light. However, I have never been terribly happy with the performance at high ISO settings with the image breaking up a bit when viewed up close. This is where I have to admit that I can be a complete idiot sometimes.

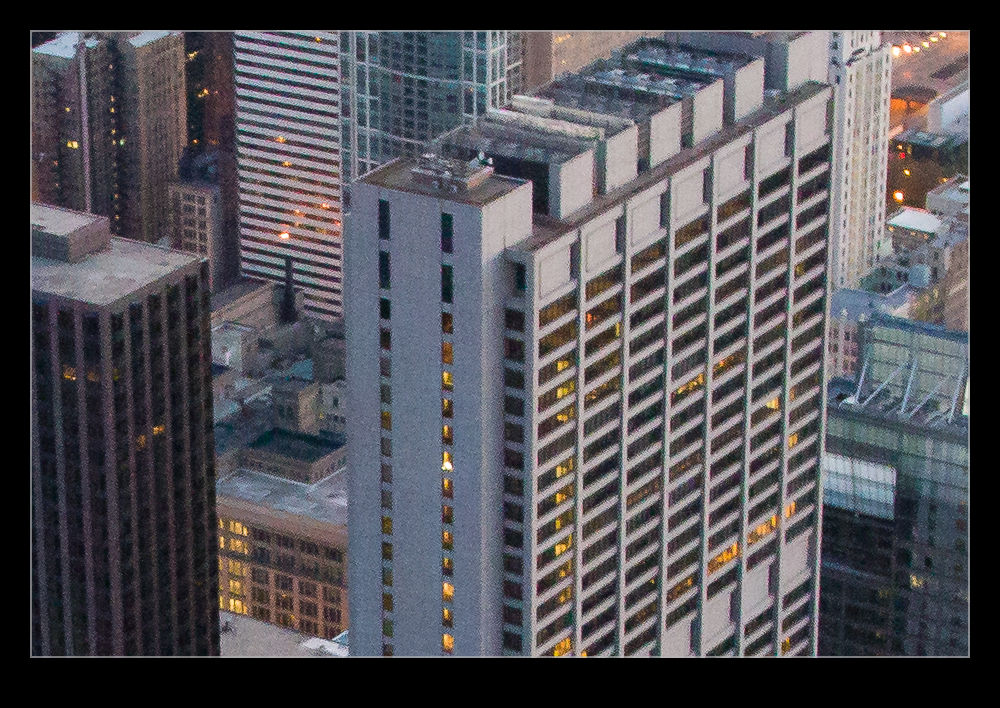 I shoot RAW all of the time and then process the images in Lightroom. I have created some presets of development settings that I apply each time I import an image and which then acts as the starting point for any additional editing. This is where my problem lies and why it has taken me so long to realize it I can’t imagine. Anyway, enough of the self-flagellation and on with the topic.
The problem lies in the Detail section of the Develop module. This is where sharpening and noise reduction are applied. I have some basic settings I start with here and, when I was importing shots taken at high ISO settings, I was not changing them. I would play with the noise reduction but things still didn’t look right. The problem was, of course, the sharpening. The basic setting I had entered was sharpening far too much for the ISO setting and was causing some odd breakup of the image. I finally realized this one morning while lying in bed – I have no idea why I was thinking of this but it suddenly came to me.

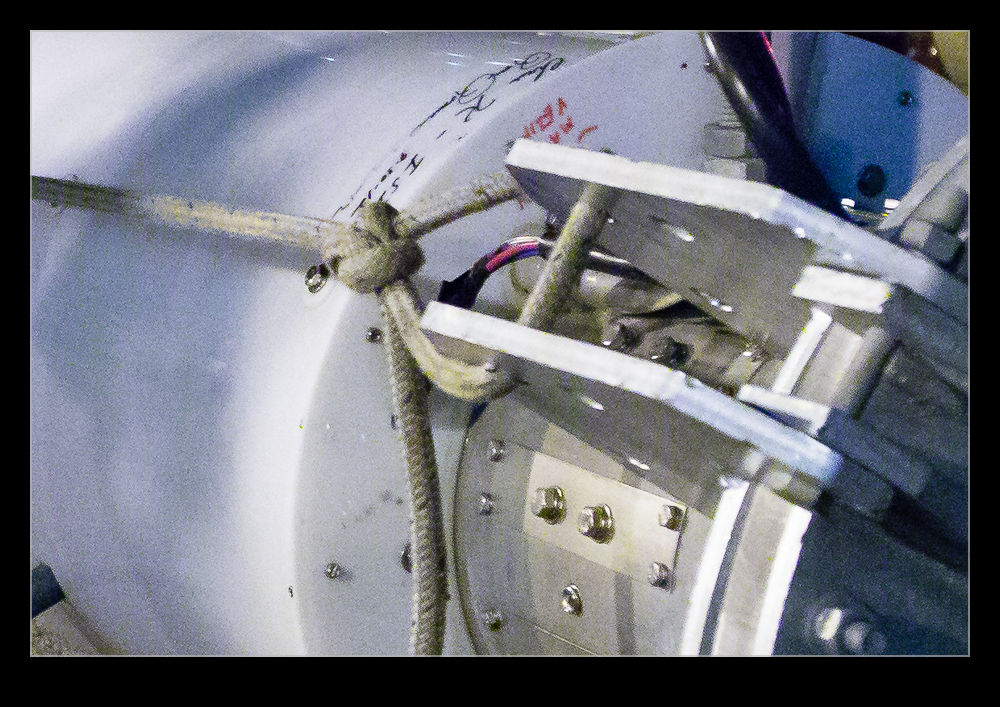 I got up and opened some high ISO images and went to the detail area. I zeroed out the sharpening and the noise reduction. Everything looked awful. Then I brought back the noise reduction and things suddenly started looking a lot better. When I was happy with the noise, it was time to bring back some sharpening. Things were a little soft after the noise was taken out so the sharpening brought back a bit of punch to the image. A tweak on the amount and opening up the radius a bit made things look good. Then a more aggressive level of masking of the sharpening and suddenly the image was looking way better than before.
When I was happy with things, I saved a new preset that was just sharpening and noise reduction and labeled it as High ISO Detail. Now I can apply it to any images that need it and be in a far better starting position for further processing. Each image will require its own approach if I am going to make more effort on post processing but I will now be starting from a far cleaner place. The samples above are comparison of approximately 100% crops with my original settings and the revised approach. Hopefully you can see the difference. It might be annoying to realize you have been missing something for so long but at least I finally worked it out!
Dust Spotting – It’s Over There!
A slight change in direction today. I am going to talk about a post processing tip that I recently read in the NAPP magazine, Photoshop User. It was a tip about how to manage dust in images. This may be something that everyone knows about in which case I apologize for being late to the game.
Dust is a familiar problem to a lot of photographers. It isn’t familiar to a lot more but it should be given the number of shots you can see that have dust spots all over them. Cameras have got better in recent years with the addition of dust cleaning functions that shake the dust off. However, not all cameras have them and they don’t always work perfectly.
When shooting aircraft against a blue sky, dust spots can be particularly conspicuous. If the area with the spot already has a lot of detail in it, the chances are you won’t notice it – particularly if the aperture is reasonably wide. In that case, you don’t really have a problem. The difficulty with dust spots is that you can get to a point where you cease to be able to see them.
Lightroom has a nice feature to assist in dust spotting. If you zoom in to 1:1 view in the Develop module and press Page Up or Page Down, you can look at the whole image to use your spot removal tool. As it moves down to the bottom of the image, another press of the button will move you across and back to the top so you cover the whole image without having to think about it. In the past, I have used this technique combined with really ramping up the Blacks slider to make the dust show up. Even then, the results are not always perfect.
The tip from the magazine was the creation of two Tone Curves to help show up the dust. I will describe the creation of the curves at the bottom since it is a bit long-winded and many may not be interested. The two curves when applied to the image create a very freaky effect. You could actually think of it as a creative finish itself but I will leave you to decide on that one. You can save the curves as a preset and use them whenever you need them. (I assume you can do this too in Camera Raw if you are using Photoshop since ACR and Lightroom use the same processing.)
The colors will be really messed up but the effect will make the dust spots really jump out of the image. You might wonder why there are two curves but, interestingly enough, some spots will show up clearly with one curve but barely at all with the other. I tend to apply one curve and run across the image, then apply the other curve and run back the way I came. It really doesn’t take very long to do.
One thing to bear in mind with this. The technique finds dust spots you had no idea were there. You will start to think that your sensor is filthy. Yes, it is – BUT – most of this stuff is totally invisible. Don’t get paranoid. You can get messed up with this. I had some shots of a vintage prop aircraft and the slow shutter speeds had resulted in small apertures and more conspicuous dust. I ended up with so many spot removal edits that the image rendering took a lot longer than normal. I suspect I had gone overboard with those shots.
Do you have to do this with all shots? Nah. However, if you are planning on doing something significant with the shots and you are concerned to keep dust spots out of the image, this could be a good way for you to find the dust more quickly and get back to what you really want to be doing rather than hunting for dust which, I suspect, is not most people’s favorite task.
Creating the Curve:
The curves are reversed versions of each other. One of them starts at 0,0 and the other starts at 0,100. Create a point at each 10% across the x-axis with each point alternating between 0 and 100. You then have a very aggressive looking sine curve (or cosine curve for the alternate I guess).
