Category Archives: equipment

Camera Bag Review

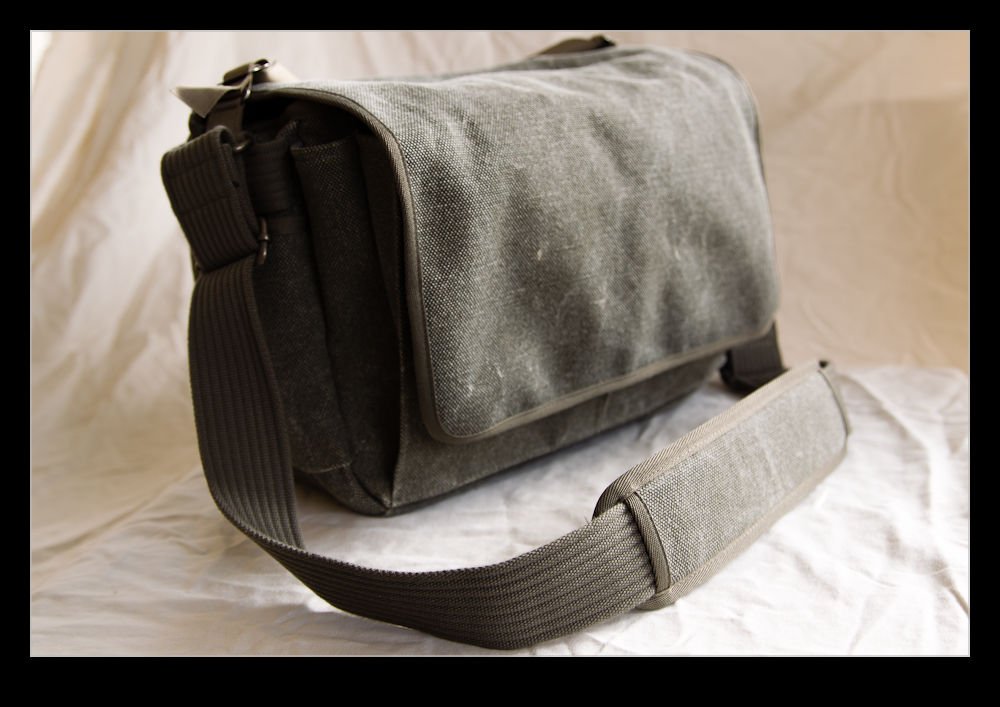
I was a lucky boy and got a new camera bag for my birthday.  Since getting my first piece of Think Tank equipment, I have been taken by how well their products are designed.  I have had (and continue to have) many camera bags and usually they come with some shortcoming or other that leaves me still searching for the right product.  My first Think Tank bag has never left me feeling that.

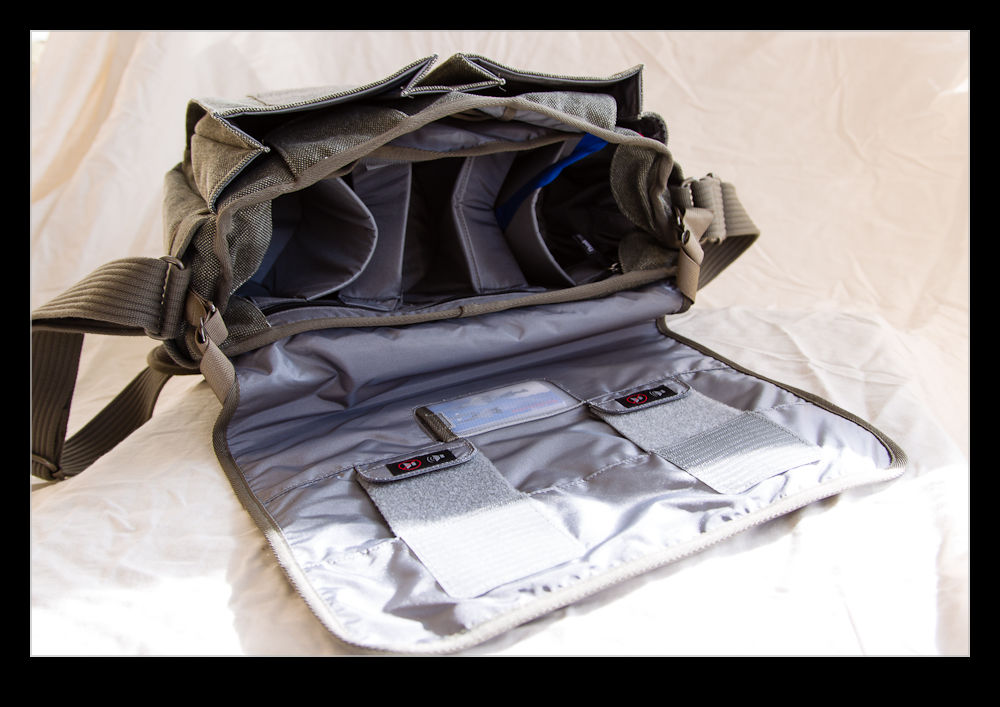
This time I was after a smaller bag that would be good around town.  The one I wanted is also designed to be inconspicuous since it doesn’t look like a camera bag at all.  It is called the Retrospective 30.  This is a great looking bag on its own.  The fact it is well designed as a camera bag too is a bonus.  Some nice little features include Velcro closures that can be doubled over to make the flap silent in use (obviously without being secured in the same way) if you are keen to be inconspicuous when accessing the bag.

It can carry a surprisingly large amount.  On its first trip out I ended up with as much in it as I sometimes get in a Computrekker backpack from Lowepro.  I had two bodies and three lenses plus some straps and a spare card holder and it did fine.  One thing to note, though.  It is a sturdy shoulder strap that carries all this and putting all that weight on one shoulder can be a bit tiring after a while.  The bag is fine – I’m more of a wimp!

Dust Spotting – It’s Over There!

A slight change in direction today.  I am going to talk about a post processing tip that I recently read in the NAPP magazine, Photoshop User.  It was a tip about how to manage dust in images.  This may be something that everyone knows about in which case I apologize for being late to the game.

Dust is a familiar problem to a lot of photographers.  It isn’t familiar to a lot more but it should be given the number of shots you can see that have dust spots all over them.  Cameras have got better in recent years with the addition of dust cleaning functions that shake the dust off.  However, not all cameras have them and they don’t always work perfectly.

When shooting aircraft against a blue sky, dust spots can be particularly conspicuous.  If the area with the spot already has a lot of detail in it, the chances are you won’t notice it – particularly if the aperture is reasonably wide.  In that case, you don’t really have a problem.  The difficulty with dust spots is that you can get to a point where you cease to be able to see them.

Lightroom has a nice feature to assist in dust spotting.  If you zoom in to 1:1 view in the Develop module and press Page Up or Page Down, you can look at the whole image to use your spot removal tool.  As it moves down to the bottom of the image, another press of the button will move you across and back to the top so you cover the whole image without having to think about it.  In the past, I have used this technique combined with really ramping up the Blacks slider to make the dust show up.  Even then, the results are not always perfect.

The tip from the magazine was the creation of two Tone Curves to help show up the dust.  I will describe the creation of the curves at the bottom since it is a bit long-winded and many may not be interested.  The two curves when applied to the image create a very freaky effect.  You could actually think of it as a creative finish itself but I will leave you to decide on that one.  You can save the curves as a preset and use them whenever you need them.  (I assume you can do this too in Camera Raw if you are using Photoshop since ACR and Lightroom use the same processing.)

The colors will be really messed up but the effect will make the dust spots really jump out of the image.  You might wonder why there are two curves but, interestingly enough, some spots will show up clearly with one curve but barely at all with the other.  I tend to apply one curve and run across the image, then apply the other curve and run back the way I came.  It really doesn’t take very long to do.

One thing to bear in mind with this.  The technique finds dust spots you had no idea were there.  You will start to think that your sensor is filthy.  Yes, it is – BUT – most of this stuff is totally invisible.  Don’t get paranoid.  You can get messed up with this.  I had some shots of a vintage prop aircraft and the slow shutter speeds had resulted in small apertures and more conspicuous dust.  I ended up with so many spot removal edits that the image rendering took a lot longer than normal.  I suspect I had gone overboard with those shots.

Do you have to do this with all shots?  Nah.  However, if you are planning on doing something significant with the shots and you are concerned to keep dust spots out of the image, this could be a good way for you to find the dust more quickly and get back to what you really want to be doing rather than hunting for dust which, I suspect, is not most people’s favorite task.

Creating the Curve:

The curves are reversed versions of each other.  One of them starts at 0,0 and the other starts at 0,100.  Create a point at each 10% across the x-axis with each point alternating between 0 and 100.  You then have a very aggressive looking sine curve (or cosine curve for the alternate I guess).

An Evening with Vincent Laforet

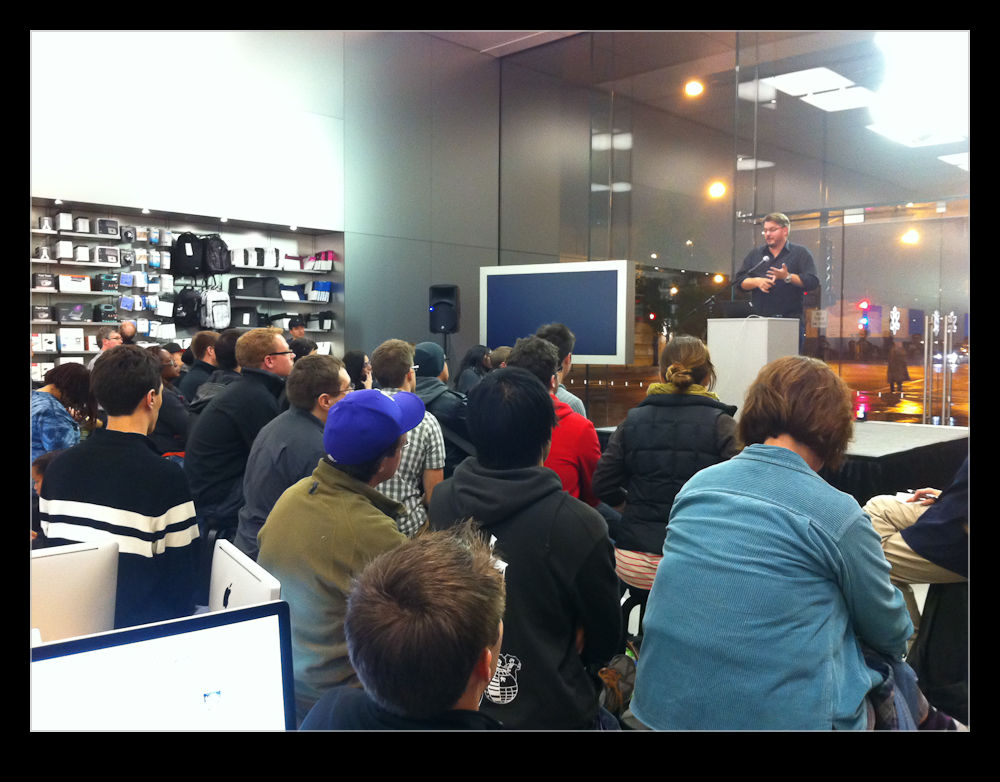
Okay, maybe not a full evening but an hour and a half so close enough.  A damp Monday evening in early November is not the sort of time that you are planning a trip out.  However, Vincent Laforet was giving a talk at one of the local Apple stores and I was keen to be there.

I saw Vincent once before at my first ISAP symposium in Pensacola FL.  He was still predominantly a still photographer in those days.  He gave a talk about his aerial photography in New York and an unbelievably moving account of his time in New Orleans during Hurricane Katrina which was accompanied by some equally moving imagery.

When Canon released the 5D MkII, Vincent filmed a short called Reverie to demonstrate the capabilities of the camera and it went viral.  I don’t know whether this was the start of his move to film or whether he was already on the way there beforehand but he is now a director and a bit of a go to guy on the techie issues with HDSLR video.

His talk was a combination of some of his history – a fair bit of stills work since his audience included a lot of photographers – along with some of the video work he has been doing.  I follow his blog so the video material was stuff I had already seen but that was not a problem.  He talked a bit about what the newer technology is bringing to the video world and how different the workflow is.

The real interest came at the end of the evening though when he had a Q&A session.  This really got to the heart of the issues people were interested in and he was very frank in his answers.  He challenged people to think about what they were doing and who was going to be coming after their work environment (and what that environment would even be).  He answered technical questions and gave thoughts on how to self-teach some of the things associated with film making.

He was a very approachable guy and willing to talk to everyone who wanted to get a moment with him afterwards.  If you get a chance to see him at any event, I would certainly recommend it.  In the mean time, his blog is well worth a look.  He doesn’t always blog regularly but, when he does, it is good stuff.  He also has a great gear page if you want some insight into the stuff he uses himself.  Check it out at blog.vincentlaforet.com if you are interested.

Something Fishy

Let’s get the statements of the obvious out of the way first.  Yes, I am a bit of a “gear head”.  I am quite partial to stuff!  Does this mean that I sometimes get things that I don’t necessarily “need”?  Yes, of course.  Having got past that, let’s move on.

One thing I have been pondering for a while on the lens front was a fish-eye.  Not something that is needed on a regular basis but something that has its moments.  Canon had a couple of fishes that I was looking at.  They had the 8mm fish and the 15mm fish, both of which had things that interested me.  Which one was better for me?  My two main bodies are 1.3 crops but I do have a couple of APS-C sensor cameras which have the 1.6 crop.  All of this impacts the effect.  Besides, when buying lenses, who knows whether I will have a full frame camera at some point.

The result of all of these variables was that I never bought a fish-eye at all.  I just pondered what I should do at length and did nothing in the mean time.  Imagine, then, my delight when Canon announced the introduction of the 8-15mm fish-eye zoom.  Have they been bugging my thoughts to find out what I want?  I guess so.  That reminds me, I must start thinking more about other things I want them to develop!

Of course, the announcement of a new lens does not mean the availability of a new lens.  Recently, it seems the announcement can be far ahead of the delivery.  Obviously the issues in Japan resulting from the earthquake and tsunami have had a major impact but I suspect there is more to it than that.  Anyway, the thing is finally in the wild.  My friend Jim Koepnick was the first person I saw to have one.  They would appear in stores and be gone almost as fast.  No biggie since it wasn’t like I had been struggling without it.  Once they were regularly in store I placed my order.

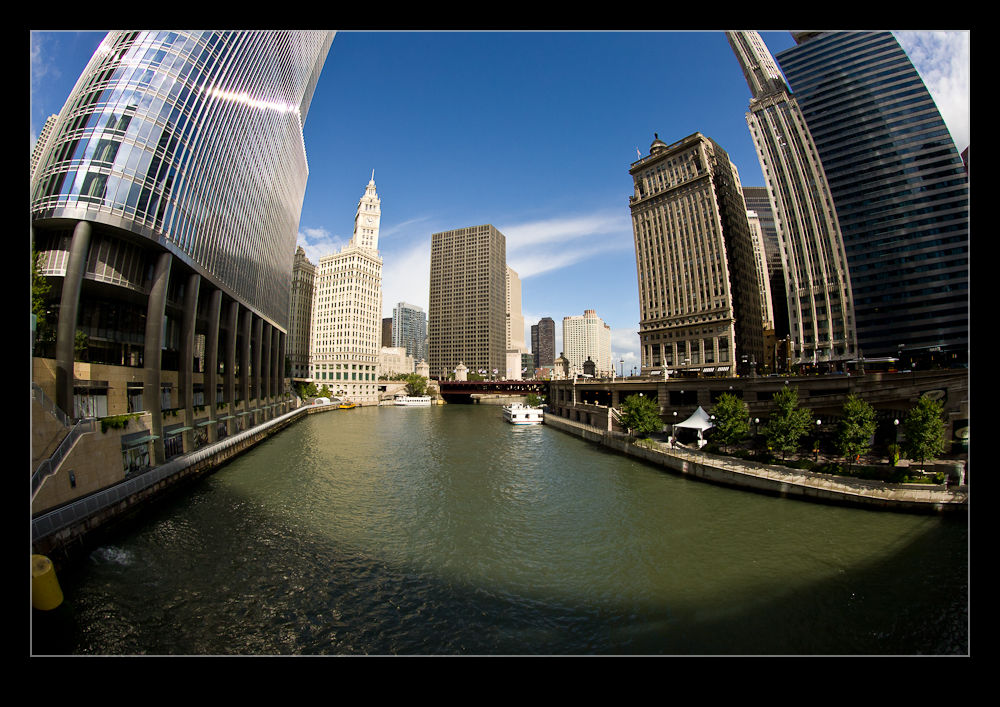
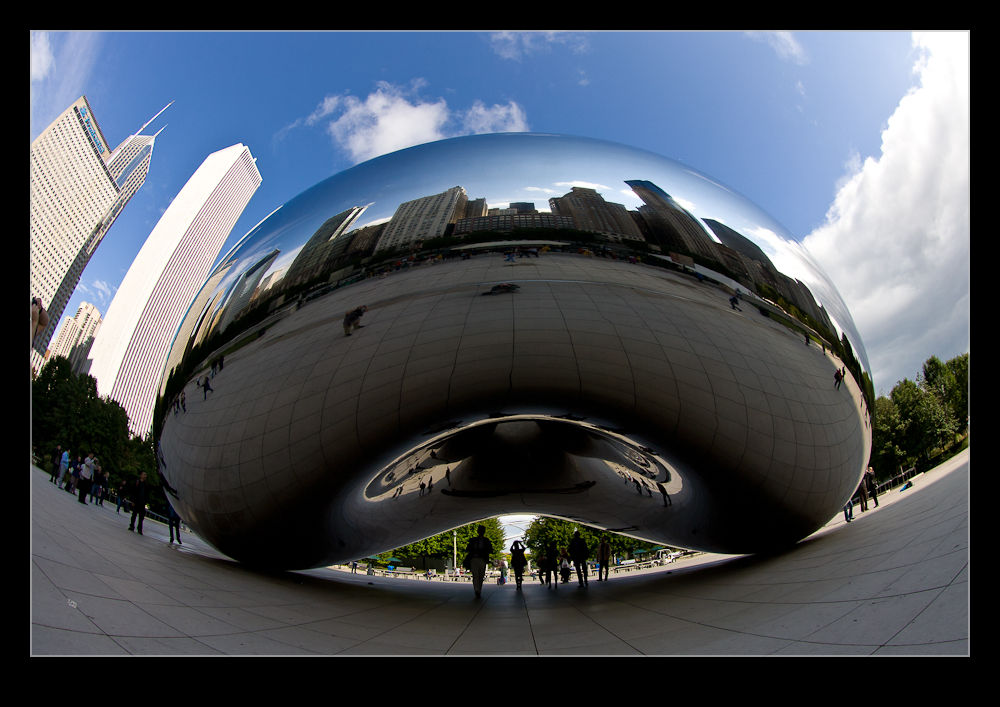
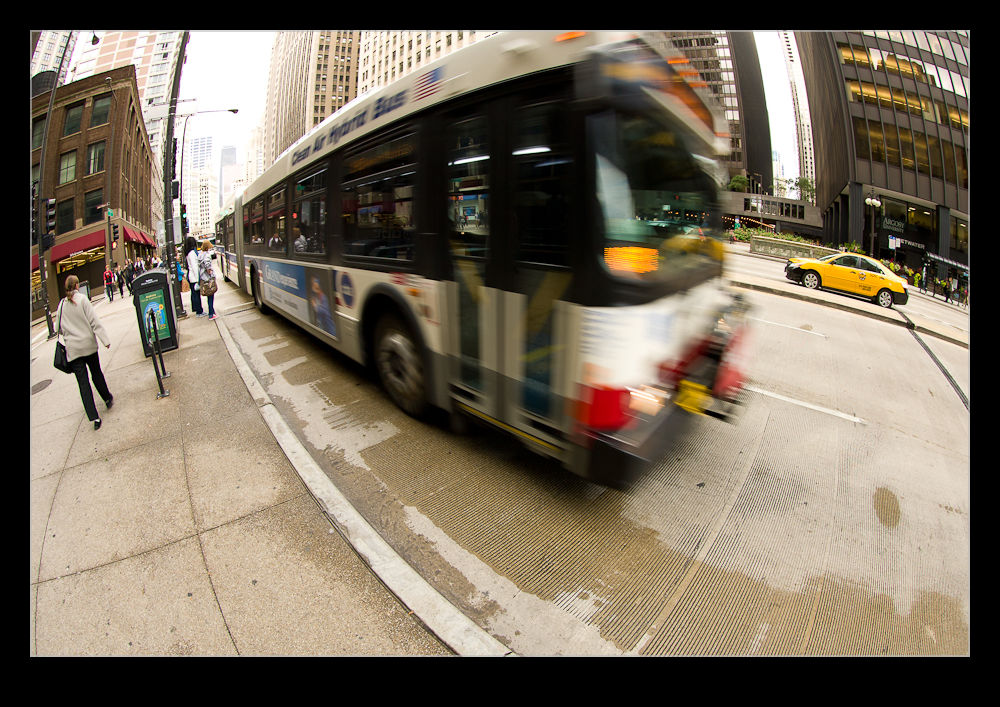
I have to say, I love the thing.  It feels great in the hand and, despite what I have heard from some reviews, I have had no issues with the lens cap.  It is also a chance for me to start learning what can be done with such a lens.  There are the obvious effects you can get and the access to a lot of width in tight spaces.  However, it can also create interesting effects by changing the angle at which you hold it.

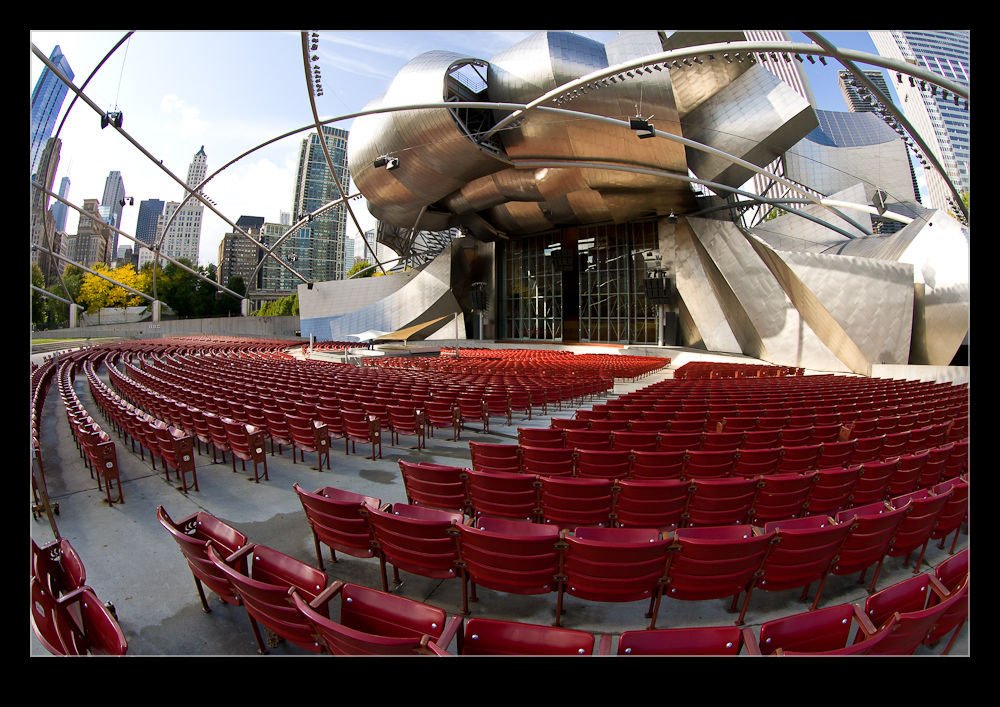
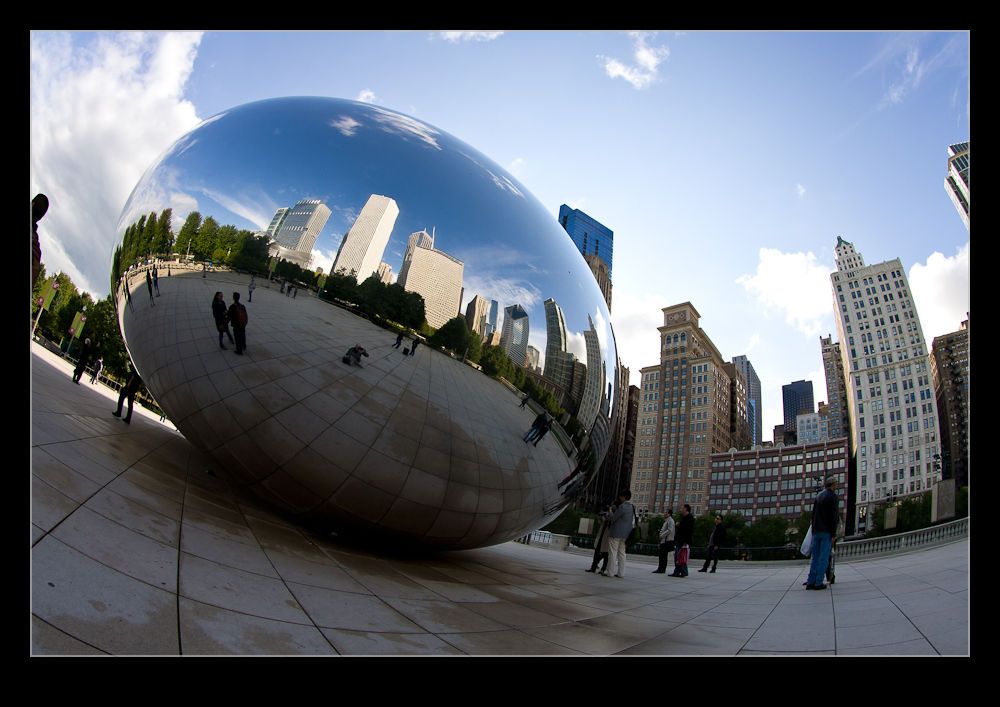
I went out in the city to give some time to experimentation.  I ended up in Millennium Park which is a slightly odd place to play with a fish since many of the features already have a slightly “fishy” look to them anyway.  Of course, that does sometimes allow the subject to be more tolerant of some distorting effects.  It was a fun place to shoot since it is always busy and getting close and using the fish provides some options as well as making surrounding people disappear into the background quite quickly.

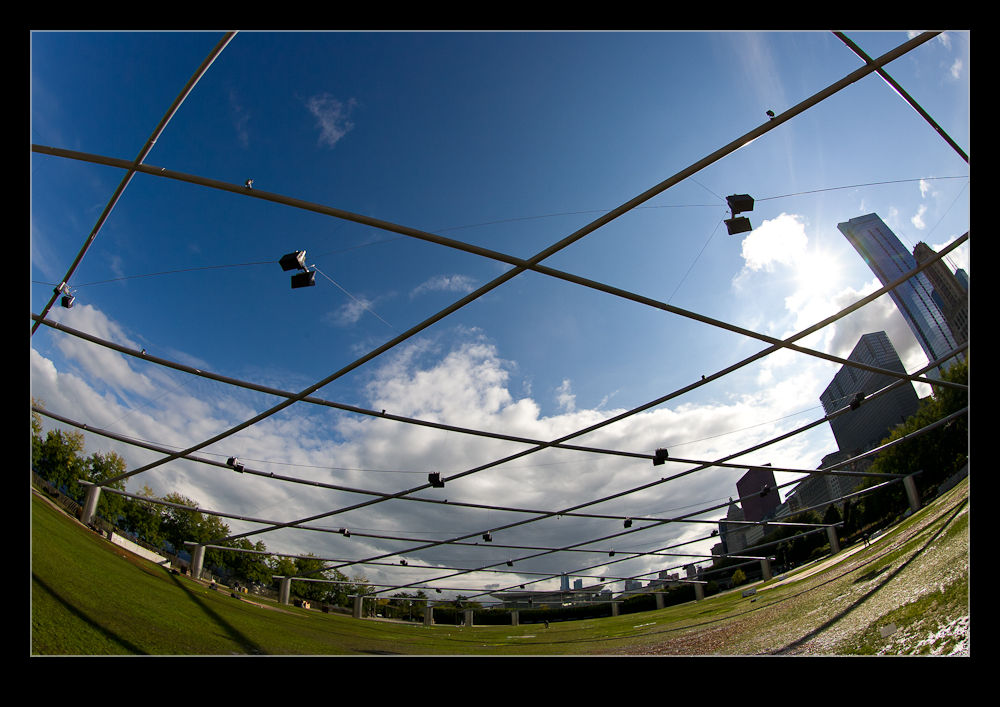
I also played around with a couple of effects.  There is a metal frame across the lawn at the Pritzker Pavilion.  By tilting the camera down, I could really emphasise the curvature but by tilting it up, the frame became almost totally flat.  Something to remember.  I also played around with slightly rotating the camera.  This made the edge of the frame level and the receding horizon appears to turn up dramatically.  Not something to overdo but still a concept to remember for the future.

I am certainly happy that I have added the fish to the arsenal.  Now I have to make sure I make good use of it without slipping over the edge into using it when I shouldn’t.  Hopefully my friends will warn me if that is the case.  That, and I have to remember to keep myself out of my own shots!

A New Body

Not for me of course.  A new camera body.  A new one for me might be good but I have to stick with the one I have I guess!  There has been a lot of information floating around the web for a while about what the next body might be from Canon.  I have been paying particular attention to this as I have been considering getting another body for a while.

The reason for my interest is that I would like to replace one of my existing bodies.  I have two broadly similar cameras but there are of different vintages.  The more I have shot with them both, the more apparent the problems have become with switching from one to the other.  There are little issues that become noticeable over time and there are capability differences that also have a bearing.

The little differences are surprisingly important.  Canon changed the control arrangements between the release dates of these two designs and switching quickly between them can result in me using the wrong button combinations.  I have back button focus set up on my cameras and they use different buttons for this.  A small issue but one that is a nuisance when you are in a hurry.  (They also have different batteries which is inconvenient although not the end of the world.)

The newer body has greater capability in low light, better frame rates and something that I never thought I would care about – video.  It turns out I shoot more video clips than I ever expected.  When you have two bodies set up with different lenses, it can be a pain to realize that you want to shoot a quick video but the appropriate lens is on the non-video body.  Therefore, two identical bodies would be better.

Consequently, I nearly bought a second body earlier this year.  Then the earthquake hit and they became a rare commodity.  For ages they were unavailable.  Then they would occasionally show up but by then, talk was of the next body coming out.  I was in a quandary.    Do I wait for the next evolution and risk having another pair of mismatched cameras or do I forgo whatever enhanced capability there may be and have identical bodies?

Today I got some clarity in that Canon announced the new body.  As expected, it merged the two lines to create a full frame camera with high frame rate capability.  This is very appealing as a full frame sensor was something I did want to get.  Canon seem to have been clever and not gone crazy with the pixel count.  At 18Mp, it is only slightly more than the current body (so no panic over replacing cards, computers and hard drives to cope with huge files) but this is with a full frame sensor so actual pixel density is slightly reduced.  This is not something I am too concerned about.

However, I do have different sensor sizes between bodies.  I would have video for both which is a plus.  The button configuration has been tweaked again.  However, it does seem to be that the key interfaces are still the same and some of the changes are things I have thought about myself.  The battery is changed which would have annoyed me but it appears to be the case that the batteries are backwards and forwards compatible so that should be fine.

There is a stumbling block of course – price!  Canon has been edging up the price of the APS-H cameras for a while getting them closer to the full frame version pricing.  With the merger of the line, it appears that they have got to a price point closer to the full frame version.  Have we been trained to accept this?  Maybe.  What will the street price be?  We shall have to wait and see.  Am I going to buy one or get a duplicate of the current model while it is still available?  I don’t know.  I have nearly six months before they become available so I guess I have plenty of time to think about it and get saving!

Ziplining

Recently, I bought myself a GoPro camera.  They seem to be ubiquitous these days showing up on TV shows on a regular basis to provide the footage from unusual angles or mounted on fast moving items.  They make good cockpit cameras as well and are really very affordable.

As part of the Kauai trip, we spent a few hours riding zip lines at Princeville Ranch Adventures.  I took the GoPro along with us in case a good opportunity came up to use it.  I was not alone as another person in our group had one.  Originally, I had intended to get a head strap for the camera for use on the lines.  Unfortunately, I didn’t order one in time before we left and couldn’t get one locally.  GoPro stuff seems to sell out very quickly so I guess I am not alone in liking the gear.

As it was, I think this proved to be a lucky break.  Since I didn’t have a mount, my only option was to handhold the camera.  Since it has a very wide field of view, this can be done without needing too much accuracy in pointing.  I could also then point the camera in any direction I wanted.  Having a fixed wide view is not always ideal but it seemed to work pretty well.

From the footage I shot that day, I have put together a short video of the ziplining adventure.  I don’t think it is going to win any awards and those people I know who are real editors will, no doubt, cringe at the quality of my cutting but it is a vacation memento at the end of the day so I am not going to get too bothered about it.  Besides, as Vincent Laforet said in a recent interview, when you need editing done properly, get a proper editor to do it.  You can’t do everything!

Here is the video.  Hope it gives you a bit of a feel for a great day out.


Lenskirt Review

Living in a high rise in the city, I have a lot of chances to shoot things that I can only see through the windows.  This has been a tricky thing to deal with over time and I have come up with various solutions with varying success.  A couple of times I have thought about making something myself to be the solution but have never got around to it.

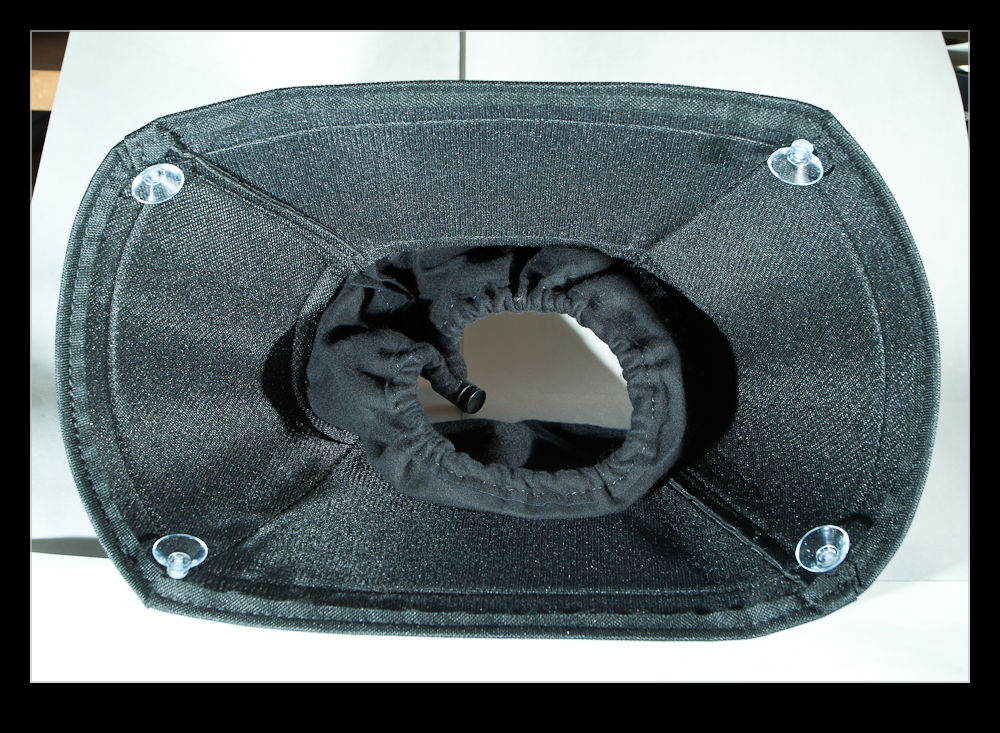
Now someone has made something that pretty much does what I want.  It is called the Lenskirt.  It is a black squared funnel that has a fabric sock at the base which cinches around the barrel of your lens.  I has four suckers at the four corners that will attach it to glass.  The idea is that it blocks any light coming in from the side and reflecting off the glass and back into the lens.

I love this idea.  However, the $49 price seemed a little steep for what it is.  However, i did buy one and it has just arrived.  Overall, I am quite pleased with it.  My suspicions about it being a bit overpriced seem valid but it does do what I want.  Moreover, it handles my widest lens (the 17mm) without any problem.  It allows flexibility of placement so you can shoot at an angle without seeing the skirt.  Therefore, while it is a bit pricey, the alternative is something I have never bothered to do so it is probably worth it to me.

This could have other applications other than shooting through normal windows.  It might be useful in an aircraft when you can’t open a window to shoot out as well.  I am never a fan of shooting through something since the surface is often of poor quality but sometimes you have no choice.

Could it be improved?  Yes.  I would have made the rim stitched to sit flat to a surface when attached rather than having to bend out.  Also, I might consider a slightly more rectangular shape given the format of shooting (although that would impact on the ability to fold it flat).  It is slightly wider than deeper but given the need to look sideways sometimes, a little more width might be good.  (The shot above makes it look a lot wider than it really is by the way!)  I might also have gone for a less reflective black material  just in case.  As I try it more, we shall see if other issues come up.  However, so far, a welcome addition to my bag.

When Does Noise Matter?

I will freely admit I am as much of a gearhead as the next photographer.  New toys always catch my attention and then it is a matter of time before the battle is won between my sensible side or my not very sensible side as to whether I am going to get something.  The price of said item may well have an influence on which side wins that battle.

One thing that is a popular discussion for the pixel peepers is noise.  Having started off with a Canon EOS10D when I first went digital and worked through a number of bodies since – none of which have left my ownership I must confess – I have seen some steady improvement in noise reduction capabilities although not always with as much benefit to the final image as I might have liked but I digress.

A while back I was shooting at the Oceana air show with two of my buddies, Ben and Simon.  We had trekked down from DC for the show and were greeted by less than ideal weather.  The cloud base was solid and low and a bunch of displays didn’t take place.  Some did though and we still had a good day.  Given the heavy cloud, though, we were struggling for light.  I was shooting mainly with the MkIIN and was up at ISO 800 for a lot of the time.

The MkIIN is well into the noisy range at 800 and I knew that was the case but there was little option.  A while after this show, Lightroom 3 came out and it had a lot of noise reduction built in that wasn’t in the previous version.  I took a look at some of the Oceana shots to see how much better they might look.  There was a noticeable improvement and I was happy.

Why am I discussing this now, over a year later?  I was mulling over this topic for some reason, probably related to another acquisition decision, and I wondered how the printed version was affected by this noise.  There are plenty of things that I fret over in an image when looking at it on screen, usually zoomed in far too close, that really don’t become apparent at all when printing.  Is noise one of those things that looks better on paper?
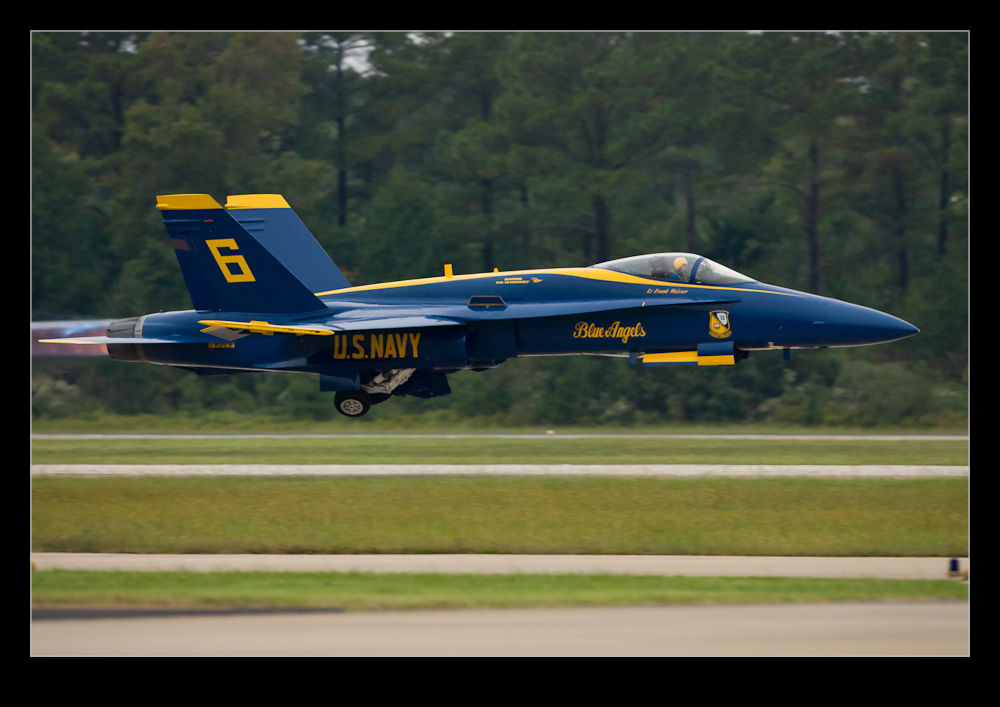
I picked one of the shots from that day to experiment with.  The shot in question is this one of one of the Blue Angels taking off.  Since there was the treeline behind, the gray sky was not an issue and the burner plumes show up nicely given how dark it is so I like the shot.  Now to check it out on a print.

One of the nice features of Lightroom is the ability to mess with the print layouts.  I made a couple of virtual copies of the image and one one of them did my best to optimize the noise reduction and on the other switched it off for the most part.  On screen, it did not look great.  I then set up a page in the print module with two cells right next to each other and put the left side of one image in the left cell and the right side of the other in the right cell.  It looks like a full aircraft if I get the positioning just right.

First I printed it on an 8.5×11 sheet.  If I look closely, I can see the divide.  It actually shows more in the background than on the aircraft.  It is visible but it isn’t as noticeable as you might expect.  This had got my interest!  What about the size of the print.  I repeated the layout on some Super B (13×19) paper of the same type and printed it again.

As you might expect, this time is is a little more noticeable – hey, it’s twice the size!  However, even now, while it isn’t great, it really isn’t that bad.  We are talking about turning the NR almost off.

So, what do I conclude from this?  Well, technology is going to always get better, both in camera and on the computer processing it and I am still going to be a sucker for a new piece of kit.  However, while there is a noticeable noise difference on screen, the print is really a lot more forgiving.  Maybe I should relax about it a lot more and just enjoy the shooting, even when the light is limited.