Category Archives: technique

After Dark! Testing the Low Light

AE7I2413.jpg
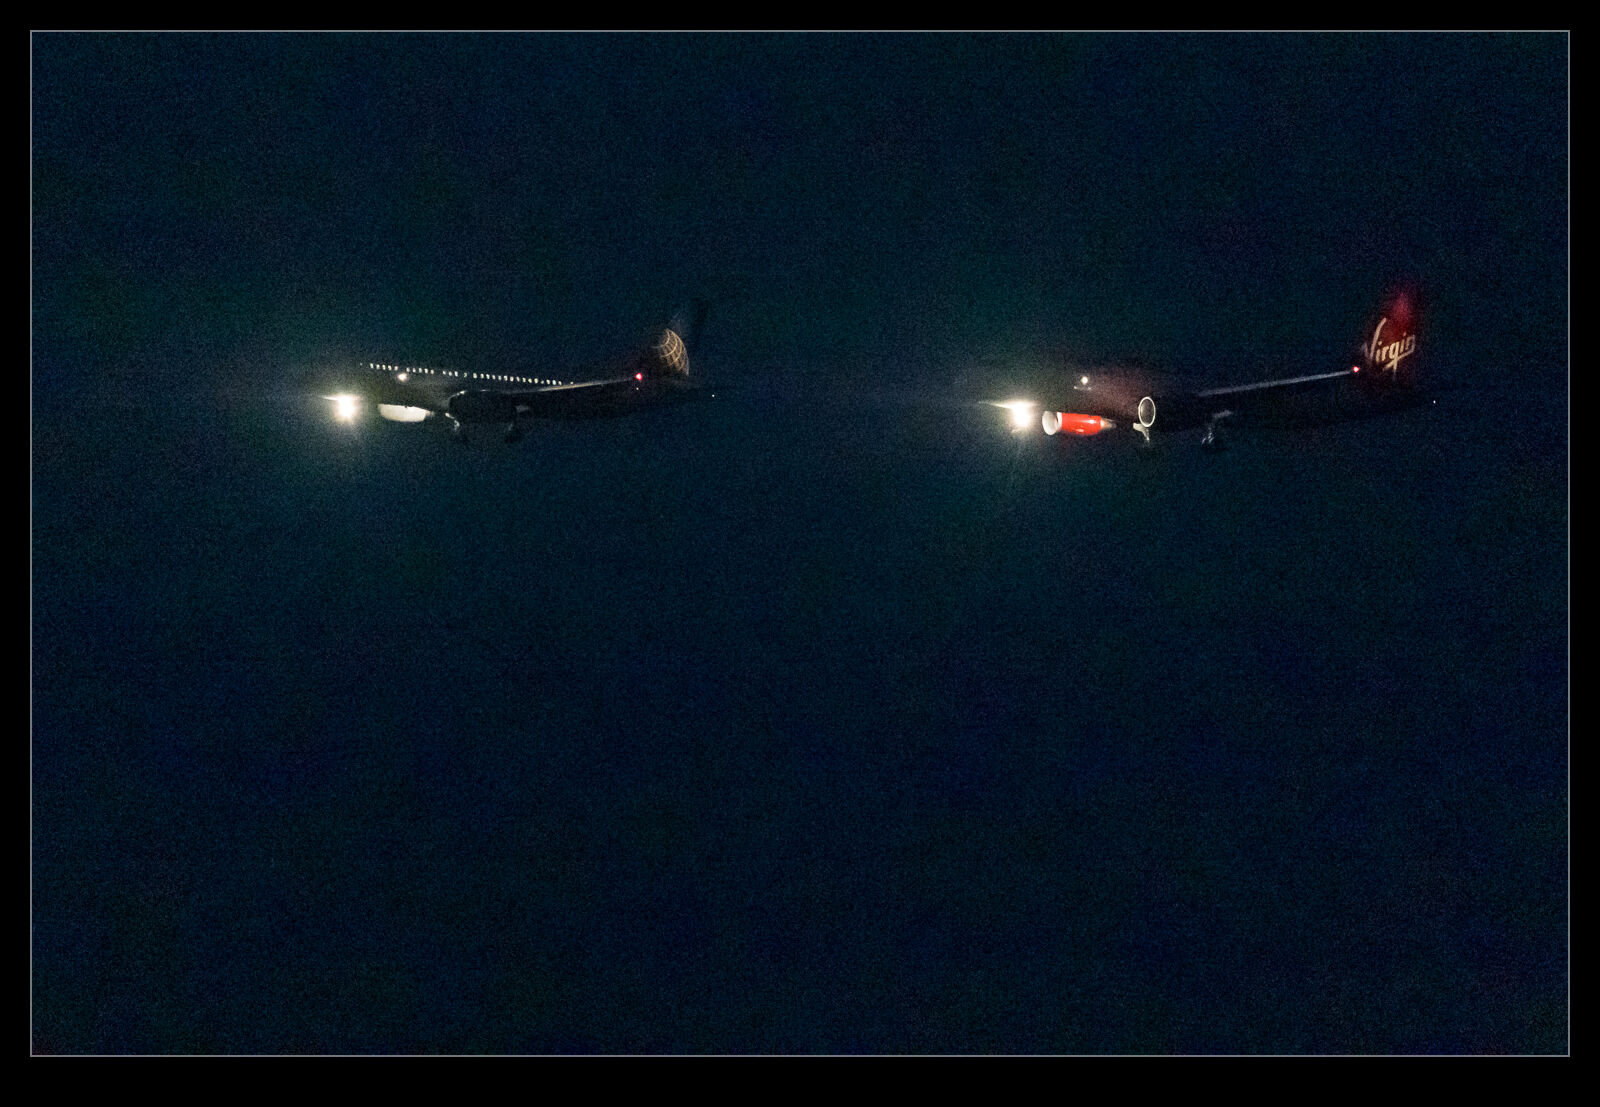
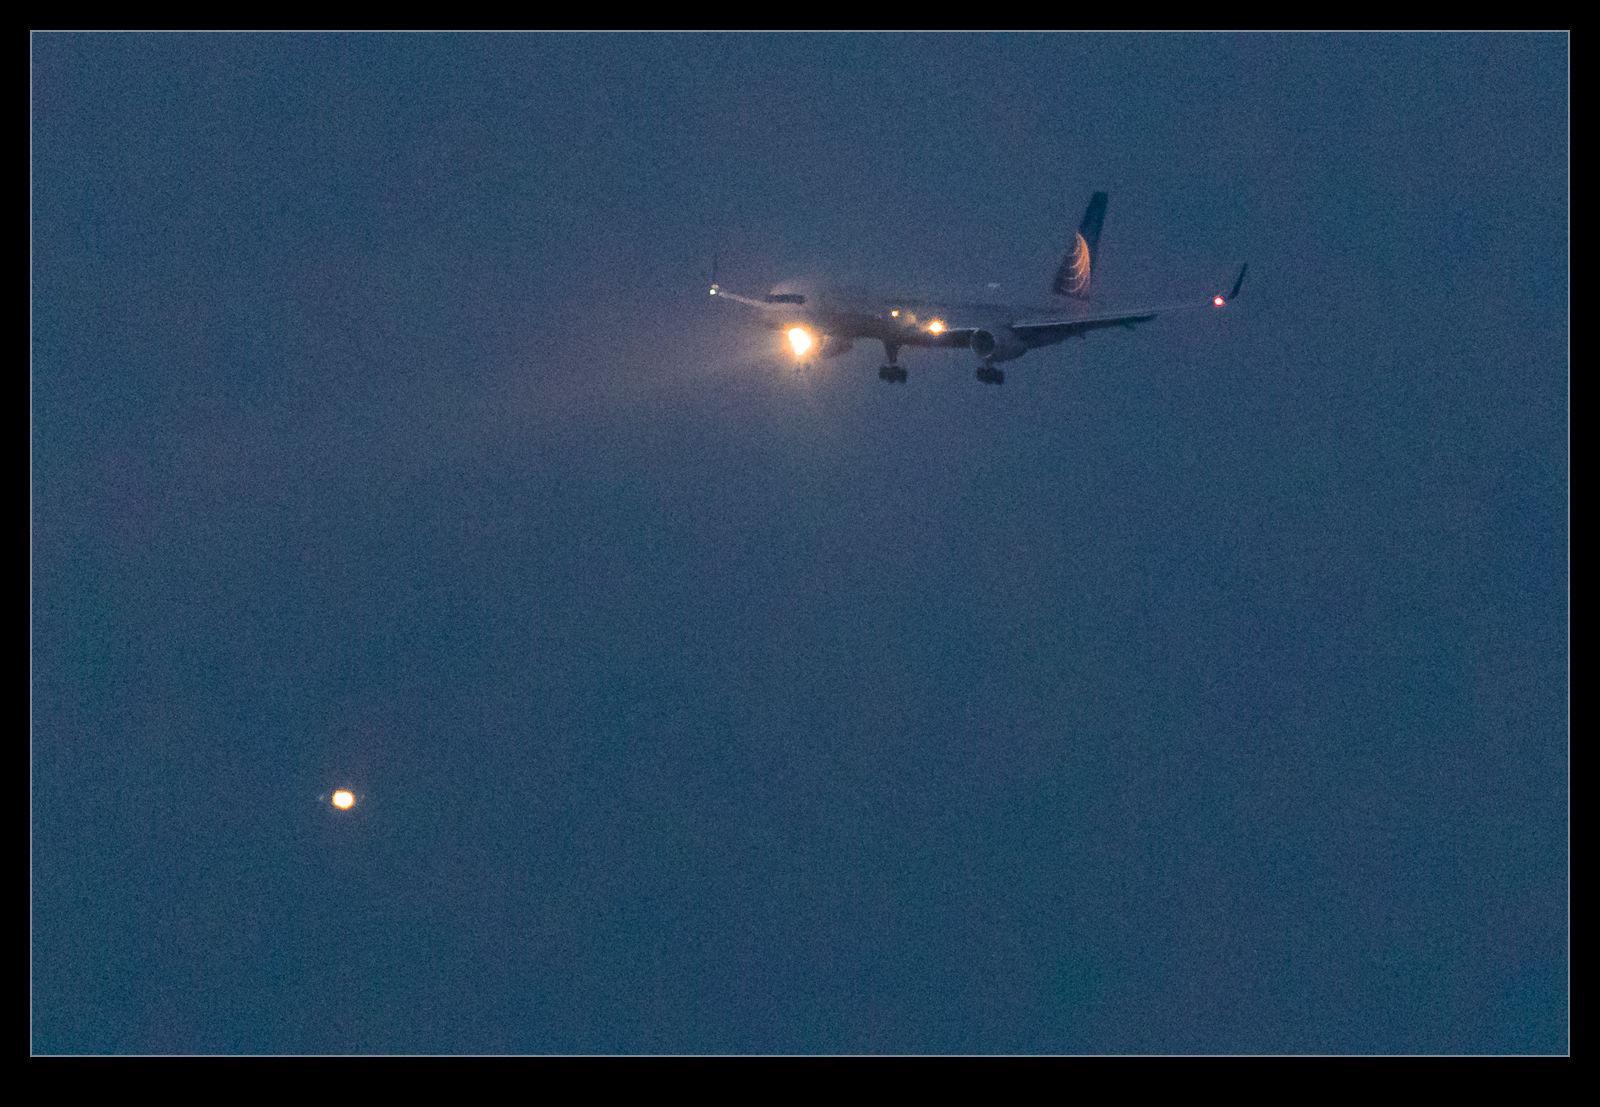
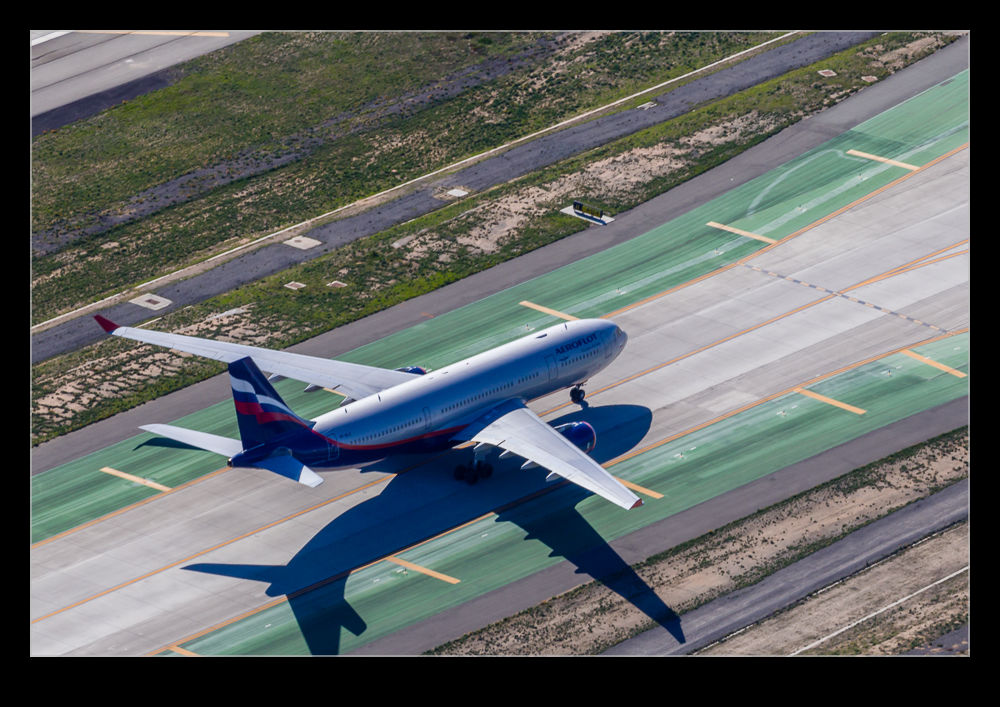
The real goal of my shoot after sunset was to see what is possible with the cameras.  An awful lot is written these days about the incredible low light capabilities of the latest cameras.  I am rather suspicious of some of the claims that are made so I was interested to see what could be done.  I have seen reviews in which people describe shooting with ISO settings and claiming they are absolutely clean – no noise!  I am imagining that there is a little bit of over enthusiasm in these claims.  No one wants to write a review that says nothing much has changed for fear that they won’t get to review the next camera.

AE7I2611.jpgConsequently, while I do expect some improvement in capabilities – particularly given I skip generations of cameras when buying my own – I am skeptical that they will be quite so dramatic.  Even so, I did anticipate some improvements from my previous bodies and I did get this.  I am not talking about noiseless shooting at ridiculous ISO settings.  I am able to work in a far higher range though.  It is worth noting that a blog post involves relatively low image sizes so the worst of the noise becomes less apparent.  Full size images are a lot more harsh.  (For this post I won’t focus on a previous issue of mine which is how printing is far more forgiving of noise than a screen is.)

AE7I2394.jpg
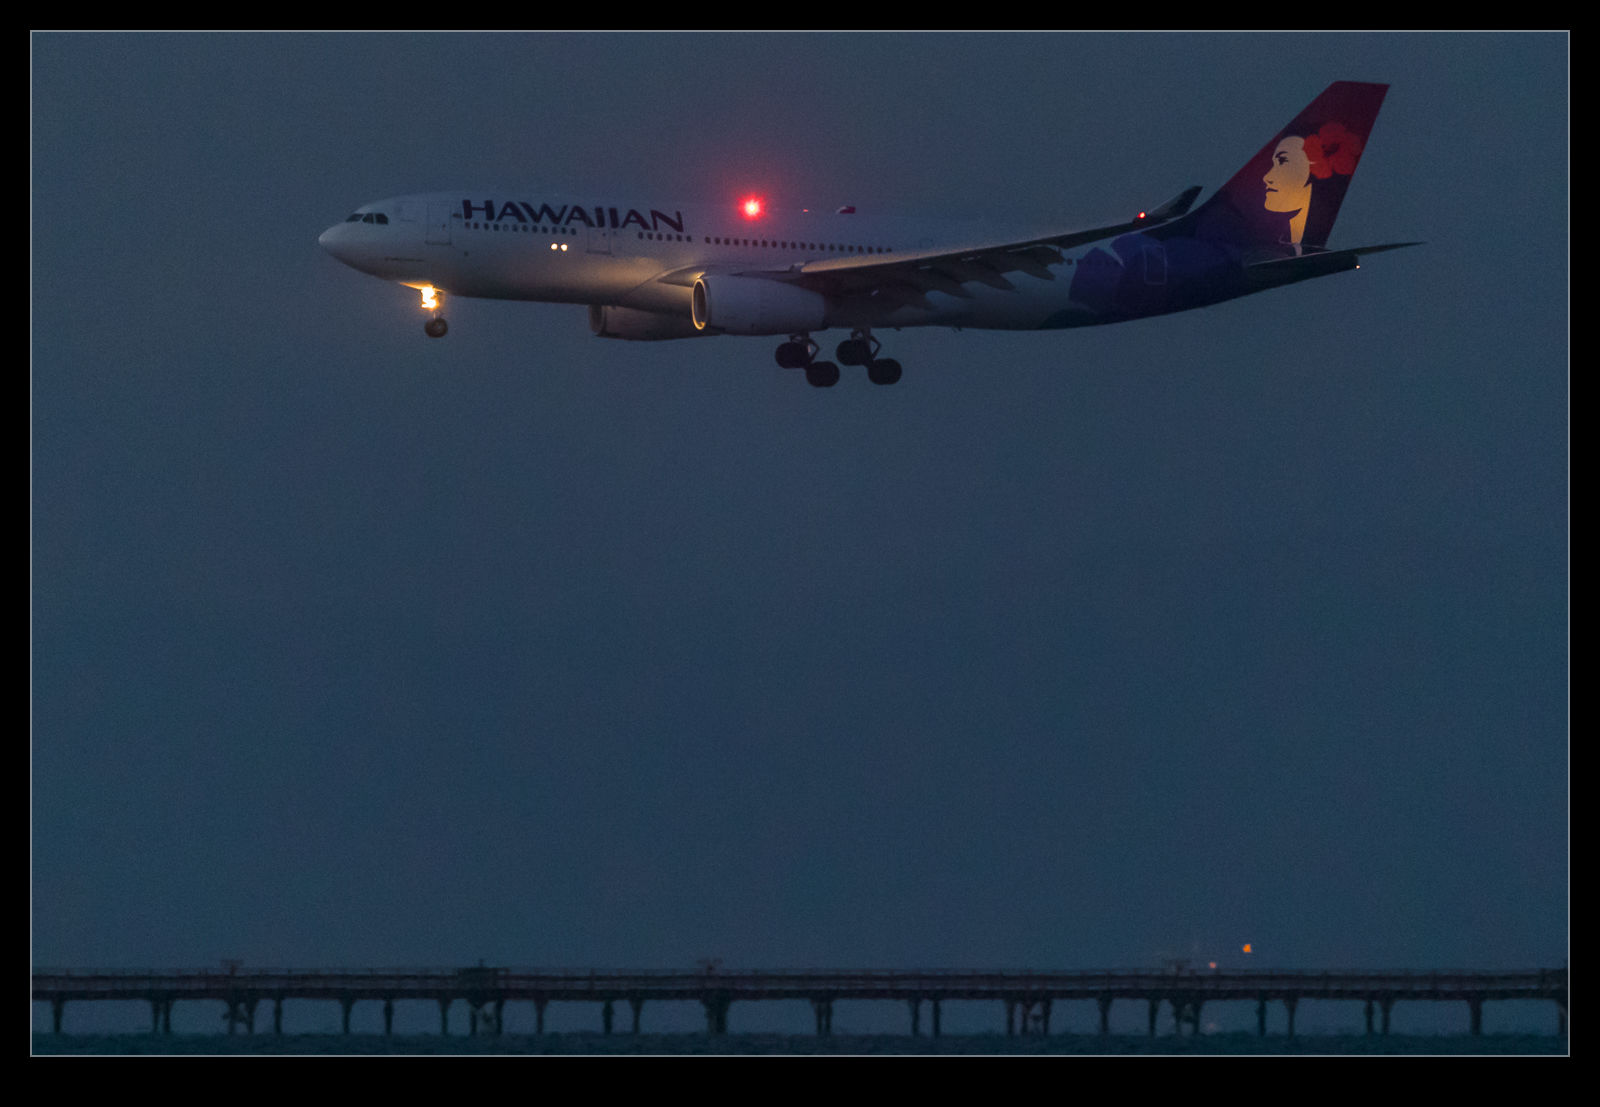
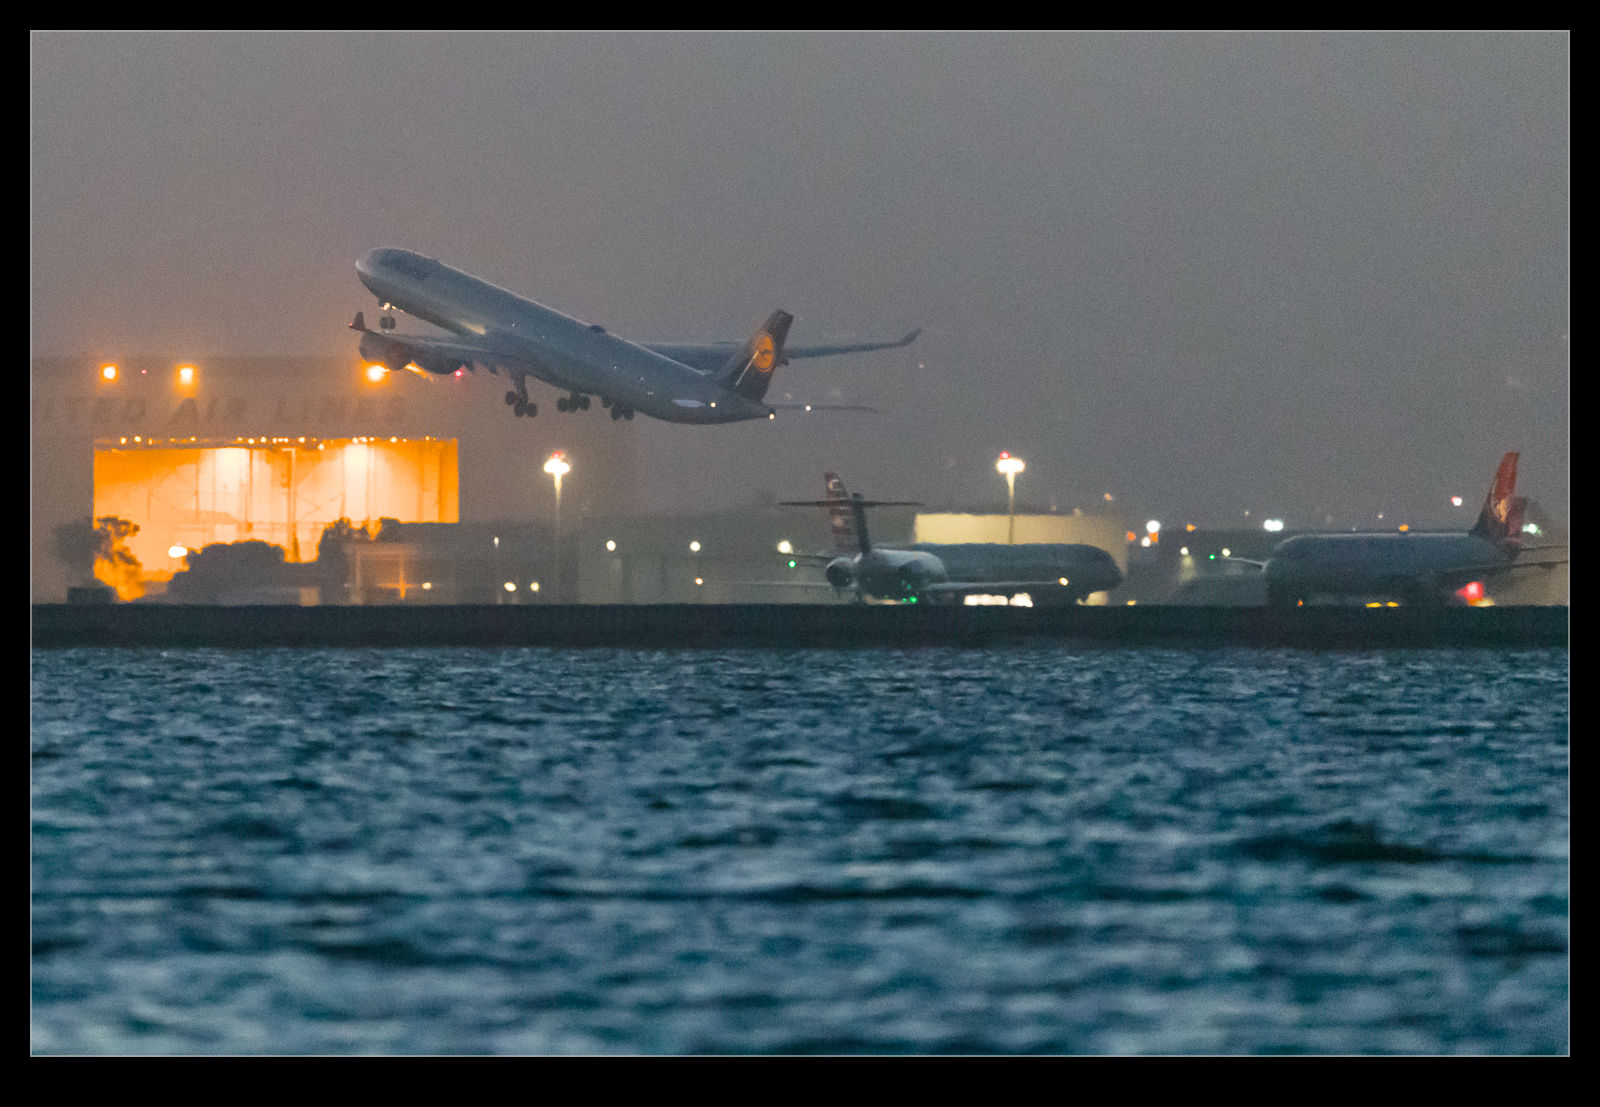
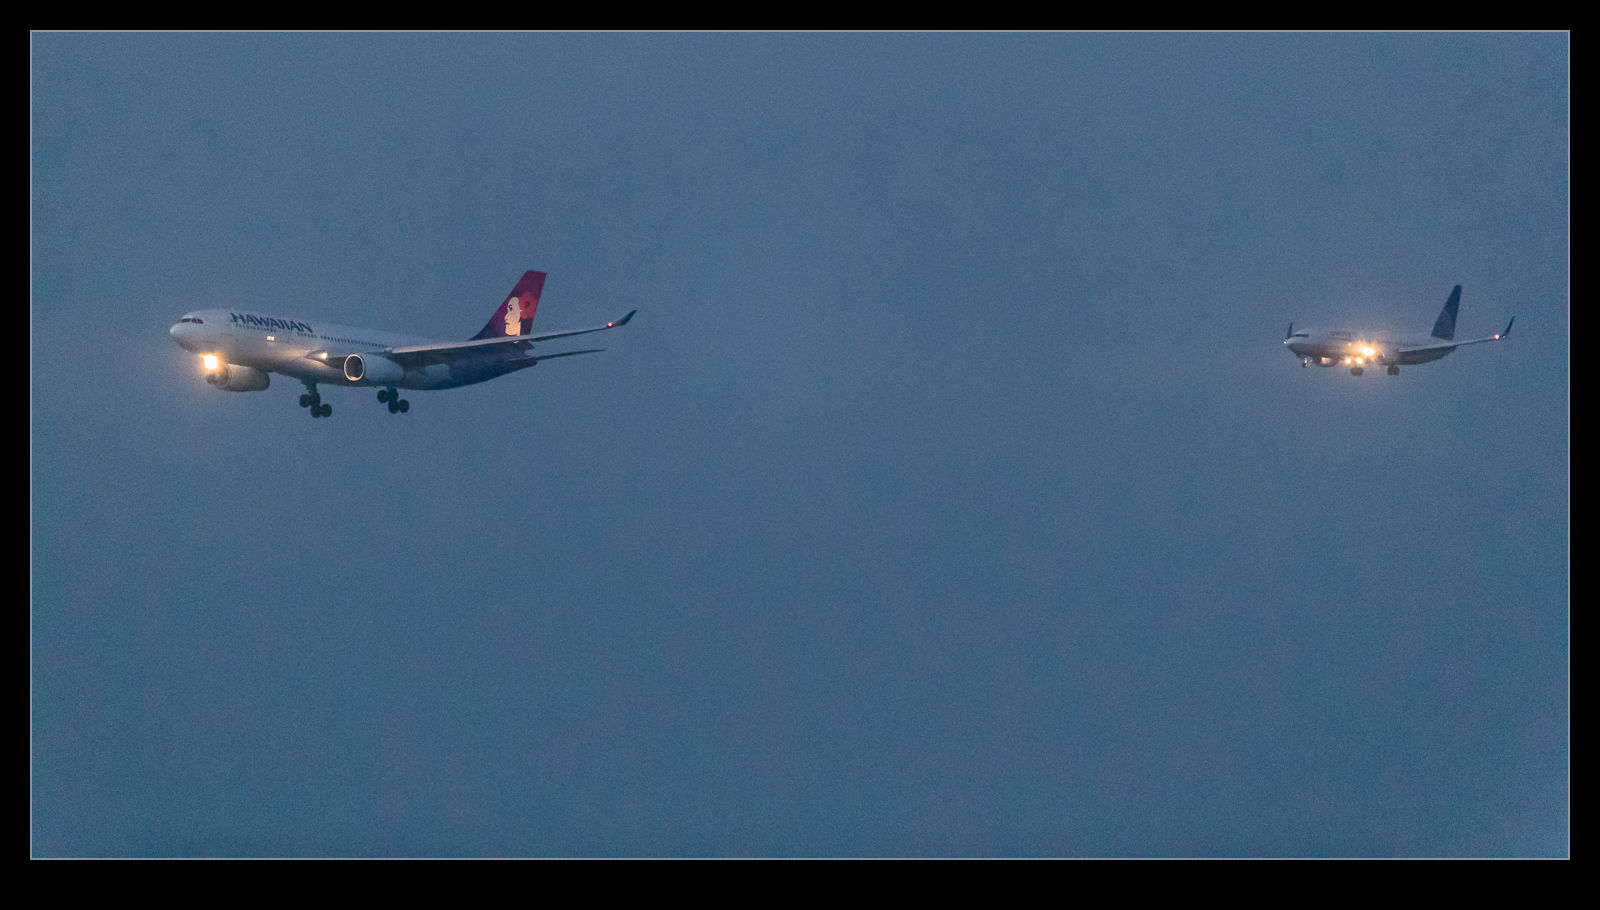
A tricky issue with shooting as the light disappears is the use of exposure compensation.  From having some positive exposure comp during the day, as the night comes on, I go through normal exposure to having a bit of negative exposure compensation.  It is dark so the shots should be dark.  It shouldn’t look like daylight.  I ended up playing around with the settings a bit to see whether -1 to -2 should be used.  -2 ended up being a bit too much.  However, it is a bit of a guessing game depending on what you are shooting and how much light there is in the background.

AE7I2482.jpgOne good thing about these bodies is their ability to handle some post processing.  If the shots were a bit dark, boosting the exposure did not bring as much noise into the shot as I would have expected with my previous bodies.  I was able to mess around with them a lot more without things going horribly wrong.  I am not getting amazing shots (unless you are comparing them to what you could do in film or early digital days in which case this really should be considered amazing – that’s how spoilt we have become).  The contrast at night is harsh so things will always be a bit difficult.  However, you can get shots in some very difficult conditions.  You won’t get detail in the images like you expect in normal lighting but that really would be phenomenal!

AE7I2773.jpgAE7I2508.jpg AE7I2647.jpg

A380 Gear Sequence

B11I1197The jets approaching SFO have their gear down long before they reach Coyote Point.  However, if you look into the distance, you can see them lower the gear somewhere around the San Mateo Bridge.  The A380 has a gear sequence that involves the outer gear coming down first followed by the body gear.  I figured I would shoot at long range and then animate the sequence.  Heat haze was not great but I think it shows the way things work.  Maybe in the winter I will try this again and see if I can get a cleaner image.

Camera Profiling

AE7I0561-2.jpg AE7I0561.jpgFor all of my previous cameras I have created profiles.  When I got the new cameras I decided not to bother and to go with the profiles that are built in to Camera Raw/Lightroom.  This was working okay for a while but there were some shots where I felt like the adjustments were having slightly odd effects.  It was almost like the files had less adjustability than my old Mark IV files.  This didn’t seem likely.  I figured I would have a go at creating profiles and see whether that made any difference.

AE7I0336.jpg AE7I0336-2.jpgThe profiles are relatively easy to create.  I have a color card that has twelve different color squares.  You take a shot of it in RAW mode.  Then comes the slightly annoying step.  You have to cover it to a DNG file.  Not sure why, since this is all Adobe software, they can’t combine the steps but never mind.  Then you open the profiling software.  Pull up the DNG file, align the four color dots with the corner color squares and let it do its thing.  Choose a name and the profile is saved on your computer where the Adobe software can see it.

AE7I0439-2.jpg AE7I0439.jpgIt does make a difference.  The thing I found most interesting was that the profiles for the two cameras were quite different.  It shows up most in the blues for my bodies which, given I shoot aircraft a lot, is no small deal.  The shots here are versions of the same images with the default profiles and the new profiles for comparison.  Everything else is the same so the difference is purely profile related.

AE7I0619-2.jpg AE7I0619.jpg

Embedding a Zoomify File

I have played with the Zoomify files a few times before.  Then I found a way to get a Zoomify file output in HTML5 format rather than Flash.  Since so many people are on mobile devices today and plenty of them don’t use Flash, having the new format was necessary to make the output usable widely.  I didn’t like the idea of a new page opening up though.  Taking people off your page can mean that they don’t come back.  Fortunately, I found out how to embed this in an iFrame.  Those of you that are web savvy will know all about this stuff but I didn’t.  However, messing around with some page code and suddenly my stuff is embedded in the page above.  Pretty cool.  Feel free to zoom and pan around the Nellis flightline!

High ISO Raw File Size

On my previous camera bodies I had occasionally shot at very high ISO settings as a result of the lack of light.  I had not paid a huge amount of attention to any secondary effects of doing so.  My current cameras had a work out in some very low light when I decided to test them in some rather unfriendly conditions.  When I was at home, I was running some disc backups and I found I could not get the normal number of files onto a single disc.  A quick bit of investigation and I could see why.  The high ISO shots had a significant increase in file size.  As I understand it, RAW files, while containing all of the data from the sensor, do have an amount of compression applied.  I imagine that the noise inherent in high ISO shots means that the compression is less effective as there is so much variation across pixels.  As an example, a shot at ISO 320 will average at about 22Mb.  The shots at ISO 51,200 are coming in at over 30Mb.  At ISO 204,000, the files can hit 40Mb. That is quite an increase!  Something to keep in mind when planning to shoot in very low light conditions.

Lightning Photography

QB5Y8912.jpgWhen I shot film I had a go at shooting lightning a number of times but never with any success.  I would try and react to get the bolt but it was always gone.  When you are using film and having a very low success rate, things get too expensive.  Consequently, I gave up on it.  The move to digital opened up a new range of possibilities.

My new approach doesn’t involve much skill (but then neither does using an electronic trigger).  I set up the exposure to have a reasonably long shutter speed.  Then I put the camera on continuous mode, plug in the cable release and lock the shutter open.  Then the camera takes a steady stream of shots.  Of course, when there is a slight gap between shots, you can imagine when the lightning will strike.

C59F3770.jpgI used to shoot a lot from the apartment in Chicago.  Set the camera up and go and do something else.  Unfortunately, the heavy rains that would accompany the storm activity could result in the sky glaring out but you still had a chance.  Some of the shots were okay and every once in a while you would get a really cool outcome.  The Trump Tower was next to us and it would be struck occasionally but it was too close to get a good look at.  You could hear it though!

New Zoomify Trial

I previously added a Zoomify image to a blog post.  It was pointed out that, as a Flash based format, it didn’t work on some mobile devices.  That was using the default Photoshop installation.  I have now found a way of generating an HTML5 version of the Zoomify output.  This is a trial to see whether it works.  Let me know in the comments.  Click here to see the file.

Those That Sneaked In

C59F0414.jpgI learned something significant while shooting the airliners from above LAX. It is a lot harder to see an airliner from above than I thought. In the many years of flying, I am familiar with the importance of maintaining a good lookout and the difficulty of spotting other aircraft around you in the sky. From our locations over the airport, we were generally picking out the aircraft from a background of the city, not the sky. I had figured that we knew the approach paths and what was due in so we would not have trouble seeing the planes as they came in.

C59F0857.jpgI was very wrong. First, they are not easy to find at all. Three sets of eyes were looking but we would find things at odd times, sometimes when they were very close. Also, with parallel operations to the 24 and 25 complexes, you can get distracted by activity on one side and miss out on something the other side. The result of this was that we did not see some of the jets until they were on the ground. Pete, who was with me, flies 777s so we were keen to get the BA jet when it came in. We knew the arrival time and still managed to miss it until it was on the ground. An Air France A380 also sneaked in past our “diligent” scan. An Aeroflot A330 was also successful in coming in untouched.

C59F0460.jpgAll of these were a little frustrating but not terrible. However, it did give me pause for thought about how I would plan the flight the next time in order to keep track of the things that I most wanted to get. This flight was my first time trying this so I was happy to have got so many shots that I like. The missed ones are not the end of the world. I did learn a lot though and will make sure I use that knowledge next time.

C59F1800.jpg

Update on the Negative Scanning

IMG_3820.jpgI wrote about the set up I had created for scanning negatives using a digital camera a while back.  Since writing that, I have been working on a lot more scans and have gained some additional experience.  This has resulted in a few changes to the configuration so I thought I would share those too.  Overall I am very happy with the results I am getting as a result of the updates.  Things could be better but that would involve considerably more expense and the need just isn’t there.

The first change I made was to use a different lens.  I had been using the 24-105.  It was pretty close to the film plane and was sensitive to getting the alignment spot on.  I had a few times when focus was not consistent across the shot.  I thought it might be better to try a longer lens further away and this proved to be a big help.  I have my old 100-400 still so I hooked that up.  It makes for a slightly higher position but I can use the zoom quite well although it needs more of the extension tubes to focus properly.  It does result in good focus although I tend to focus manually as the autofocus does not seem happy in this setup.

IMG_3822.jpgI was using Liveview quite a bit and I discovered that the old batteries I have were not lasting long at all.  Rather than buy new batteries, I went to Amazon and picked up an AC adaptor that replaces the battery for about $15.  Now I can scan as long as I like without having to have batteries charging in the background.

I also have modified slightly the light pad.  I found I was moving it around a lot more than I realized as I moved the negatives and swapped strips.  A little gaffer tape now holds it pretty much in place.  This means I can have the lens zoomed more closely to the full frame of the film which allows for a higher resolution scan.

With everything tethered in to Lightroom, the import process is pretty smooth.  The preset I use is okay but I am regularly tweaking for the white balance and exposure.  This is not too big of a deal.  I find I can get better detail out of the shots than was possible with the scanner and using the raw convertor gives me plenty to work with.  They are still limited by the quality of the original shots of course!

Overall I am very pleased.  I can scan a lot of stuff very quickly compared to the old way and now I am happy to scan a whole shoot without worrying about whether any of them could be ignored.  It is quicker to scan them and then discard them afterwards.  I am scanning stuff that I have been thinking about for a long time and rescanning shots that had been done before but really were not great.  Of course, now I have even more stuff to do in whatever spare time there is so maybe this wasn’t such a good idea after all!

IMG_3821.jpg