The most recent update for Adobe Photoshop includes a function called Super Resolution. Many of the third party plugins and stand alone image processing tools come with tools to increase the resolution of images. In Photoshop you used to have a basic way to increase resolution but it wasn’t that clever and could introduce odd artifacts. I had been advised to use it in small increments rather than one big increase to reduce the problems but I hardly ever used it.
 The new addition to Photoshop is apparently based from machine learning. If the PR is to be believed, they took loads of high res images and low res versions of the same image and the machine learning came to recognize what might be there in the small shot from what it knew was in the large shot. I don’t know what the other packages aim to achieve but this new tool in Photoshop has been doubling the resolution of the shots I have played with. You end up with a file four times the size as a result of this doubling of dimensions.
I have tried it out on a couple of different shots where the resolution was okay but not terribly large and where a higher res shot might prove useful. So far the tool is available through Camera Raw in Photoshop – not Lightroom. You need to update Lightroom in order to import the DNG files it produces. There is a suggestion that Lightroom will get this capability in time which would be more user friendly from my perspective.

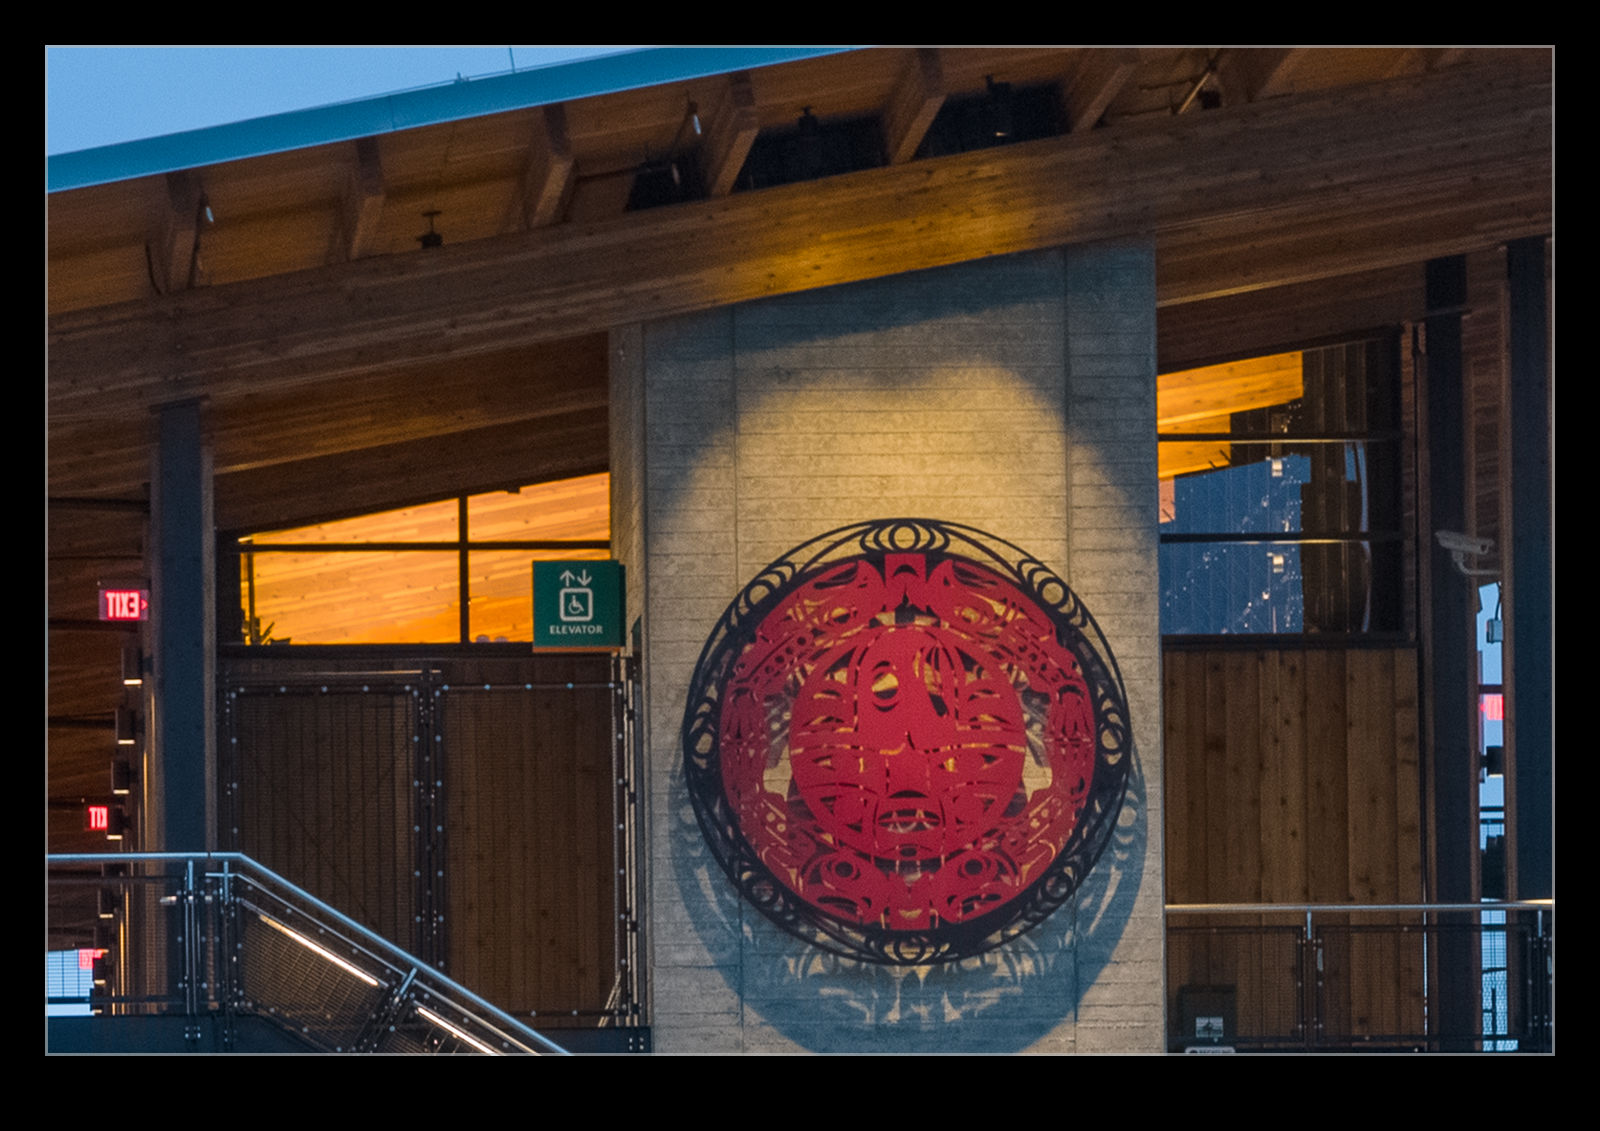
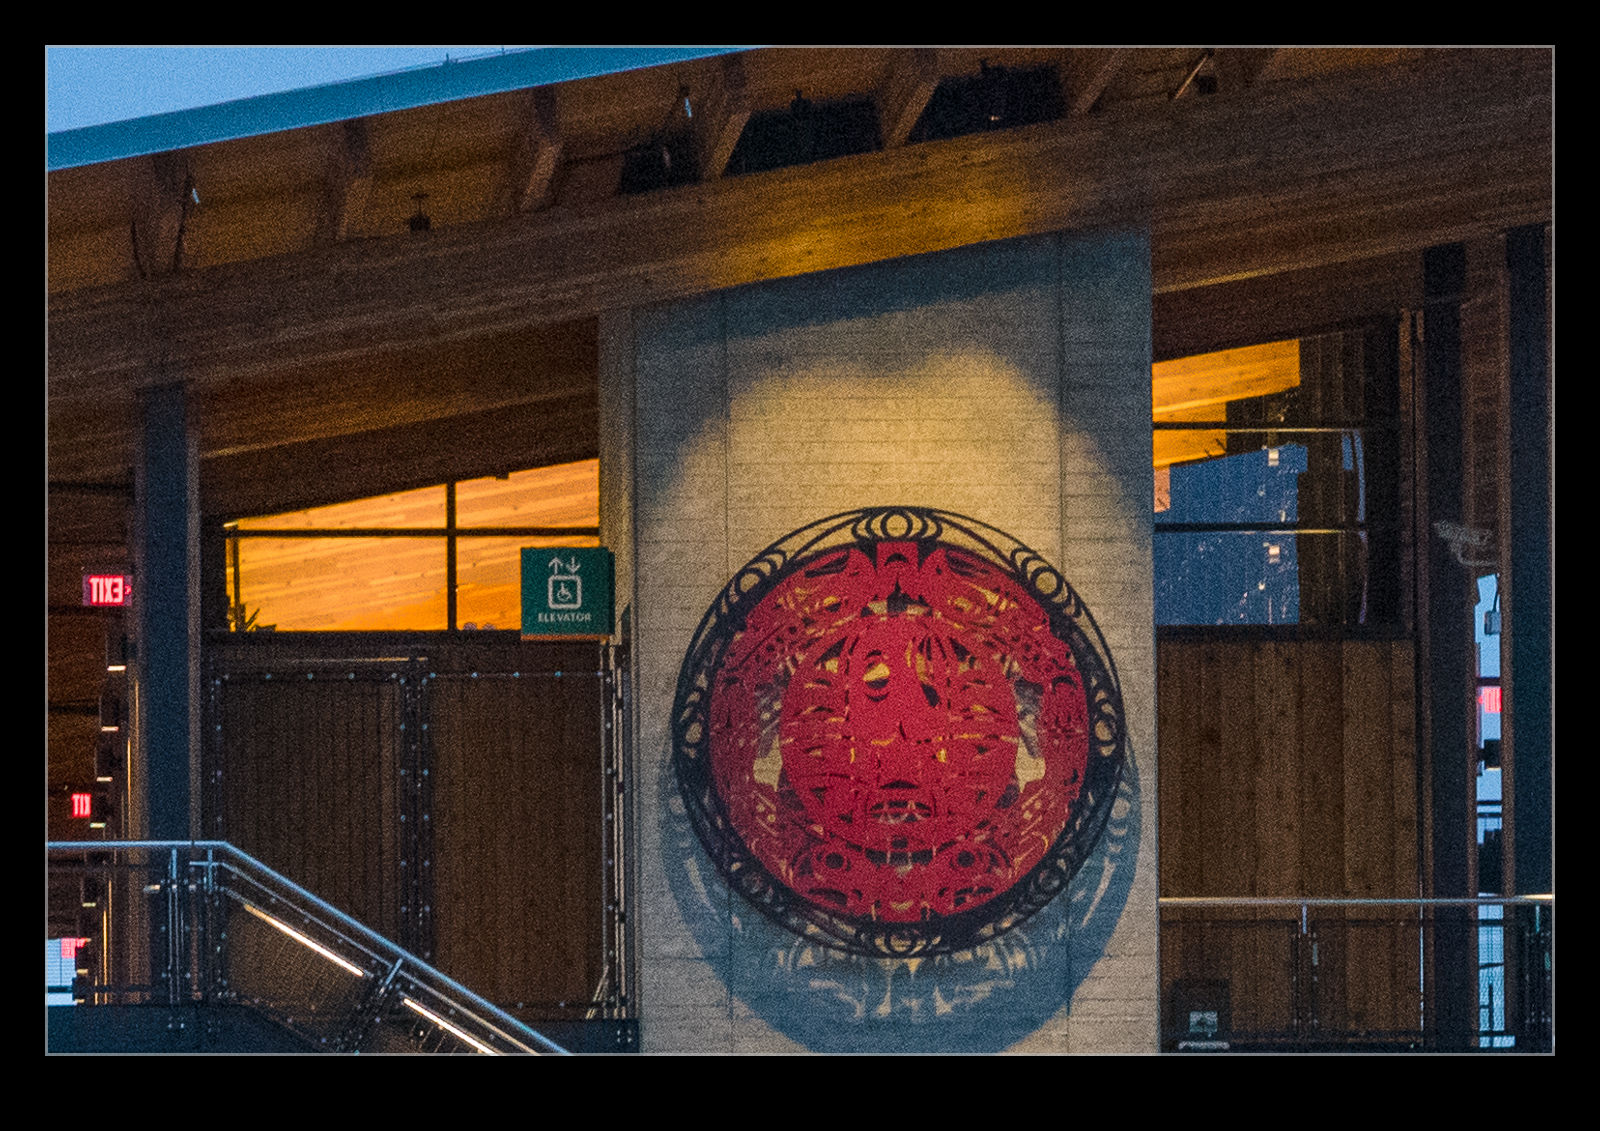
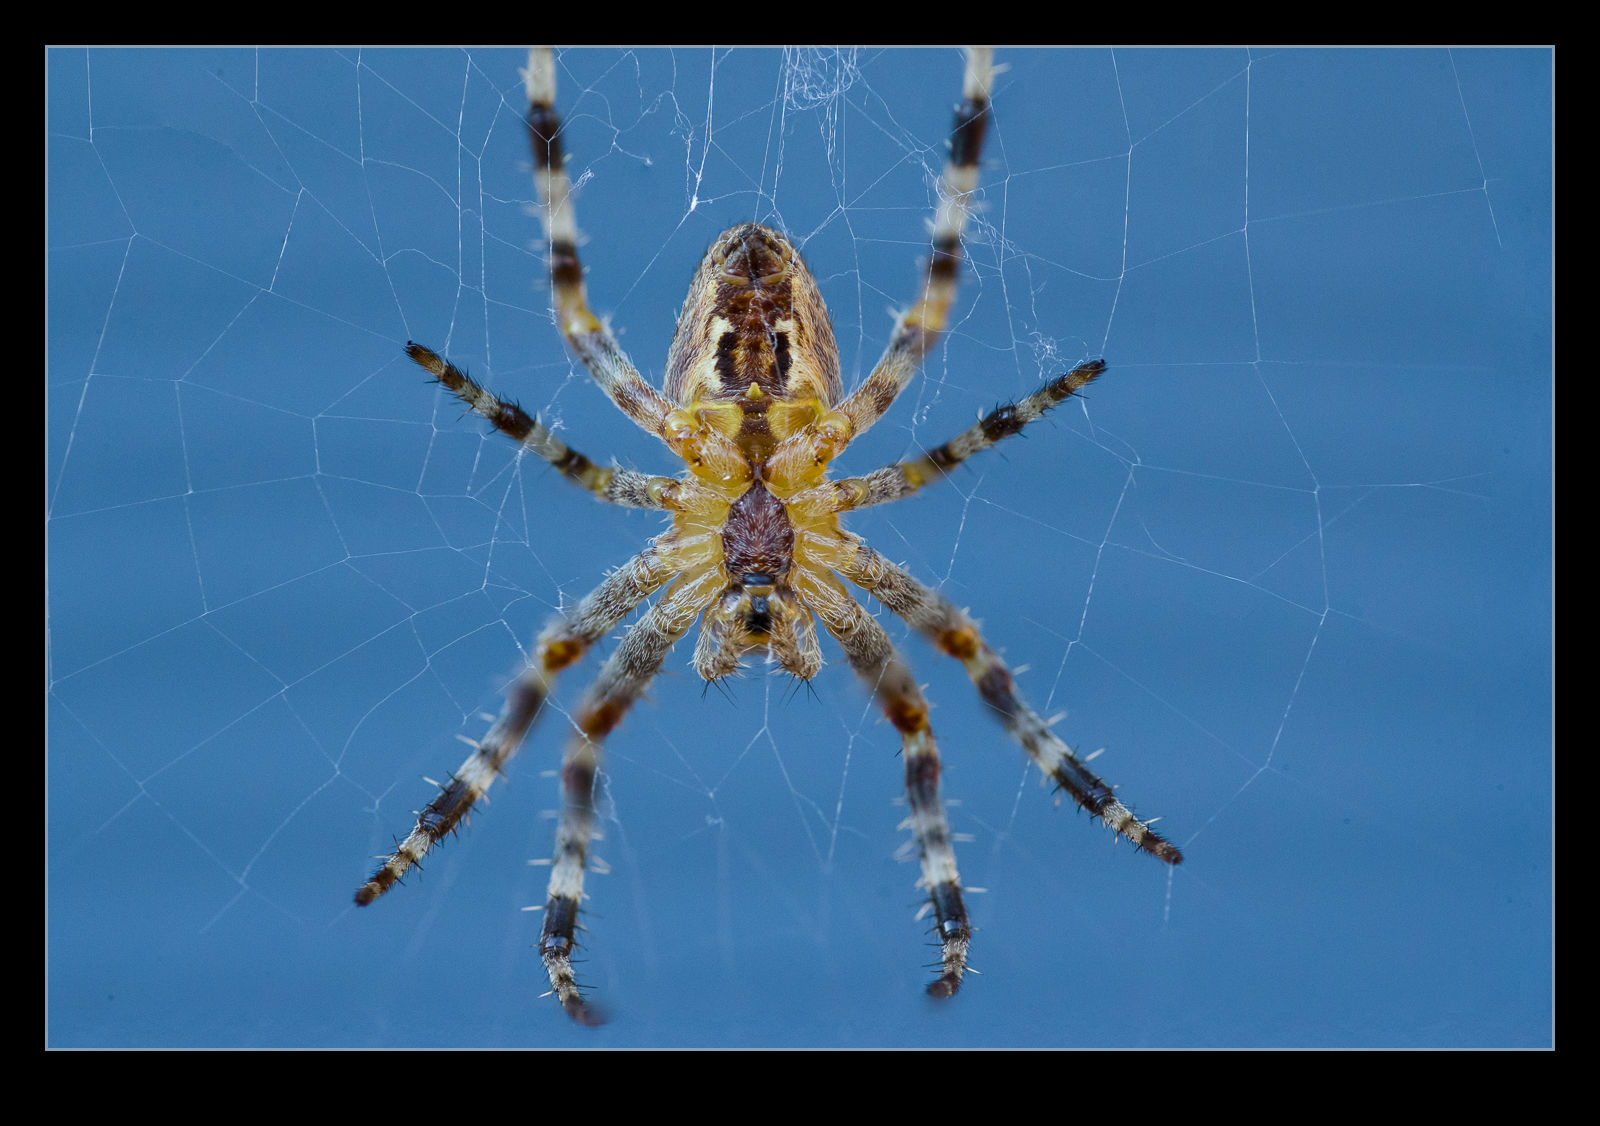
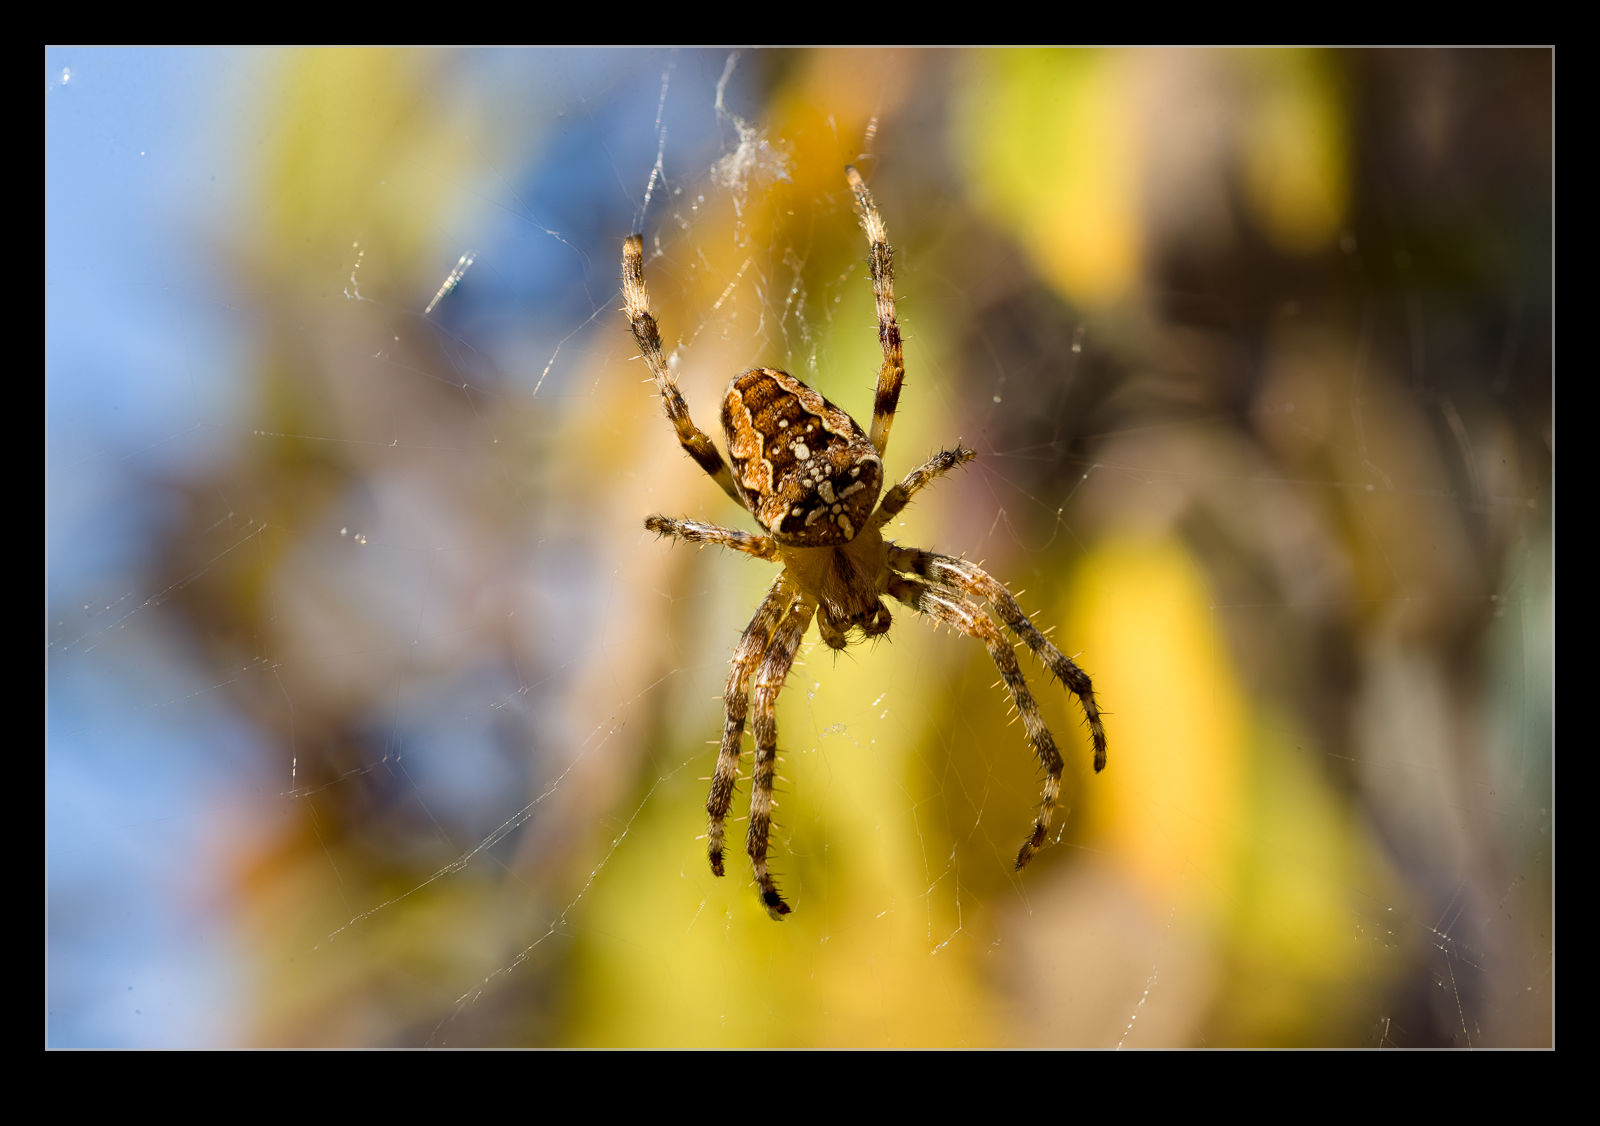
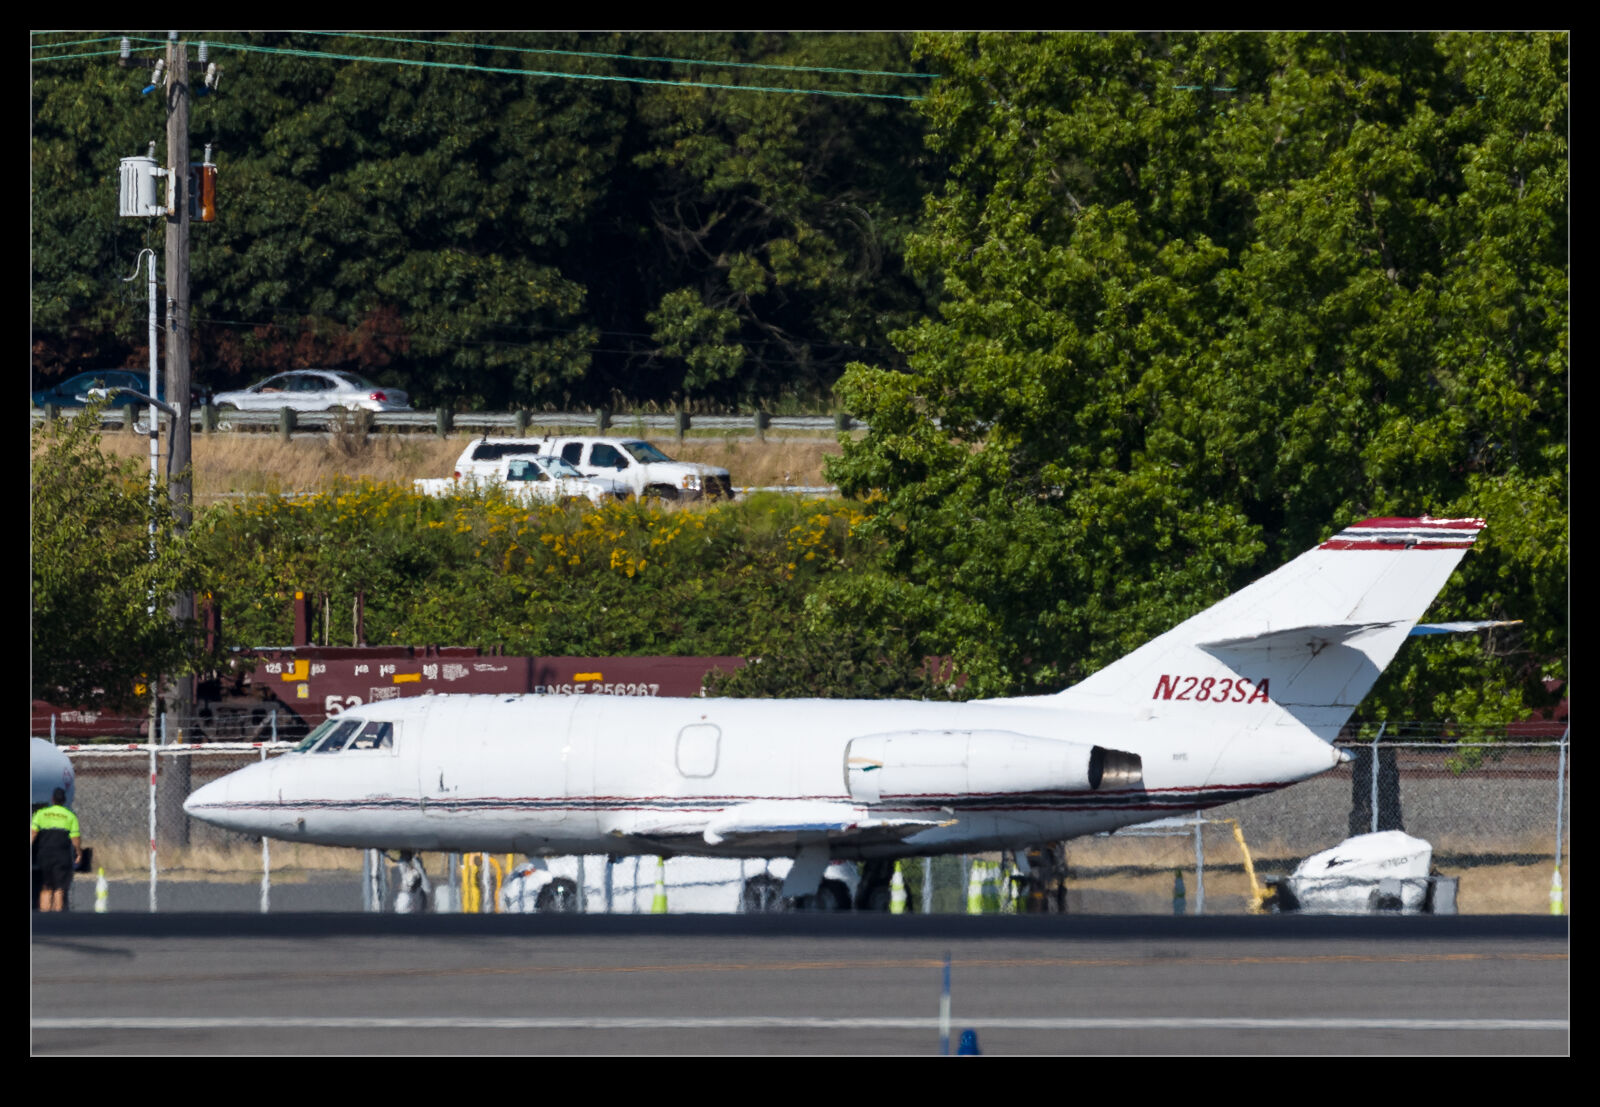
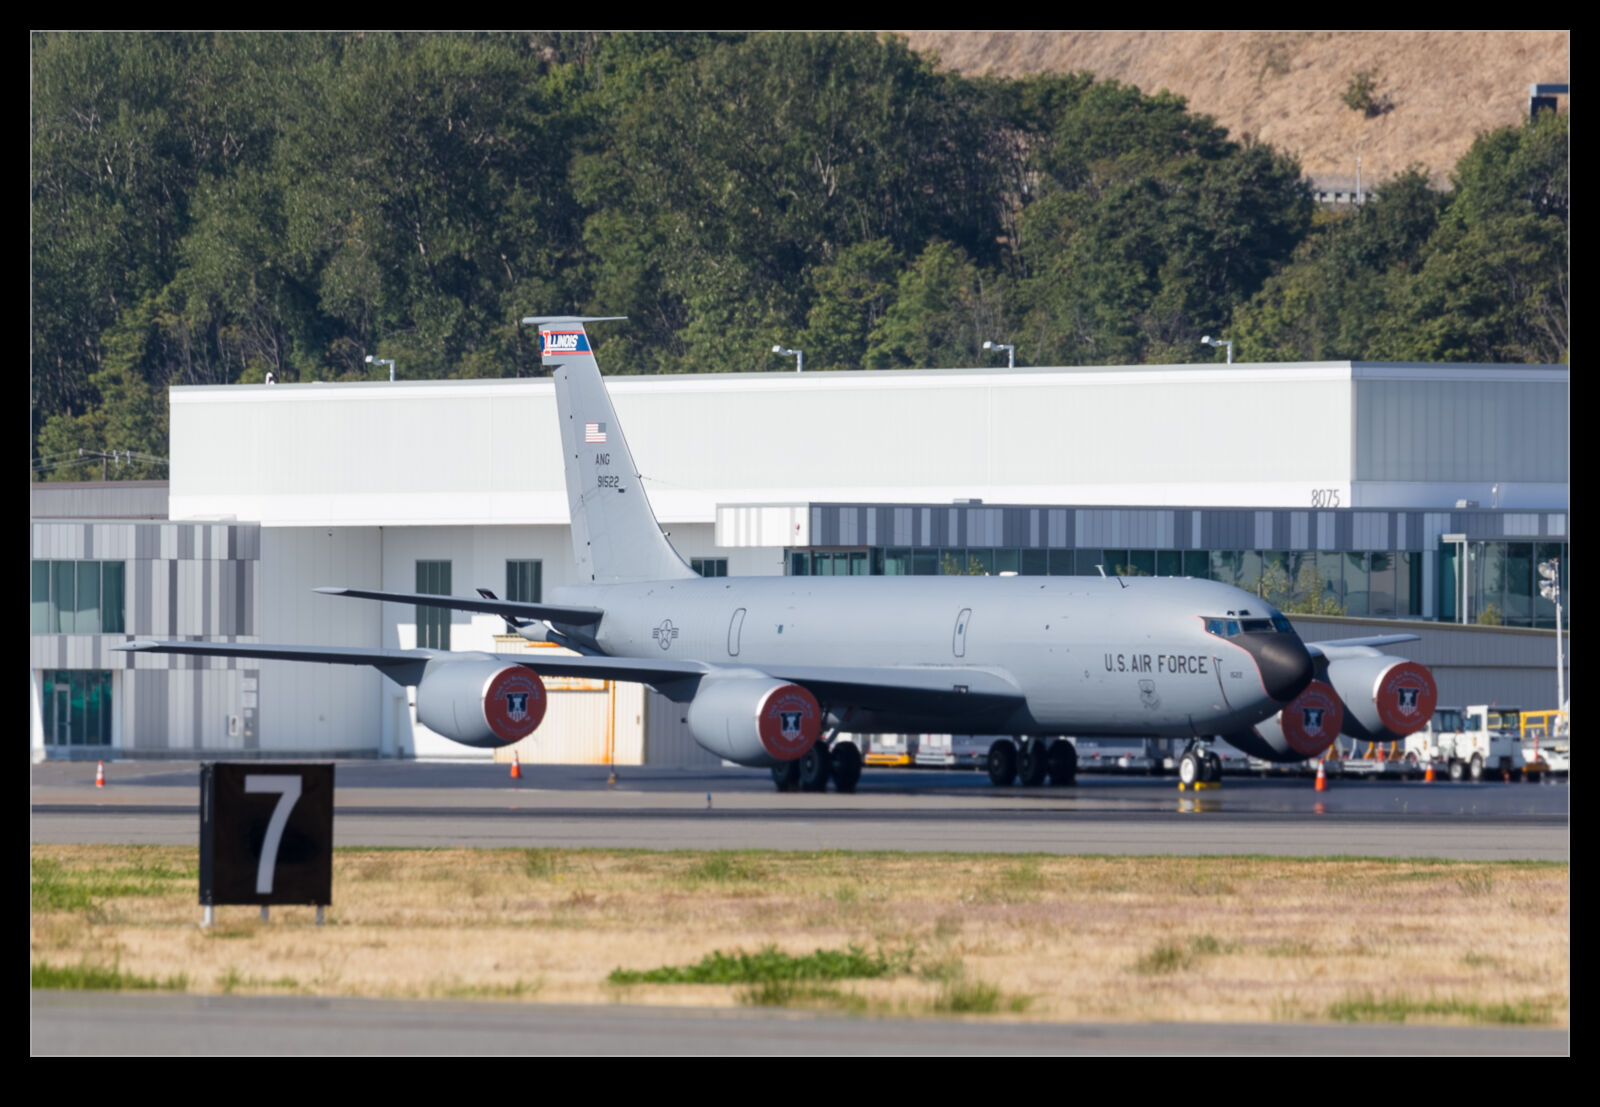
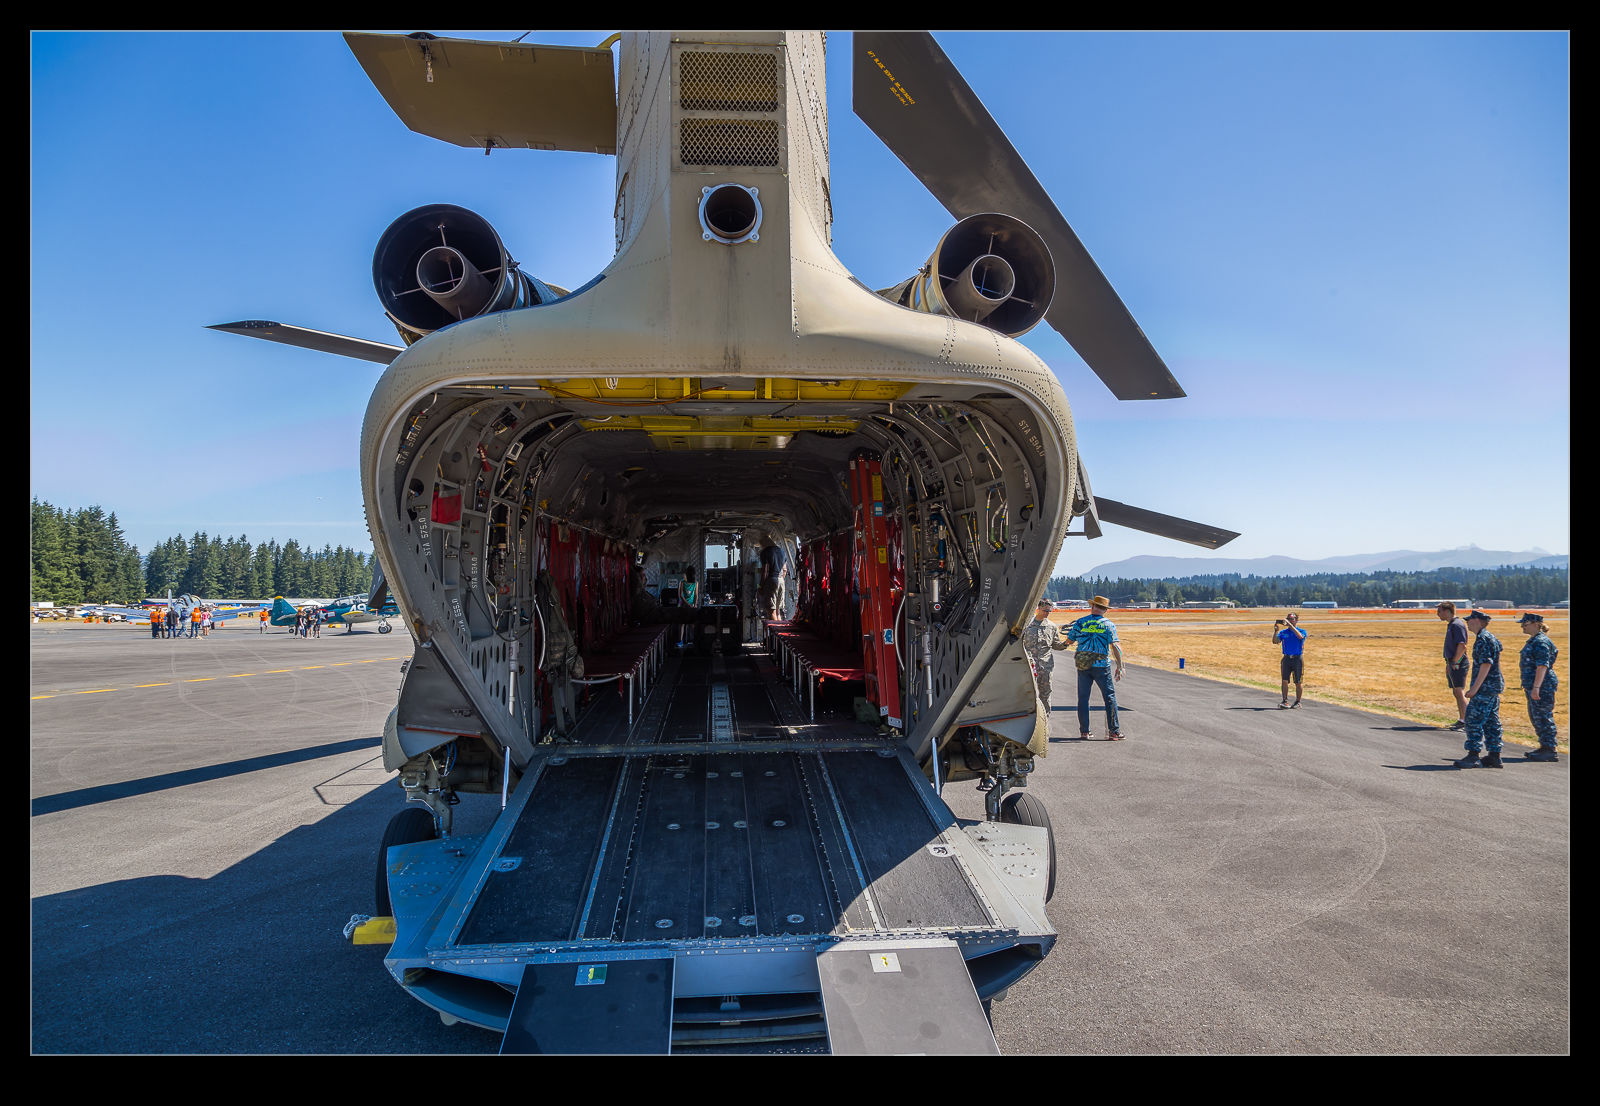
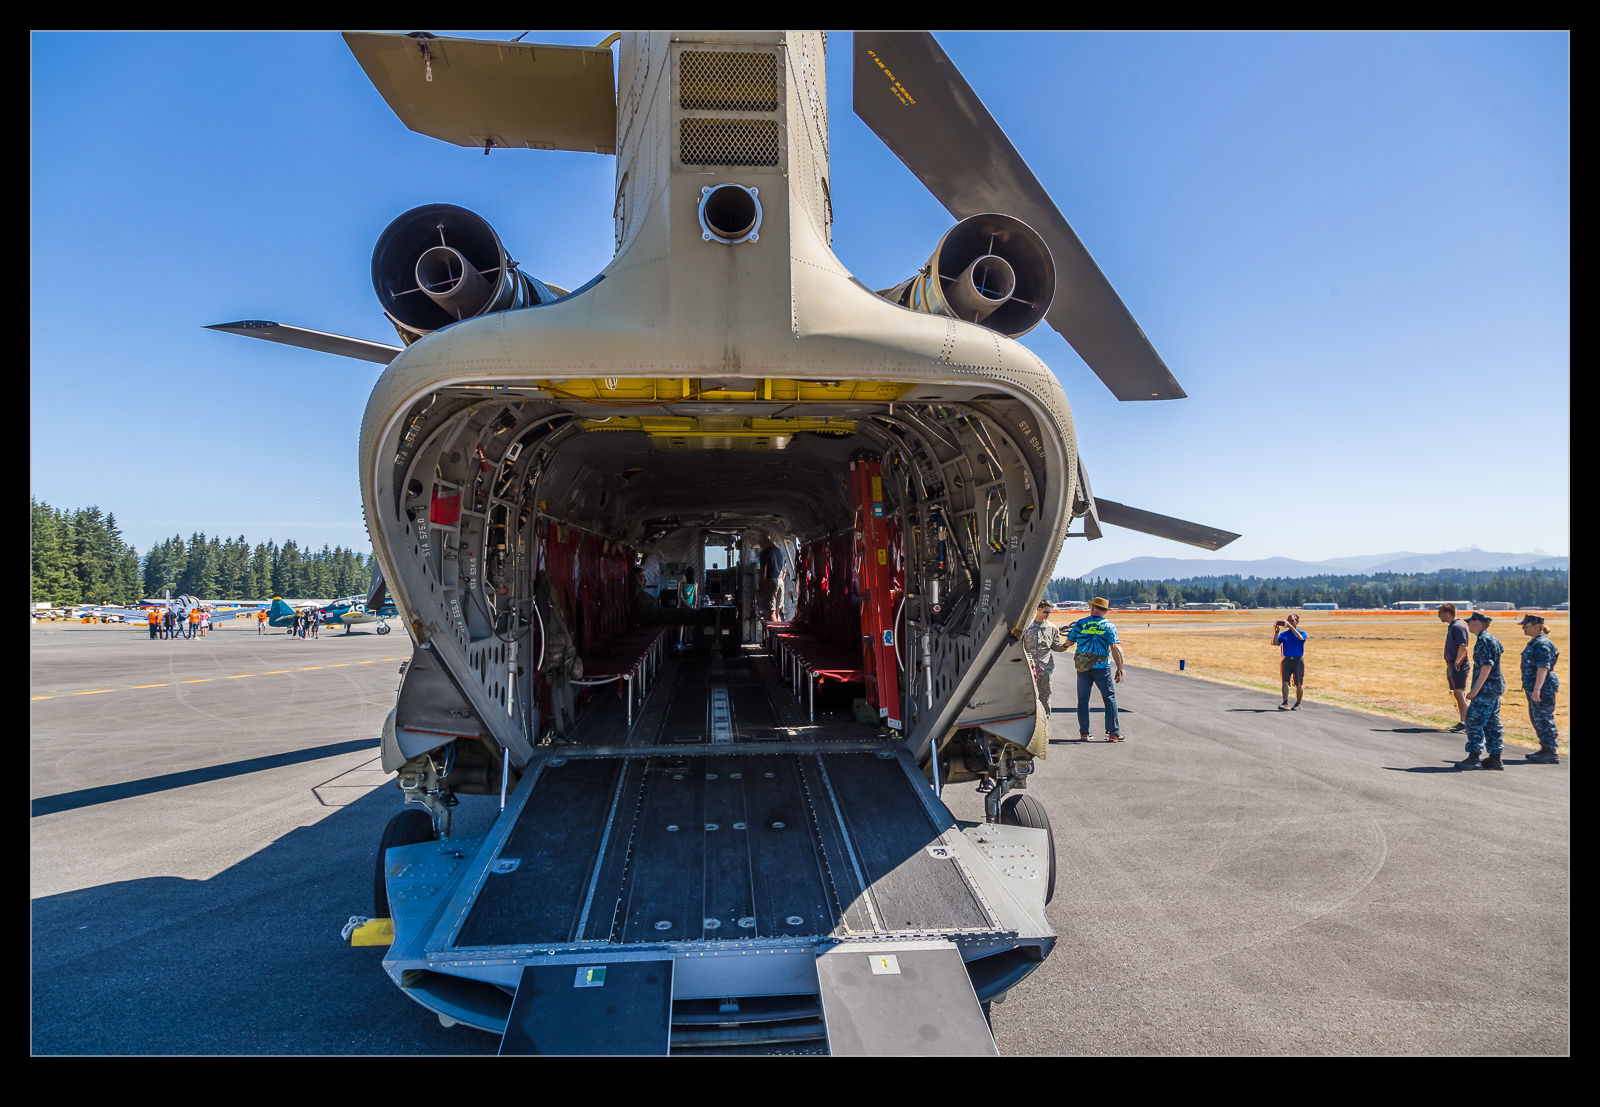
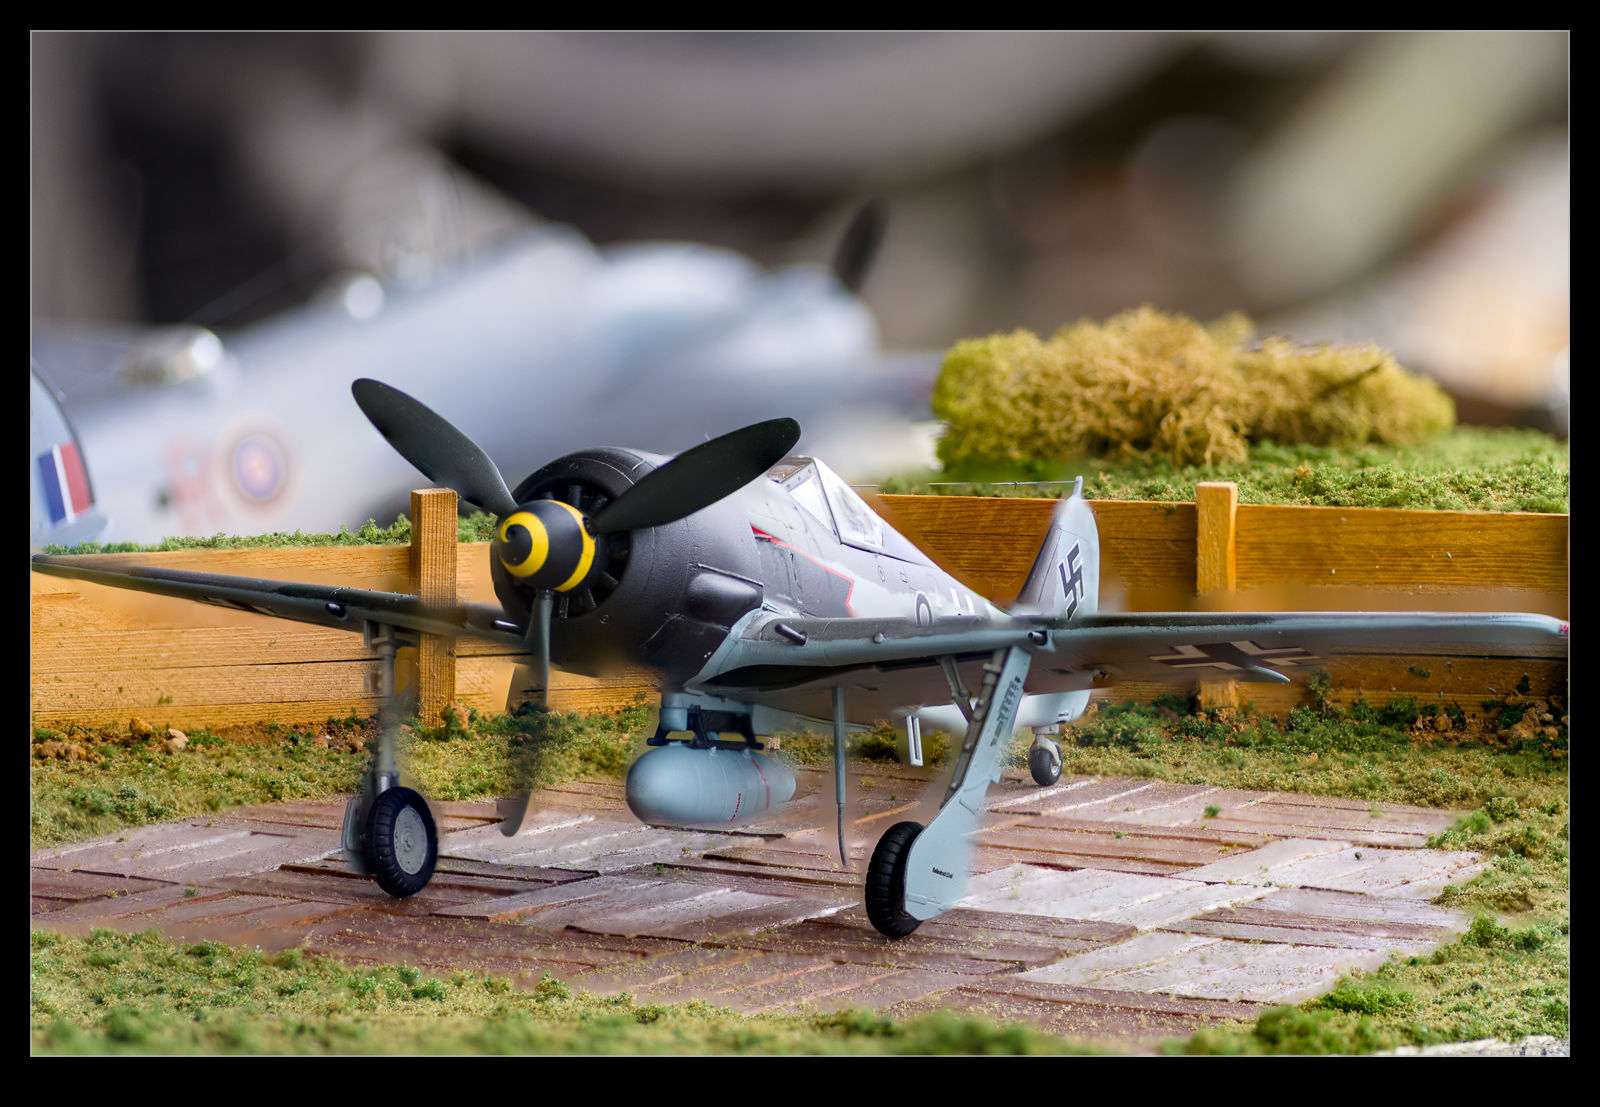
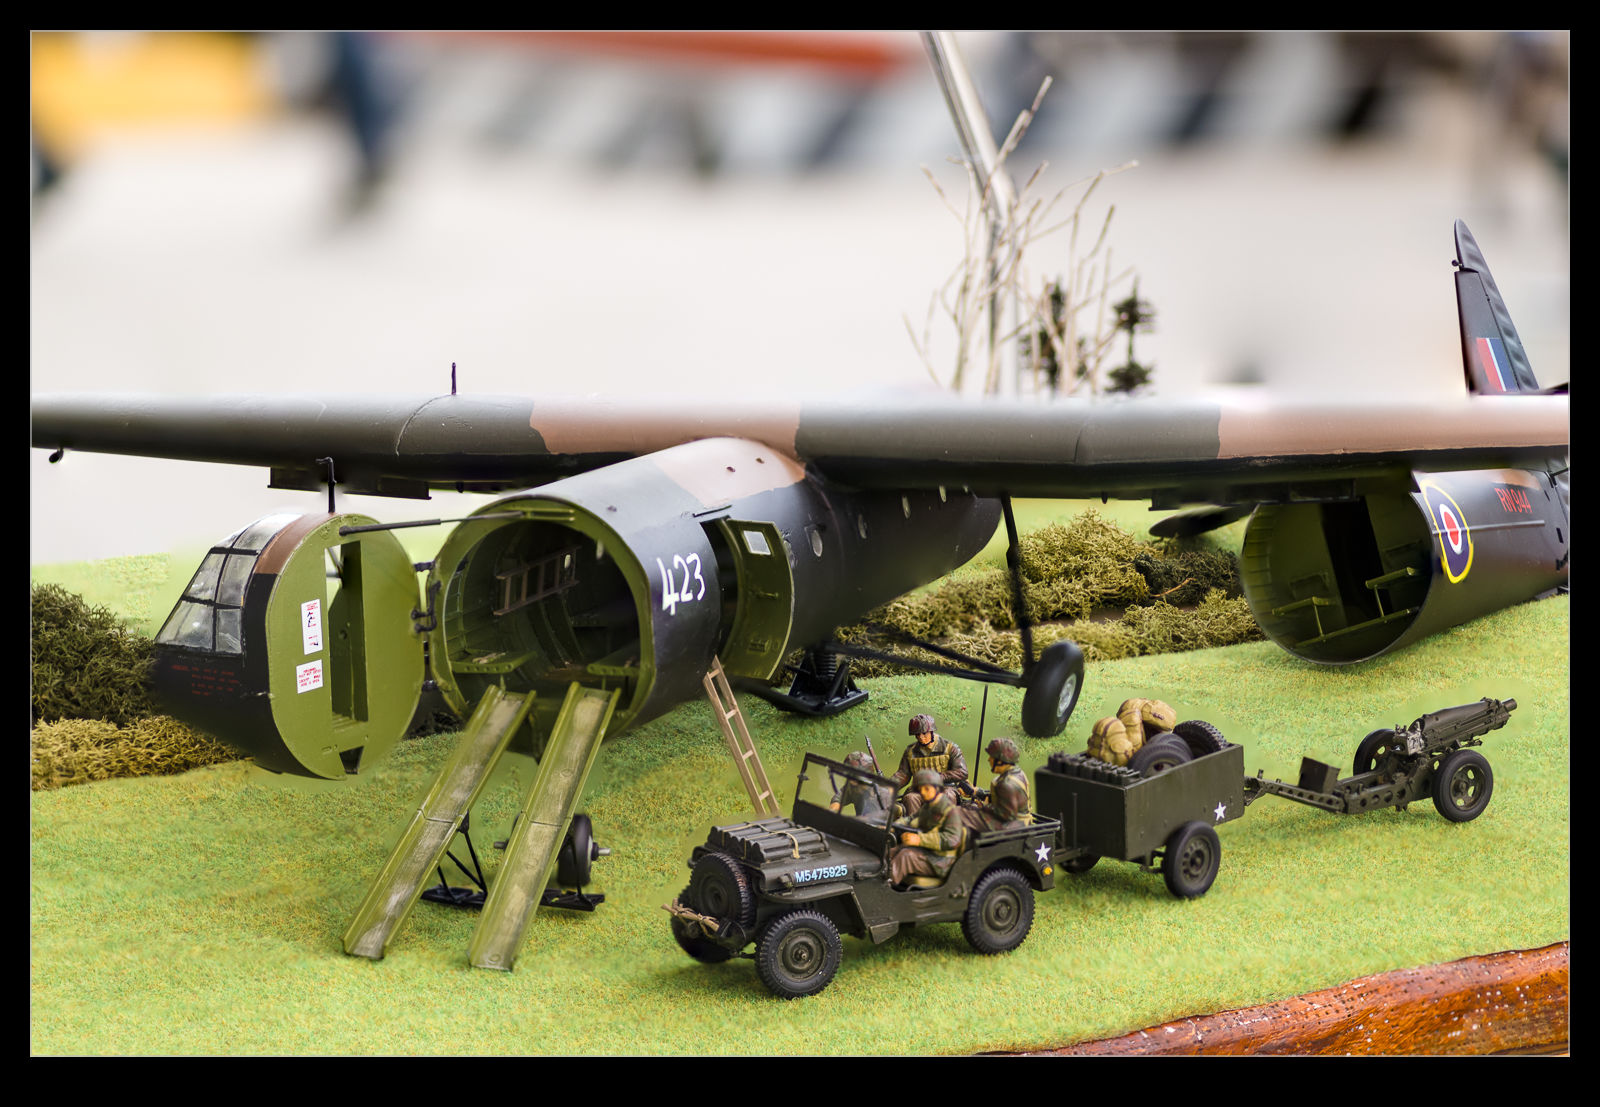
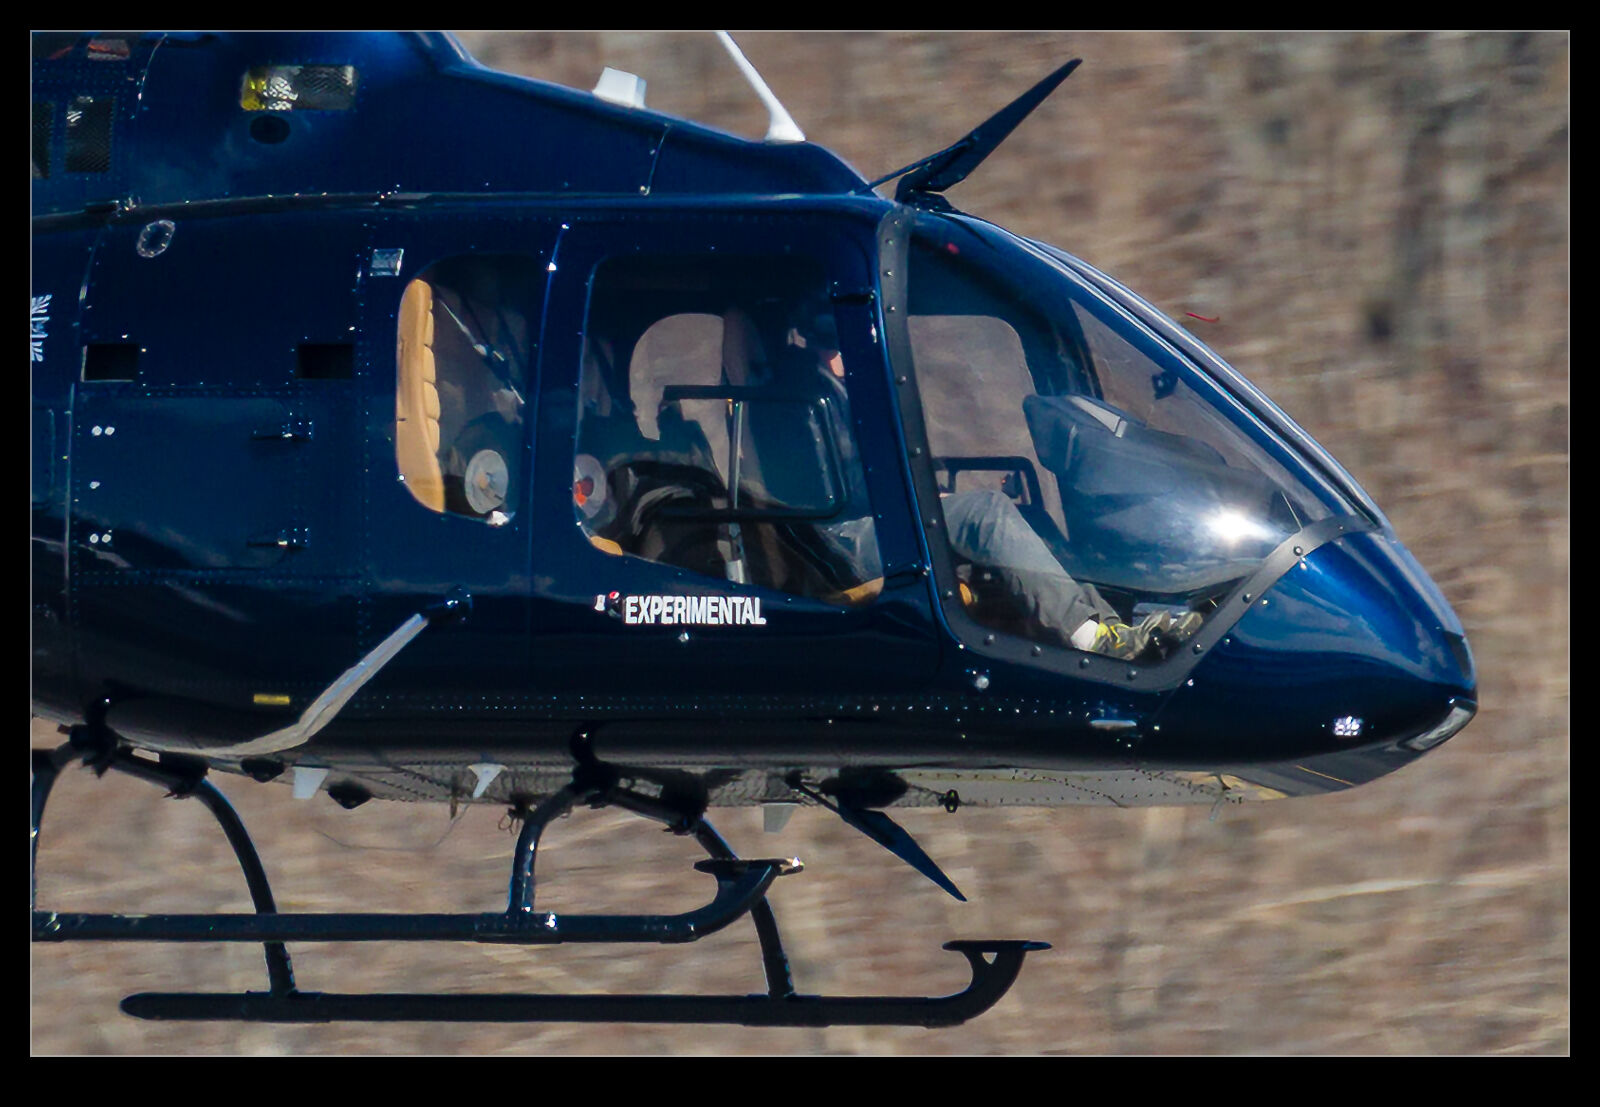
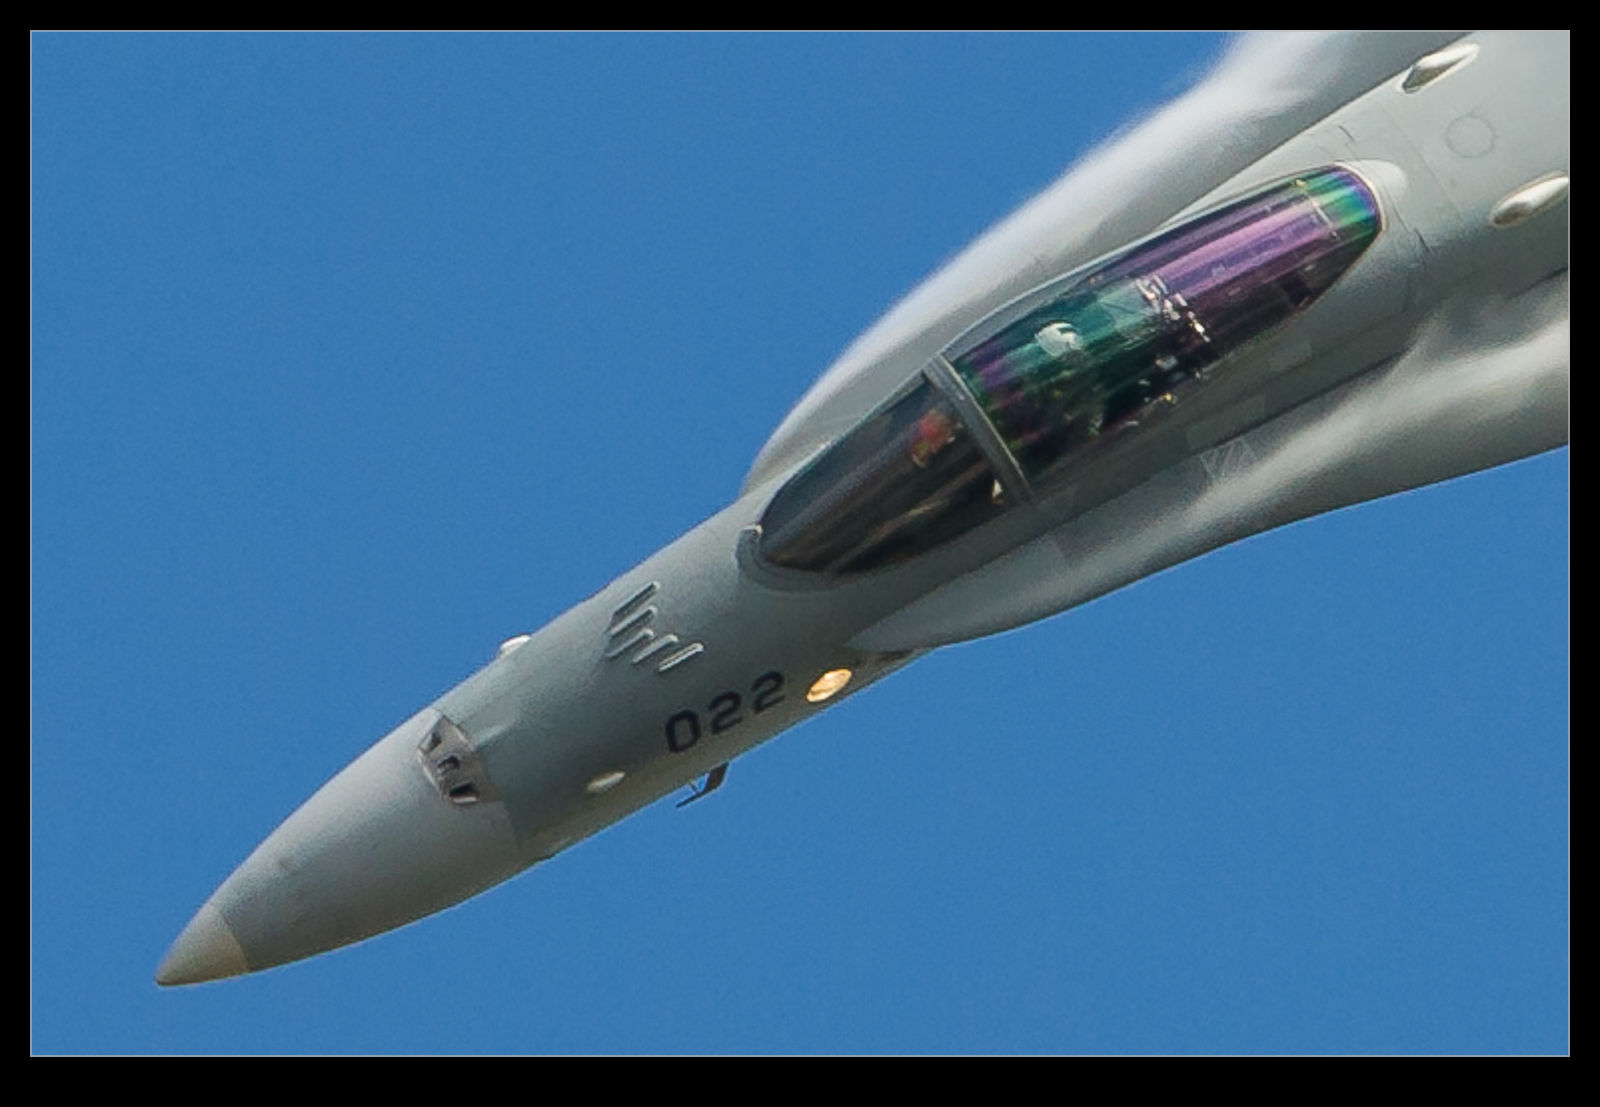 My computer is not cutting edge so it takes a little while to process the images. It forecasts five minutes but seemed to complete the task way faster than that. In the examples here, I attach a 200% version of the original shot and a 100% version of the new file. There seems to be a definite benefit to the output file. I wouldn’t describe this as earth shattering but it is useful if the original file is sharp enough and I might have a need for this for a few items over time.