Category Archives: technique

Lightning Photography

QB5Y8912.jpgWhen I shot film I had a go at shooting lightning a number of times but never with any success.  I would try and react to get the bolt but it was always gone.  When you are using film and having a very low success rate, things get too expensive.  Consequently, I gave up on it.  The move to digital opened up a new range of possibilities.

My new approach doesn’t involve much skill (but then neither does using an electronic trigger).  I set up the exposure to have a reasonably long shutter speed.  Then I put the camera on continuous mode, plug in the cable release and lock the shutter open.  Then the camera takes a steady stream of shots.  Of course, when there is a slight gap between shots, you can imagine when the lightning will strike.

C59F3770.jpg
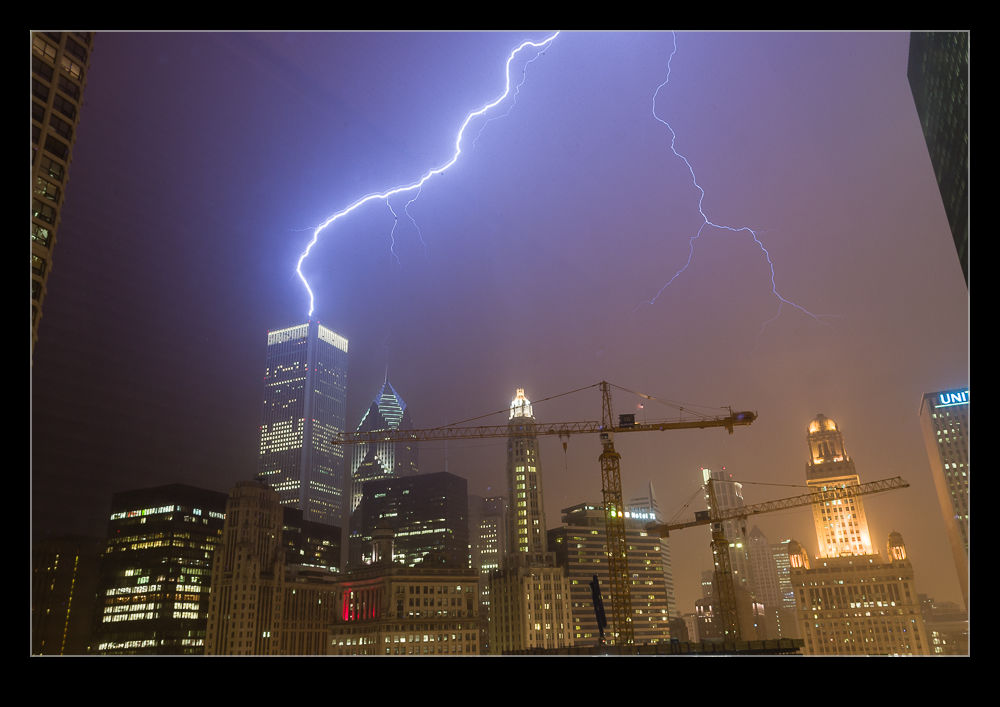
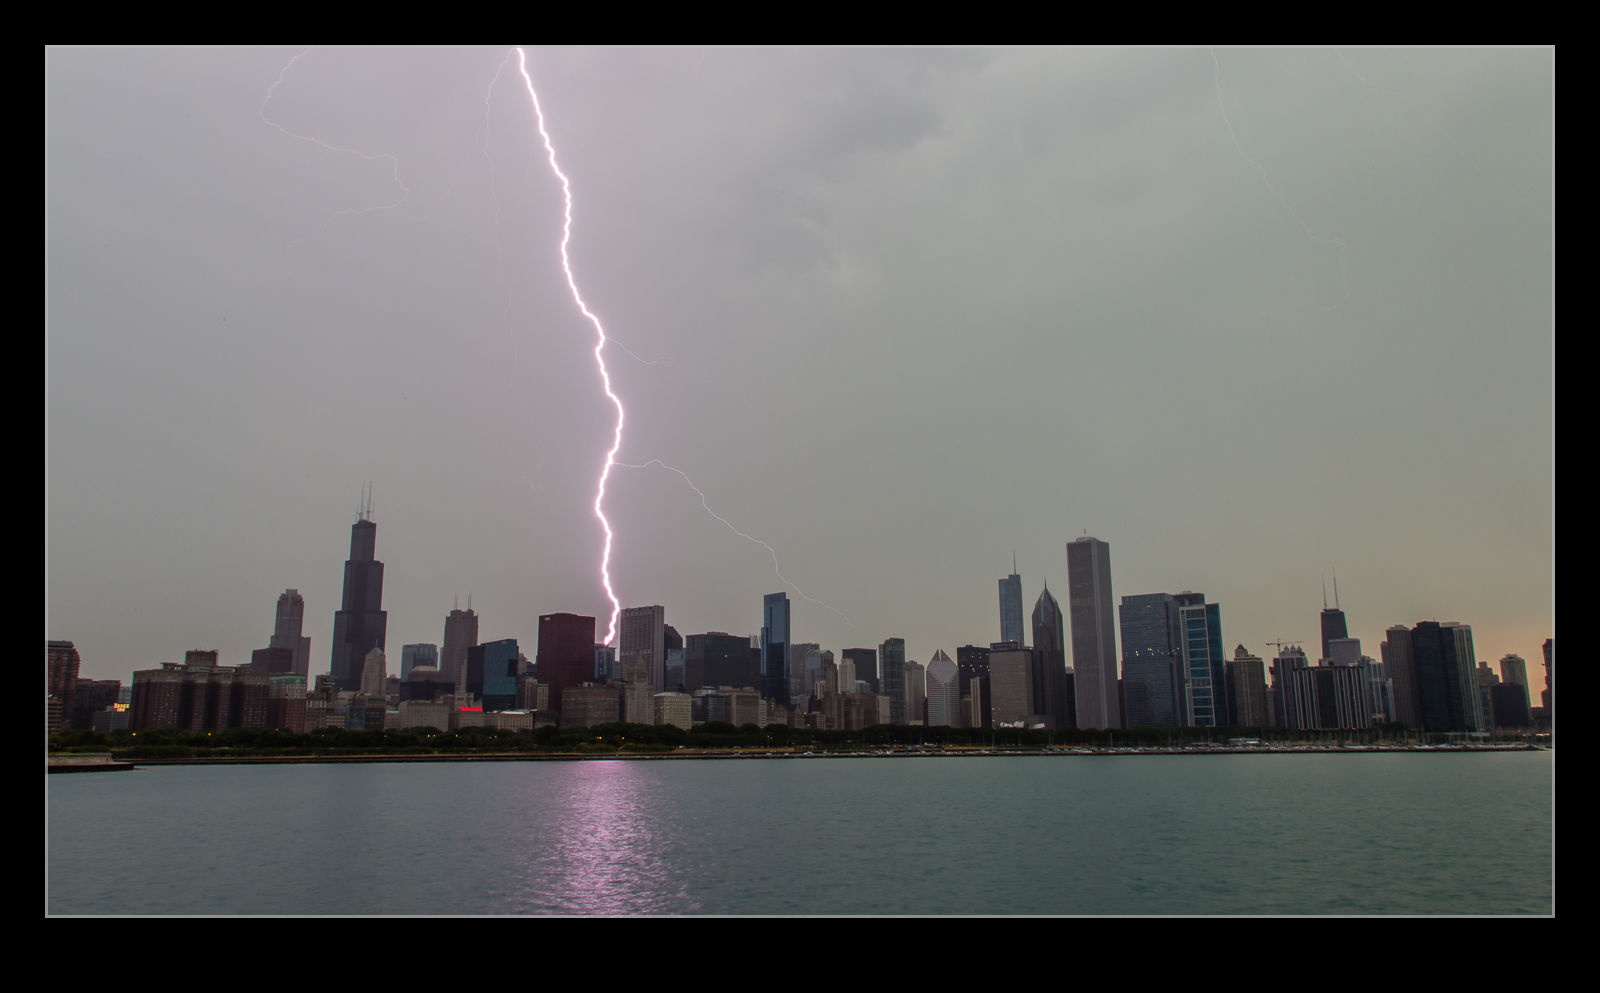
I used to shoot a lot from the apartment in Chicago.  Set the camera up and go and do something else.  Unfortunately, the heavy rains that would accompany the storm activity could result in the sky glaring out but you still had a chance.  Some of the shots were okay and every once in a while you would get a really cool outcome.  The Trump Tower was next to us and it would be struck occasionally but it was too close to get a good look at.  You could hear it though!

New Zoomify Trial

I previously added a Zoomify image to a blog post.  It was pointed out that, as a Flash based format, it didn’t work on some mobile devices.  That was using the default Photoshop installation.  I have now found a way of generating an HTML5 version of the Zoomify output.  This is a trial to see whether it works.  Let me know in the comments.  Click here to see the file.

Those That Sneaked In

C59F0414.jpgI learned something significant while shooting the airliners from above LAX. It is a lot harder to see an airliner from above than I thought. In the many years of flying, I am familiar with the importance of maintaining a good lookout and the difficulty of spotting other aircraft around you in the sky. From our locations over the airport, we were generally picking out the aircraft from a background of the city, not the sky. I had figured that we knew the approach paths and what was due in so we would not have trouble seeing the planes as they came in.

C59F0857.jpgI was very wrong. First, they are not easy to find at all. Three sets of eyes were looking but we would find things at odd times, sometimes when they were very close. Also, with parallel operations to the 24 and 25 complexes, you can get distracted by activity on one side and miss out on something the other side. The result of this was that we did not see some of the jets until they were on the ground. Pete, who was with me, flies 777s so we were keen to get the BA jet when it came in. We knew the arrival time and still managed to miss it until it was on the ground. An Air France A380 also sneaked in past our “diligent” scan. An Aeroflot A330 was also successful in coming in untouched.

C59F0460.jpgAll of these were a little frustrating but not terrible. However, it did give me pause for thought about how I would plan the flight the next time in order to keep track of the things that I most wanted to get. This flight was my first time trying this so I was happy to have got so many shots that I like. The missed ones are not the end of the world. I did learn a lot though and will make sure I use that knowledge next time.

C59F1800.jpg

Update on the Negative Scanning

IMG_3820.jpgI wrote about the set up I had created for scanning negatives using a digital camera a while back.  Since writing that, I have been working on a lot more scans and have gained some additional experience.  This has resulted in a few changes to the configuration so I thought I would share those too.  Overall I am very happy with the results I am getting as a result of the updates.  Things could be better but that would involve considerably more expense and the need just isn’t there.

The first change I made was to use a different lens.  I had been using the 24-105.  It was pretty close to the film plane and was sensitive to getting the alignment spot on.  I had a few times when focus was not consistent across the shot.  I thought it might be better to try a longer lens further away and this proved to be a big help.  I have my old 100-400 still so I hooked that up.  It makes for a slightly higher position but I can use the zoom quite well although it needs more of the extension tubes to focus properly.  It does result in good focus although I tend to focus manually as the autofocus does not seem happy in this setup.

IMG_3822.jpgI was using Liveview quite a bit and I discovered that the old batteries I have were not lasting long at all.  Rather than buy new batteries, I went to Amazon and picked up an AC adaptor that replaces the battery for about $15.  Now I can scan as long as I like without having to have batteries charging in the background.

I also have modified slightly the light pad.  I found I was moving it around a lot more than I realized as I moved the negatives and swapped strips.  A little gaffer tape now holds it pretty much in place.  This means I can have the lens zoomed more closely to the full frame of the film which allows for a higher resolution scan.

With everything tethered in to Lightroom, the import process is pretty smooth.  The preset I use is okay but I am regularly tweaking for the white balance and exposure.  This is not too big of a deal.  I find I can get better detail out of the shots than was possible with the scanner and using the raw convertor gives me plenty to work with.  They are still limited by the quality of the original shots of course!

Overall I am very pleased.  I can scan a lot of stuff very quickly compared to the old way and now I am happy to scan a whole shoot without worrying about whether any of them could be ignored.  It is quicker to scan them and then discard them afterwards.  I am scanning stuff that I have been thinking about for a long time and rescanning shots that had been done before but really were not great.  Of course, now I have even more stuff to do in whatever spare time there is so maybe this wasn’t such a good idea after all!

IMG_3821.jpg

Compression of Perspective

C59F1027.jpgShooting with a long focal length lens has the effect of compressing the image to make elements appear a lot closer together than they really are. When shooting from the helicopter over LAX I was using a 100-400mm lens. The aircraft themselves were quite low to the ground, particularly those on short final to land. They weren’t a long way off the ground but the lens in use had the effect of making things look a lot closer than they really were. Some of the shots I got of the aircraft over parking lots or near the In’n’Out really make it look as if the jets were barely airborne. I like the extra drama this adds to the shots.

An Alternative to Negative Scanning

IMG_3734.jpgI am in the process of experimenting with a new approach to scanning old photographs. For many years I have been using a Minolta Scan Dual III scanner. It can accept strips of negatives or slides and does a reasonable job of scanning them in. It is a bit labor intensive and is certainly not fast. Moreover, the scanner is not terribly reliable and it will often hang mid scan requiring me to restart it and close down the application before restarting that too. Since it takes a long time, I often get it running and go and do something else so I might miss the problem.

I do have another imaging tool that works very quickly. In fact I have several of them. These are my current digital cameras. I have bought a set of extension tubes to allow me to treat existing lenses as macro lenses. I have also acquired a small light pad. Cutting some card to shape means I can hold down any old negatives and view them through a hole with illumination from the light pad below. Mount a camera on an arm looking down on the pad and I now have a way to image the negative.

IMG_3733.jpg
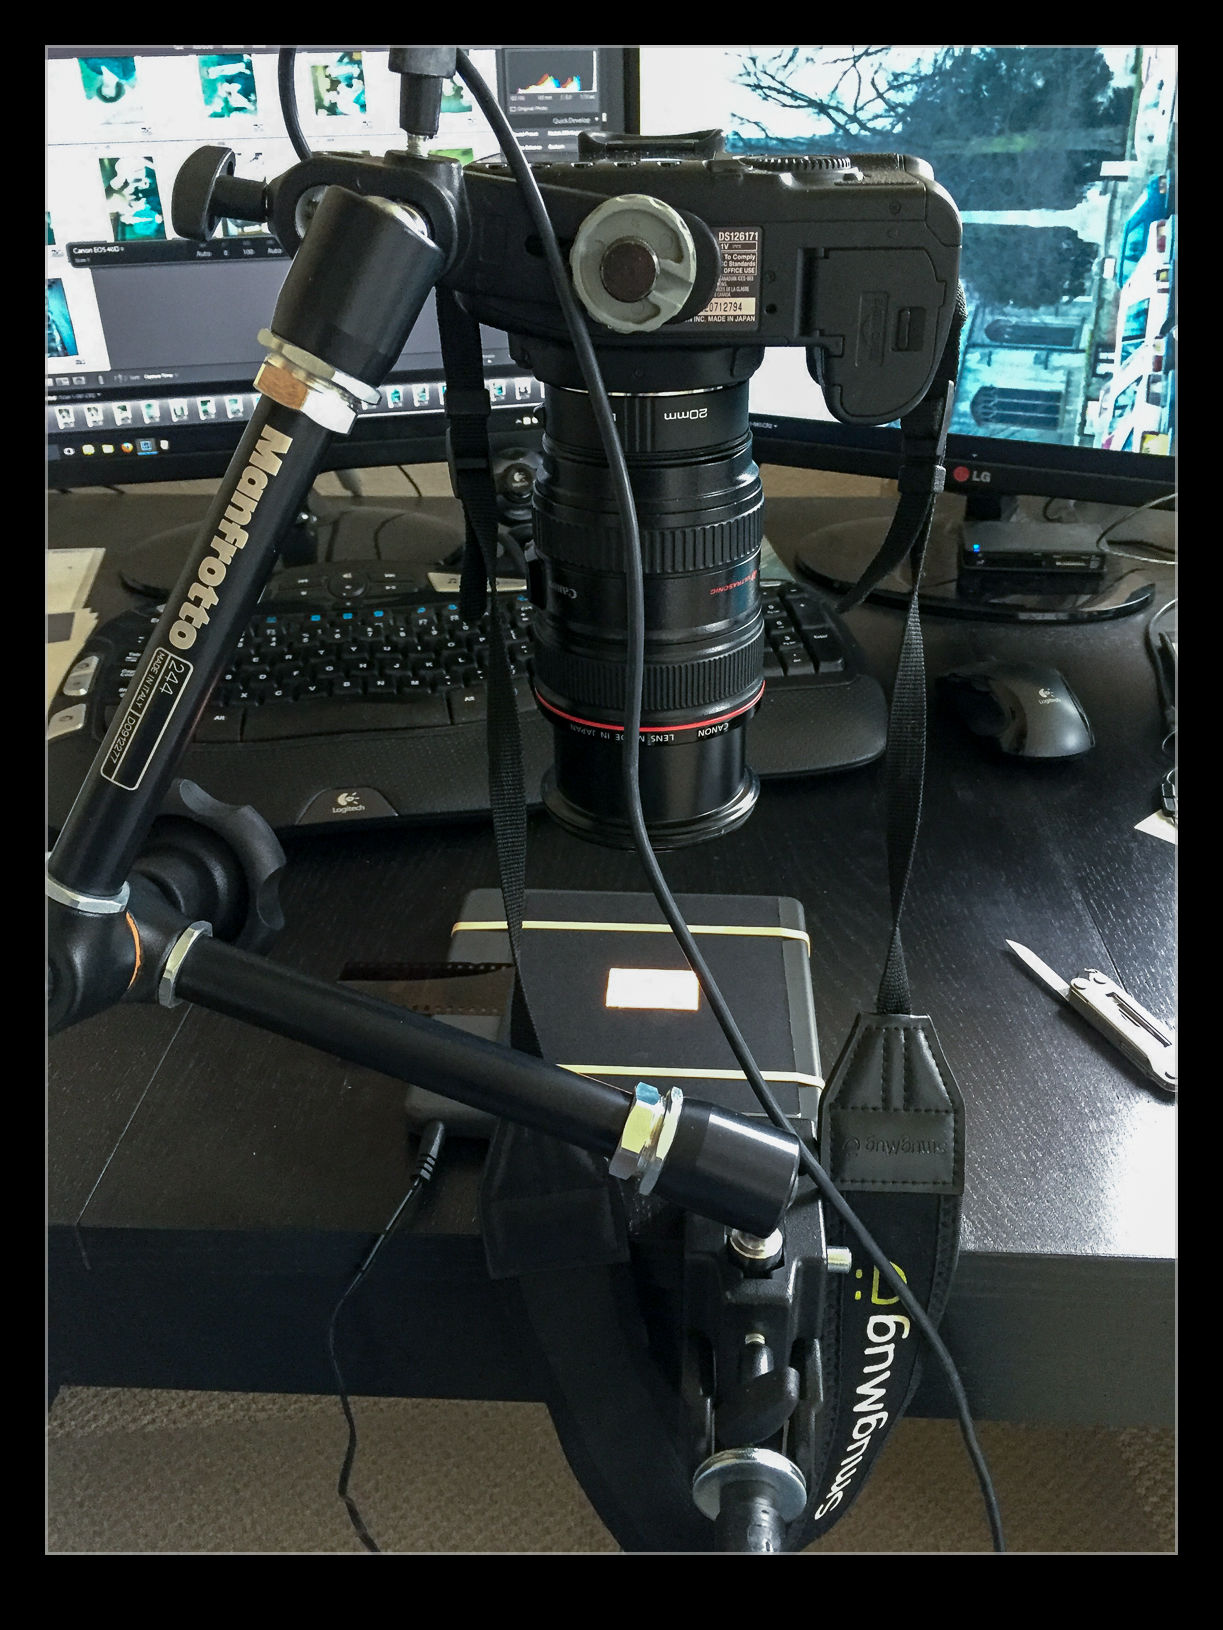
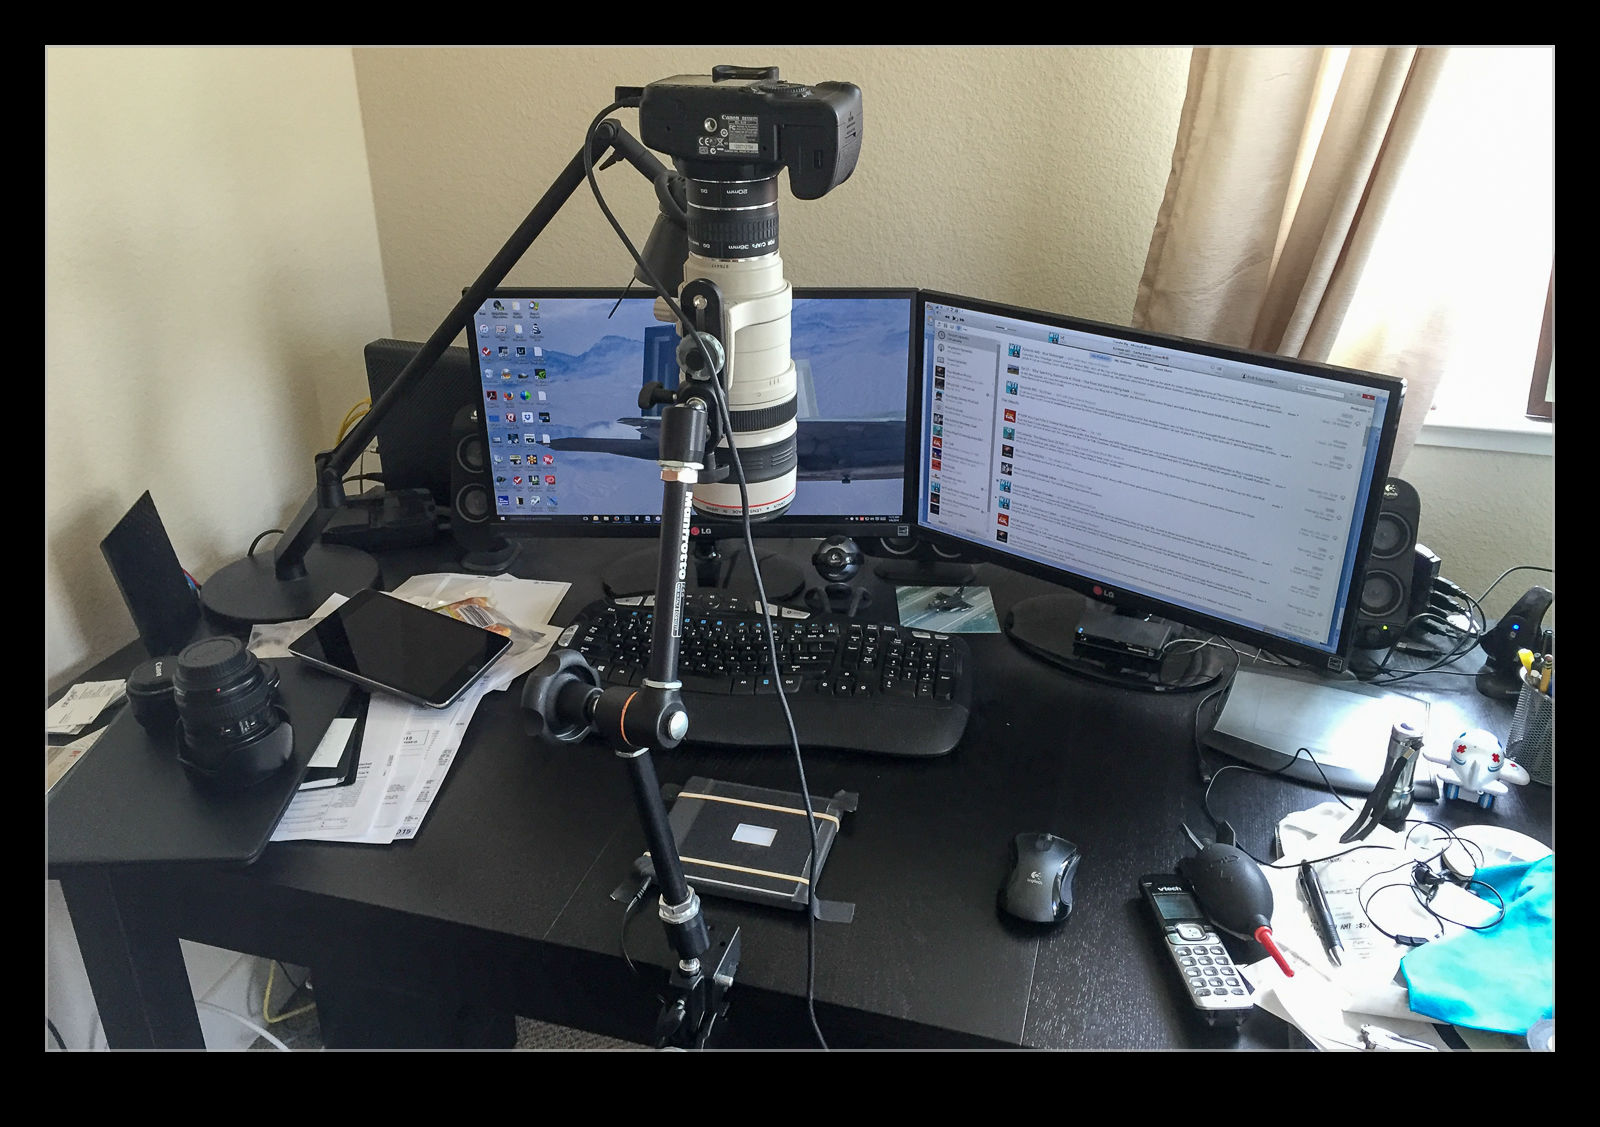
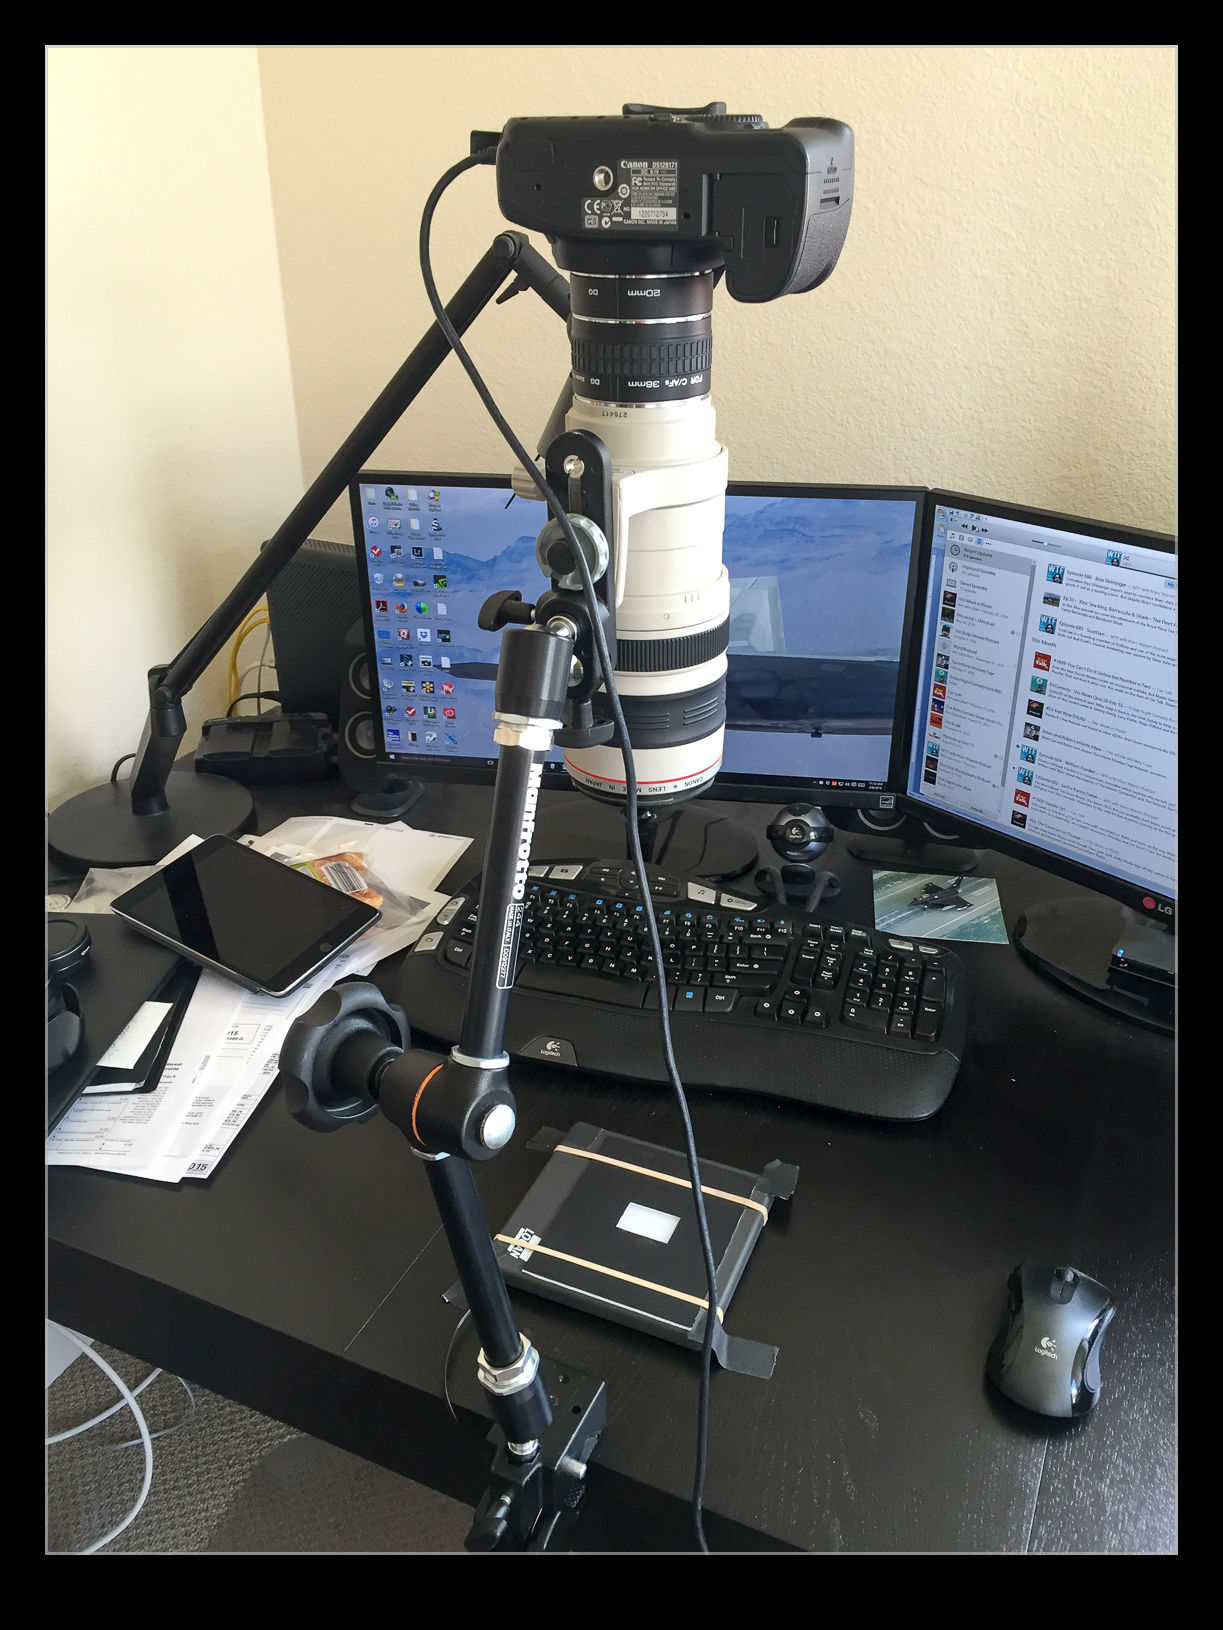
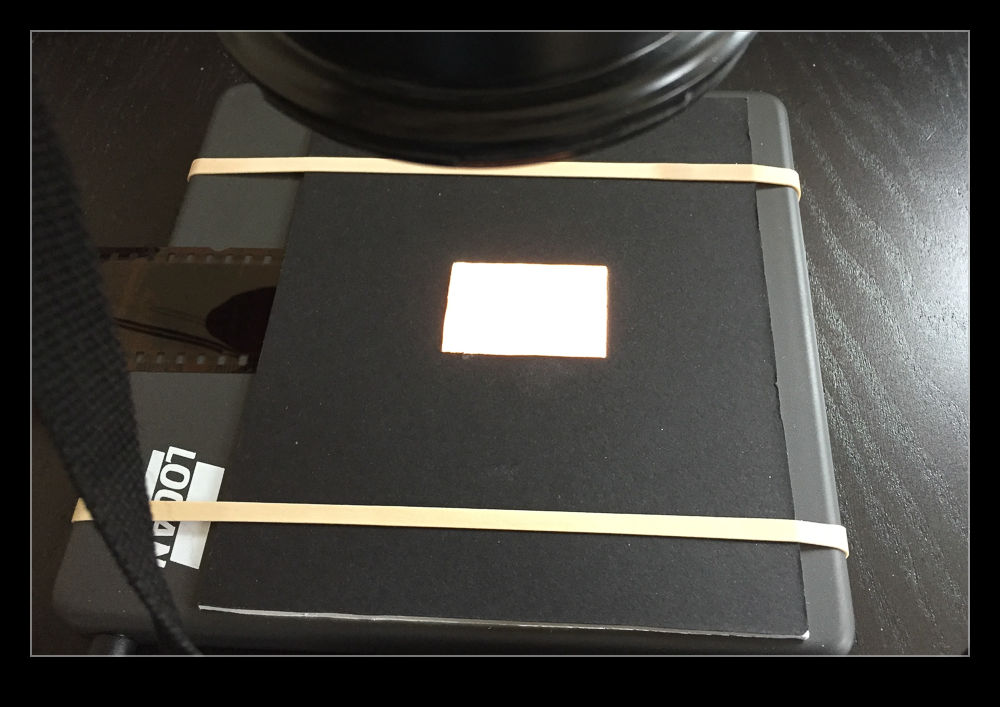
I am taking the images at my desk so I am able to tether the camera to the computer and use Lightroom to capture the images directly.  This has actually provided me with an opportunity to drag out one of my older bodies that doesn’t get used anymore.  My old 40D has been sitting on a shelf for a long time but it has come back into use for this project.  It has more than enough resolution for this task.  (Unfortunately, the batteries are now rather old and don’t hold a charge well so I am going to get an AC adapter from Amazon for ten dollars which should free me to scan as much as I want.)

I slide the negative into the holder and check the rough alignment through the viewfinder.  Fortunately, although it took me a while to find it, the 40D does have Liveview so I can make use of that to make sure the alignment is right.  I use the trigger release in Lightroom’s tether dialog to take the shot to avoid disturbing the setup.  If an image needs over or under exposure, I have to remember that it is a negative so I have to use exposure compensation in the opposite sense.  The shot is imported straight in the Lightroom when it is taken.  The first thing that I need to do is reverse the tone curve to change the negative to a positive. A white balance correction will take out the color cast of the negative and I now have an image to work with. I have a preset for given film types that does this during the import process.

IMG_3735.jpg
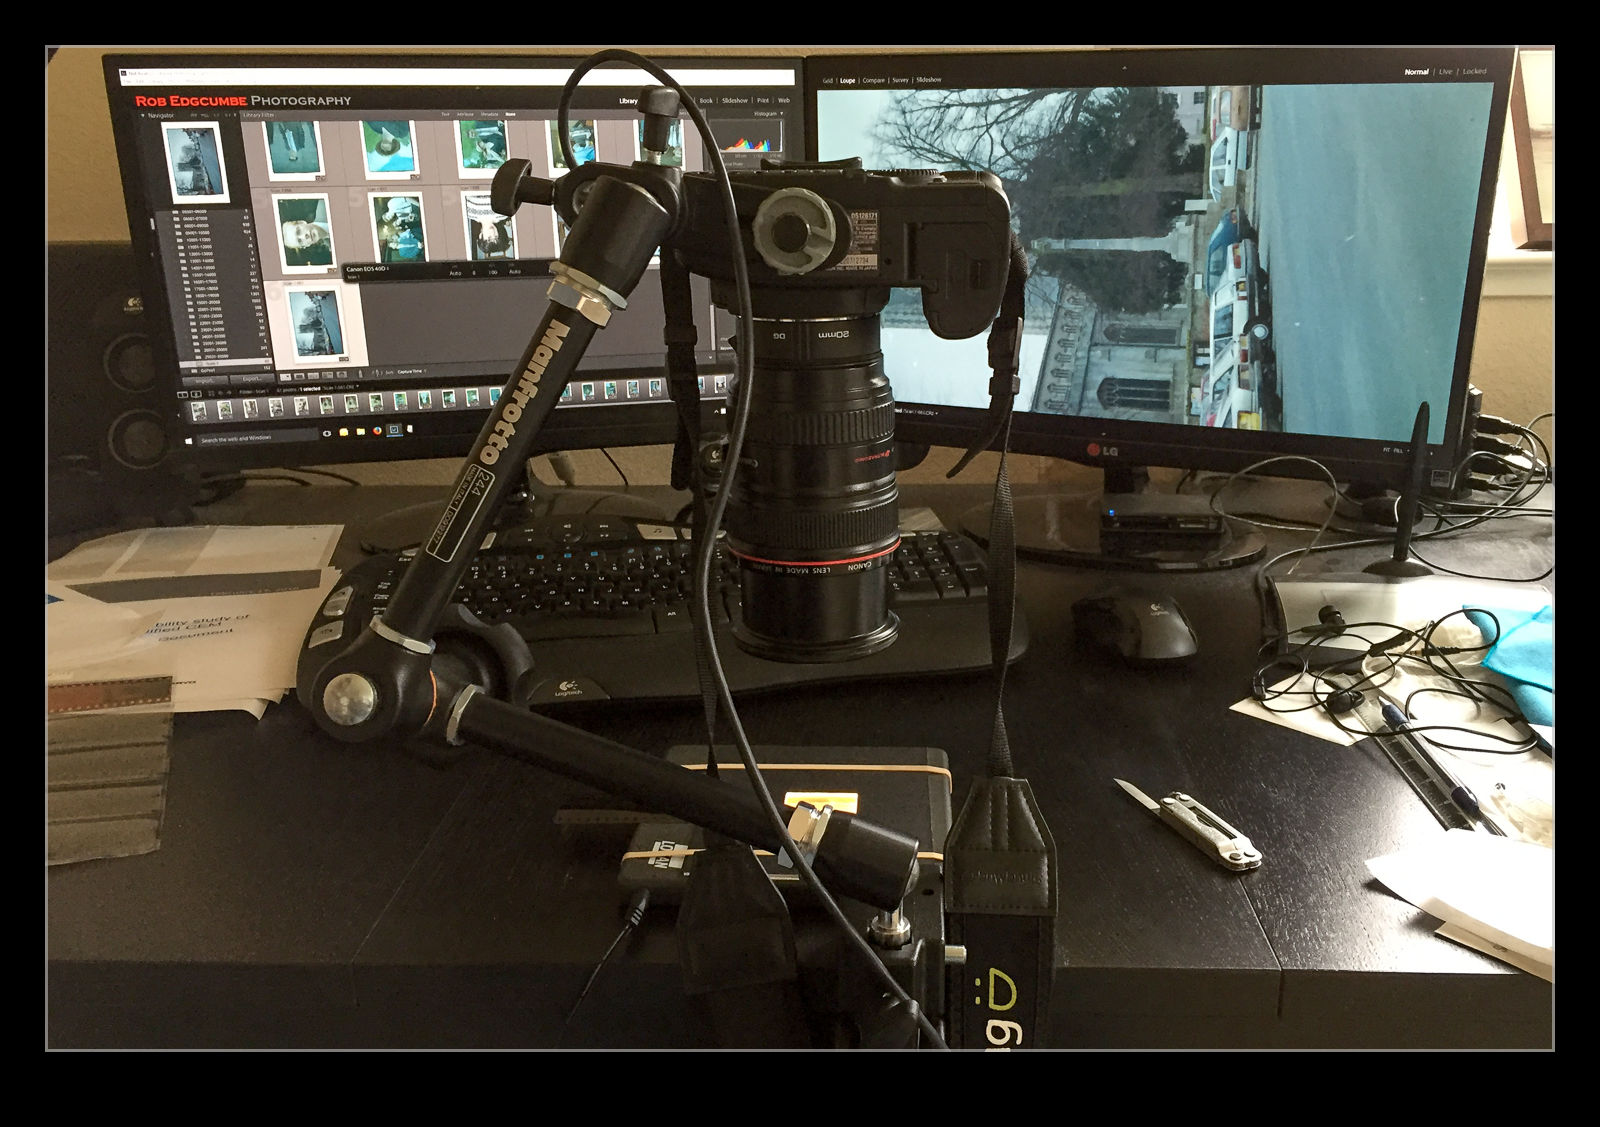
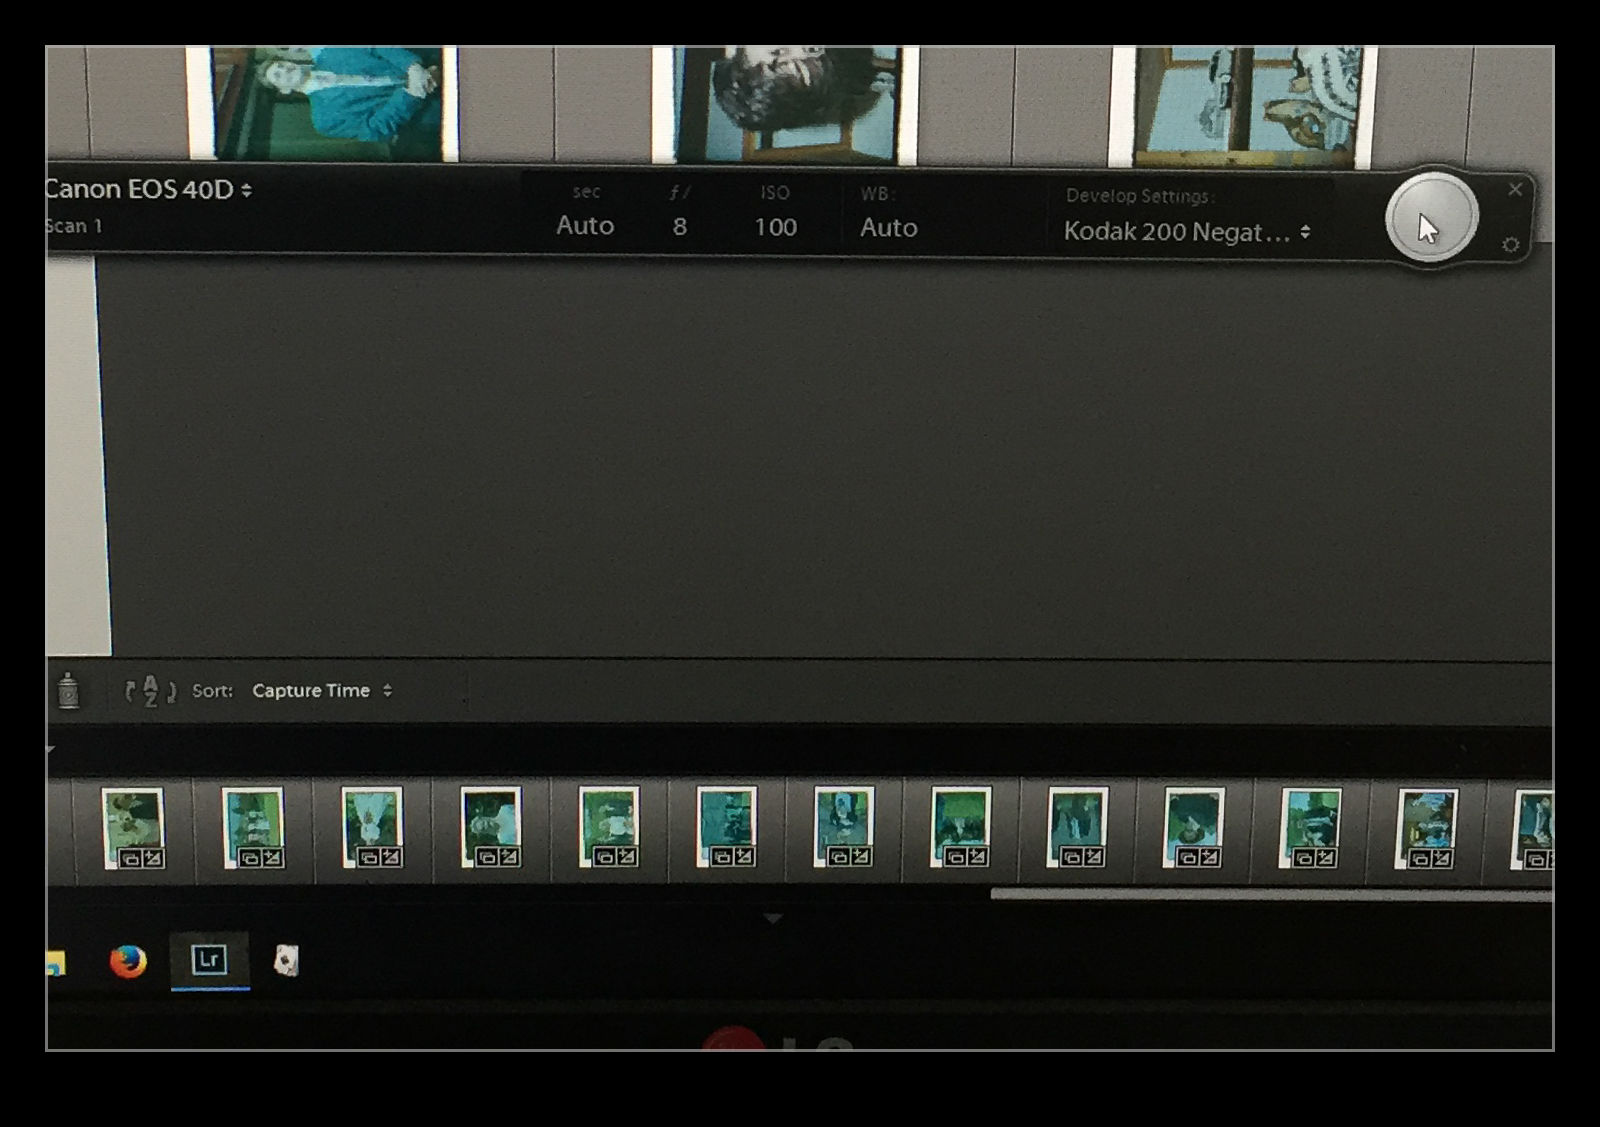
The image is now recognizable but not there yet.  Now I have to do some manual manipulation to tidy it up.  The sliders have to be used carefully in this case because they are now working in reverse as a result of the tone curve that I applied. This requires some thought. Exposure is still exposure but is reversed.  Usually shots look a bit washed out so, what would normally by the Blacks slider is now the Whites.  Shadows are handled with the Highlights and vice versa.  It takes a bit of getting used to but it is not too hard after some practice.  I tried using Auto Tone but it did not do a great job.  I imagine the algorithms were not designed for operating in reverse!

With everything set up, I can work through a shoot very quickly.  Choosing which ones to ignore and reshooting if something doesn’t look right can be done pretty much on the fly.  Is the image quality great?  It’s okay but not amazing.  However, many of the originals are not that great either.  For the majority, it actually does a pretty decent job and sets me up for something that I can do more work on if I need to.  It is a big improvement on my previous approach and now I will make quick scans when I need them rather than be dreading the time involved and avoiding all but the must have shots to save time.

IMG_3732.jpg

Fisheye Correction in Lightroom

I have a pretty well defined routine for importing and processing my images in Adobe Lightroom. I have presets for importing images that put them in the right folders, apply copyright information and apply development presets. I can then edit from there as I go. One of the settings I have set as a default is the application of the lens correction settings. This setting deals with any natural vignette in the lens as well as some distortion. Occasionally this can be tricky if you have something close to the edge of a wide lens and it gets slightly chopped by the correction.

AU0E3419-2.jpg AU0E3419.jpgI discovered a more extreme version of this while processing some shots from the Lick Observatory. I had taken my 8-15mm fisheye zoom with me as I thought there might be some use for it in the telescope buildings. It turned out to be a good thing to have. When I first had the lens, Adobe had not created a profile for the lens so the shots came in uncorrected with the fisheye look I expected. More recently, Adobe have created a profile for this lens. It was added in one of the updates and, since I don’t use the lens all of the time, I hadn’t noticed.

AU0E3382-2.jpg AU0E3382.jpgWhen I was going through the shots, I noticed the wide shots had some strange distortion at the edges. I was perplexed by this and also wondered where the circular fisheye shots were because I was sure I had taken some. Only then did I realize that these were those shots and the corrections were being applied. Here are some examples of the before and after with the correction to give you a idea of what the transformation is. A pretty dramatic change. I might make use of this sometimes but I shall also have to remember switching this off when shots with this lens are involved.

Zoomify the SFO Departures

I was recently drawn back to something I had experimented with a long time ago but had since forgotten about. I was at SFO when the wind was strong enough to require all departures to operate from the 28s. This resulted in a long line of jets along the taxiway beside the runways as they waited their turn to take off. I shot a very wide panorama shot of them all lined up. It didn’t help that they weren’t bunched too tightly but, even if they had been, the pano that results is very wide and shallow.

There is nothing much you can do with this unless you have a long wall waiting for a mural (which I don’t). However, I still liked the shot. What to do with it? Then I remembered Zoomify. This is an output format embedded within Photoshop that creates a web page that you can zoom in and out of and pan around. It allows someone to explore a large image in more detail if they want to do so. Not quite on the scale of Gigapan images but still a neat tool when you need something slightly different.

Zoomify Panorama

Blog Image Upload Using WP/LR Sync

Providing a review on something you haven’t had a lot of use of doesn’t seem like a good plan. This is something I have been using for a while and, now I have had a bit of time with it, I thought I would share what it is like. Uploading images to the blog is obviously a big part of the preparation of posts since, at the end of the day, this is primarily a photographic blog. When I first started out, I would create the images I wanted and then upload them manually. That was time consuming but was soon superseded by an alternative.

I started using the LR/Blog plugin to Lightroom. This would create a version of the file including any formatting, borders and conversion to the right color space and would then upload it to the blog. This worked okay for a long time but it had one significant limitation. If I tried to upload too many shots at once, it would fail and then lock me out of the blog for a while. I started searching for an alternative when my efforts to solve this problem went nowhere fast.

If you Google this topic, almost everything brings you to LR/Blog. However, recently I came across WP/LR Sync. It is a Lightroom plug in that makes use of the Publish services in Lightroom. Rather than uploading the images one time, you add the files to a collection that is then published to your blog. If you change the image, you can have the online version amended in sync with the original. If you go to http://apps.meow.fr/wplr-sync/ you can read more about it.

I decided to give this a go. However, in the guidance, Jordy provides a piece of information for people like me who have problems uploading lots of images. Apparently, my hosting service treats too many upload attempts in a short time as an attack and you get locked out. This was what was happening before. WP/LR Sync has a field that allows a small time delay between images which, if set just long enough, will prevent you getting treated as an attack. Something like this would also cure my LR/Blog issues I guess but that ship has sailed.

I am very happy with the new plug in. It works well and allows the same edits of the image before uploading as before. A benefit is that, if you drag images to the sync collection and they were already in there, you don’t end up with duplication on the blog. The one you previously uploaded is there. You just might have to scroll down a bit to try and find it. If you want to have a go with this add on to Lightroom, visit http://apps.meow.fr/wplr-sync/ and check it out.