Seattle was hosting two football games in one weekend. The Seahawks had their season opener on Sunday and the Huskies were playing on Saturday. The 142nd FW from Portland sent up three jets to undertake flyovers for both games. Each flyover involved two jets so the third was a spare should one be needed. After all, these jets aren’t young. Indeed, with the wing taking delivery of F-15EX jets, it won’t be long before the Charlie models are gone.
They showed up at the end of the day which made it easier to be there to catch them. Since there were three of them, I decided to use a relatively high shutter speed for the first jet, a slower shutter speed for the second and then lower still for the last jet. That way I should get a result on the early jets and hopefully would get something more dynamic on the last one if I was lucky. Things turned out well enough and the last jet even popped the speedbrake on touchdown which was welcome. The skies were a bit red as a result of the smoke in the are from wildfires but that might have softened the light a little.
The arrival of the Starlux A350 has already appeared in a previous post. I got there a little ahead of its scheduled approach and, since I was playing around with using my longer lens, I decided to try shooting some of the preceding arrivals with the same lens from head on to get some tighter compositions and see just what would work before the planes got chopped off by the limited field of view. I had a variety of types coming in from the little E175s to 777Fs. They gave me some things to work with and I quite like how some of them came out. A bit of variety is good when the subjects are very repetitive.
A couple of years ago, when we redid our back yard, we planted a small plum tree in one of the beds. It has grown well and, last year we had a few small plums that developed. They all fell before we had a chance to pick them, so we had no idea whether they were any good or not. This year, we had a lot more plums as the tree has grown quite substantially. I picked one of them to see how it was doing, and it wasn’t too bad. It did have a split in it, though.
The following weekend, I decided to harvest the rest. One had already fallen, and I think I saw a rabbit having a good chew on it. The rest came off easily enough. Quite a few had splits in them which, from what we hear, is the result of them getting a lot more water than they have been used to. I put them all in a bowl to get a photo. For the first one, I put them all with their best sides up. Then I turned them to show the most damage. Selective angles in photos can really change the impression you give!!
There are times when I just seem to want to take photos of something, irrespective of what it might be or what I might do with the images afterwards. I was sitting out on the deck behind our house and there were some rabbits eating our grass (as there often are). I had been watching some videos on wildlife photography and they had been emphasizing the need to get the camera angle low to improve the focus on the animal and separate it from the background. I had the camera and a long lens and there were some rabbits so why not give it a go.
Unfortunately, the rabbits are rather skittish, so some patience was required to get down on the ground without scaring them away. Then I had to wait until they looked in the right direction. Meanwhile, I was struggling with the angle being so low that the rabbits were partially obscured by the ground. (I might also mention, that wasn’t the only struggle. Lying on the ground for a while was making me quite uncomfortable and, when I did finally get up, it wasn’t elegant.) These were the results of my experimentation.
Cleveland Browns Stadium was across the way from the hotel I was staying in while in Cleveland. There was a bar up on the roof of the hotel with an outdoor area, so I headed out there one evening to get some images of the stadium while it was illuminated. There was glass all around the area, so I had to make use of the small gaps available and then stitch the images together to make a pano of the whole stadium. It worked out pretty well for some night images with the phone.
One of the special parts of the trip to Arizona was that Mark and I got invited along by our friend Joe to a night shoot at the Pima Air and Space Museum. I had seen some images from previous night shoots and the idea of photographing the many interesting airframes there in the dark intrigued me. The museum is excellent and well worth a visit, but it can be hotter than hell there and the light can be quite harsh, so this was a great alternative to try.
When I was a student, I used to do quite a lot of night photography. In the days of film, you played a lot more of a guessing game as to how things were working out. Also, film suffered from what was known as reciprocity failure so you could really extend the exposure in low light without necessarily ruining things. Digital is a lot more linear and also gives you the chance to see how things are coming out and have another go.
A lot of the attendees had done this more than once and had come equipped with a variety of tools to play with. Lights on stands, wands of different LEDs, huge flashlights etc. Plenty of things to work with. I had brought some tools along but was definitely keeping it simpler. Joe offered us some lights to work with but, since this was a new effort for me, I decided to keep it simple and try to get one approach worked out.
I had a tripod so I could leave the camera in place and then a couple of strobes to play around with. I had to make some set up adjustments first. Take off IS from the camera since it can wander over long exposures and make things blurry. Second, put the strobes on manual power and experiment with how well they do illuminating things. What I didn’t do but should have with hindsight was to go to bulb mode rather than 30 seconds on the shutter. At some points with the larger airframes, I was very frantic in trying to get everything lit in the 30 seconds. It proved to be rather energetic, and I was pretty pooped by the end of it.
I would open the shutter and then move around the airframe illuminating it with pops of the strobe. I quickly learned to shield the strobe, so it didn’t illuminate me and add me in to the shot. I also came to realize how the larger areas when I stood back a bit needed more light to compensate. All of this is logical but not something I thought of before trying it. More research/planning would have been a good idea. I was also surprised how my shadow could show up in some shots when I have no idea how it would have got there.
I did photograph some of the more famous assets in the collection – how can you ignore a B-58 or a B-36 – but I did also take time for others that were just of more interest to me. The size of the place meant you could easily not come across one of the other photographers for a while. They were helpful in pointing out the hazards of guy wires. Some of the larger planes have wires to stabilize them and these are basically invisible in the dark. If you are running around popping off flashes, you could easily collide with something unyielding. Fortunately, nothing like this for me but maybe some luck in that?
Would I do it again? Absolutely! It was very interesting and got some nice results. It also taught me a lot about what I wasn’t doing right and would set me up for a few ideas of how to do things differently in the future. I think a large flashlight would be an addition I would make, and I would definitely use the cable release and bulb mode. My thanks to Joe for taking us along and to the team for letting us join in.
When shooting departing jets at BFI, I often have a conundrum about the lens to use. For some of the higher performing aircraft, they get off the ground quickly, so the longest lens is probably going to be best. However, other types use a lot more of the runway and can rotate a lot closer to some of the places I like to shoot from. The long prime can be best a lot of the time but, if they run long, I might be too close for the shot. A Falcon 7X can run a bit longer if it is heavy as a result of the three-engine configuration versus the twins like the Gulfstreams and Globals. This one did that but, it rotated quite close to me. I was actually really pleased with how things turned out and then I spun around to get the climb out from a tight angle as well.
Walking along the shore, someone had been feeding the pigeons. The term rats with wings is often applied to pigeons and you can see why. (I think rats are amazing creatures so it might be a compliment to draw the analogy.) While pigeons might not be too popular, they are incredible flyers and I find their flight and, specifically, their wings, to be amazing. As we watched from a distance, they got spooked by a dog and all flew off. However, they only circled for a short while before landing on a nearby roof. Soon, they swooped down to the railings and then back to the ground where the food still was.
They repeated the process shortly afterwards and this got me interested. Photographing wildlife can be tricky since you never know what they will do next. Having some predictability can give you better options. I decided to get around to the other side of them and wait for them to get spooked again. With so many people walking dogs in the area, it couldn’t take too long! Sure enough, they were soon back up on the roof.
I didn’t try to get any one bird. That would be very tough to do. Instead, I shot wider and with a higher shutter speed to freeze the action and waited for them all to return. They kindly performed exactly as they had done before so it was a case of waiting and shooting as they all gradually made their way back down. Some of them had really amazing poses as their wings flexed and folded as they flew to the food. What amazing creatures they are.
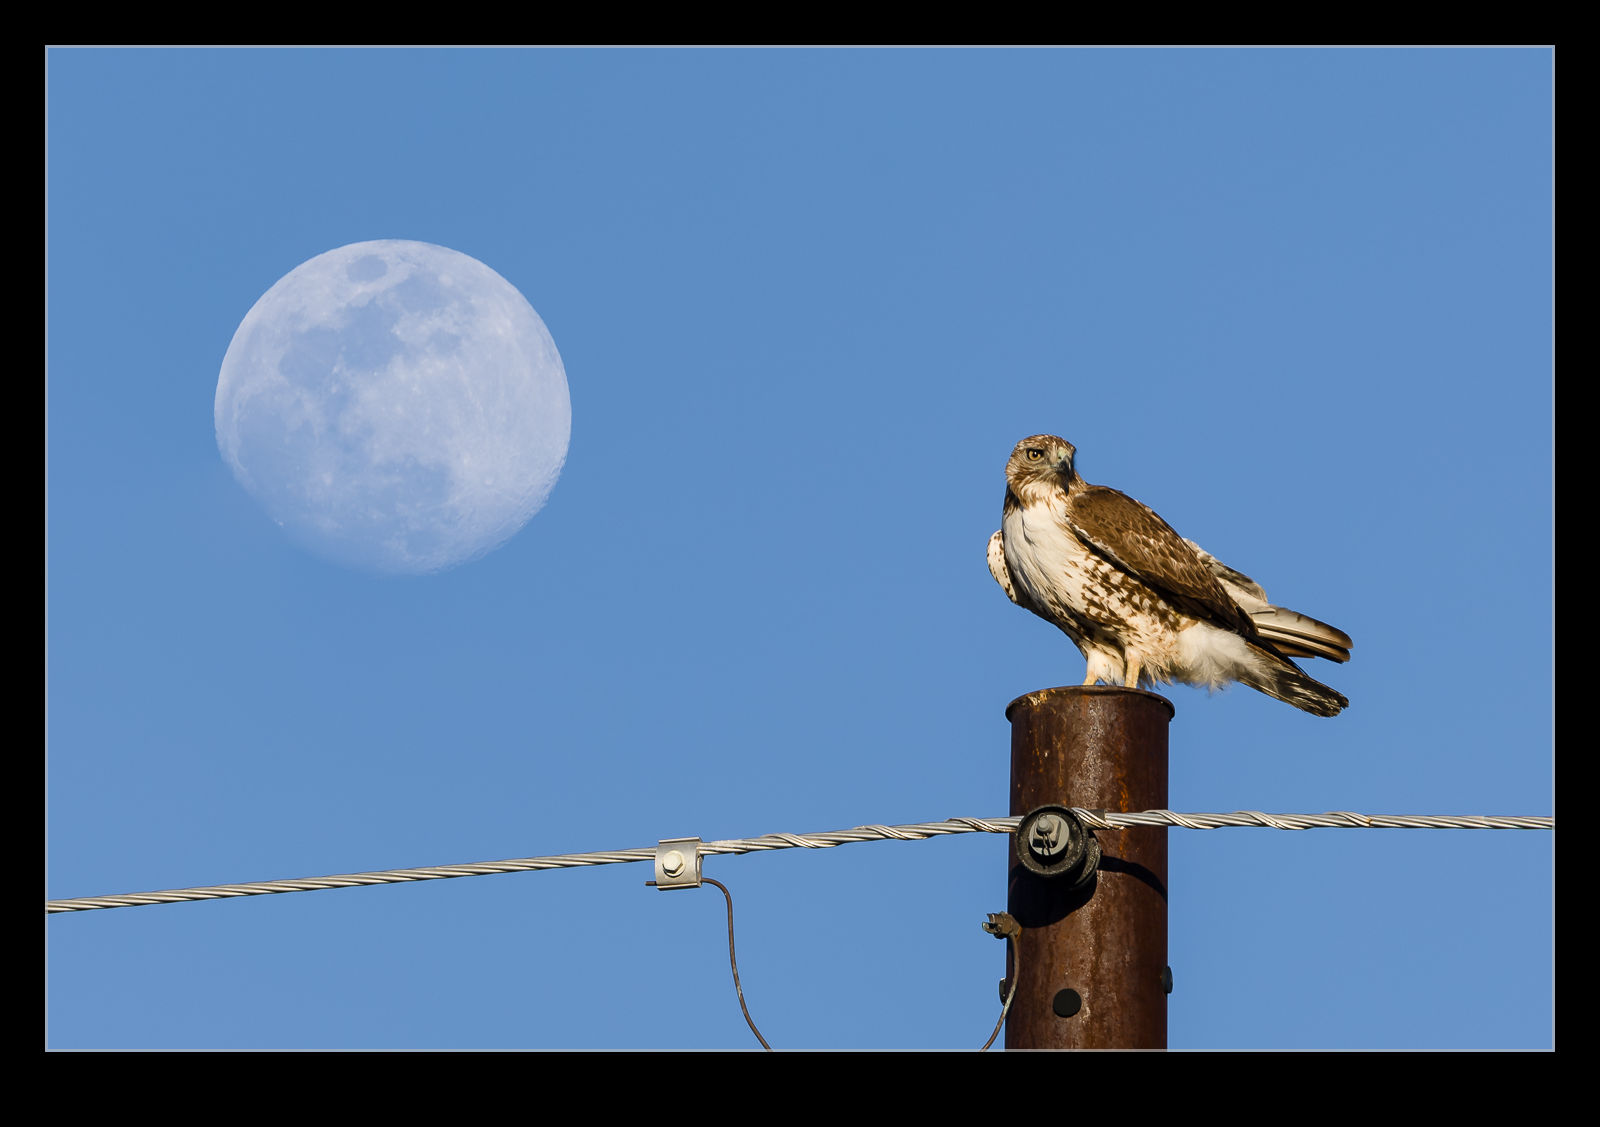
My El Centro wildlife encounters continued after the owls had been photographed. A hawk showed up on a utility pole close to us at one point and, since no jets were landing, I was happy to take its photo. Then I realized that the moon was rising not far away, and a short movement allowed me to bring the two into closer alignment. With the long lens, the focus depth was narrow, so I took shots of the bird and shots of the moon. When I got home, a little focus stacking allowed me to make both sharp to show how it looked to me at the time I was there.
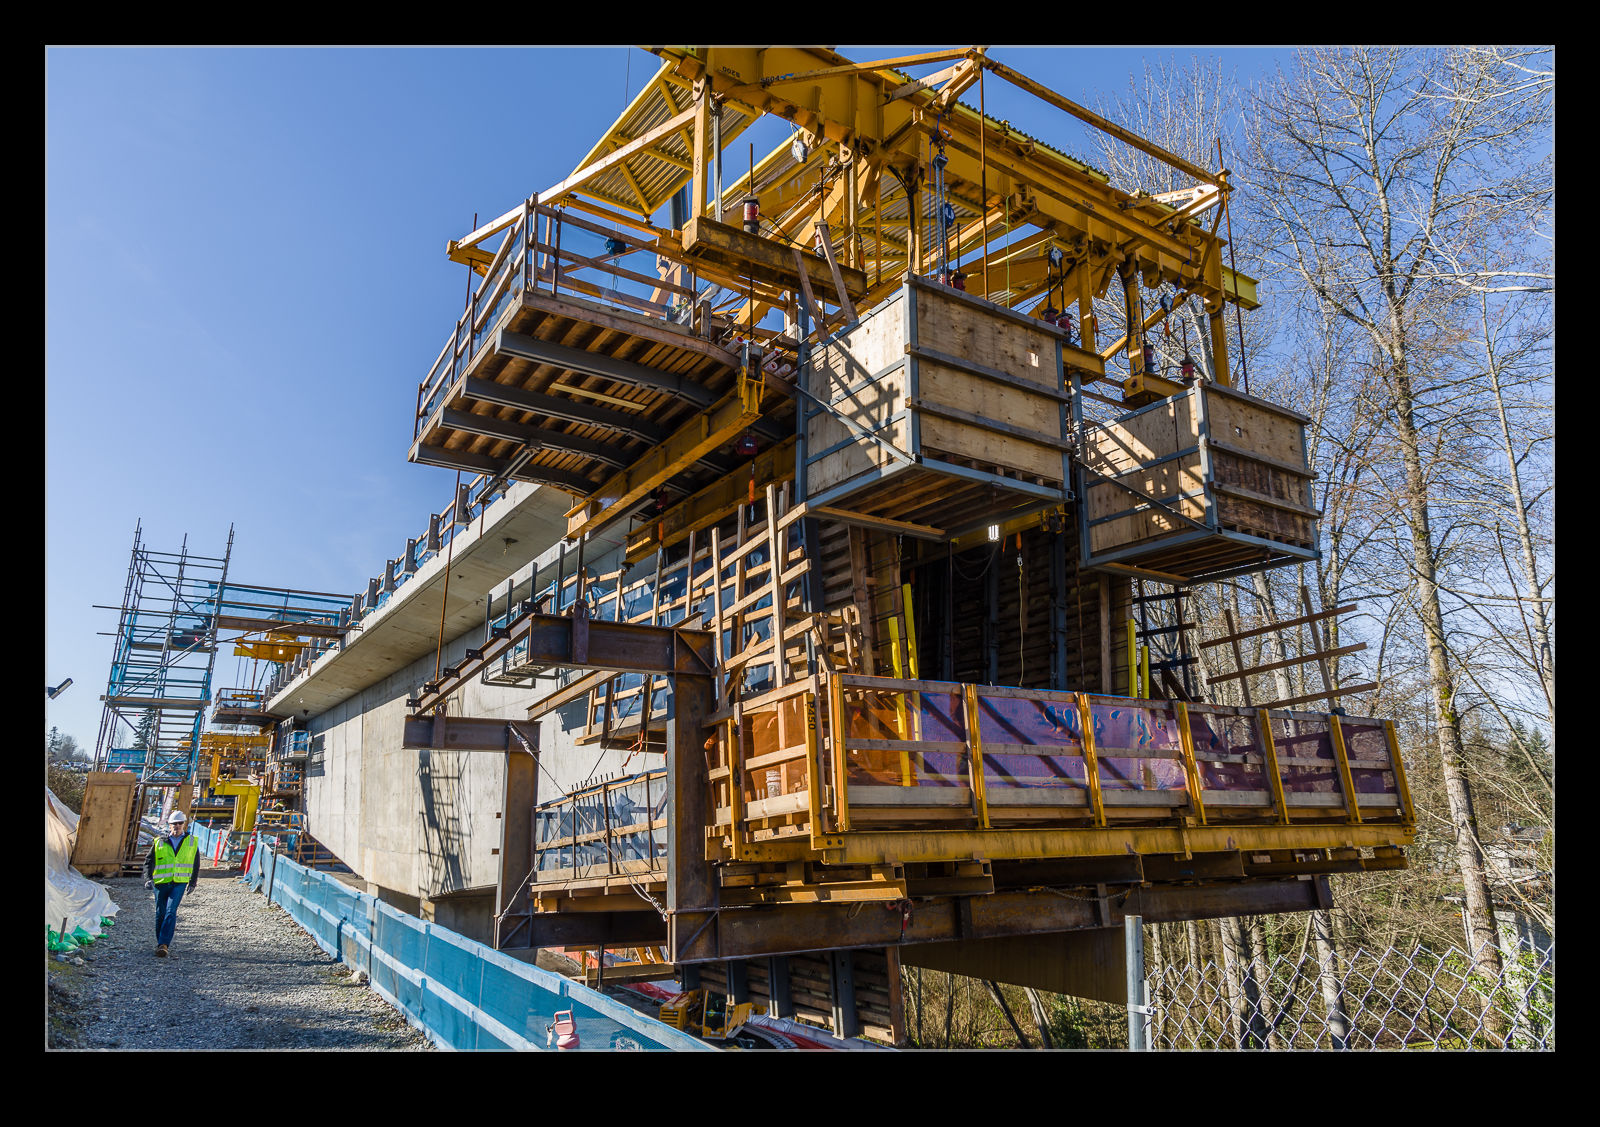
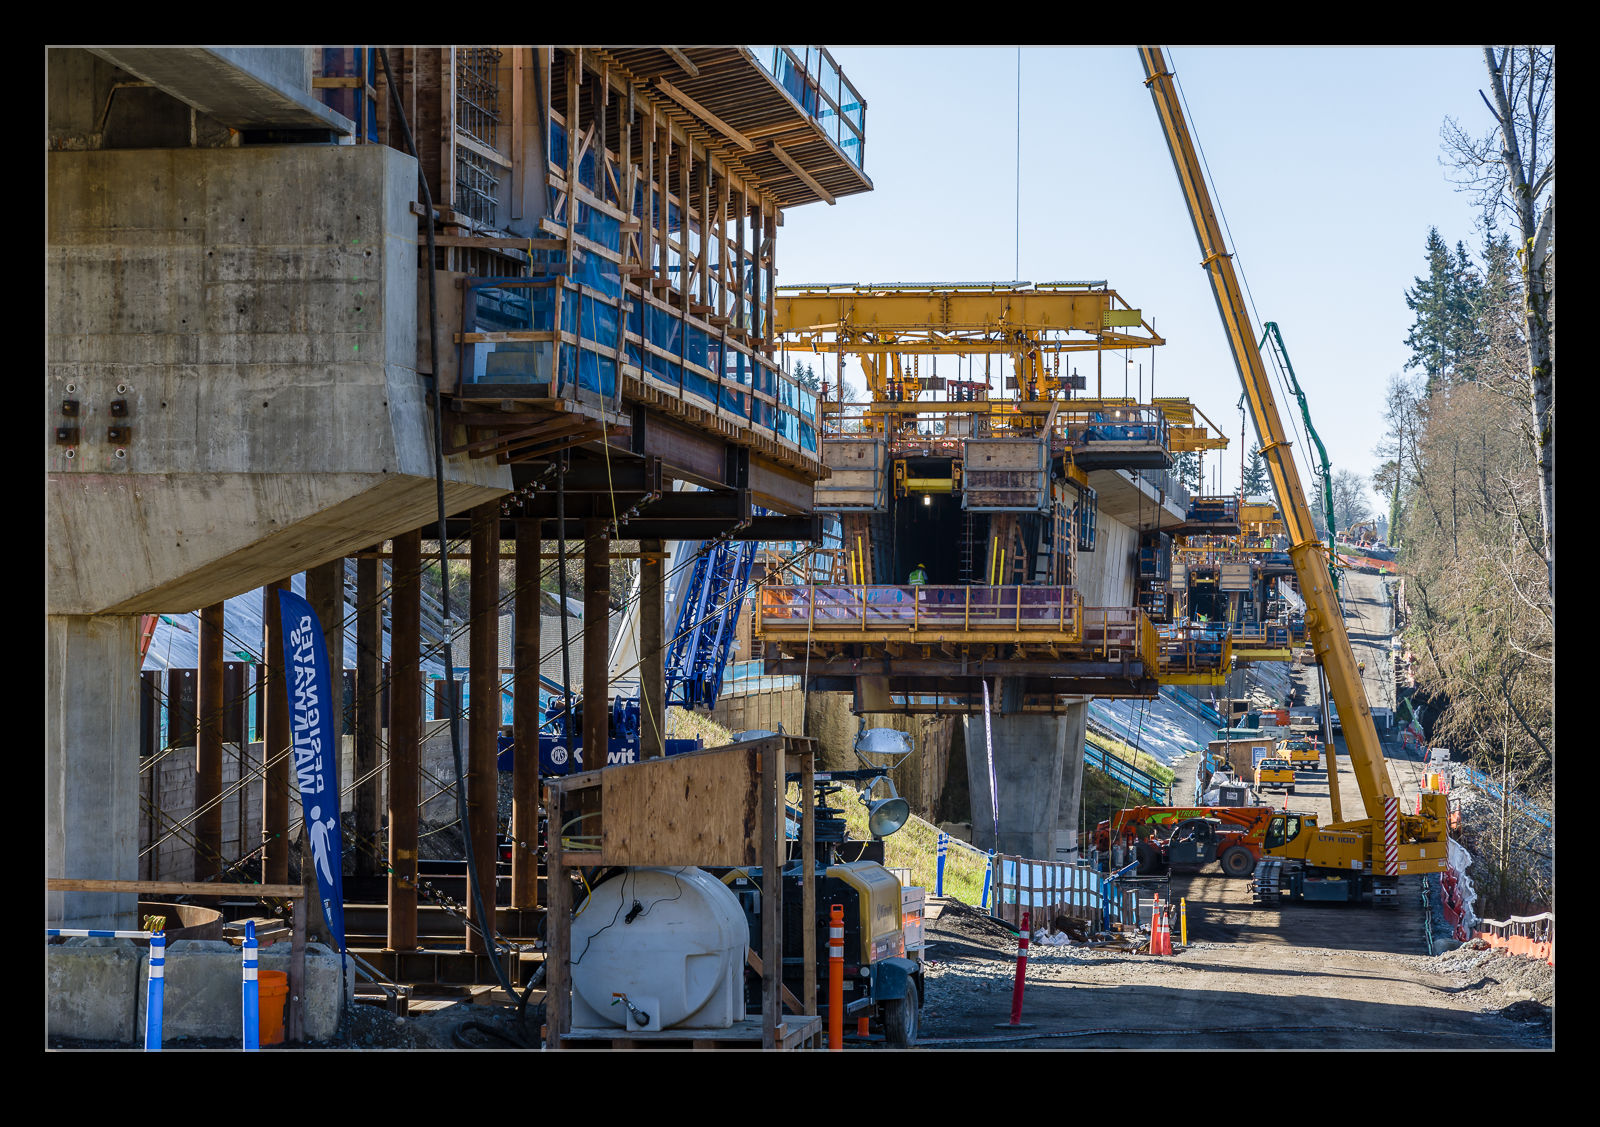
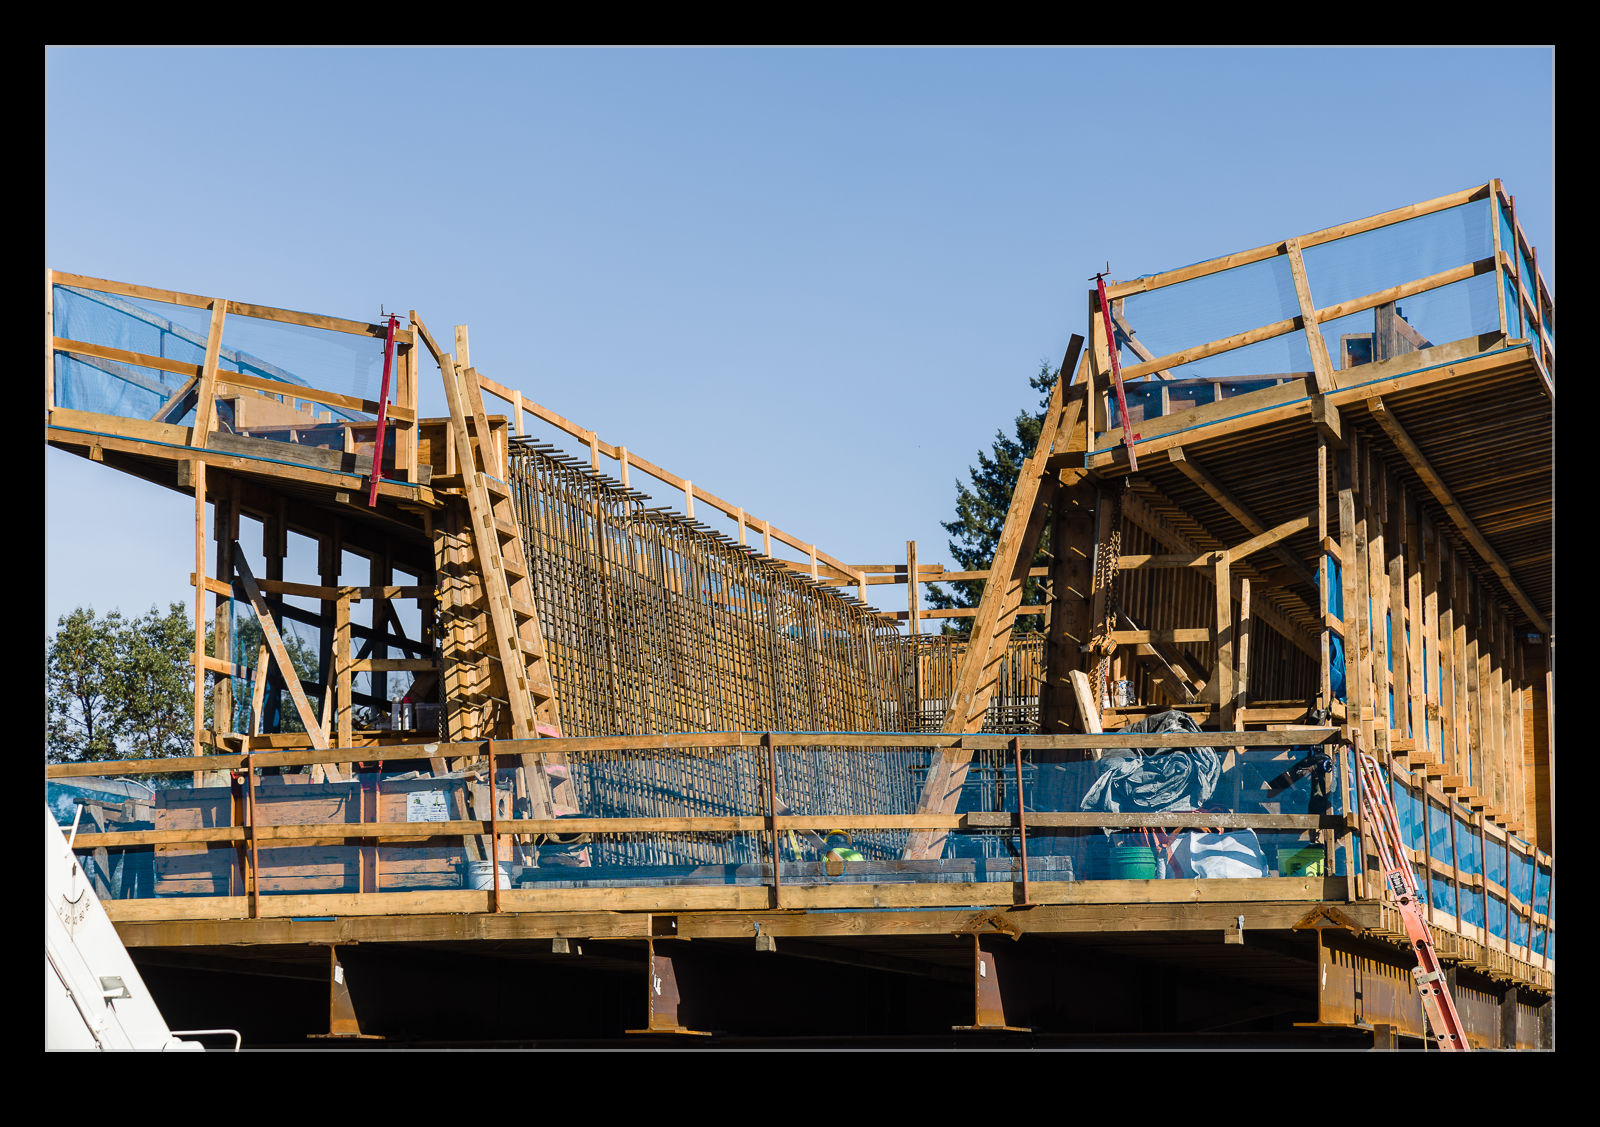
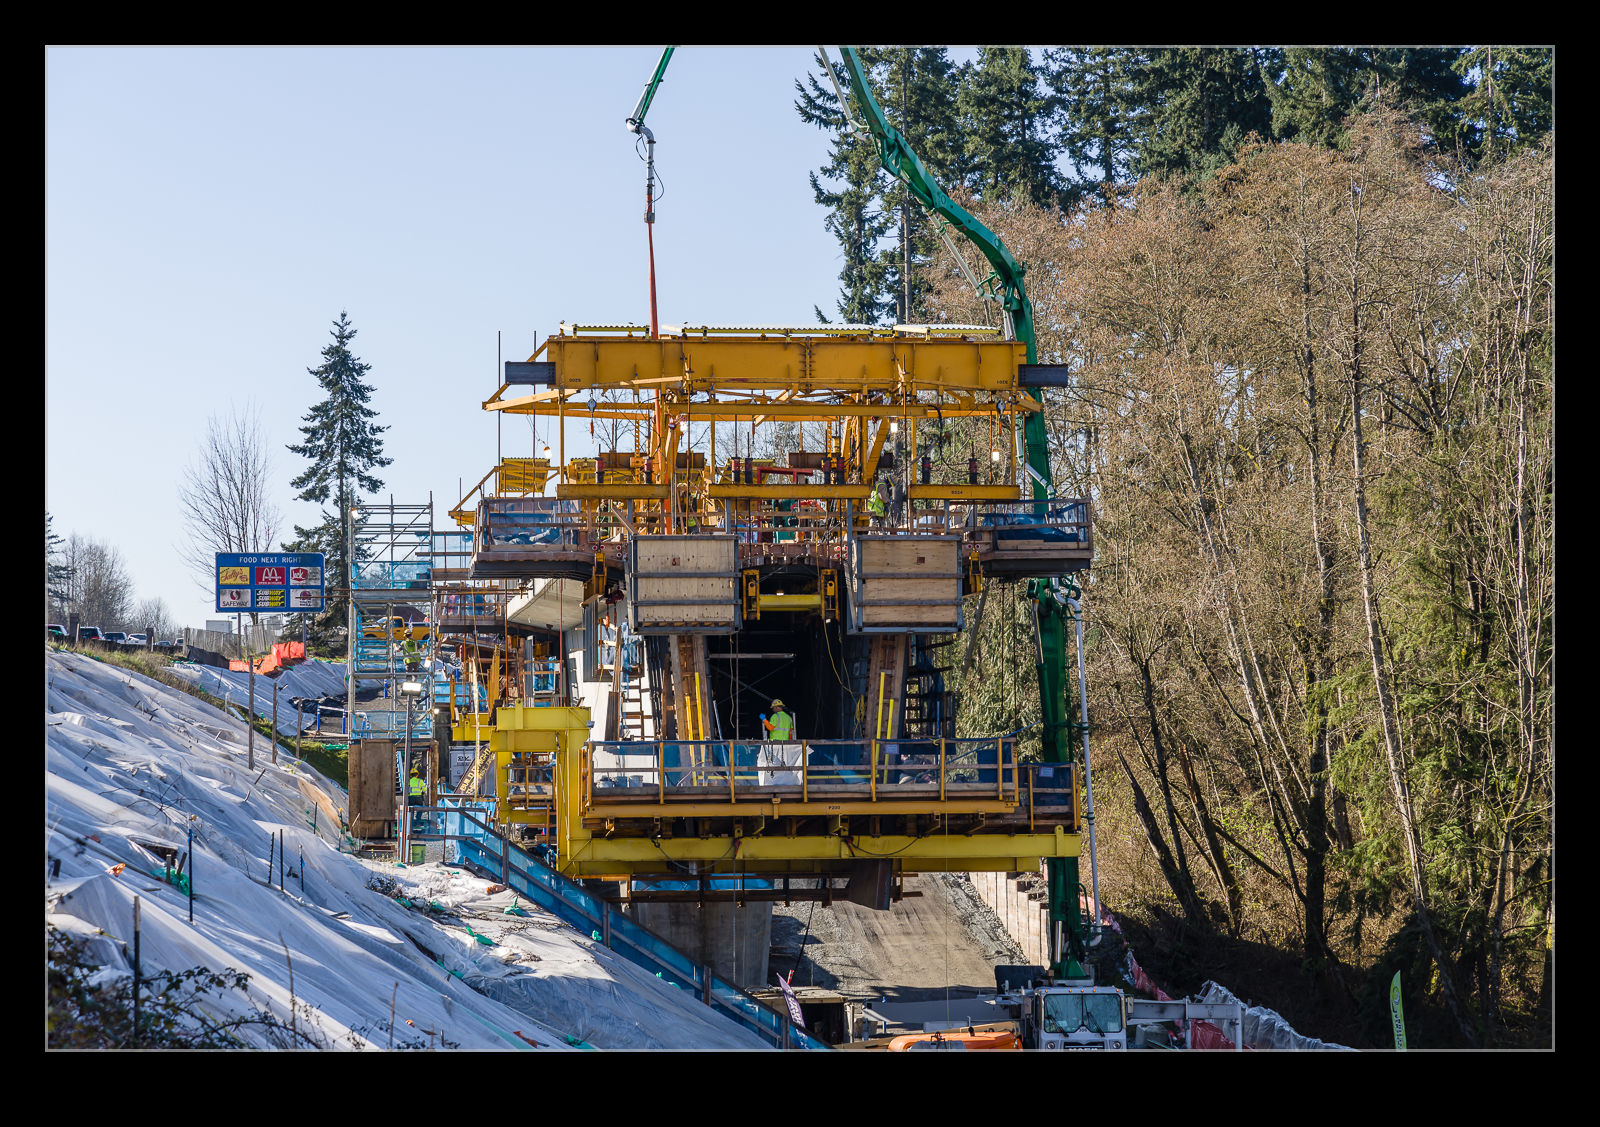
One of our work projects includes the construction of a long span bridge for the light rail line to run over. I have been down on many occasions since the construction started on this section but much of the early work was the preparation of the ground and the creation of the foundations for the final bridge. We now have the piers in place and the construction of the bridge itself is underway.
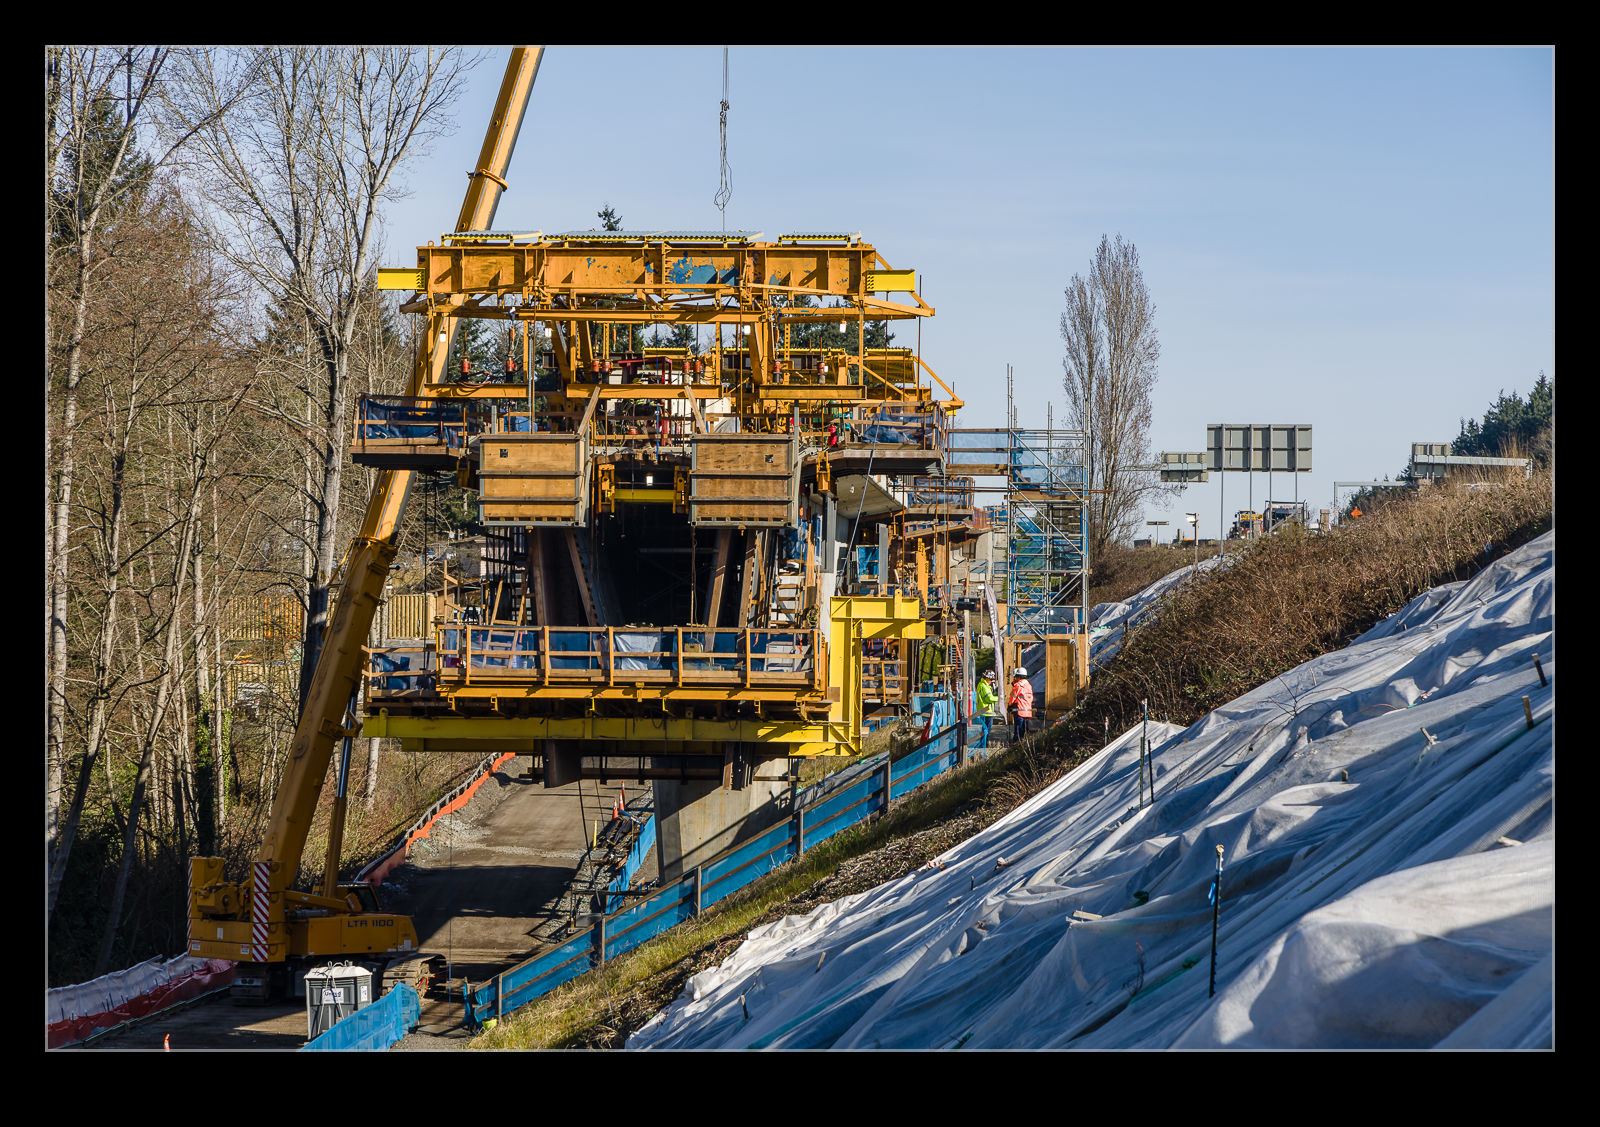
This type of construction involves casting the bridge in sections in place rather than offsite and then bringing them in. Steel supporters called travelers, hold the formwork in place as each section is cast. When it is cured, the traveler moves out onto the new section and the process is repeated. This happens symmetrically about the pier, so the bridge grows out in both directions at once keeping everything balanced.
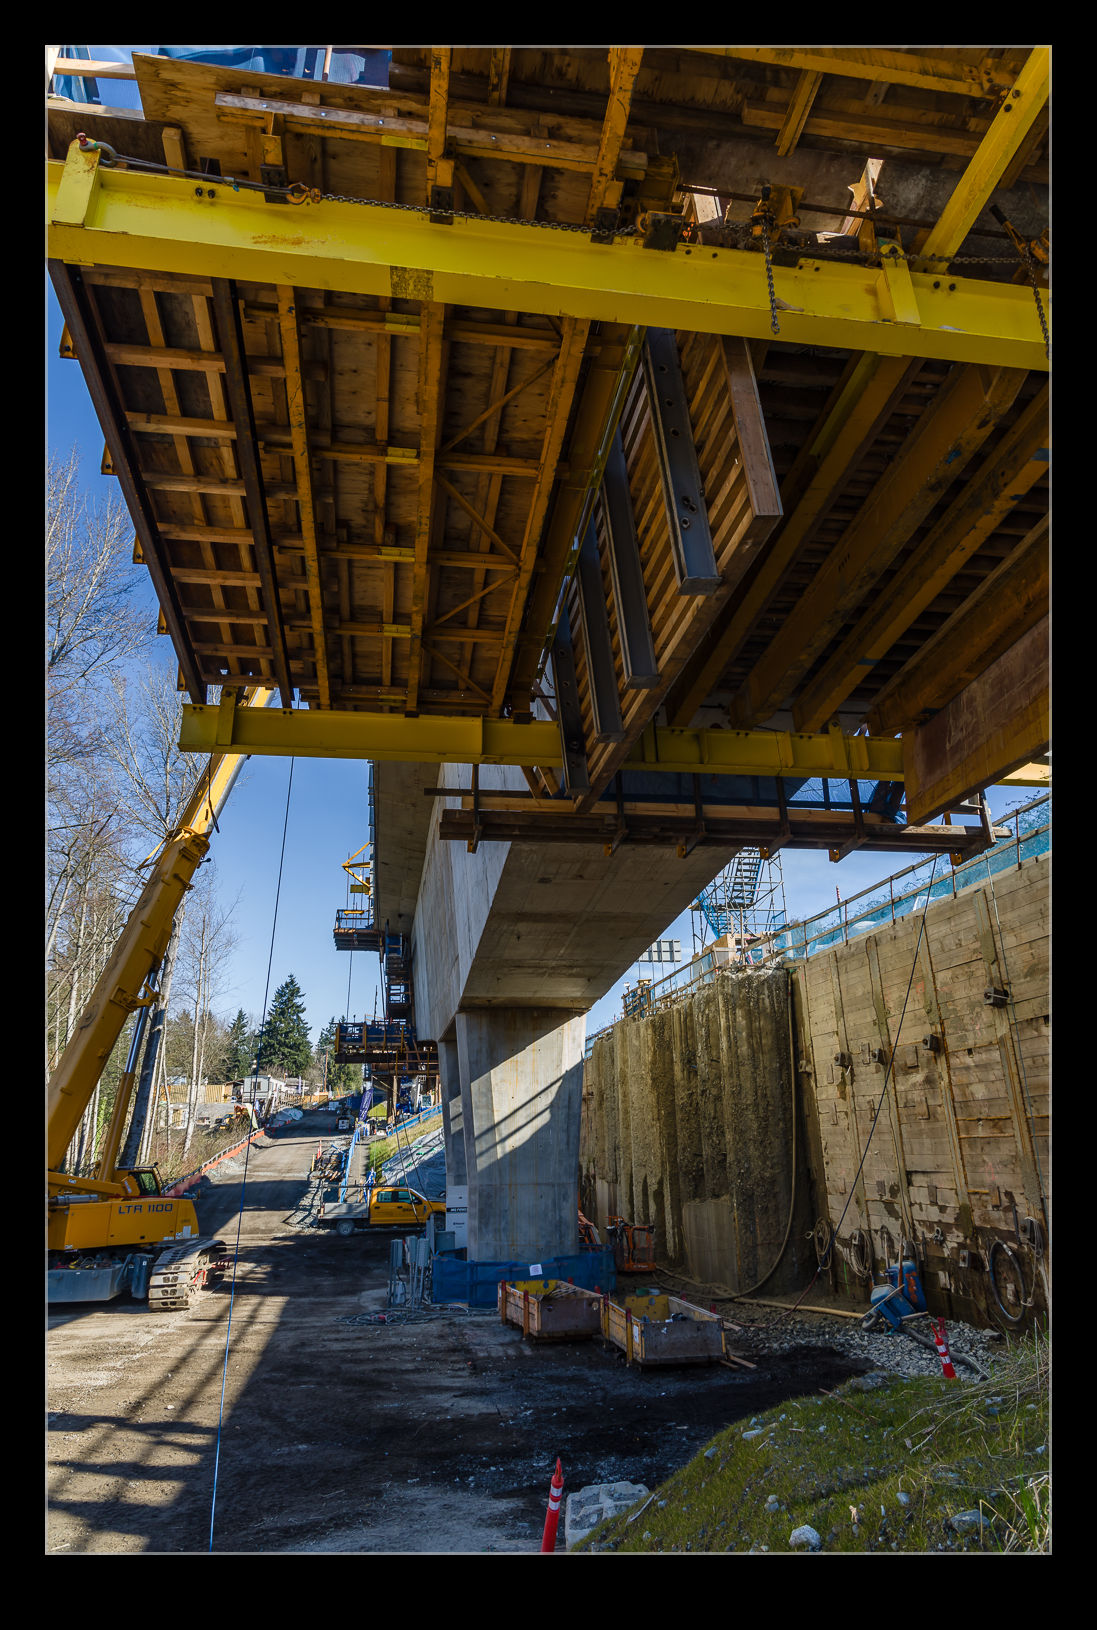
The process moves quite quickly so, each time I go down, the bridge has got noticeably larger. There are actually to sections happening at once to make the two halves of the bridge. They grow towards each other, and the final casting will connect the two cantilevered spans to complete the bridge. That will happen later in 2024. The section of the bridge is hollow so it will be possible to access the insides of it in the future. If I get a chance to go inside at some point, expect more images here.
 Seattle was hosting two football games in one weekend. The Seahawks had their season opener on Sunday and the Huskies were playing on Saturday. The 142nd FW from Portland sent up three jets to undertake flyovers for both games. Each flyover involved two jets so the third was a spare should one be needed. After all, these jets aren’t young. Indeed, with the wing taking delivery of F-15EX jets, it won’t be long before the Charlie models are gone.
 They showed up at the end of the day which made it easier to be there to catch them. Since there were three of them, I decided to use a relatively high shutter speed for the first jet, a slower shutter speed for the second and then lower still for the last jet. That way I should get a result on the early jets and hopefully would get something more dynamic on the last one if I was lucky. Things turned out well enough and the last jet even popped the speedbrake on touchdown which was welcome. The skies were a bit red as a result of the smoke in the are from wildfires but that might have softened the light a little.