Above LA

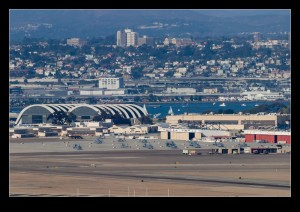
wpid13798-AU0E2015.jpgArriving in LA from the north brings you in to the city from an interesting direction. You come down the coast and then run in to the city before making a turn towards the west to land (assuming LAX is operating in the usual direction. You can see Van Nuys, come over Culver City south of Beverly Hills with the Hollywood sign off to the north and then pass close over the top of Downtown before making the turn. You are pretty low so have a nice angle on things as you go and, with it being later in the day in the early spring light, things aren’t as harsh as they get later in the year.
wpid13790-AU0E1977.jpgA few good views of the city as well as the race track near the airport were on offer so who was I to say no?

C-46 Commando

wpid13604-C59F9601.jpgEven people how aren’t particularly into aviation have a reasonable chance of having heard of the Douglas DC-3, also known as the C-47 and the Dakota. Not only was it a hugely important aircraft in WWI but it also continued to provide the post war commercial services and, even today, to fill a niche in air transportation. Far less attention is given to one of its counterparts in the war, the Curtiss C-46 Commando. The C-46 never stuck in the public conscience in the same way and its use post war was a lot more limited.

wpid13612-C59F9800.jpgHowever, they didn’t all disappear and one fine example still flies at a lot of air shows. I got to see it at Pungo in Virginia a few years back at an ISAP event. The symposium was being held in Virginia Beach and we spent a couple of days at Pungo. One was the day before their annual air show. We got to look around the collection and see the aircraft in action. The C-46 put on a few great low passes and I was at one end of the field and got a great view head on.

wpid13606-C59F9606.jpgOn the day of the show, the weather was not cooperating and the train came down heavily at various times throughout the day. The C-46 did fly in the gaps provided by the not so awful weather. They were not conditions conducive to good photos but I still got some of it. However, the practice day proved to be the better day for seeing this fine machine in the air.

wpid13610-QB5Y5183.jpg wpid13608-C59F9763.jpg

Special Weapons at Cosford

wpid13693-22.jpgI have twice been able to visit the museum at RAF Cosford outside Telford in the UK. On my second visit, I had a very surprising experience. I was looking at a Buccaneer that was on display in one of the hangars. As I walked around it, I saw something that I had not expected to see. They were some bombs but not normal bombs. When I worked on Tornado many years ago, some of the handling clearances we wrote were for what were euphemistically called special weapons. Even the outline of these stores was highly classified and anything we did that included clearances for them had a higher security rating than normal weapons. I never saw one for real. Only the drawings showing the shapes were available. Once I finished working on them, I figured I wouldn’t see them again.

wpid13691-21.jpgTurns out I was wrong. The RAF retired their weapons as part of an overall strategic weapons reform and, once they were withdrawn from service, the classification was downgraded. This included allowing the weapon shapes to be declassified so they could be put on display in a museum. When I first saw them, I thought that someone must have made a big mistake but it turns out that everything was above board. I doubt many people walking past them were even aware of what they were and they certainly won’t have been as surprised as I was.

St Patrick’s Day Parade in Dublin

wpid13761-AU0E1382.jpgTen years living in the heart of Chicago meant that St Patrick’s Day was treated with a certain level of trepidation. Yes, the dying of the river green was fun and there was a parade. (It was a huge parade that went on forever and could be held in some bitterly cold weather that made you wonder whether you really wanted to know what you still hadn’t seen.) However, the city got taken over by people getting hammered from breakfast to early the next morning so it wasn’t always the best place to be! You can see some of my previous writings on the day here if you wish.

wpid13775-AU0E1562.jpgNow we are in California, we live in Dublin! Okay, it isn’t that Dublin and it might not have much real connection with Ireland but it has embraced the name and made St Patrick’s Day a big event. There is a parade the then a fairground and stalls are set up in the area around the public library and the sports fields. I figured I should stroll along to see how the parade went.

wpid13783-AU0E1670.jpgWhile it might not be on the same scale as the Chicago parade, it was still a pretty sizable affair. Plenty of people seemed to be out lining the streets to watch it go through. The participants were a mix of groups. The various local schools had their marching bands, the emergency services participated, local groups would show off their specializations and you had some of the light-hearted elements thrown in for good measure like the Shriners in their little cars. A few horses and dogs were thrown in for good measure.

wpid13781-AU0E1669.jpgBringing up the rear was a vintage bus and a modern bus from Wheels, the local transit agency. I was standing next to a woman who obviously worked for them but showed up after things had started and was worried she had missed them. She needn’t have worried. The weather was great – another difference from Chicago – so everyone in the parade as well as those watching seemed to be having a good time. A variety of groups were throwing goodies out to the crowd but I was on the wrong side of the road to get anything they threw. Just as well really because, while I am enthusiastic for the freebies when they are throwing them around, I always find myself wondering why I wanted the stuff shortly afterwards. However, I did get some free Pocky samples and I didn’t mind eating them at all!

AMARG

wpid13657-QB5Y2726.jpgThe storage facility at Davis Monthan AFB in Tucson AZ is very famous. The storage of so many airframes that are either gradually being broken down for parts or that have the potential to make it back into service is well known and has been the subject of many books and articles. Getting access to the facility is a bit harder than it used to be but there is a tour that is run each day from the Pima Air and Space Museum across the road from the base.

wpid13642-QB5Y2680.jpgThe tour is on a bus that doesn’t allow anyone off so it is not ideal either from a photography perspective or from the point of view of exploring the more unusual aircraft. However, it is a simple thing to do so making the trip on the bus was the option I went with when I was there a few years ago. The bus had tinted windows which affect the photos quite a bit and you are stuck on one side of the bus so anything on the opposite side is a case of seeing what luck you have shooting across the bus. Reflections are a constant problem of course.

wpid13638-QB5Y2666.jpgThe storage facility is exactly as you imagine it would be. The lines of aircraft of the same type are very cool. It really doesn’t matter what the type is. Seeing so many of one type together, often with a wide variety of unit markings, is impressive. The big types like the C-5, the C-141 and the B-1B dominate their areas. The smaller types can be scattered in amongst them. Some look rather forlorn, often without the gear any more, mounted on wooden frames. Other locations have parts stacked up. A selection of wings from A-10s were stacked in a row. At some point I need to make the plan to visit and investigate the facility in a lot more detail.

Cutlass

wpid13618-C59F7438.jpgWhen I was a kid, I saw a picture in an aircraft modeling magazine of the Vought Cutlass. The planes caught my imagination at the time but they were already long gone from service so the chances of seeing one in the UK were not good. However, I did come across one much later when visiting the Museum of Flight’s restoration facility in Everett WA. My first visit to the facility was when it was just a location where work was undertaken and you could drop in. More recently, it has been turned into a visitor location with a shop and entry fee.

wpid13620-QB5Y7682.jpgNothing has changed with the Cutlass though. It is apparently a bit of a basket case for restoration purposes with a lot of problems in the structure. Consequently, I don’t know what will happen with it or whether it will remain a work in progress indefinitely. However, it is cool to see a Cutlass at all. When thinking about this, I decided to see whether I had ever come across a Cutlass at any museum. However, I couldn’t find an example anywhere in my files so I guess this is the only one I have seen.

wpid13616-C59F7424.jpg wpid13614-C59F7396.jpg

Over Candlestick Park

wpid13737-AU0E1827.jpgA previous post included some aerial photos of SFO taken as I flew out of Oakland. That departure routing also takes you over Hunters Point and then Candlestick Park. The demolition process appears to be well underway with a section of the stadium gone. I was glad to get a shot of it while it was mostly still intact. Soon it will be gone.

wpid13731-AU0E1783.jpg wpid13733-AU0E1809.jpg wpid13735-AU0E1824.jpg

Los Vaqueros Watershed

wpid13753-IMG_2510.jpgA short drive from Dublin can take you in to the hills and some pretty queit places. There is a reservoir that is just across the county line known as the Los Vaqueros Watershed. We thought it would be a good place for a hike while the temperatures are still cool. When things warm up, I suspect this will be a pretty hot part of the area. As it was, the temperatures were nice and the recent rains meant the hillsides were very green.

wpid13755-IMG_2517.jpgThe purpose of the visit was to have a hike so I decided not to take my cameras with me. However, the phone is always with me so there is a camera if the view warrants it. The shots here are all from the camera. It was amazingly quiet while we were there. Plenty of people were fishing down at the water’s edge but on the trails we were almost alone for much of the time. As we were heading back to the car, a few more groups showed up but most of the time we were nowhere near anyone. The exception was a bobcat that appeared on the trail below us. Nancy spotted it about the time it spotted us. We stared at each other for a while before it got bored and wandered off. Needless to say, the wide angle lens on the phone was not up to getting a shot so you will have to take my word for it.

wpid13751-IMG_2509.jpg

Above SFO

wpid13743-AU0E1855.jpgThis blog has had plenty of pictures that have been taken at SFO. Most of them have been of the planes flying into and out of the airport. Not many have been of the airport itself. If you find yourself on the left side of a plane out of Oakland heading south, you will get a pretty good view of the airport on the other side of the bay as you climb out. That includes a view along the departure runways as you head towards the city and then a turn that takes you close to over the top.

wpid13747-AU0E1894.jpgYou climb quickly so start to end up a bit high for good shots but it still is a pretty neat view. The aircraft windows provide their usual problems but moving the camera around gets a better chance of a reasonable shot. I also have been experimenting with using a smaller aperture. I used to think shooting wide open would be best to avoid showing the scratches and any other blemishes on the windows. However, since the distortion in the windows is quite variable, shooting with a narrower aperture might restrict the light to a smaller part of the window and increase the chances of getting the clear area for the whole shot. Who knows? Individual aircraft vary so much, it is hard to tell at this point.

wpid13741-AU0E1843.jpgIt would have been cool to have more traffic at SFO as we flew over but the planes were pretty small anyway so that may not have made any difference in the end.

wpid13745-AU0E1860.jpg wpid13739-AU0E1833.jpg wpid13727-AU0E1774.jpg

Time Lapse Tutorial

I have mentioned in the past some of my interest in time lapse. I recently posted a sequence on here and a friend of mine asked me to put together a guide to how I had gone about doing it so here you go.

When putting together a time lapse, the first thing is trying to establish what will be special about what you are shooting a sequence of that will make a time lapse more interesting than any other form of presentation. Usually this involves something that changes slowly in real time but becomes more dynamic in a time lapse such as a sunset or storm cloud development. Alternatively, it is something where a lot happens over a long time that isn’t terribly dramatic on its own but, when speeded up, becomes far more impressive. This could be a sequence of activities with multiple people or launching airplanes as was the case for the one I recently made.

Once you have established what it is that makes it interesting, then you have to decide how best to portray that. Choosing your location and your angle of view are the next challenges. I was shooting departing and arriving aircraft at SFO so I needed an angle that gave me a good view of them and a field of view that allowed plenty of the movement to be seen without everything being too far away to be noticeable. In this case, shooting at night works well because the lights stand out far more making the aircraft more conspicuous than would be the case during the day.

Now it is time to get into the technical issues. How long a clip do I want to make? Shooting time lapses means getting a large number of still shots which will each be a single frame of video. Video frame rates vary but I used 30fps for the sequences I make. Therefore, 30 shots will give me a second of video. If I want a minute of video, I need to shoot 1,800 shots. That’s a lot of shots. Also, figure on shooting more before and after the main action since it is nice to have some spare video at each end to play with in future editing.

You know how many shots you need but how long in real time do you want to cover? Are you starting before sunset and finishing well after sunset? Do you have a peak period of activity that you want to cover? Now you can see how many shots you need over a given amount of time so you will work out how long the interval between each shot can be? The interval between shots is critical but you must also factor in how long a shutter speed you want. This is where shooting at night is a lot nicer because you can get nice long shutter speeds. These make for smoother looking videos because there is no jerkiness. Shooting on a sunny day with a very short shutter speed and a few second interval will result in a jerkier output. The “rule” is to have the exposure time at least half the interval. Doing that during the day may require some neutral density filters. At night it is a lot easier to manage.

Now to mount and control the camera. Obviously a tripod is a necessity to make a stable platform for the shots. A cable release is a must have and preferably one with a timer built in so you can program the intervals. However, if you are shooting at night, you can get away with putting the camera on burst mode with a shutter speed to match your interval and then lock the shutter release open. It will then just keep shooting. The other camera thing to consider is image stabilization if you have long shutter speeds. IS can wander around for long exposures making everything blurred. Keep it turned off. I would also switch autofocus off once you are happy everything is sharp to avoid the focus getting changed by the camera. If the conditions are changeable, you might go with something like aperture priority to accommodate changing exposures. At night, manual might be your best bet. Always keep an eye on how the exposures are doing if in a programmed mode to ensure you aren’t exceeding your interval with your shutter speed. There are complex bulb ramping tools available to use if you want to get advanced. I haven’t tried these since they haven’t been necessary for my purposes so I can’t give good advice. I do have the functionality in a cable release device that connects to my iPhone called Triggertrap but I haven’t ever pushed it to its limits.

One thing you will discover is that fixed apertures are not fixed. Cameras will go to a slightly different aperture for each shot which can result in slight variations in exposure. This “flicker” can be managed by clever manipulation of the lens position but I prefer to use software to fix it. The software will also help if you end up tweaking the camera settings during the capture sequence.

Last piece of equipment advice is bring a chair. Once everything is at work, you don’t have much to do. You can shoot with a second body of course or you can sit back and relax. If you have a buddy along, that is not a bad thing! I shoot all of my sequences in RAW format. For night shoots this gives you a lot of latitude for tweaking the exposures. It does use up a lot of memory but storage is cheap these days. With charged batteries and big cards, you are good to go.

Once the shoot is done, you get home with a ton of images that look remarkably similar. First I import them into Lightroom. I will keyword them in the same way as anything else from a shoot including adding a time lapse keyword. Then I will make sure all of the time lapse shots are in one subfolder before jumping over the LRTimelapse. I am not going to try and write a tutorial on using LRTimelapse. The website for the software has far better guides to how to use everything. However, I will focus on the key elements I go for.

The main one is the Deflicker process. This is a routine that analyses each shot and applies little tweaks to the exposure to avoid any visible flicker. You can draw out a box in the image preview to tell it where to analyze. This means you can pick an area that is constant in the image as a reference and avoid areas where there is a lot going on. If the image exposure is gradually changing, it won’t affect that. It will just take out the individual variance. You can see a trace of how the overall exposure tracks during the sequence.

The other element I sometimes use is panning. You can define keyframes in the sequence and jump back into Lightroom to crop each one as you wish. Back to LRTimelapse and it will calculate the individual crops for each frame to make a smooth pan between your chosen keyframes. Quite nice to provide a little variety if you wish. I always crop the images to a 16×9 format since that works nicely for HD output formats.

When all of your tweaks are fixed, you save the metadata files and go back to Lightroom to reload them. (There can be a bit of back and forth like this throughout the process.) In Lightroom, there is an export dialog from LRTimelapse which then renders out the individual files from each shot. These will then be taken by LRTimelapse and rendered as a video clip.

Sounds really simple that way and, to be honest, it is pretty straightforward. A little practice helps of course. When it works out, the result can be very satisfying. Of course, a lot of times, you see something that you really wish you had done differently. That is something you will have to put down to experience and try to remember next time you are out shooting.

One last thought – if you are shooting something that involves light trails at night, consider making each image a layer in Photoshop and blending them together as a stack to see what happens. It can work pretty nicely sometimes. However, you can end up with a pretty huge Photoshop file so your computer may groan while processing it. Happy shooting!