Tag Archives: photoshop

Clever Feature of Lightroom CC

This one is something that I can attribute to the Kelby media juggernaut. I did not discover this myself but, if you are a user of Lightroom CC and use either the HDR or the panorama functions, this could be of interest. One of my issues with them was that they took a while to bring up a preview. Once you had got this, the processing would work in the background.

It turns out, if you don’t need to tweak the settings and are happy with what you used previously, you can hold Shift and Ctrl and press either M for panorama or H for HDR and it will launch right into processing the whole thing in the background. You can set multiple versions off if you wish and they will all get to work out of sight while you do something else. While my feelings on the outcome of the processing are not universally great and I covered this in some previous posts, it does a reasonable job most of the time and this is an even better feature that is well concealed!

Experiences with Lightroom CC

I have discussed some of the new functions of Lightroom CC here and here. Aside from those changes, how have things been with the program overall? To be honest, I am a bit underwhelmed by the new version. There have been a few minor functionality upgrades but nothing huge. I do like the ability to add images to a collection when importing them since that has saved a step for me. However, the presets do not seem happy remembering which collection it is so that is rather buggy. Many of the bugs in the previous version also exist so, if they have really recoded a lot, they have still reused a lot of the code.

The new version also seems to have a fair few bugs of its own. The crop tool seems to have developed some new quirks that result in it deciding you have finished selecting the area a short while after you actually do so, if you have moved the cursor away, you get some very odd effects. I still can’t get it to stop trying to create a backup copy of my files when I import new images. Nothing new was added for video which I think is daft. They give you the capability to import video and even trim and edit clips. However, with Photoshop having the ability to be a basic video editor (and now my default), there is no way to connect videos in Lightroom with Photoshop in the same way as you do for stills. That baffles me.

The big benefit is in processing speed. My workflow involves rendering 100% views to speed me through the culling process. The new version certainly renders them a lot faster. I did have to upgrade my graphics cards though. My vintage cards did not have the necessary version of OpenGL to let Lightroom take advantage of them. It also has lens profiles for two of my lenses that were not in the previous version which is nice to have.

Overall, I am okay but a bit underwhelmed. Since I pay for the subscription, I am paying for it but it does have the feel of being free so I am less concerned even if I can understand the truth. What I am hoping for is a bit more frequency in fixes to deal with the bugs and maybe bring some extra capabilities.

HDR Within Lightroom

The changes in Lightroom CC that included the Photomerge also included a change to the processing of HDR images. Again, the functionality has been brought within Lightroom rather than requiring the move out to Photoshop and the output file is again a DNG file. This means a smaller file than the 32 bit TIF that I was previously getting. A while back I wrote about some of the odd experiences I was having with moving these high bit depth files between Photoshop and Lightroom so a new workflow is of interest.

According to some of the publicity at the time of roll out, the new processing approach does not require as many images to work with. I have been shooting five images for HDR to date. They say that only a couple are necessary. I have tried carrying out the processing with five and with two and there doesn’t appear to be an obvious difference in the output. There is a benefit in the time taken to process the images though so this does appear to be a good improvement.

You can either let the output be automatically toned using the normal Lightroom processing functions or do it yourself. I let it have a go at first but have not liked the choices it made so have reverted to carrying out the toning myself. It is not a time consuming process so seems worthwhile to me. While I felt that Photomerge was not as capable as using Photoshop, in to case I think it is a better solution and this will be part of my workflow. Now to reset the camera to shoot fewer bracketed images!

Lightroom’s New Panorama Feature

Lightroom CC comes with a number of new features. High on the list is the new panorama feature. Previously, if you wanted to stitch a panorama, you would select the shots in Lightroom, make sure you had them synced up for any exposure edits and white balance corrections and then send them to Photoshop. Photoshop had a Photomerge function that you could use or you could open them as layers in a document and carry the merge out yourself with a bit more control. This was the approach I used and I wrote about the technique here a while back.

The new Photomerge in Lightroom CC is designed to do without Photoshop. It takes your original files and then makes a new DNG file which is the stitched panorama but, as a RAW format, it still allows you to edit the image using the normal editing tools. I had to give this a go so, how well does it work?

The answer is a mixed one. In many cases, it works just fine. It stitches together the shot nicely and you can go on your way. While the initial preview process takes up a little time, the processing of the final stitch is done in the background so you can get on with something else – something I find very handy. However, it does have some shortcomings.

First, it doesn’t always find the way to stitch the shots. I have had a couple of times when it couldn’t work out the alignment. When I tried the same shots in Photoshop, they worked just fine. Not sure why these didn’t work but the algorithms must have some limitations. Next, it doesn’t always deal well with curvy edges. I have had a couple of stitches that I tried where the aircraft fuselage, although a smooth curve, ended up with some kinks at the area where the stitch took place. Photoshop never caused me trouble with these either. Big panos also seem to make it unhappy with some very odd alignments being chosen (after a long time processing) so they may have to stay in Photoshop for now.

The last problem is cropping. You have the option to have the whole stitch or to have it crop in automatically (or you could crop manually afterwards). Cropping pulls you in to the shot more aggressively to get rid of any blank pixels. You can fix this by shooting a lot wider to have more to work with. However, having been used to being able to fill odd little gaps using Content-Aware Fill in Photoshop, not being able to do so in Lightroom is a limitation. I can, of course, open the file in Photoshop and do just that. However, if I do so, I might as well use Photoshop to do the merge in the first place.

Overall, it is pretty good. I suspect there will be some tweaks behind the scenes as CC gets updated progressively so I might not even know that Adobe have fixed some of the issues. The Fill issue will be more obvious though. I shall probably keep using it unless I feel the Photoshop is merited and it is a good addition but I hope they take it further so I don’t have to consider Photoshop in the future. We shall see because the new update of Photoshop is out and includes Content Aware Fill of the gaps in panos which might be enough to sway me back.
SFO Night Time Lapse Take 2

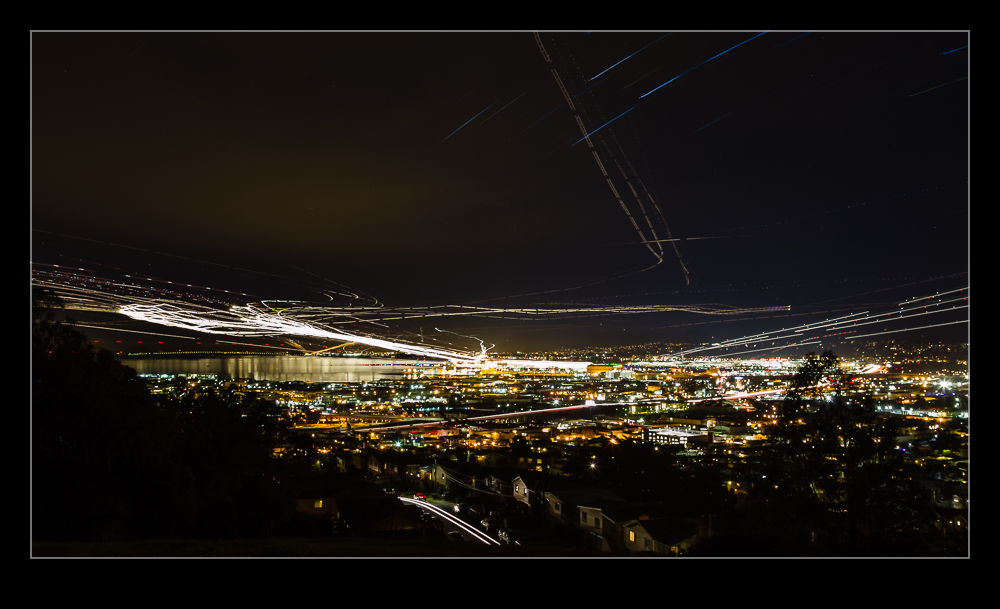
wpid13560-C59F6490.jpgLast summer my friend Paul had been across and we had hatched a plan to shot some time lapse and night streak shots of SFO from a hill that overlooks the airport. The plan seemed like a good one but it was thwarted by two things. First, there was some cloud in the area which obscured some fo the view. Second, it doesn’t get dark until late in the summer and Paul was on UK time so was pretty worn out by the time we could do anything.

Instead, we concluded that a second attempt would be made when he was over during the winter. So it was that we found ourselves back up on the hill. We had come well prepared this time with sturdy tripods and good cable releases. The only thing I had forgotten was the chairs since you have a lot of time to hang around on a dark hillside taking shots like this. I took a long sequence of shots that would be edited into the time lapse. When I got home, some quick work in LRTimelapse and the video was together as you can see below. I also decided to see how well the sequence would blend together to get a streak image. I have never tried to work with quite so many layers in Photoshop before. It certainly struggled with it but it did work. Unfortunately, there must have been some very slight movement on the tripod because the ground lights did not exactly align which made for a blurry foreground when using the Lighten blend mode. To counter this, I duplicated one of the base layers and masked that back in to give the ground a clearer image. The blended version is the one at the top of the post.

The Spot Healing Brush

I recently put together a post on an old event that I had shot in my film days. It was the demonstration of the BAe 146 at London City Airport and the post is here. When I got the negatives out and scanned them, they were not in good condition. Despite washing the negatives, they still had a lot of scratches and blemishes on them. In order to prepare them for the post, I spent a great deal of time cleaning up the shots.

The tool I used was the Spot Healing Brush in Photoshop. I had used it occasionally in the past but never had I spent so much time using it in one session. It turns out I was not well aware of its functionality and I learned a little about it as I went. I had clicked on the tool and gone to work on it. The brush works by healing whatever you click on. You can click on a spot or draw across a section and it will then heal. However, it defaulted to certain settings which I wish I had known to change. It started out with Proximity as the setting. This makes it sensitive to picking up colors and patterns from things nearby.

At some point, I thought to change it to Content Aware at which point it became so much more helpful. In proximity mode, I found that I could heal many blemishes but I ended up with patterns in uniform color areas that looked very conspicuous. With content aware it came up with a far smoother solution which made for a cleaner result. Skies were the real issue for this and the change worked well.

Also, when working across edges, I found the tool was fine if I went perpendicularly across the boundary. Trying to work along an edge was tricky but if I went straight across the line, the algorithms were clever enough to know to leave the edge intact and just take out the blemish. It is a very cool tool and one I now have a better idea of how to use when required.

HDR 32 Bit and Lightroom

This post is a plea for help. Anyone who is a regular user of Lightroom and Photoshop may be in a position to educate me a little. I use Photoshop to process my HDR shots. I start out in Lightroom, select the shots and use the Edit Photo>HDR Pro method to open them up in Photoshop. I then use the 32 bit version of the HDR Pro processor to create the file. I then take the Edit Using Adobe Camera Raw option for opening the file to undertake the final mapping. This works pretty well and I can usually get something I am happy with.

I then close the file and save it which automatically reimports the finished file back into Lightroom. This is when things go wrong. The view of the file in Lightroom doesn’t appear to make use of any of the edits I had done in ACR. The highlights are too bright and the shadows too dark. I can then use the Lightroom Develop settings to get something close to what I want but surely that should not be necessary. I might make further tweaks but shouldn’t it look the same when I close out of Photoshop.

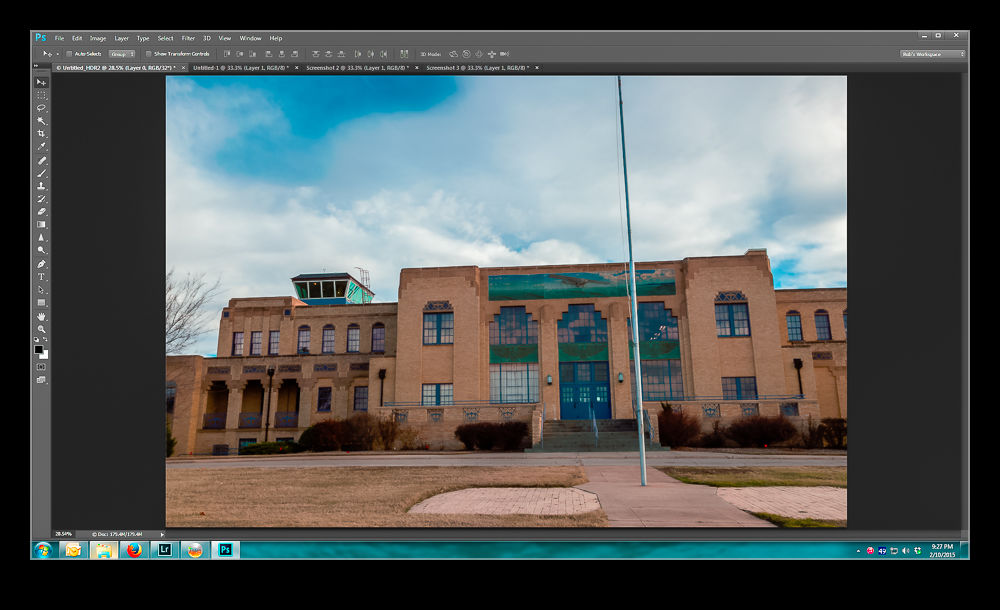
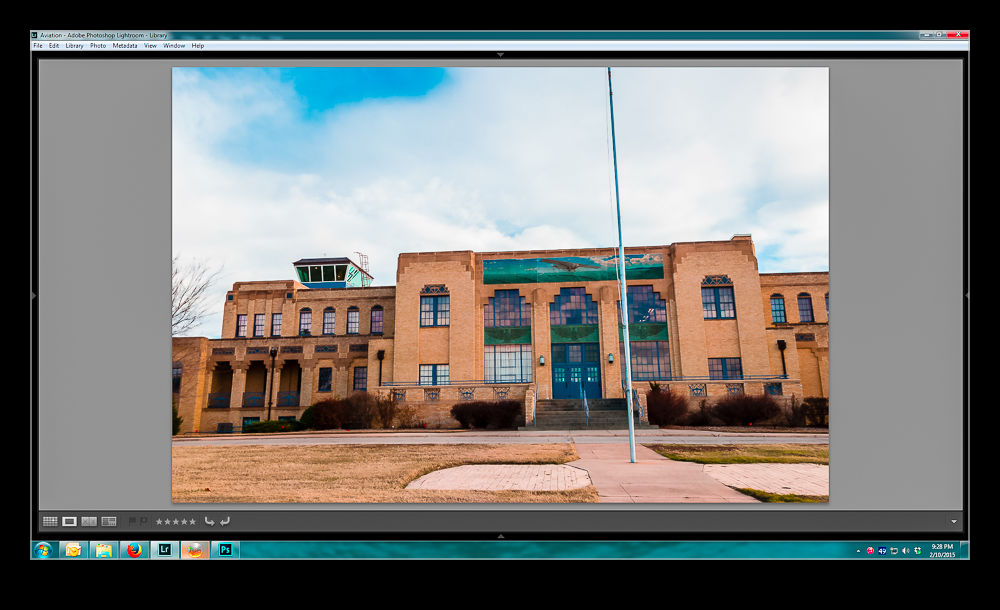
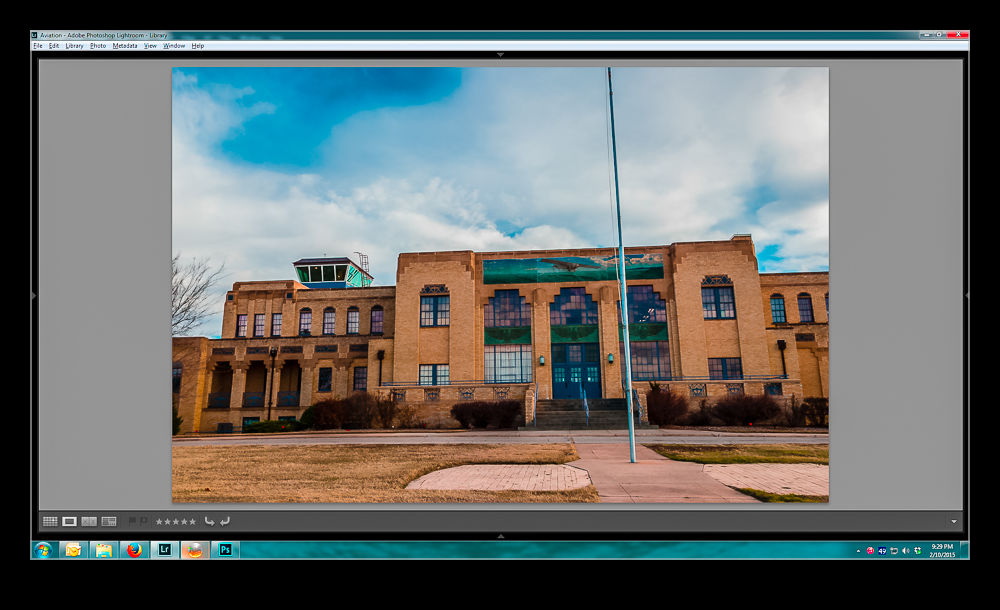
Below is a sequence of screen captures to show you the unprocessed shot in ACR, the finished version, what it looks like in Lightroom and then what I can tweak it to. Any suggestions are gratefully received.  (Note, I didn’t make this exactly match the two edited versions.  It is aimed to illustrate the disconnect and the recovery process.)

Original HDR merge pre tone mapping

wpid12810-Screenshot-3.jpg

HDR with ACR tone mapping appliedwpid12808-Screenshot-4.jpg

How the saved image appears when imported to Lightroomwpid12806-Screenshot-5.jpg

Using Lightroom to get back to something like I had in Photoshopwpid12804-Screenshot-6.jpg

Adobe Camera Raw and Video

Regular readers will be familiar with my gradual experimentation with video and video editing. In the early days of my playing with video, I discovered just how sensitive video is to exposure errors. The sort of thing that could be easily corrected in post on a raw still file were not so easily dealt with in video that was already compressed when it came out of the camera. Avoiding over exposure was one thing to do which is slightly different to shooting aircraft against a bright sky when having enough shadow detail on the aircraft is important and the sky can be recovered a bit to give a more pleasing outcome. For video this doesn’t work as well but having less shadow detail doesn’t seem to matter with motion as much as it does for stills.

Another change I made was to go with a development profile in the camera that is a lot “flatter”. This was something I read about on various blogs in that it gives the editor more to work with when grading the video later. This is certainly true but it means you definitely have to do some work in post to get the image back to something more pleasing.

I never cared for the editing tools in my old video editing application since they were weak and not as intuitive as what I was used to in Photoshop/Lightroom. Consequently, I embraced video editing in Photoshop when it became a better developed feature. However, I hadn’t found it as easy as I had hoped to get the right effect using levels and curves adjustments. Then it struck me (why it took so long when everyone else must have been doing this) that Camera Raw is the tool that combines all the things I need to enhance the video output.

I have now been using it on a couple of projects and I have to say it works very well. You have to convert the layer to a smart object first and then apply Camera Raw as a filter. If you don’t convert it, the filter only applies to the frame you are looking at and that is no use. However, one lesson I have learned is to work out the other parts of your edit first and leave this step to last. The rendering of the video with the filters applied is a huge amount slower. Short videos that would previously have rendered out in a minute or two may now take over an hour. This also applies to running through the video to make your edits. The real time rendering is lost. I suppose that you will be using a proper video editing suite if you do this on a daily basis so the use of Photoshop is moving away from its core role. However, it suits me to do so. Therefore, make all of the edits you need first and when you are happy with the final composition, convert to smart objects and filter away. Just remember that the conversion gets rid of transitions so those will have to be put back in again but that doesn’t cause me any problems. Then hit render and go and do something else. While Photoshop will do many things in the background, video rendering takes it over and you can’t work on another project while it works in the background so go off and write a blog post. That’s what I am doing right now!

Funky Cloud Processing

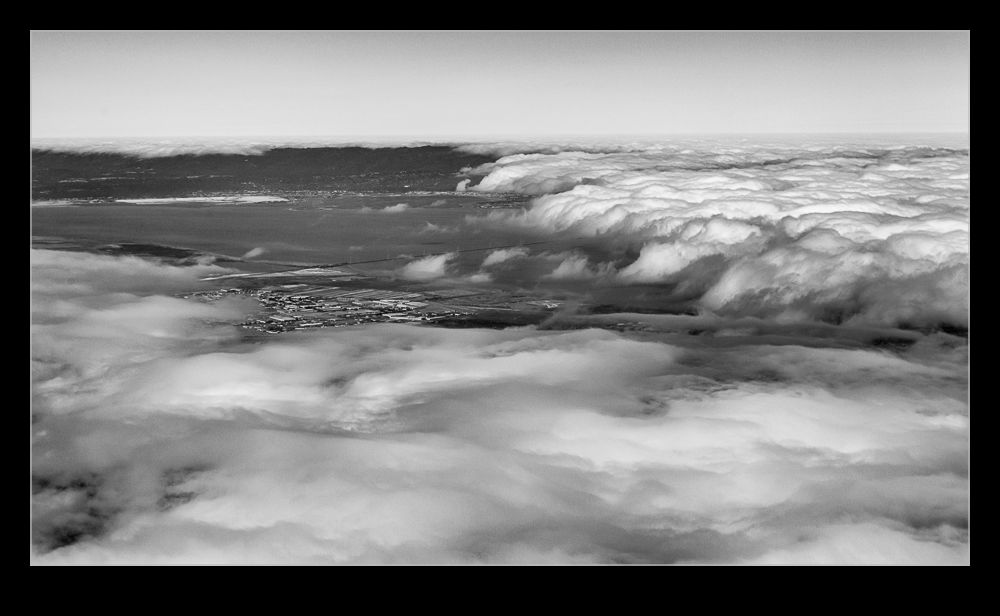
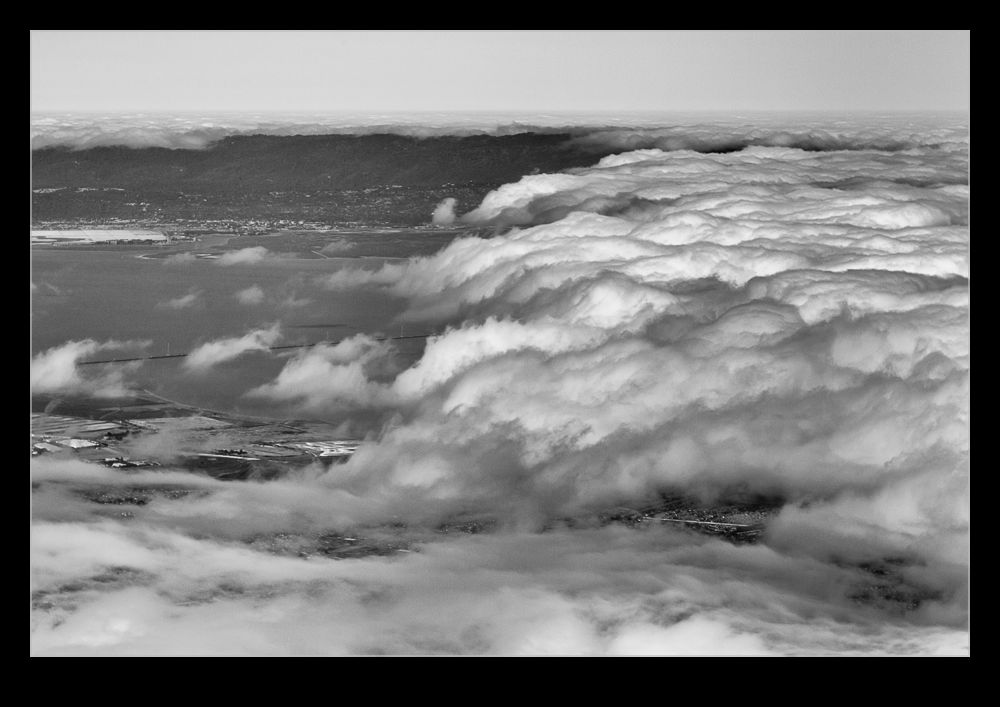
wpid10424-C59F1221-Edit.jpgPart of a run back into Oakland recently came across the bay but it was unfortunately covered in cloud. However, the cloud was sitting in very distinct locations with a clear edge as you headed down the bay and a similar edge near the shoreline on the Oakland side. Since we were not high above it, this looked pretty interesting. Even as I photographed it, I figured the shots would need something a bit different when I got around to processing them. Having a more contrasty look seemed the best bet and a black and white conversion also seemed likely. That is what I went with and I was quite pleased with how it turned out. See what you think.

wpid10422-C59F1217-Edit.jpg

HDR Panoramas

wpid10158-C59F8190-Edit-Edit.jpgAnother one of my processing technique posts today. For those of you interested in pictures of places, today will probably be one you pass on. You have been warned. This is about my first venture into the realm of HDR panoramas. I know at least one of you who knows exactly how to do this sort of thing and does it on a regular basis. You also will probably skip the rest of the post. However, you have some specialized tools for doing the job and I am playing with Lightroom and Photoshop so here is how it goes.

My initial thought having taken the shots was which order to carry out the processing. HDR first or pano first. I concluded that it had to be pano first. All of the pano exposures were consistent and would stitch properly while I wasn’t convinced that each of the pano frames would be consistent if I had done the HDR blending first. However, this left me with a second concern. Would the pano merge produce images that would align for the HDR merge. I use the pano tools built into Photoshop and, while I select the algorithm it uses, I did not have confidence that it would produce an identical alignment for each set of exposures. However, this was the route I tried.

Stitching the panos was straightforward enough. I created each of them from Lightroom and ended up with five panos with differing exposures. At this point I could have taken them directly to HDR Pro within Photoshop but, since I wanted everything to end up in the Lightroom catalog, I decided to save the files and go to HDR Pro from there.

Here I encountered my first hiccup. As expected, the panos produced were not identical. There were very close but not identical. HDR Pro only works on files that are the same dimensions. I imagine some more specialized HDR applications might be able to handle this but I was stuck with Photoshop. Since the panos were thousands of pixels across and only a few pixels different, I opened them back up in Photoshop and changed the canvas size to be identical in each case. HDR Pro is able to manage alignment of slightly misaligned shots anyway so I wanted worried about the positioning. Also, with such small changes in dimensions, I didn’t fear that I would have distortion.

With this change made, Photoshop went to work and created the HDR file. Amazingly, it worked just fine. I didn’t have any problems with the files being distorted relative to each other and it did a great job of blending them. All that was left was to crop everything in to clear up the empty corners from the pano creation (I didn’t get rid of those in the first instance since I was trying to keep the pano files identical in size and alignment) and then a few tweaks back in Lightroom had the job finished. I was pretty pleased with how it worked and, with the experience of this time, should be able to turn them around quite quickly next time.