Category Archives: technique

More Time Lapse Fun

I have been messing around with time lapses for a while as regular readers will know.  One of the things that I had been thinking about was getting a panning effect in a time lapse.  I was chatting with Ken Sklute at ISAP and he told me that, rather than bothering with expensive motorized panning heads, it was simpler to use the full image size that a DSLR offers and let the video software undertake the panning for you by cropping in on the shots.

I am not a big video guy and have Pinnacle Studio as my package.  It is fine for the basic stuff but doesn’t have the most impressive features.  When I goggled this topic, I came up with After Effects techniques for doing what I wanted.  I tried the free trial but struggle to come to terms with what was required, despite the detailed tutorial.  Guess that says something about me as a self teaching student.

Then I got lucky,  My friend Jo Hunter over at futurshox posted some video from Oshkosh of time lapses doing exactly what I wanted.  I dropped her a message and she came straight back with the solution.  The program is called LRTimelapse and it is a standalone program that makes Lightroom develop settings that you can then combine with a video output setting to make the final product.  It is developed by a guy called Gunther Wegner and you can find the whole thing at his website.  It is donationware and I have made one because it works and has solved a problem that had been troubling me for a while.

I need to get better at the effect but for the time being, here is a sample of the effect.  For comparison, first I have the original time lapse and second I have the panning version.  No change in the content but certainly a more interesting thing to watch I think.

Time to get brutal

When I first started shooting digitally, I didn’t delete any pictures. I’m not sure how this started but, as time went by, I found old shots that benefited from more modern processing and software capabilities.  It was sometimes surprising how a shot that previously I didn’t think was any use could actually be turned into something better.

Of course, this was a tiny proportion of the shots.  Most of the crappy shots were still crappy shots whatever the software that was used.  Being horribly out of focus or even something taken accidentally like the floor or the inside of a camera bag is never going to be fixed with some miraculous software.  However, for a while storage was cheap so I didn’t care.

At various times additional drives have been added to the computer and the back up NAS has been rebuilt with ever larger drives.  (I have lots of spare drives if ever you need one!)  The problem is that I keep taking ever more pictures and the cameras have ever larger file sizes.  Besides, how many pictures do I actually need?  Each time I re-shoot a subject I get a few new shots that are keepers and some of the previous shots of that subject go down the priority list.  Am I ever going to need a thousand different shots of a Strike Eagle?

Consequently, I have finally grown up.  I am getting rid of stuff.  (I should point out that I do have BluRay backups of everything made early on so, if I really wanted to, I might be able to drag out any file!)  I am now getting brutal with stuff as soon as it is shot.  Meanwhile, I am progressively going through a lot of older stuff to get rid of the crap.  This is a two stage process.  First I am going through to take out shots that are clearly not good – blurry, poor focus etc.  If I spot that half of the subject is missing at the same time those will go.  However, zooming in to spot the duds sometimes means you don’t see that the shot is also crap.

Those will get picked up in the second phase.  Then I shall assume the shots are basically useable but remove the ones that just look bad as well as weed out the obvious duplicate.  However, phase one is taking a long time so phase two will come later.  Also, this is a great crappy winter day job and now it is summer.  I am spending more time doing fun things.

Will anyone else see the benefit of this.  Certainly not the hard drive manufacturers but hopefully I will.  The shutter actuations on the cameras won’t reduce but at least I will try and make life easier for Lightroom!

Getting a jump in the woods

I recently read a very interesting book on flash photography specifically for Canon shooters. The book was by Syl Arena and he obviously has put a lot of time and effort into developing his technique and understanding the way the Canon flash system works. I don’t know whether a similar book exists for the Nikon shooters out there but, while a lot of the specifics in this book relate to the Canon technology, a lot of the techniques and concepts are equally applicable and might make the book worth a read.
Anyway, having read this book once through and picked at it a number of times for specific sections, I have become quite enthusiastic about experimenting with high speed sync and making the action pop out of the shot while de-emphasizing the background. Some of his examples had included skating and there is a skate park not too far from me that I am interested in trying out at some point soon.
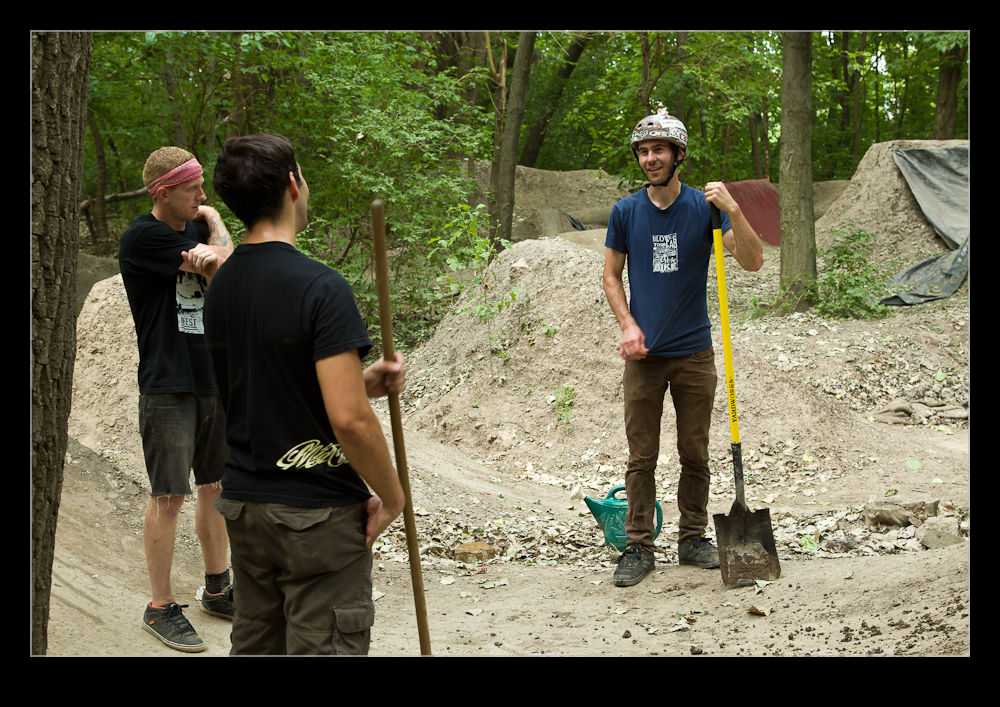
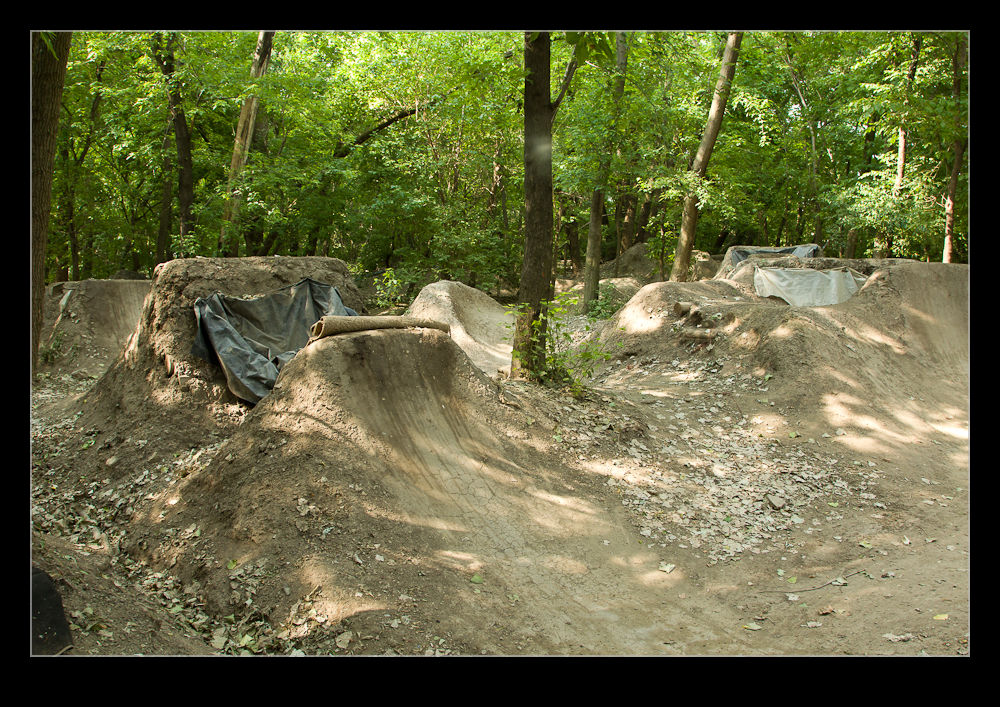
However, the start of my experimentation has actually been some biking. A little way north of me in the city is a park called Clark Park that has some routes laid out by the local cyclists. The area is called The Gardens and is a partnership between the riders and the city. The routes include jumps and berms and I decided to try and check it out to see whether I could get any good shooting opportunities and to see how well I could implement some of the ideas in Syl’s book.

I contacted one of the guys who helps organize things and he was very welcoming about me coming down. I headed down one Sunday when a bunch of them were getting together. Unfortunately, the weather had not been good that week and the ground was wet under foot. Everyone was grabbing shovels and working on developing some of the runs. I grabbed a shovel and a wheelbarrow and got to work too. It has been a while since I did anything at could be considered real physical labor and the blisters and aching muscles that I had the next day were a testament to my easy lifestyle!
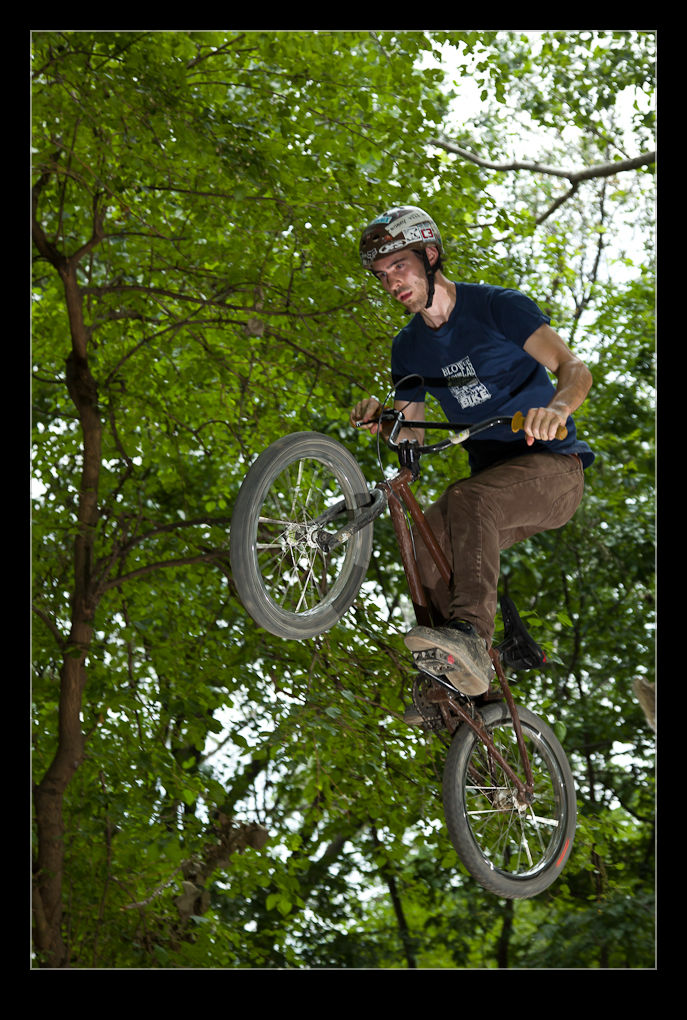
There was no riding that day and in the following weeks the weather was not helpful tending to dump a ton of rain every few days making it hard for anything to dry out properly. That combined with my own other activities meant I didn’t get a chance to go back for a while. However, finally the stars aligned again and I got to head back.
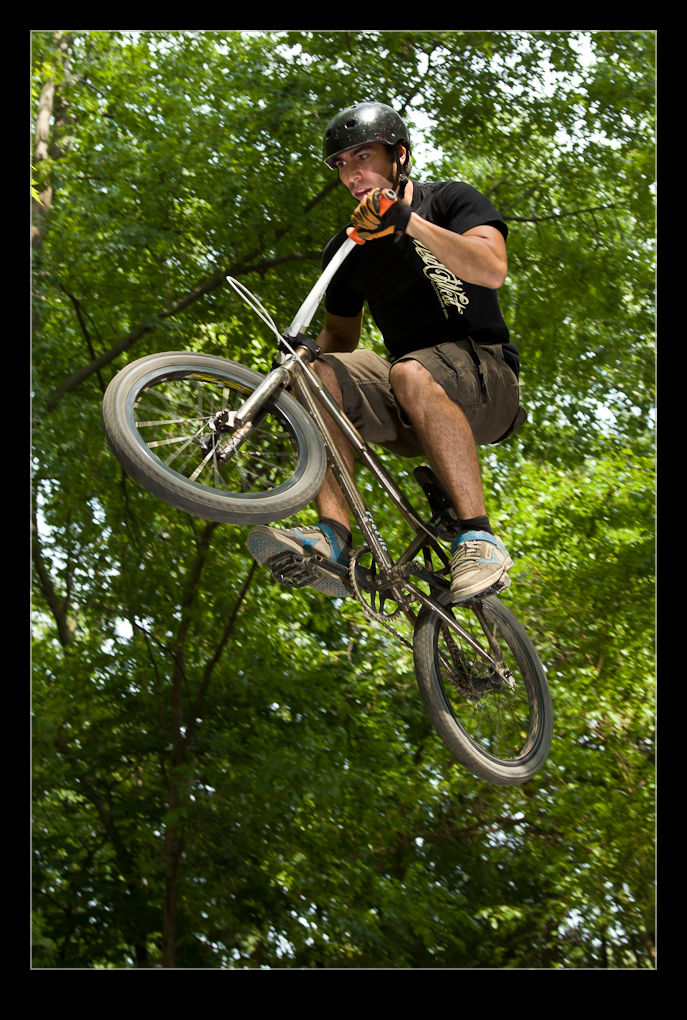
A bunch of guys were already there when I showed up and were starting to get some runs in. The jumps are very dramatic to look at and I suspect more dramatic when you riding toward them. There are a sequence of jumps along a run so the guys get up some momentum as they go. It all looks really cool.
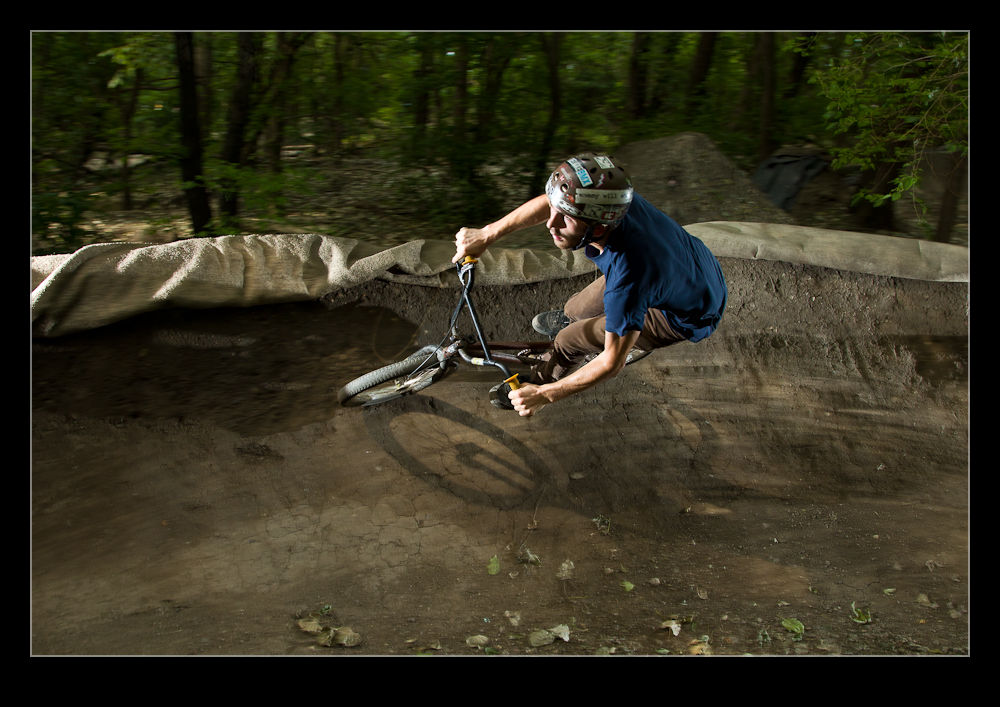
I had a couple of flash units that I was triggering with an IR controller. This is something that is considered unreliable outside but, since we were under tree cover, it proved to be reliable provided I was pointing the right way. I did bring a long cable connection as a backup but didn’t need it on the day.

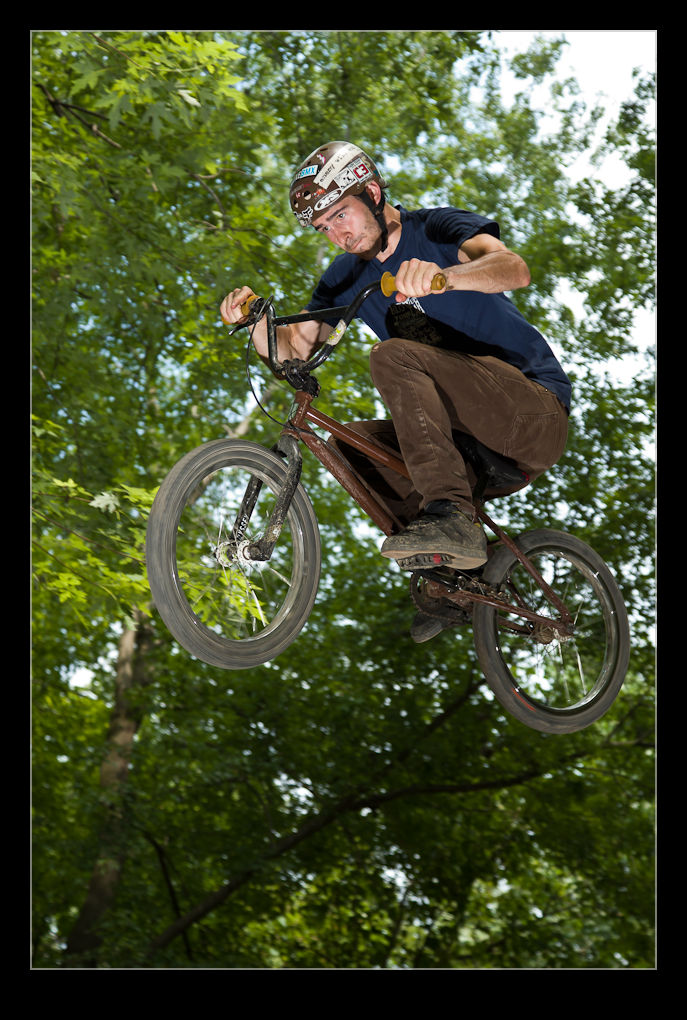
The guys were happy to try a few things for me as I experimented. I shot a lot of flash on the jumps and around a berm along with some ambient light shots. The tree cover meant those needed the ISO cranked way up but, even then, it was hard to get a good shot. However, some of them gave a good sense of the motion. I shot in manual with the exposure dialed down to make the background less apparent and then used high speed sync at about 1/400th of a second to illuminate the rider. This seemed to work quite well although I did end up taking the flash exposure compensation down to -1 stop.
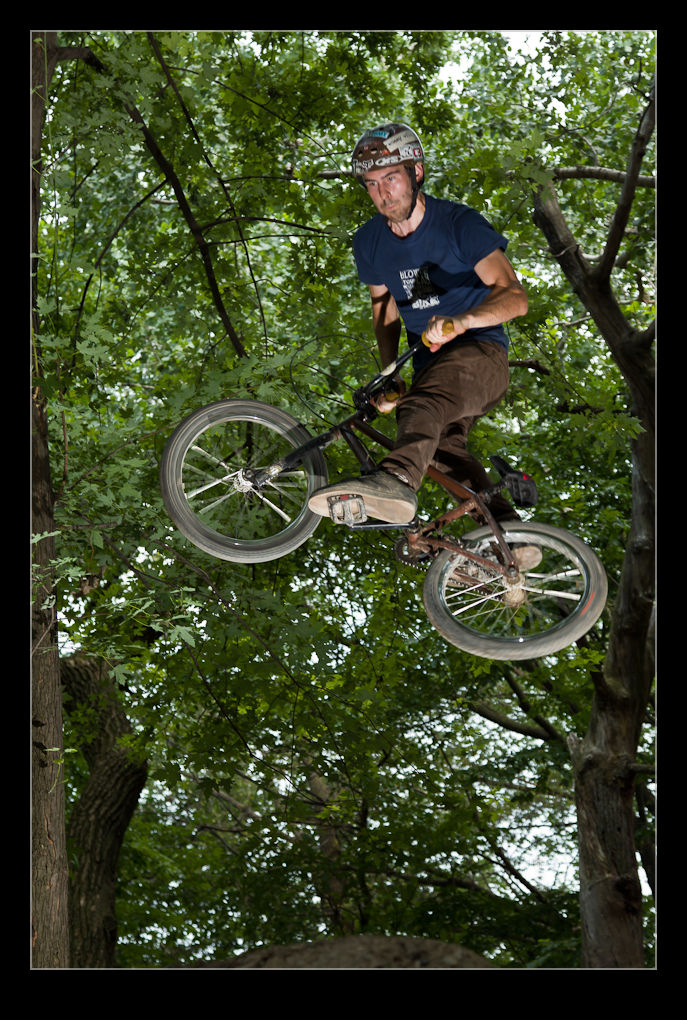
I balanced the two flashes 2:1 with the foreground getting the greater proportion of the light in the rider’s face and the fill coming from behind. Next time I shall experiment a bit more with this. One of the tricky elements is finding a good spot to locate the flashes since the jumps are steep and slightly broken up at the edges. I had one flash on a Gorillapod and the other on a bean bag. The Gorillapod was the better solution and I will have to get another one at some point.
One other thing I experimented with while I was there was mounting a GoPro video camera on the hot shoe and shooting some video at the same time. This worked out okay but the sound of the shutter firing on the camera below tends to be a dominant sound. Some editing will be necessary with the music to blank that out.  When I have done that, I shall put something up here.

For additional shots, go to the gallery at this link.

What’s the best camera?

I suspect you have heard the phrase, the best camera is the one you have with you.  Well, I am a bit of an idiot as I went out to a location the other evening for another reason but didn’t stick a camera in the car.  We headed to Moreton Arboretum out in Lisle.  We are members and go there pretty regularly to wander around.

This time they were running a cheese and wine type of event.  Tables were set up outside, there was a bar and a tapas menu.  A very pleasant way to spend an even out in the warm as the sun gradually headed down.  The photographers amongst you are thinking golden hour.  Why didn’t I think of that.

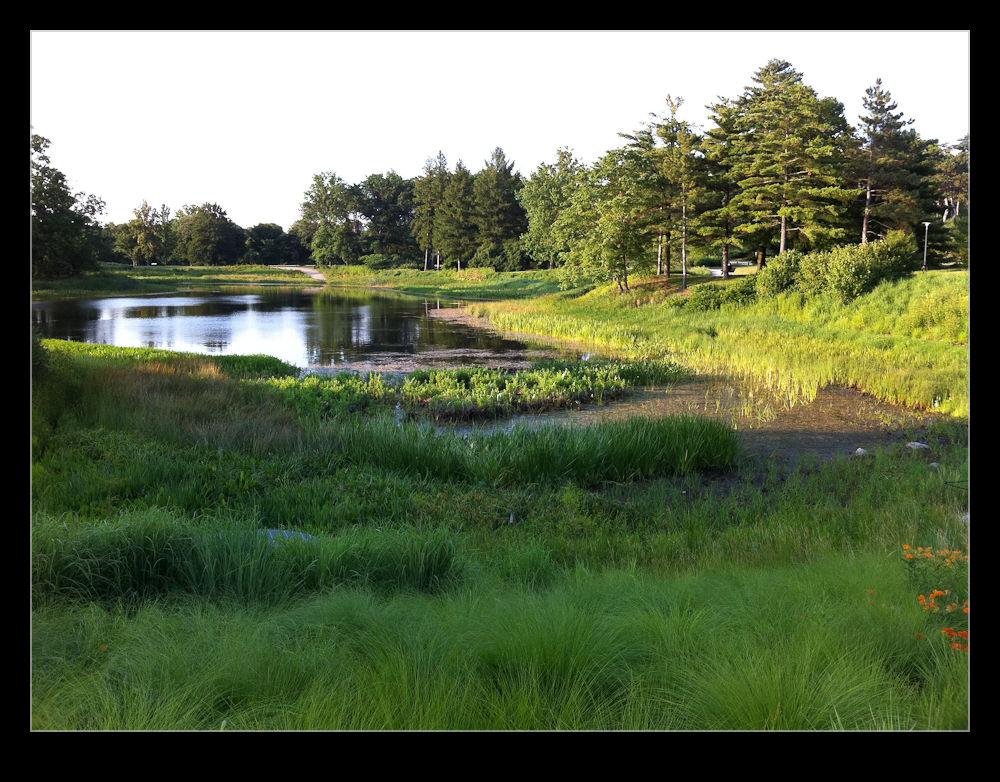
There is a lake near the visitors center which I will have shot a number of times from different directions, usually in the harshest light of the day.  This time I was there when the light was great and as soon as we took a stroll around the lake, I was kicking myself for not having brought my camera with me.

Plan B was my phone.  The camera is okay but not special.  However, it was the best camera I had with me so it would have to do.  It doesn’t handle too much contrast well so a little angling to try and get what I wanted was in order.  Not stunning results but it’s what I got so here you go.

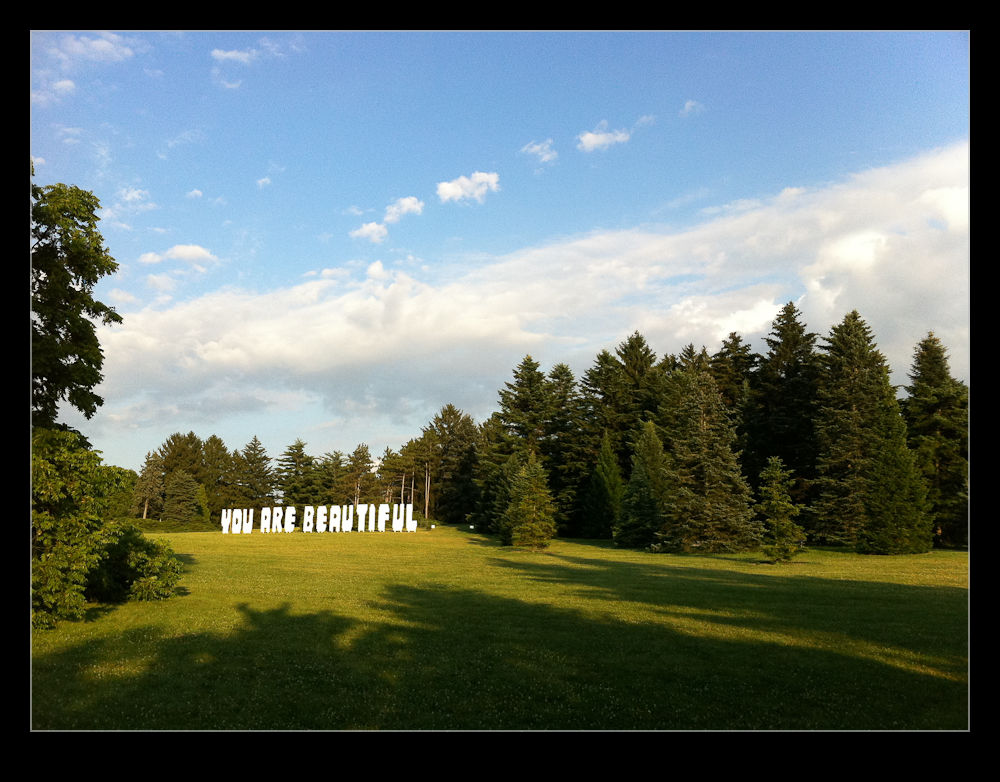
This last shot was something we saw when wandering around.  I might explain more another time…

Flashing at the birds

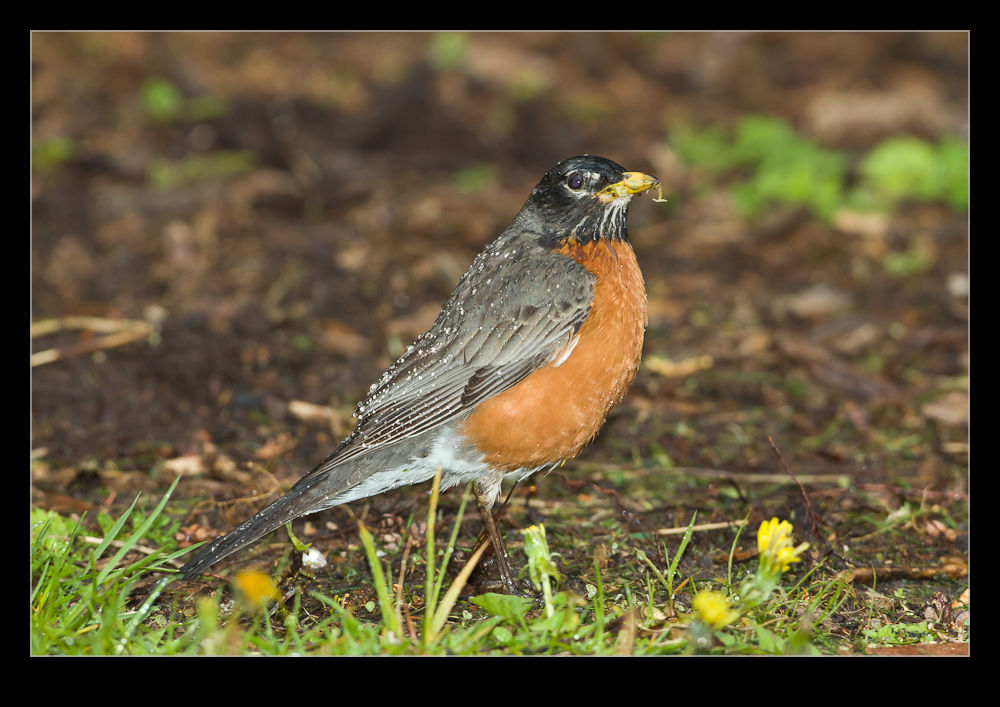
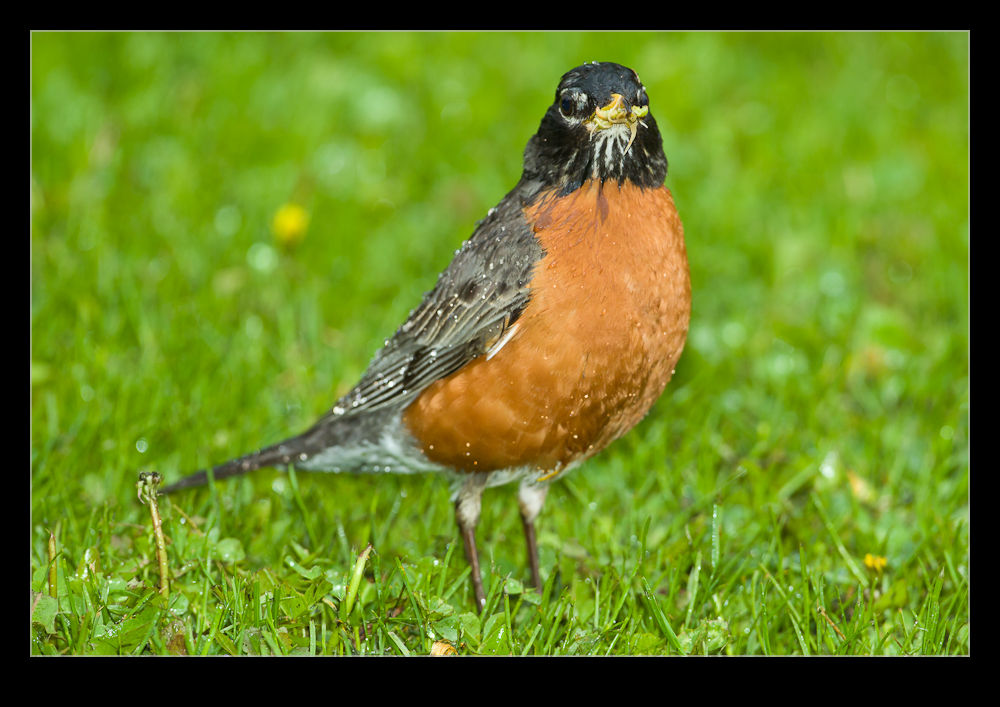
While hanging around up in Door County in Wisconsin, I have been taking a bunch of pictures of the local wildlife. Mainly a lot of birds in the vicinity of our hotel and that is always a fun challenge. To add to the challenge, one of the afternoons that we were back at the hotel, the weather closed in and it began to rain. There was a patch of grass outside our balcony that seemed to be a popular spot for some robins so I started taking some shots.

As you are probably aware, robins are quite bold creatures so, with a little patience, you can end up with them coming reasonably close in. However, with the light having faded fast as the weather deteriorated and the natural shade of the area, it was not looking good to get a good shot. I started out by bumping up the ISO but that was only helping so much and, without a tripod, I was still going to get mixed results.

At this point I decided to try something that everyone who shoots wildlife a lot probably does to some extent but that I had not tried before and that was using some flash to boost the excitement. I had no idea how much to use so experimented with a little extra FEC, then zero and ultimately one stop under on FEC. The latter seemed to have the best results judging by the quick view on the back of the camera – always such a reliable indicator!

I was using the flashgun straight with no boost like a Better Beamer (if that is the right name) so it was a bit of a raw experiment but the results seemed to be be pretty pleasing so this is something I will have to think about further in due course.

An alternate canvas

I guess the title is a bit of a lie in this case as the alternate is actually canvas. I haven’t done any canvas printing for a while. I used to have some canvas that printed in one of my previous Epson ink jets but I haven’t used that stuff since changing printers and haven’t ever found profiles from the manufacturer so they must have disappeared not long after I bought the stuff.

I have experimented on printing on a number of finishes in recent times with some printing on metal that has come out well. However, I gently had a client who was interested in a large format panorama. I was hunting for a good printer for this since my regular print outlet does not cater to large format panos at all. I had used another place as a trial but they had produced a really crappy result. While searching for an alternative, I mentioned to the client that I had heard good things about a place that specialized in canvas prints including larger format panos and was he interested. It turned out he had already been wondering about a canvas print.

I prepped the files and sent them off to the place. I told him to hold off paying for it until I had seen whether it was worthwhile. If I don’t like the result, I am not going to have a client paying the price if my name is on the work. The turnaround was really pretty speedy.
I received the canvas and I have to say I was impressed. It was mounted on a wood frame ready stretched. The finish was excellent and the colors looked very vibrant. The packing was also good and the whole product was well protected. I will certainly use this place again if I have anyone after a similar product and I now find myself contemplating some panoramic options for myself to justify a print for home.

Panning for gold

While the title might be a bit inaccurate, you are probably not going to struggle to guess what the topic really is. I have always enjoyed playing with panos since my days of film when it would be a lot less complex and consist of sticking together a large number of 6×4 prints to make a larger collage. The effect was rough and ready but there was something rather cool about the way they came out at the highly accurate results possible today doesn’t have.

While stitching together shots is straightforward given any number of software tools (although Photomerge in Photoshop has got sufficiently good that I rarely need to use anything else), achieving a good pano with the camera in my phone was a different challenge. Without control of the exposure and the white balance, it was hard to make the shots merge cleanly. I then got hold of an app called 360 which would shoot a pano as you gradually moved the camera around. It overlays a grid so you can see the coverage still available and you could pan up and down as well as laterally.

Originally the results were less then ideal. It would have discontinuities on some of the straight lines in the scene and was particularly unhappy in low light or when panning vertically. However, the latest version of the app is now out and it is a dramatic improvement. After playing with it at home briefly, I tried it while on the road the other day. We were heading up passed Green Bay and so stopped off to see Lambeau Field. I’m sure the Bears fans I know will be cursing me for such treachery but I wanted to see such a famous stadium. Anyway, it wasn’t a photo trip so I only had my phone in my pocket at the time. I decided to give the pano a shot using the latest version of the app and I think it did a pretty good job. It was fun to watch new areas that had a different exposure suddenly get corrected to merge with the existing image and straight lines that were originally out of position get jumped to the right place as the app worked out what was wanted.  It isn’t perfect yet.  Some lines still don’t line up and the resolution is surprisingly low compared to a normal shot by the phone.

Nice work by occipital who are the developers. I like what you have done so far and look forward to what you come up with next.

To Shoot or Not to Shoot

Harsh Sky

In a previous post I mentioned my trip to Indianapolis for the air show at Mount Comfort.  A few things were going to make getting good shots tricky at this event.  First, the crowd face south at the show so, through the majority of the display, there is a strong chance of back lighting.  Also the forecast was not for great weather.

Dark Cloud Background

This forecast was one of the things that actually helped persuade me to go.  With a lot of cloud, the backlighting might actually have been tempered.  Also, with the possibility of rain, it might even work out that a lot of vapor could show up during the displays.  It could also mean getting drenched with no flying, though, so a chance was taken.  There is always the nice idea of a bit of sun on an aircraft with an evil looking sky behind it.

Harsh Sky

When I am at a show with a backlighting issue, I tend to try and go to one extreme of the crowd line.  This can have two advantages.  First you get some different angles from the normal shots that being near show center gives.  Second, by picking the end carefully, you can get sections of the display that at least have the sun on a quarter position rather than head on.


Dark Cloud Background

Metering in these situations can be tricky.  You can go with exposure compensation based on your view of the sky brightness with anything between +1 and +2 a possibility.  Alternatively, you might try manual metering based on some pre-readings.  That is a lot easier to go with when the lighting is more consistent – constantly changing skies make manual metering a lot more work.  I have used both.  Of course, with harsh backlight, there is only so much you can

Backlit

Top Light

do.  Good exposure on the subject is not going to be matched with a great background.  Therefore, there are only going to be certain angles that can get a reasonable chance of a good shot.  Does that stop me shooting at the other angles?  Of course not!!  I have tons of images that are no-hopers but the fun of the shoot and the way things look better through the viewfinder are highly likely to stop the part of the brain that says no point shooting now.  Of course, there is an upside to this.  Tracking the aircraft throughout its pass does put you in a good position to get a better shot when the light is good.

Another thing to look for is exploiting the conditions to get a different look.  Normally when shooting aircraft you are trying desperately to avoid a silhouette.  An alternative is to go for that look deliberately and get something a little different from the normal shot.  It isn’t always going to work but when your options are limited, why not try something else?

Silhouette

One last thought, panning with aircraft to get a good shot is something that is always worth practicing (if you want to shoot aircraft that is!).  Even crummy conditions can be good panning practice and will set you up well for the time when the conditions are good and you need to be ready.

Lenskirt Review

Living in a high rise in the city, I have a lot of chances to shoot things that I can only see through the windows.  This has been a tricky thing to deal with over time and I have come up with various solutions with varying success.  A couple of times I have thought about making something myself to be the solution but have never got around to it.

Now someone has made something that pretty much does what I want.  It is called the Lenskirt.  It is a black squared funnel that has a fabric sock at the base which cinches around the barrel of your lens.  I has four suckers at the four corners that will attach it to glass.  The idea is that it blocks any light coming in from the side and reflecting off the glass and back into the lens.

I love this idea.  However, the $49 price seemed a little steep for what it is.  However, i did buy one and it has just arrived.  Overall, I am quite pleased with it.  My suspicions about it being a bit overpriced seem valid but it does do what I want.  Moreover, it handles my widest lens (the 17mm) without any problem.  It allows flexibility of placement so you can shoot at an angle without seeing the skirt.  Therefore, while it is a bit pricey, the alternative is something I have never bothered to do so it is probably worth it to me.

This could have other applications other than shooting through normal windows.  It might be useful in an aircraft when you can’t open a window to shoot out as well.  I am never a fan of shooting through something since the surface is often of poor quality but sometimes you have no choice.

Could it be improved?  Yes.  I would have made the rim stitched to sit flat to a surface when attached rather than having to bend out.  Also, I might consider a slightly more rectangular shape given the format of shooting (although that would impact on the ability to fold it flat).  It is slightly wider than deeper but given the need to look sideways sometimes, a little more width might be good.  (The shot above makes it look a lot wider than it really is by the way!)  I might also have gone for a less reflective black material  just in case.  As I try it more, we shall see if other issues come up.  However, so far, a welcome addition to my bag.

Navy Pier Lift

Regular followers of this blog will know that I do a lot of jobs with Midwest Helicopters.  Earlier this week I got a call from Jim telling me that they were planning a job at Navy Pier later in the week.  Given the location of the pier, the possibility of some nice city backdrops was very tempting.  Where to shoot from would depend on where the actual lift was.  For those who haven’t been there, Navy Pier is pretty long!

I went to the website to try and get a contact on the pier who might be able to get me into a location that would be good for shooting.  They have a contact for people wishing to photograph (commercially) on the pier so  I contacted the person and they got back to me a while later.  Turns out, the pier is very focused on what is necessary to get a shoot arranged.  They had a series of terms, most of which were not a problem with the exception of getting them named on my insurance overnight!  They also had a fee which was quite substantial.  Since the shoot was associated with some work for them, they were prepared to consider waiving the fee.  However, the manager was out and by now the lift was the following morning.

Outstanding commitment on the part of my contact meant I got the all clear at 10:30 the night before.  I am very grateful that they tried so hard and it was certainly nice to be totally legitimate.  The morning dawned with some very promising conditions.  We all rolled up to the site and got set.  Unfortunately, the loads were not ready so the lift was postponed for half an hour while the rigging was set up.

Eventually we went ahead.  A theater on the pier has a fabric cover that had been ripped in a storm.  The new covers were going up and a damaged vent was being brought down.  The guys receiving the loads were working on some temporary cable rigging under the main beams.  They were not in much of a position to manhandle the loads as they came in so Jim was a busy guy making very fine adjustments from the helicopter to get everything in place.  He did a great job and I was well positioned to get some good shots.  I particularly liked the angle looking down the roof line at the heart of the Ferris wheel behind the theater.

I was with Brian on the parking deck.  He had an idea for a shot that I hadn’t considered.  He would be hooking on the lift line as the helicopter hovered at head height.  He wanted a shot that was a city panorama with the hook up as part of the scene.  I hadn’t considered doing a pano with action in it before but gave it a go.  I actually tried several during the lift and they actually came out quite well.

Stitching the pano of Brian was harder than I thought.  Photoshop did a great job of creating the pano and totally excluding the helicopter since it was only in one shot.  However, the layer was still there so some delicate masking work could bring it back in.  It was actually really cool to watch it appear on the monitor.  The pano is not something that will always have a place on a shoot but it is an interesting idea to add to the shoot list.

For more pictures of the lift, you can go to this gallery.