Category Archives: equipment

My Copy of Lightroom Got Sick

After a previous update to Lightroom (6.12), it became almost unusable.  Importing would take forever and, once the images were in, it would grind to a halt.  Keywording and editing became a nightmare.  I was struggling to work out what was wrong.  A check on performance showed the processor wasn’t busy but the RAM was maxed out.  I couldn’t understand why.  The first thing I do when Lightroom behaves strangely is to delete the Preferences file.  This file can get corrupted and mess with the performance badly.  Just delete it and restart and things are often fixed.  That didn’t work in this case.  When the new version of Lightroom was released, I hoped this would fix everything but sadly not.  (Meanwhile Photoshop itself is working just fine on this system.)

I had a long session with the Adobe tech support people which got me nowhere.  After telling me this was normal, they realized it was not when our screen sharing crapped out as a result of the machine slowing to a virtual standstill.  They tried a bunch of simple stuff and got no further than I had on my own.  They suggested a second session would be needed and then promptly sent me an email telling me that the issue had been successfully resolved.  Not sure how they concluded that.  Meanwhile, I wondered whether there was an issue with my Windows installation so decided to do a completely clean install.  This had some slight benefits but basically the problem still remained.

I have done a bunch of scanning of similar issues and I found out a technique the support team can use to tweak performance.  There is a config.lua file that can be created in the presets folder to influence the system.  I have added this file and it has certainly made a few things work better.  It has also slowed some things down as well which isn’t ideal.  This was not a solution though.  All it did was make the program slightly more usable.

Another session with Adobe ensued.  This time we got into the permissions for some of the folders that contained the catalogs.  Lots of time to reset these to give greater authority.  I was told this is sometimes an issue with large catalog files.  Lots of time later, I found that nothing had really changed.  The whole thing would still get bogged down very quickly.

Then I read about Lightroom 7.2.  This was a new update that was supposed to address a lot of performance issues.  It was supposed to make better use of multi-core processors as well as larger RAM configs.  I had seen a sequence of updates not improve things – my issues were clearly not the normal performance problems although I had previously experienced some of them too – but I was hoping that, if they had changed the architecture of the software, maybe whatever was causing my machine to have problems might have been tweaked/replaced.  If not, I was seriously considering the need to buy a new system since this was so horribly inefficient.

I waited for the release date to come around when I knew the update was on its way.  Then I got an update to the iPad version and it said the new version of Camera Raw was included.  This must mean it was close.  A day later, the update dropped.  I downloaded it immediately and opened up.  Hurrah!!!  Everything run fast, the RAM levels were moderate and stable, everything was happening as it should.  My system lives!  Let’s hope this isn’t a false dawn.

Making Use of the Camera’s Features

One of the things that I was glad to get when I last changed camera bodies was the ability to have exposure compensation while shooting in manual mode.  You might wonder why this is a useful thing to have but I was shooting a couple of time recently when it was useful.  Sadly, the first time I didn’t think to use it.  The second I did though.  This is the result of shooting in dark conditions when the light levels are changing quite a bit.

The problem in the first case was that I was shooting in aperture priority mode.  The light was low, so I went to auto ISO to allow it to adjust.  The camera looks to get a shutter speed that is related to the focal length of the lens you are using.  I was shooting a landing aircraft and, when I was out at the full length of the zoom, it kept shutter reasonably high.  However, as the plane got closer and I zoomed out, the camera dropped the shutter speed down which meant the panning resulted in a lower keeper rate.  I should have foreseen this and I was annoyed with myself.

The next time, I thought through the issue a bit better.  A gray sky meant that I needed to have some positive exposure compensation.  I went to manual mode, set the shutter speed and aperture that I wanted but included the exposure compensation.  Then I set auto ISO.  Now I had the ISO adjusting to get the combination I wanted while including exposure comp.  On my old bodies, this was not possible.  The result was the exposure I wanted with ISO adjusting throughout the sequence.  When conditions are not great and changing quickly, this is an approach I can highly recommend.

Planning for the Eclipse

A couple of years ago I started thinking about the total solar eclipse.  We were living in California at the time and I had not long before been to an aviation shoot in Madras Oregon.  Madras was almost directly on the centerline of the path of totality so I thought about booking a hotel.  However, I didn’t do it then and time rolled on.  This year we moved to Washington so now Madras was a bit closer – just over five hours away if traffic is flowing freely.

As things got closer, it was time for a more thoughtful approach to what might be involved and this is where Nancy played the leading role.  She was not particularly interested in the eclipse but she knew I was.  Indeed, at one point in the run up she actually asked me if I would prefer to make the trip alone.  I can tell you that, having witnessed everything, she is really glad I didn’t want that!  Salem was the closest place with a good position for the totality.  Situated on I-5 south of Portland, that also meant a lot of other people were going to be going there so that was a non-starter.  Madras is further east which adds a bit to the drive but we focused on that.

We decided to stay in Portland the night before and set out early.  Plenty of people had been flooding in over the previous few days but, no doubt, others would be doing the same as us.  We also chose not to go to Madras itself but to go to Warm Springs just north of Madras.  This is a Native American reservation and they were welcoming people to the baseball fields to watch the eclipse.  The area is very dry so the chances of cloud obscuring things were a lot lower than closer to the coast.  To get there should take just under two hours from our hotel near Portland’s airport.  We decided to leave at 3am to give ourselves plenty of margin.

We did have a Plan B.  While there was a lot of time in the schedule for traffic, if it got really bad, we might just find ourselves on the highway when the eclipse happened.  As long as we got south of Mt Hood, we would be in the path of totality and, if you looked at the charts for timing, you didn’t have to get too far in to have a reasonably long period of totality.  We packed plenty of food and water and assumed, if it was totally congested, we would be with a huge bunch of people on the road and would enjoy it all together.

Getting up just after 2am, we checked the traffic reports online.  Everything was currently clear.  Good news but not necessarily to be relied on to last.  If we were leaving then, how many others were doing the same?  We put our stuff in the car and off we went.  The roads were pretty open and, as we got onto route 26, we were in a steady stream of cars but nothing that would slow you down.  We headed off into the wilderness.  This is a trip that takes you through some great scenery – if it is light.  Instead, we were out in the pitch black.  The stars around us were amazing to see since there was no light pollution if you weren’t looking ahead in the path of the headlights.

The traffic never materialized.  We got to Warm Springs in an hour and fifty minutes, arriving at the parking area fifteen minutes before it was due to open.  We met the nice people looking after things and they informed us we were the first to arrive and to park at the end of the row (which was hard to see in the pitch dark).  We parked up and had a few hours to kill so set the seats in the car up as a sofa and took it easy.  Nancy couldn’t sleep but I dozed off a few times.  Meanwhile, more cars arrived and people started milling around as it gradually got lighter.

Once the sun was up, we went off to look around the town and stretch our legs.  Then we set up our spot for the viewing.  I had brought two main cameras.  One was the longest lens combination I could get and the other had the 100-400 on it which I was planning to use for a time lapse.  I had bought solar filters for both a while back and B&H had shipped them with loads of viewing glasses.  We had shared some with friends already but we carried loads of spares in case anyone needed some.  No-one did though.  Everyone around us was well prepared so our spares stayed in the bag.  Meanwhile, I set the time lapse camera at an angle to see if I would track the path of the sun across the frame.  (I got this wrong as I did not have a steep enough angle.  I tweaked it a couple of times but it wasn’t ideal.  It worked but was a bit wonky!)

Lastly, I opened up the Solar Eclipse Tracker app on my phone which provided an audible guide to what was coming up and we got ready.  The skies were pretty clear initially with a hint of wildfire smoke in the distance.  As the time got closer, some high-level cloud did come in but nothing too significant.  Then it all started.  More to come…

Adobe Fixed the Time Zone Issue for Video

In this previous post, I noted that there was a problem with the way in which Lightroom identified the time of video files.  I was having to manually adjust the capture time after importing them.  When I contacted Adobe, they said it was a problem with Canon and vice versa.  Not helpful.  However, I notice that, with a recent update (I won’t say upgrade because some aspects of it seem to have really screwed up Lightroom performance), the video files now come in with the correct time associated.  I only found this out because I was about to adjust them when I realized they were already correct.  One little annoyance has now gone away.  Hurrah!

Sensor De-mosaicing and Southwest Colors

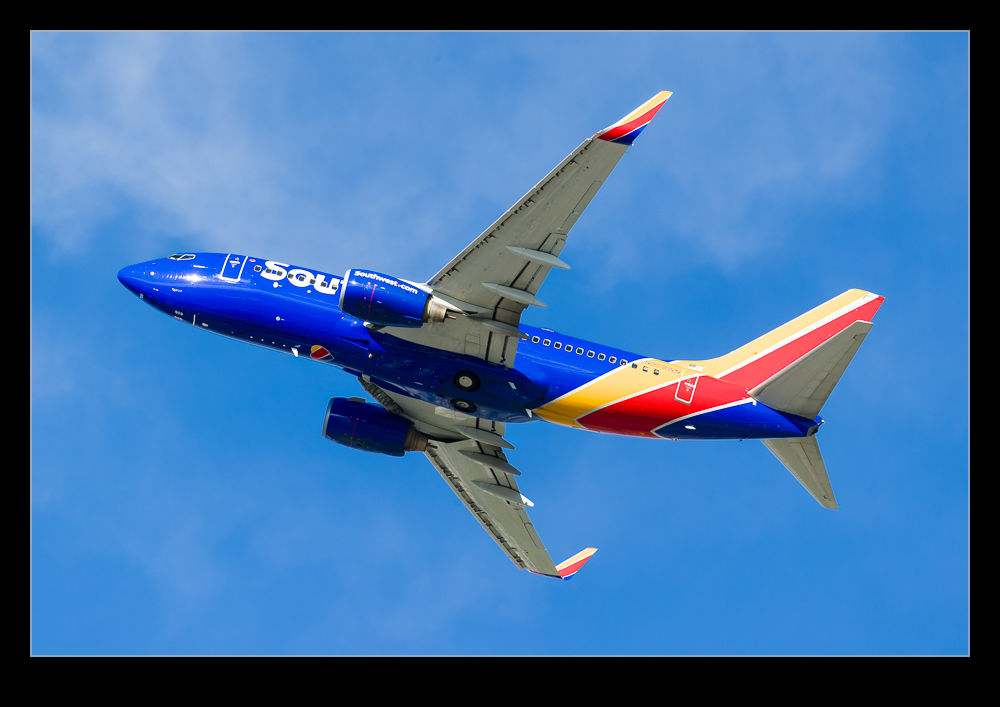
I have been pondering the way in which the method by which digital images are captured is affected by what is being photographed.  As part of my workflow, I render 1:1 versions of the images and then quickly weed out the ones that are not sharp.  This needs you to be able to see some detail in the shot that shows whether the sharpness is there.  I have found that, if a Southwest Airlines 737 is in the new color scheme, something odd happens.

Digital image sensors actually capture one of three colors.  Each pixel is sensitive to a certain color – either red, green or blue – courtesy of a filter.  They colors are arranged on the sensor in a pattern called a Bayer pattern.  The camera then carries out calculations based on what the pixels around each location see to calculate what the actual color should be for each location.  This process is known as de-mosaicing.  It can be a simple averaging but more complex calculations have been developed to avoid strange artifacts.

When I photograph the new Southwest scheme, something strange occurs around the N number on the rear fuselage.  It looks very blotchy, even when every other part of the airframe looks sharp and clear.  I am wondering whether the color of the airframe and the color of the registration digits are in some way confusing the de-mosaicing algorithm and resulting in some odd elements to the processed image that weren’t there in real life.  If any of you have photographed this color scheme, can you see whether you had something similar and, if you did or didn’t, let me know what camera you were shooting with so we can see if it is manufacturer specific or not.

Demise of a NAS

Moving house means packing up your stuff and hoping it all survives the journey.  Some things you have are not ones you are happy about leaving out of your control so you take them with you.  Since we were driving up, we had a bit of flexibility about what we could take with us.  Aside from the camera gear, I brought my two NAS devices.  These have the backups of all of my stuff so, while the computer went in the truck, I had the backups.  However, when we got to the new place, one of the NAS units wouldn’t fire up.

This rather defeated the purpose of taking my backups with me.  The reason I have two units is that the one I have had the longest is limited in the size of drives it can handle.  2Tb drives are the largest so, as it was getting full, I bought a new unit.  Originally I had planned to just use it but, instead, I kept the one going and added new data to the new unit to avoid having to buy larger drives up front.

I figured at some point I might want to retire the old NAS.  It was far noisier than the new one and was probably over ten years old.  It seems to have made the decision for me.

Now I was in a worrying position.  The newer unit didn’t have enough capacity for all of the data.  However, it could handle most of it.  I immediately backed up what I could.  Meanwhile, I ordered new drives to expand it.  The price of drives has dropped dramatically so the 3Tb units are being replaced by 8Tb items.  That should provide plenty of capacity for a long time!  As the drives get swapped out sequentially and the NAS rebuilds and syncs everything, I gradually got extra capacity and set up the full back up process.  Now I am back to normal.  It does make me wonder about the life cycle of a NAS though.  (As an aside, I do have a tertiary backup of the images to BluRay so, while some elements were vulnerable for a while, the majority did have a fallback option.)

Another Go at Stitching iPhone Raw Shots

As I posted a while ago, I have been experimenting with stitching shots from my phone.  Since I am shooting in raw on the phone, I have some latitude to play with the shots in post that wasn’t there before.  This time, though, I thought about it a bit more and put the camera into manual mode to fix the exposure.  This should make the stitching and blending easier than when it changed between shots (although, to give the Lightroom team credit, it did a pretty good job anyway).  I allowed plenty of overlap and the merge seemed to go pretty well.  Since it outputs a dng file, you still have the chance to edit more aggressively than would be possible with a jpeg.  Meanwhile, you get a higher resolution shot than with the internal pano mode.  This may be my go to method from now on.

Creating Lens Profiles for Adobe Software

UPDATE:  It turns out, the upload process for the profile sends to an address that doesn’t work.  While I try to fix this, if you want the profiles to use, you can download them by clicking here.

Within Adobe processing software, there is lens correction functionality built in to the Lightroom Develop module (or Adobe Camera Raw in Photoshop) that compensates for distortion and vignetting in the lens the image was taken with.  Adobe has created a large number of lens profiles but they never created one for the Canon 500mm in its initial version.  Adobe also has an online tool for sharing profiles but this does not include one for this lens either.  The 600mm had a profile and it was supposedly close so I had been using that for a while.  Recently, though, I was shooting with the 1.4x teleconverter fitted and this introduced some new effects which required some manual tweaking to offset.

I still wasn’t happy with the result so I decided it was time to bite the bullet and create some profiles from scratch.  Adobe has a tool for creating a lens profile.  It involves printing out some grid targets which you then shoot a number of times to cover the whole of the frame.  It then calculates the profile.  I was shooting at both 500mm and 700mm so I needed a few targets.  To make a complete profile it is a good idea to shoot at a variety of focusing distances and with a range of apertures.  The tool comes with many targets.  Some I could print at home but some of the larger ones I got printed at FedEx and mounted on foam core to make them more rigid.  Then it was time to shoot a bunch of very boring shots.

The software is not the most intuitive I have ever worked with but it eventually was clear what I had to do.  (Why do some manual writers seem like they have never used the process they are writing about?)  I found out how to run the analysis for different charts and distances separately and append the data to the profile as I go.  I did need to quit the program periodically because it would run out of memory which seems like an odd bug these days.  After much processing and some dropped frames as a result of poor shooting on my part (even on the tripod I got some blur occasionally with very slow shutter speeds) it got a profile out.  The proof of the pudding is in the eating of course (that is what the actual phrase is for those of you that never get past the pudding part) so I tried the profile out on some recent shots.  It works!  I was rather delighted.  I may shoot a few more samples in good conditions to finish things off but this was a rather happy outcome.  Once I have tweaked the profiles sufficiently, I shall upload them to Adobe and anyone can use them.

Shooting RAW on the Phone

The update to iOS 10 brought with it the possibility to shoot in RAW on the iPhone.  For some reason Apple didn’t bother to incorporate this feature in the base phone app but they did make it available to other camera app developers.  Camera+ is one that I use a bit so I figured I would start shooting in RAW via that.  Obviously RAW means larger files but, since I download my files to the desktop frequently and tend to clear out the phone, this wasn’t a concern.

First thing I found out was that other apps could see the shots.  I had taken a few shots and wanted to upload to Facebook and it turned out there wasn’t a problem doing so.  However, the main benefit was anticipated to post processing back on the desktop.  With the SLR shots (is there any point to saying DSLR these days?), it is possible to recover a lot from the highlights and shadows.  Would the same be possible with the phone?  Sort of.  You can get a bit more in these areas than would be the case with the JPEG when things are quickly lost.  However, the sensor data is still not anywhere close to being as adaptable as it is for an SLR.  You get more flexibility to pull the sky back but it is still pretty limited.

Is it worth using?  Definitely.  While it might not be the post processing experience you will be used to with SLR files, it is certainly better than the JPEGs provide.  The increase in file size is hardly an issue these days so I will using it from now on.  The camera app doesn’t have the pan and time lapse stuff so easily to hand so the phone’s base app will still get used but, aside from that, it will be my choice.  My main gripe now is that they have a random file naming protocol that is a little difficult to get used to.  Small problems, eh?

Backup Strategy for the Blog Has Changed

Since I first started the blog using WordPress, I have been looking for something sensible for backing up the blog data.  I can use FileZilla to copy off everything on the blog periodically but that is a process that requires me to do something on a regular basis and it isn’t very convenient.  I had set up a plugin that was supposed to back up everything to a Dropbox account but I was never successful in getting too much of it to actually backup properly.  It always seemed to be stalled.  Consequently, I was concerned that I was vulnerable to a data loss.  Given how much effort goes into the backup strategy for my photos and documents, having the blog relatively unprotected didn’t seem to make much sense.

Then I came across an alternative approach.  This uses a plugin called UpdraftPlus.  I read a detailed article online about how to use this plugin to back up to a Google Drive account.  Since I already have one of those that doesn’t currently get used for anything else, I was interested.  The base account I have comes with 15 GB of storage so that seemed like plenty to cover what I needed.  The full article on how to set everything up is at https://premium.wpmudev.org/blog/how-to-backup-your-wordpress-site-to-google-drive/ if you want to check it out.  It is not the simplest process and the interface appears to have been tweaked since it was written but I got to where I needed to be and have everything setup now.  It backs up on a daily basis so I now have a couple of previous backups at any one time should they be needed.  If you are wondering about backup strategies yourself, maybe this will be a useful approach to consider.