I have changed my approach to editing my pictures quite a bit recently. This has served two purposes. The first is to make better use of my storage requirements and the second is to focus more quickly on the better images. Sadly, this has highlighted to me how I have actually missed out on some of my better work in days gone by. Not a happy lesson to learn but a valuable one.
I never used to delete images since storage was not a problem. I did occasionally find images that newer RAW processors could do something with. However, to be honest that was a rare occasion and, even then, I wasn’t likely to have an outlet for that image. However, by not getting rid of stuff, I really cluttered up what I had. Moreover, I would scan through and find images I liked the look of and mark them as favorites. When I would come back to them later, I would find they were a bit flawed – not sharp enough usually being the problem. What was worse was that I would search based on ratings and so wouldn’t bring up the next shot which actually might have been almost identical but sharper!
Consequently, I had a workflow that hid the good shots and encouraged me to pick the wrong examples by mistake. I have now changed all of this. Part of this is driven by trying to keep storage requirements under control. I have been shooting a lot of rotor-craft and getting good rotor blur requires low shutter speeds which often means shooting lots of frames to get a few sharp ones. When you are being buffeted by the down-wash, no amount of good technique is going to be enough! I do generally shoot more these days anyway so I have a lot to work through.
The first thing after downloading is to generate 100% previews of all images. I can then set up Lightroom with one side as the full image and the other has the 100% view. This way I can determine sharpness of the shot at the same time as seeing whether the overall image is okay, i.e. no poles across the shot or noses cut off! I have copied a process I saw demonstrated online where I assign a job descriptor in Lightroom and then set up smart collections for that job of Picks, Not Rejects and Rejects. I have also started separating out video clips to another smart collection. By reviewing the Not Rejects folder, anything rejected gets automatically removed so it thins out as I go.
This certainly brings the numbers down but not always as dramatically as I would like. I suppose I should be pleased that I am not shooting such a low percentage! Once I have done this, I can now trust that the shots that are left are all considered usable. Then I can go through again and weed out the obvious duplicates by picking the best of a given type. This will really help to thin things out. The other thing I will do (which I also tend to start as I get further through the first review) is culling those that are just not interesting. I have come to the realization, far too late, that only the best shots are ever going to see a use somewhere (and most of them won’t either). Therefore, a relatively uninteresting shot that is sharp and well composed might as well go in the trash unless it has something unique about it. Most don’t!
This has resulted in me thinning down the shoot far more rapidly. The review also includes marking as Picks those I particularly like. Hopefully, this will make it a lot simpler to get to the good stuff in due course. Now I am also gradually following the same process for the large selection of previous images. Maybe I won’t have to upgrade my hard drives for quite a while with all of this space I am freeing up and the reduced rate at which I am filling space.
One footnote to all of this. My NAS runs a backup of everything every night. When images get deleted, they will be gone from the backup the following night. However, before anything is deleted, it is all backed up to Blu Ray discs. That way, nothing is truly gone forever. However, it would require some serious effort to go back to those discs to find something that is deleted since they are gone from the Lightroom catalog. However, they are easy to backup so why not?
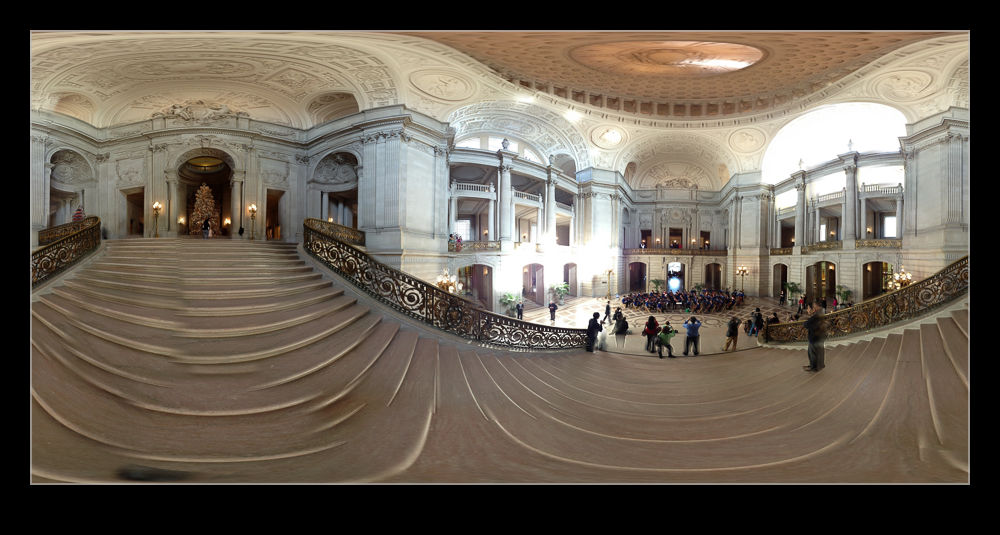 A meeting in the heart of San Francisco meant a bunch of our team were meeting downtown. A few of us got there a little head of the meeting and, with a couple of minutes available, I wanted to check out the City Hall building since it was only a couple of blocks away. As an old City, San Francisco has some classic architecture and this is no exception. For some reason, despite the numerous times I have been to the city, I have never been to City Hall before.
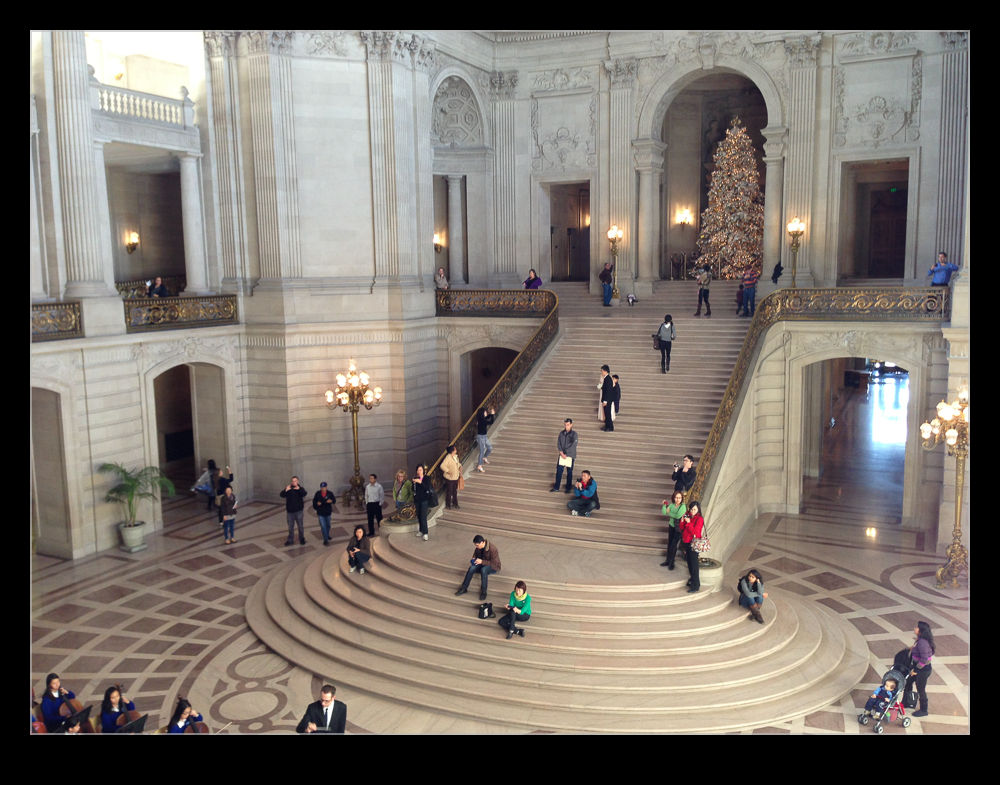 A group of school kids were playing some orchestral music in the main hall and plenty of family members were there. I wandered around taking a look. Since I didn’t have my normal cameras, the phone had to serve duty. Fortunately, that also allowed me to try another one of the 360 panoramas. I suspect I shall be carrying another camera with me when I am next in the area.