 Nancy and I had been discussing what pictures to add to the walls in the house. We were trying to find something that was a nice layout and also could include images from a variety of places. We settled on the Collagewall from MPix. I have used MPix for a lot of photo printing requirements over the years so was happy to give this product a go.
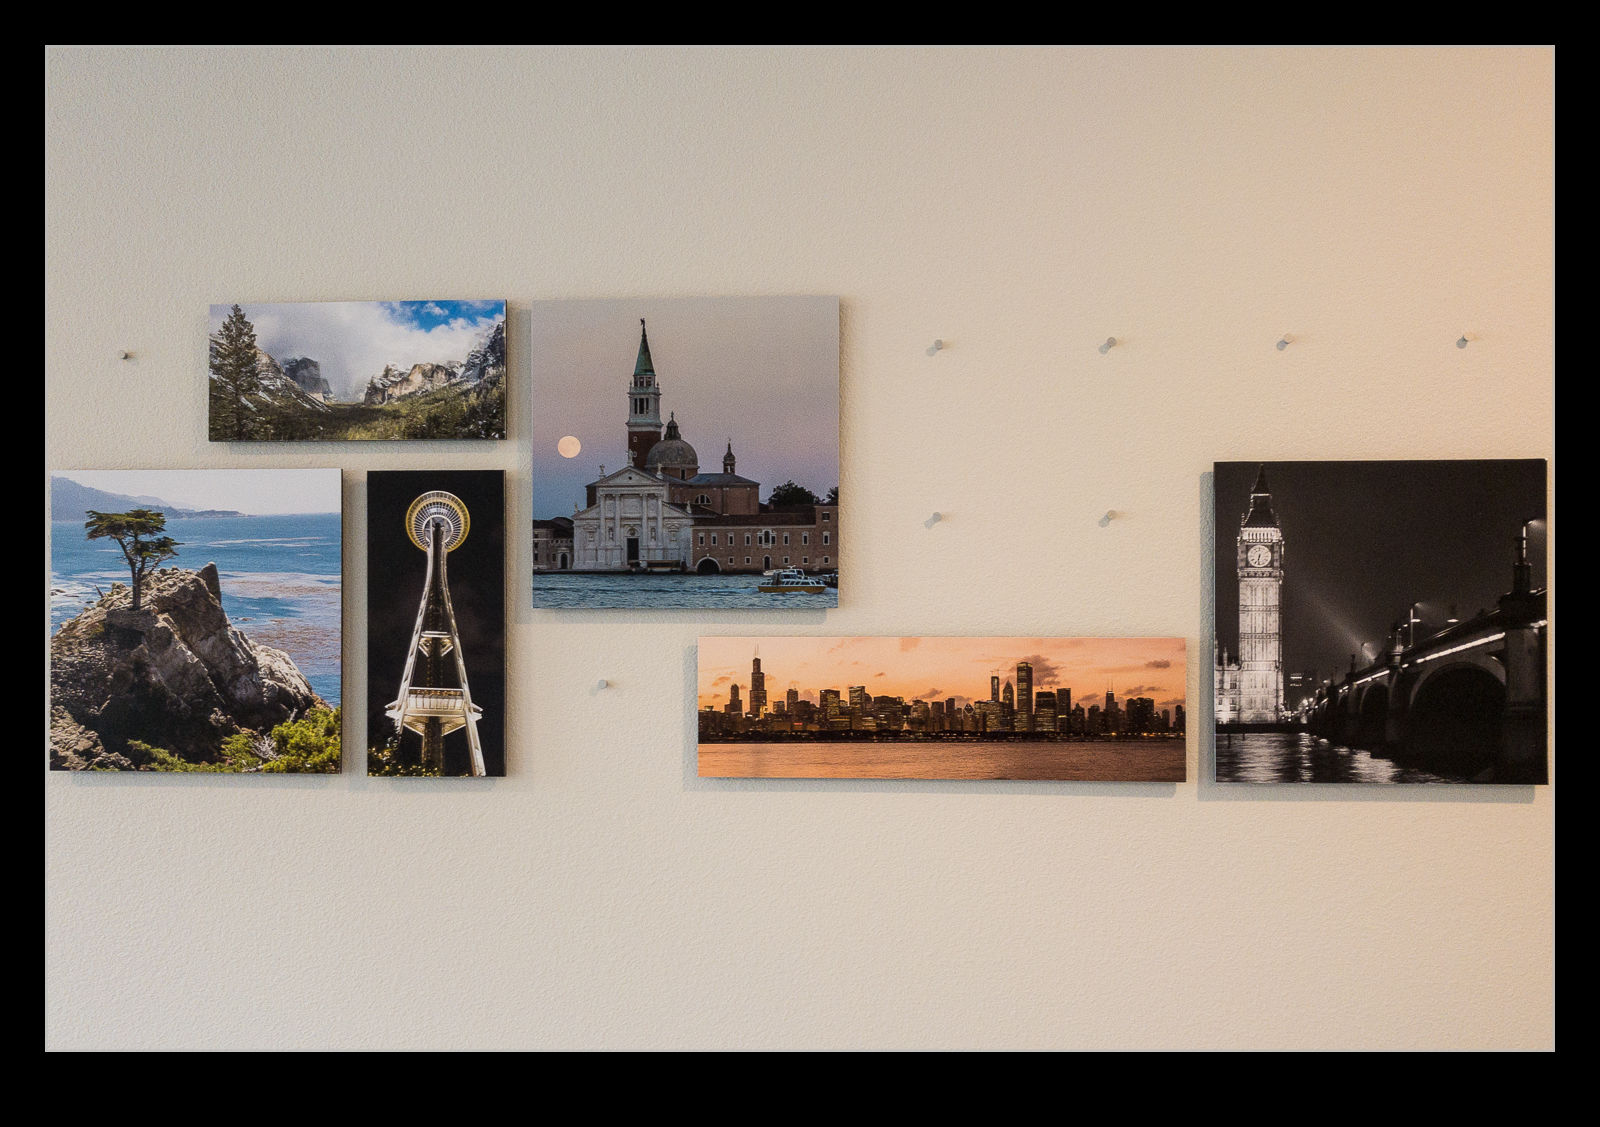
 They have a variety of configurations that you can choose from. They have varying dimensions and layouts and you can pick your images to fit different aspect ratios. The one we went with was 4.5’ across to fit a large wall space and it included some large and small square format images with a couple of panoramic shots and one vertical thin image. I did all of the selections and formatting in Lightroom and then just dragged and dropped them in to the configuration tool. It was very straightforward.
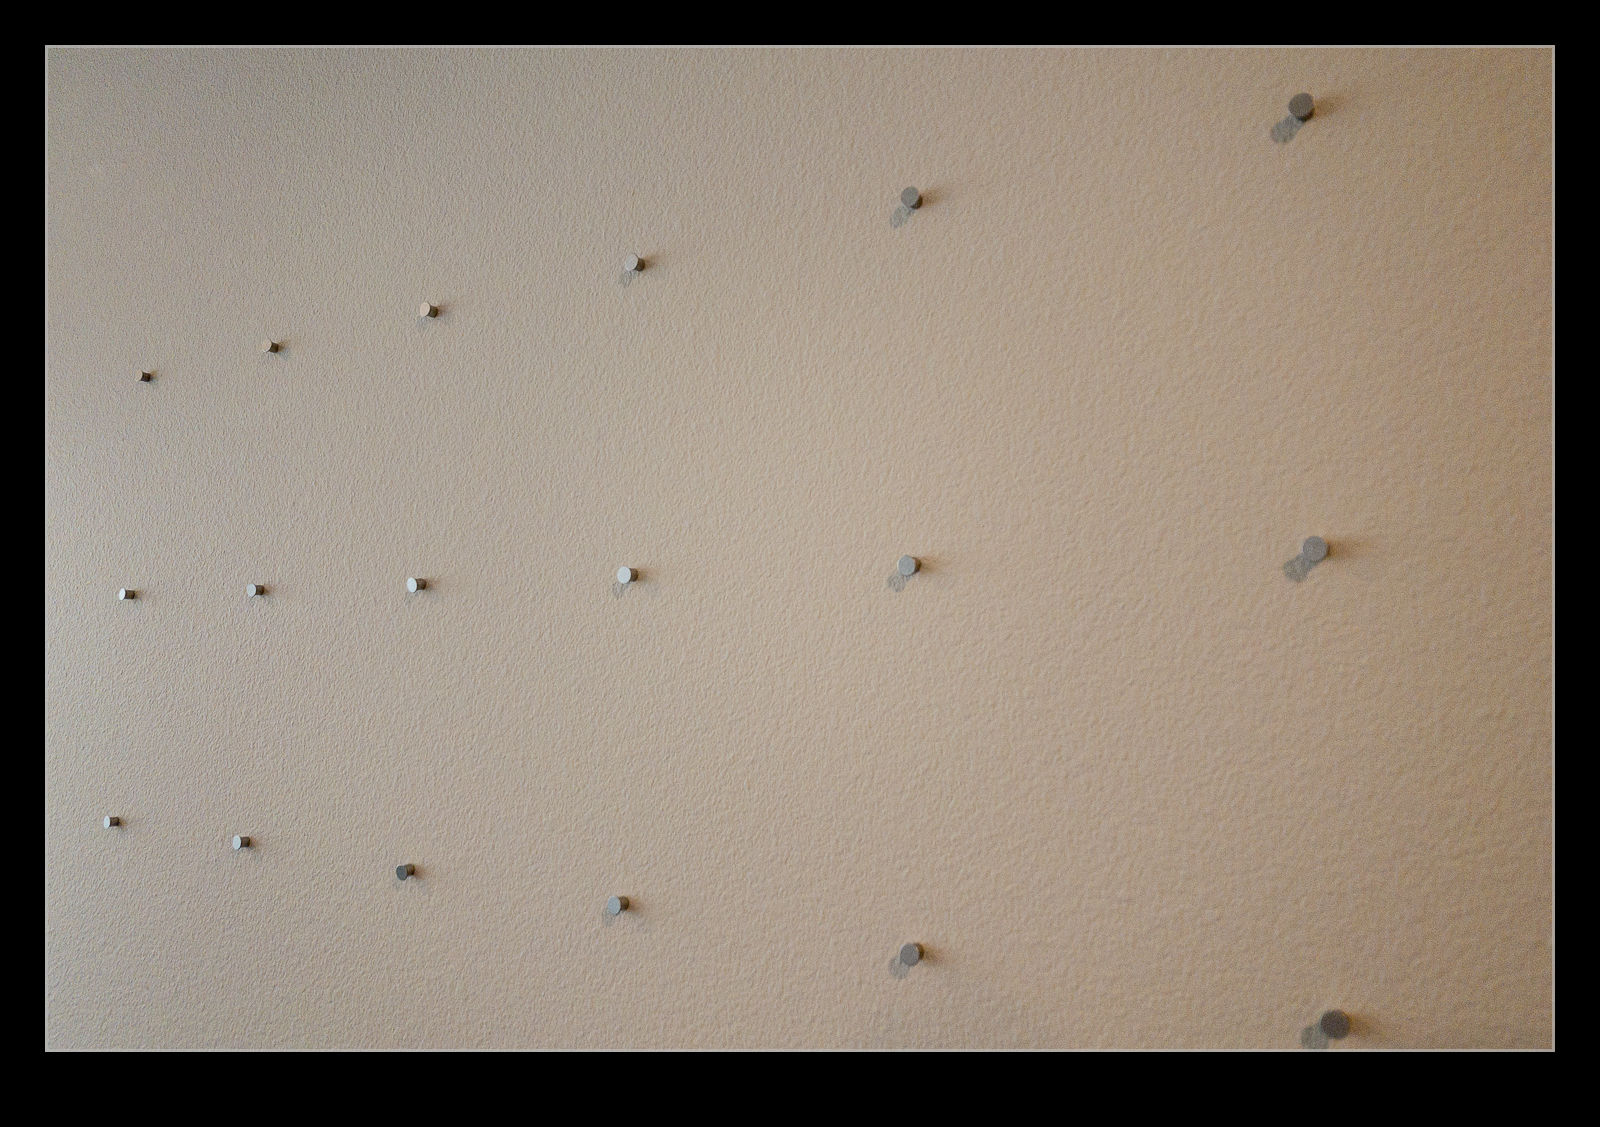
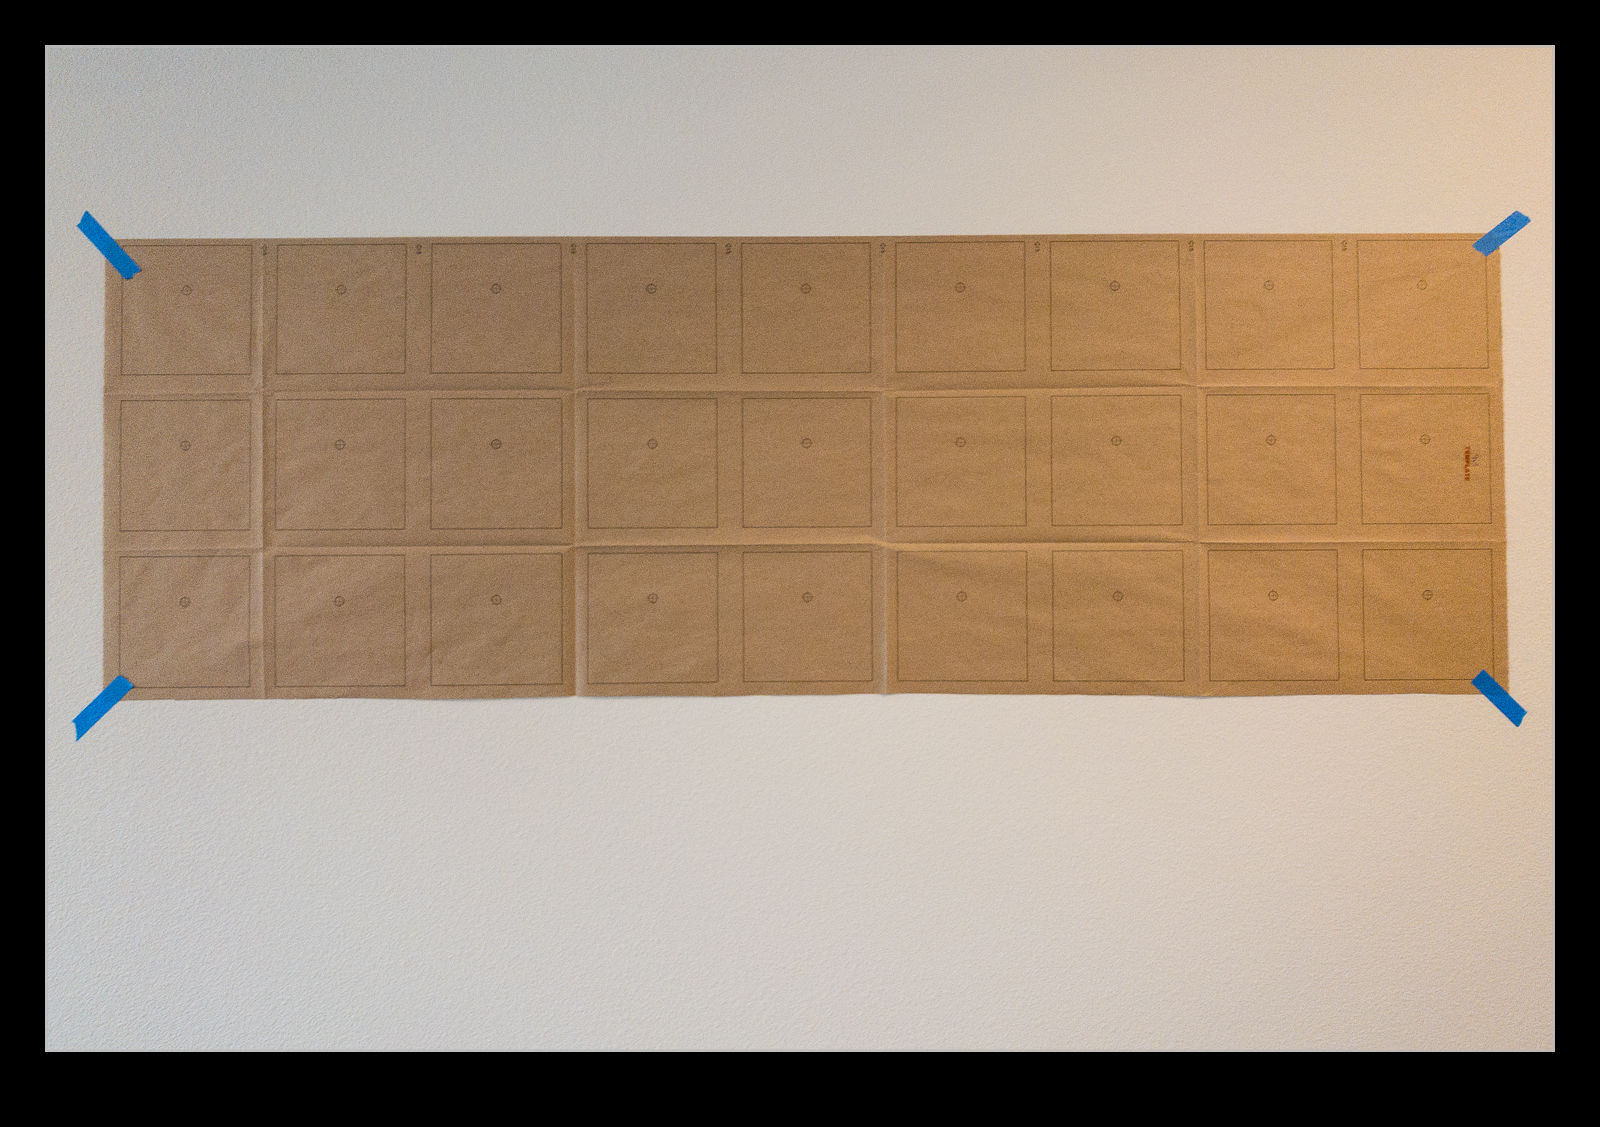 The whole things was printed and shipped quickly and would have been with us shortly thereafter had it not been for a winter storm that meant the package got to spend a week in Salt Lake City. However, it finally arrived and we could install it. There is a paper template provided to assist in putting it on the wall. You tape that in place checking for location and level before getting to work. A series of pins need to be inserted into the surface of the wall. Using the template, you can make an initial pin hole with one of the pins without pushing it all the way in. Then, when all locations have an initial mark, the template can be removed and saved for any future installation.
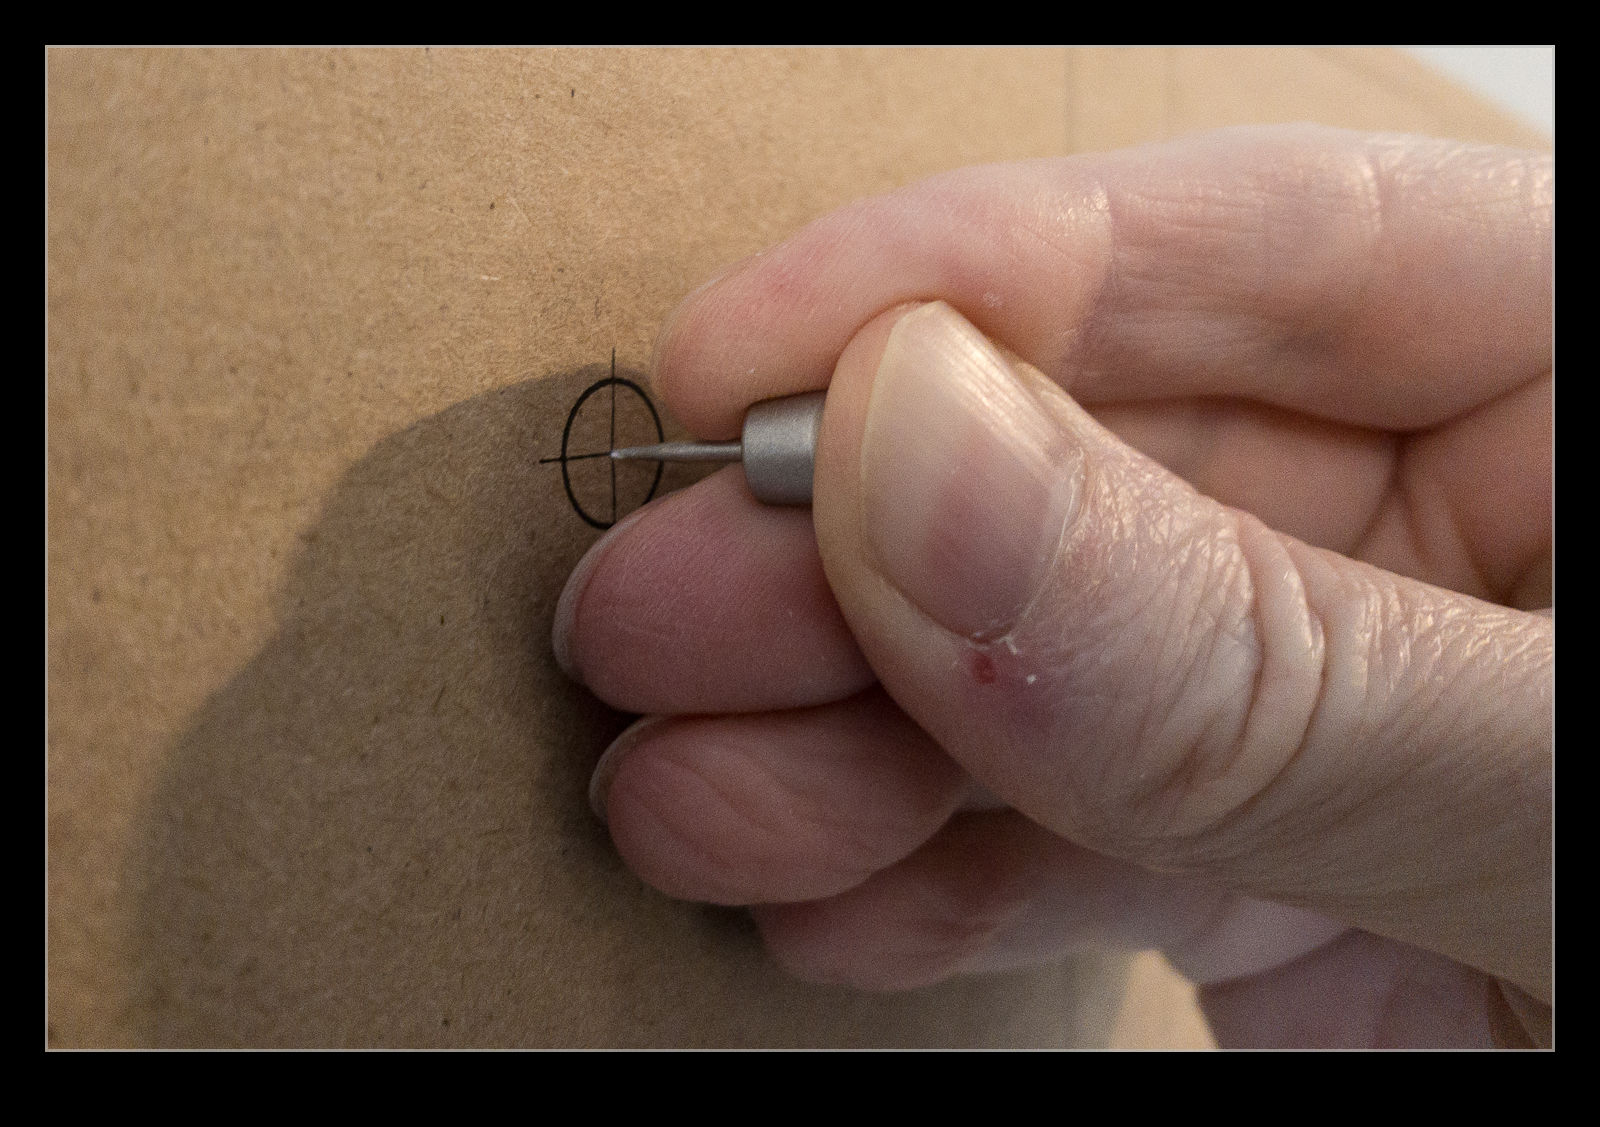 Then add the full set of pins by pushing them all the way in to the initial holes previously made. This results in a grid of pins covering the full area of the finished work. Slots on the back of the prints will then slide over the heads of the pins. For some of the small prints and the panos, adhesive foam pads are added to provide some stability. The larger prints are stabilized sufficiently by the pins. Then you slot everything in to place.
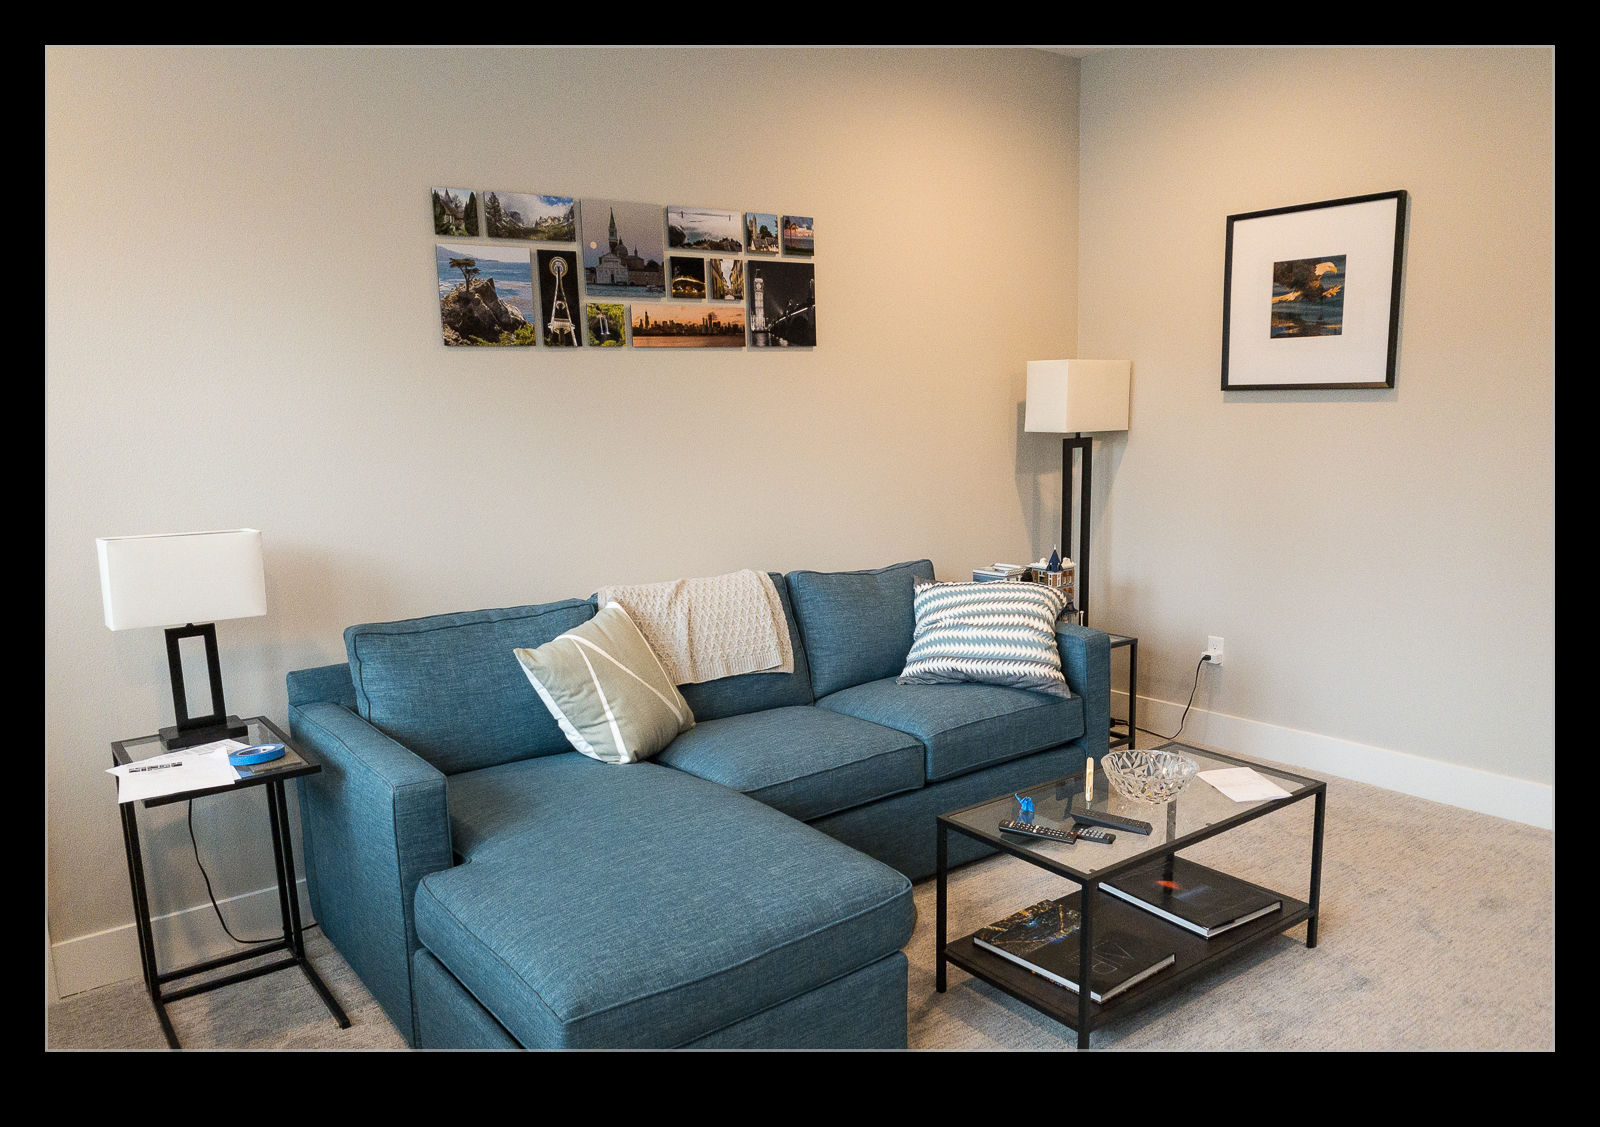
 From start to finish, it was probably little more than half an hour to put it up. A significant portion of that was making sure the template was exactly where we wanted and properly leveled. Nancy pushed out each print while I was inserting the pins. Finishing it off was very simple. The nature of the installation means changing a print out for a replacement would be very easy and then include a folding element that can be inserted in the back to make each print stand on its own if required. I’m really happy with the way it has come out and might do a smaller installation for another location in the house. In truth, the longest part of this is choosing the right shots to include.